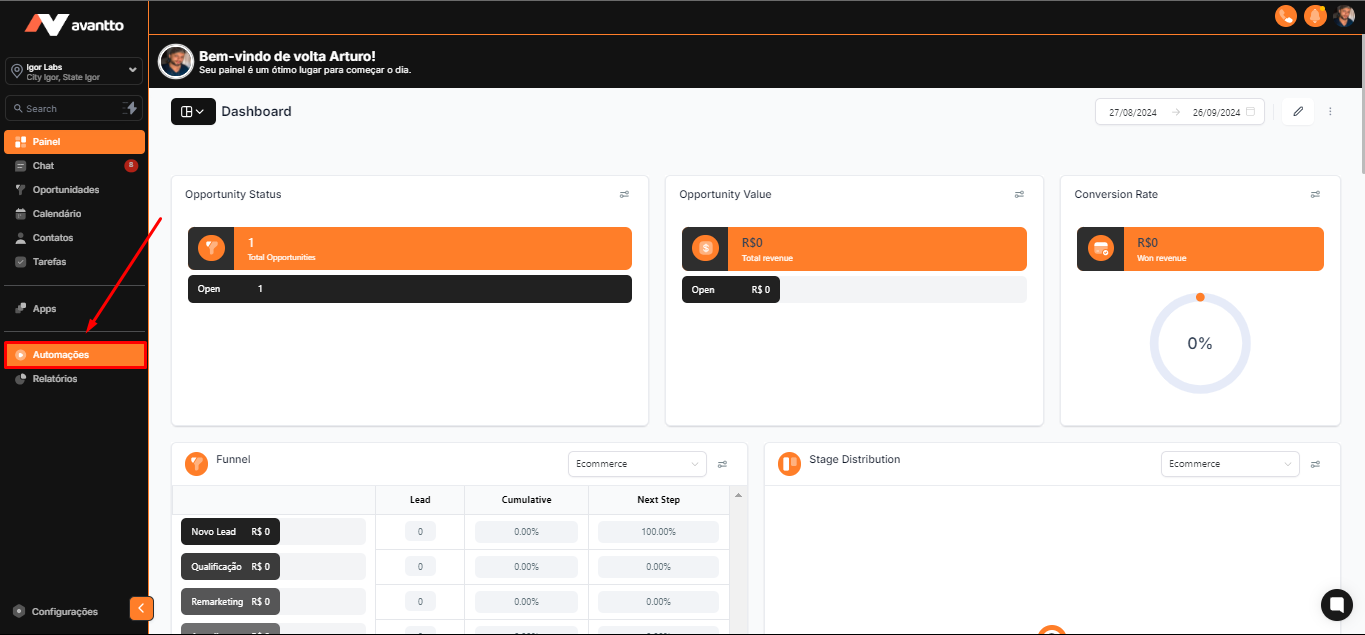
1.1 In the left side menu of the screen, click on Automations
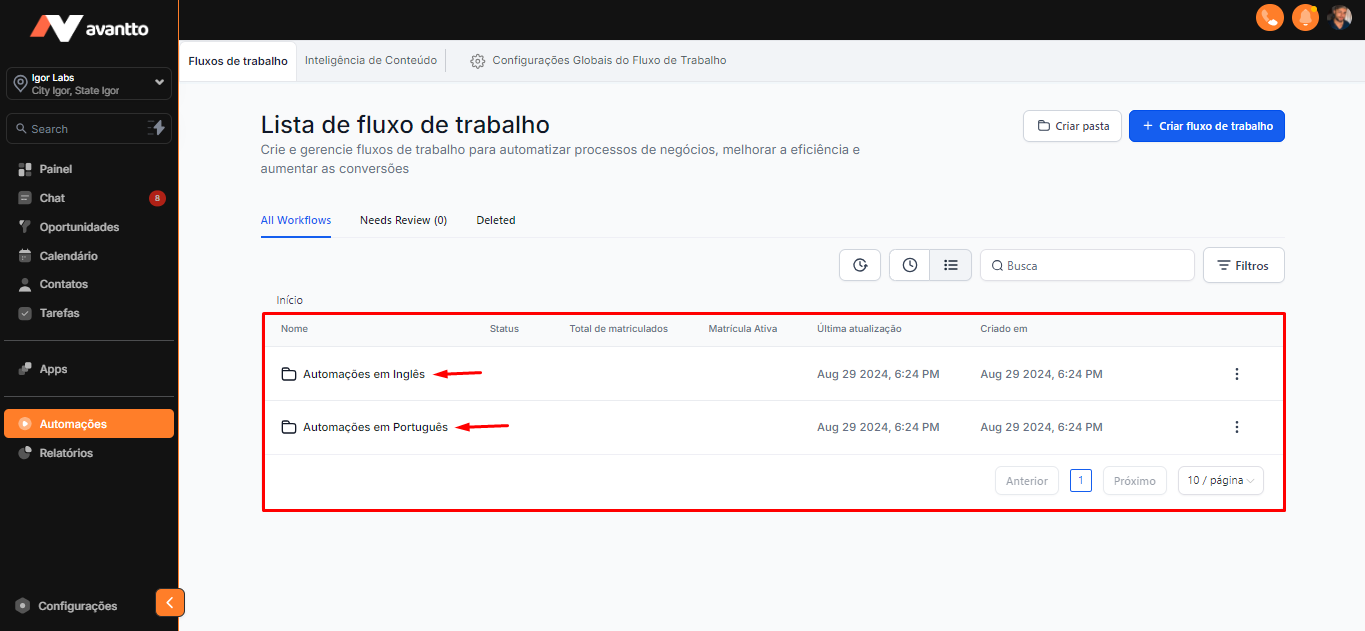
1.2 You will find two main folders, one in Portuguese and the other in English, differentiated by the language of the automations contained in them.
1.3 Entering the Portuguese automation folder, there are seven other folders, which are separated and ordered by niches.
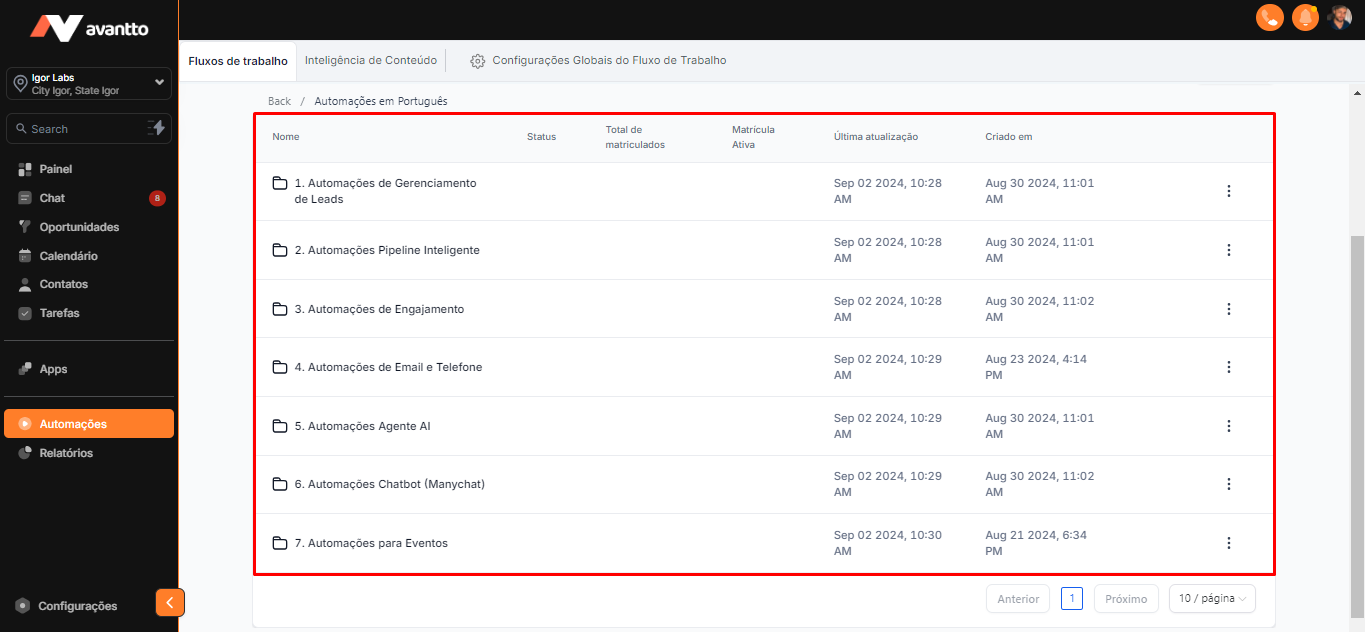
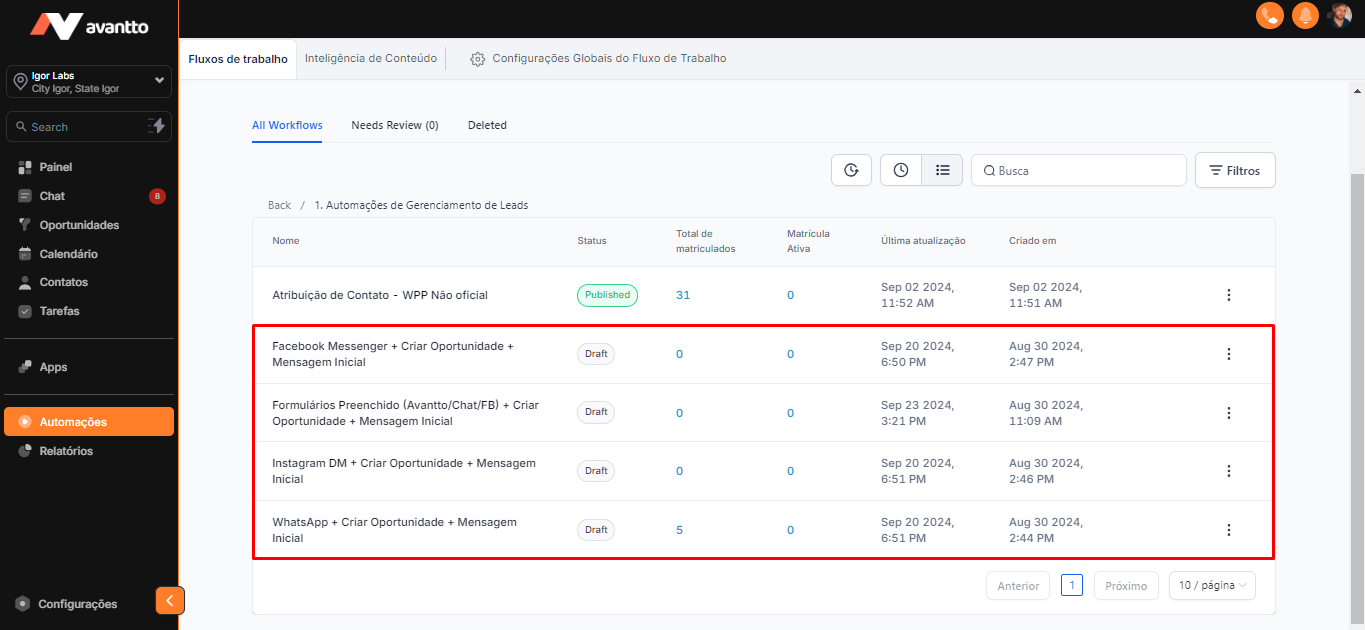
2.1 Folder 1. Lead Management Automations
It will probably be the most used, as they work by capturing leads from other external sources that are or are not connected within Avantto. Providing the possibility to create contacts, create opportunities, send the initial message, and other conditional actions. The difference between these four automations is the channels being worked on. Such as, Facebook Message, Forms, Instagram, and WhatsApp.
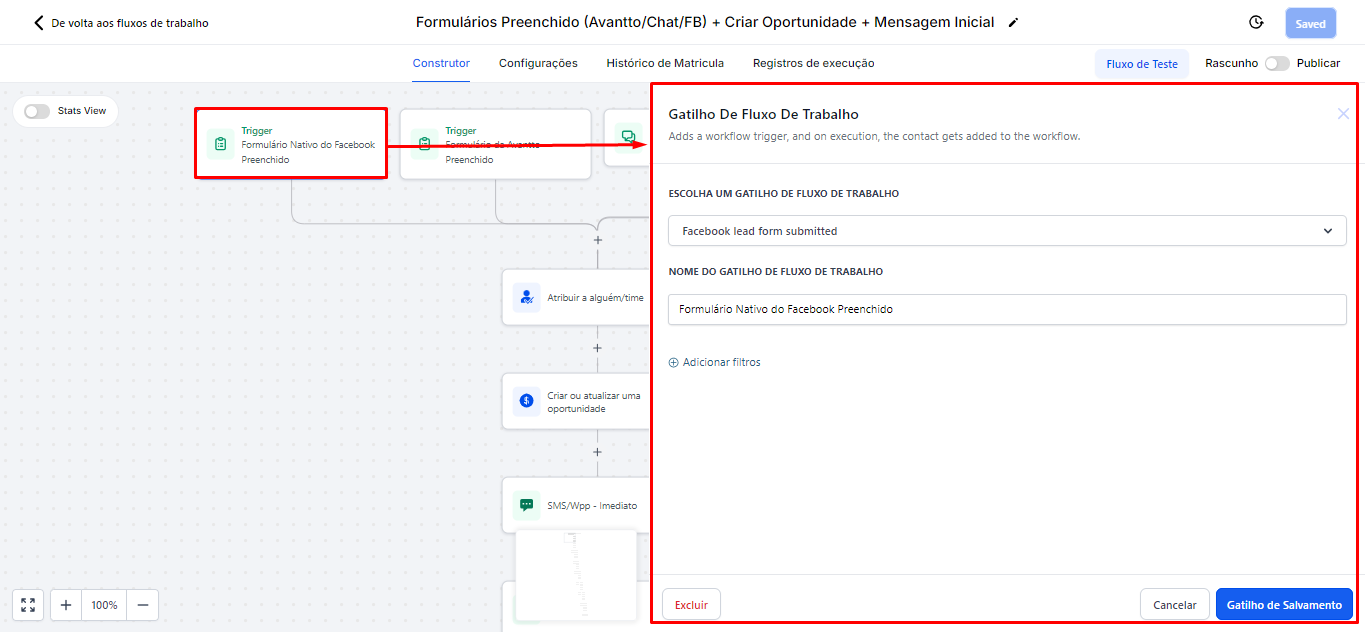
2.1.1 When opening the standard Forms automation, as the name indicates, we find three types of triggers. The first is Facebook's native form, its requirement is to map the fields, crossing the information from the Facebook form with Avantto's contact fields. Thus, when the lead fills in the fields of this form, the data is automatically transferred to this automation, and the same happens in all other forms.
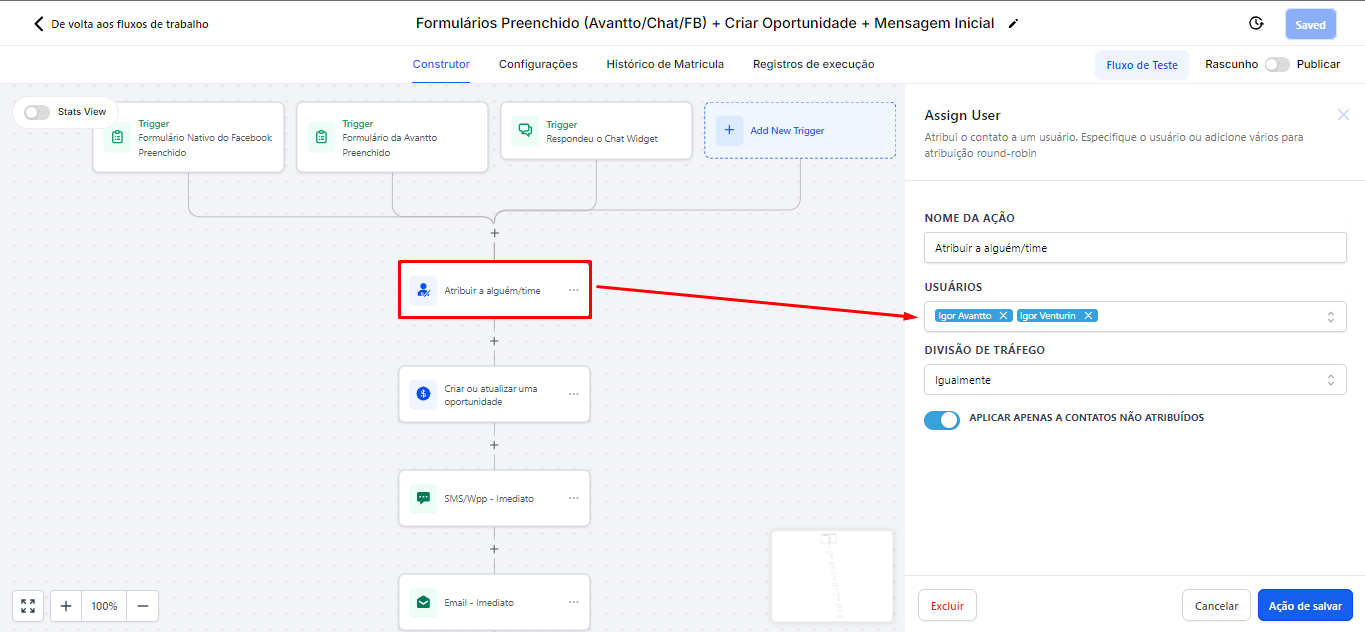
2.1.2 The assignment is necessary due to the use of WhatsApp (unofficial) registered in Avantto. Since the automation cannot identify which user is sending the message, we need to specify which number will be used to send messages through this automation. It is important to perform this configuration every time you create automation that needs to be assigned to someone.
2.1.3 Now, an opportunity will be created within the pipeline at the "New Lead" stage. The name of this opportunity will be generated from the default custom contact values ({{contact.first_name}}), while the source of the opportunity will be set based on the person's last conversion channel ({{contact.attributionSource.sessionSource}}). The status of the opportunity will be kept as "Open", and it is also possible to pre-define the values of all opportunity fields, whether standard or customized, by clicking "Add Field".

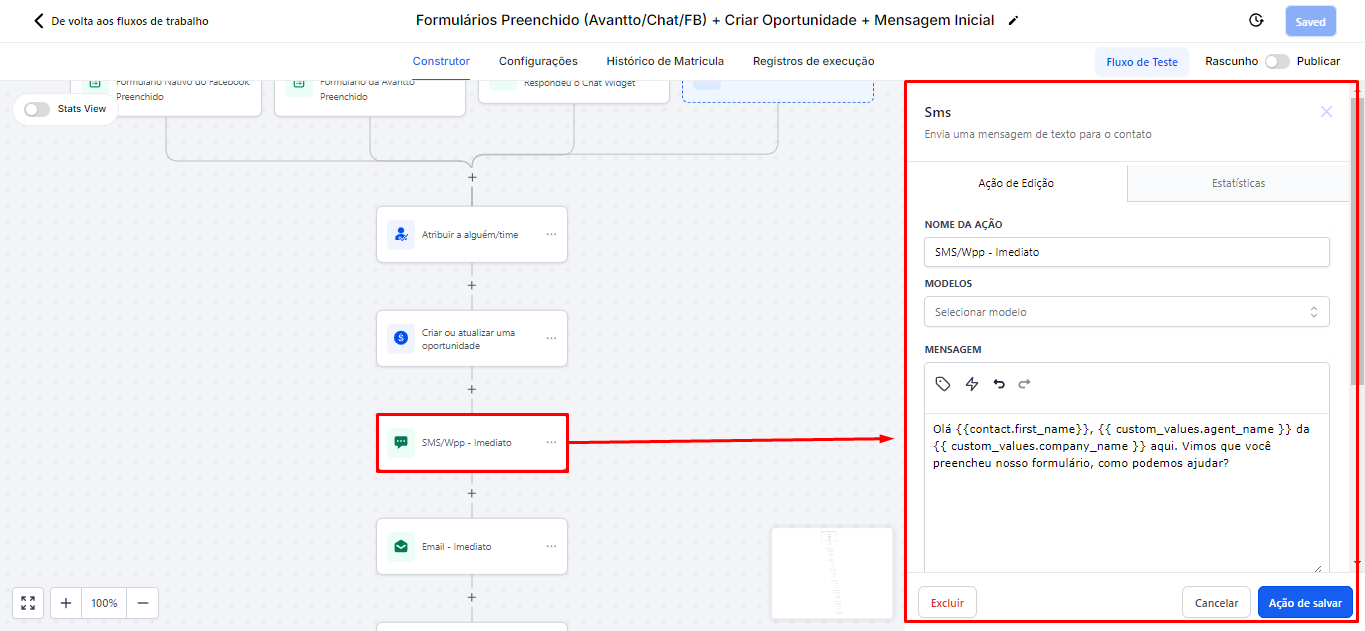
2.1.4 In the SMS sending (for those using unofficial WhatsApp, the message will be sent through the SMS channel) there is a standard message worked with Custom Values, both at the contact level and at the account level, which serves any niche, where you have the option to edit and customize as you wish. The same customization happens in Email sending.
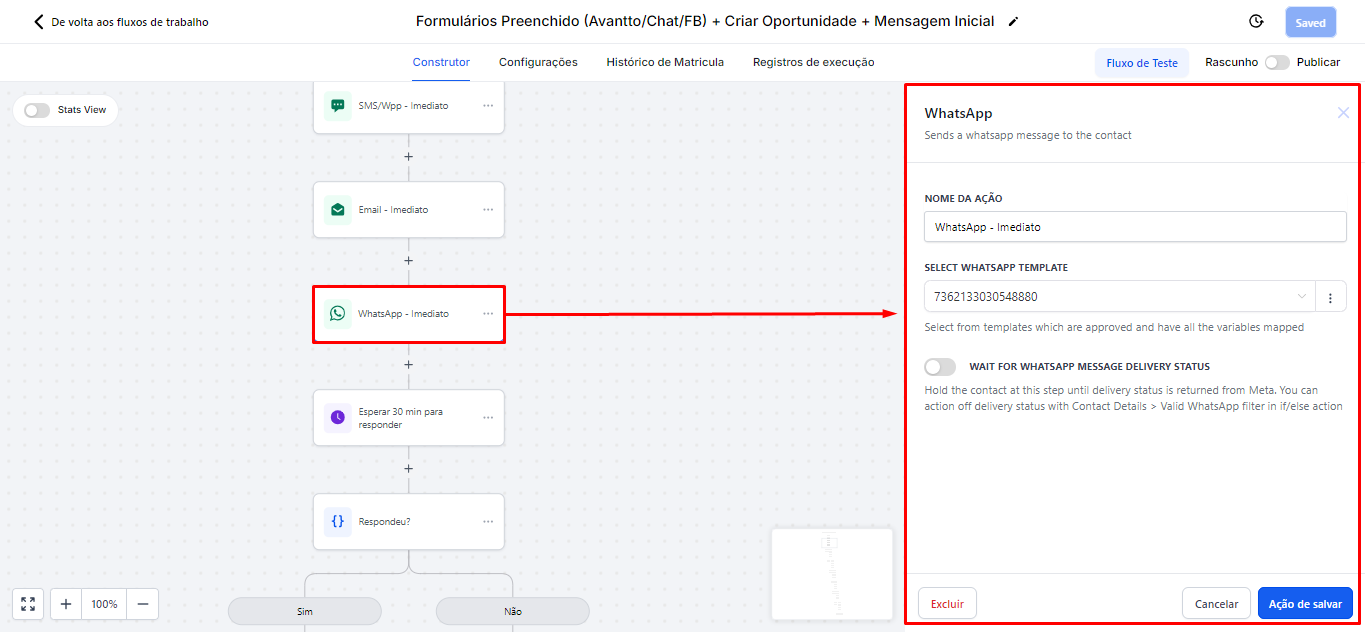
2.1.5 To work with WhatsApp sending using the official API, the process is a bit more complex, as it is necessary to first save the template so that Meta can authorize its use within automations. Click here to see the step-by-step!
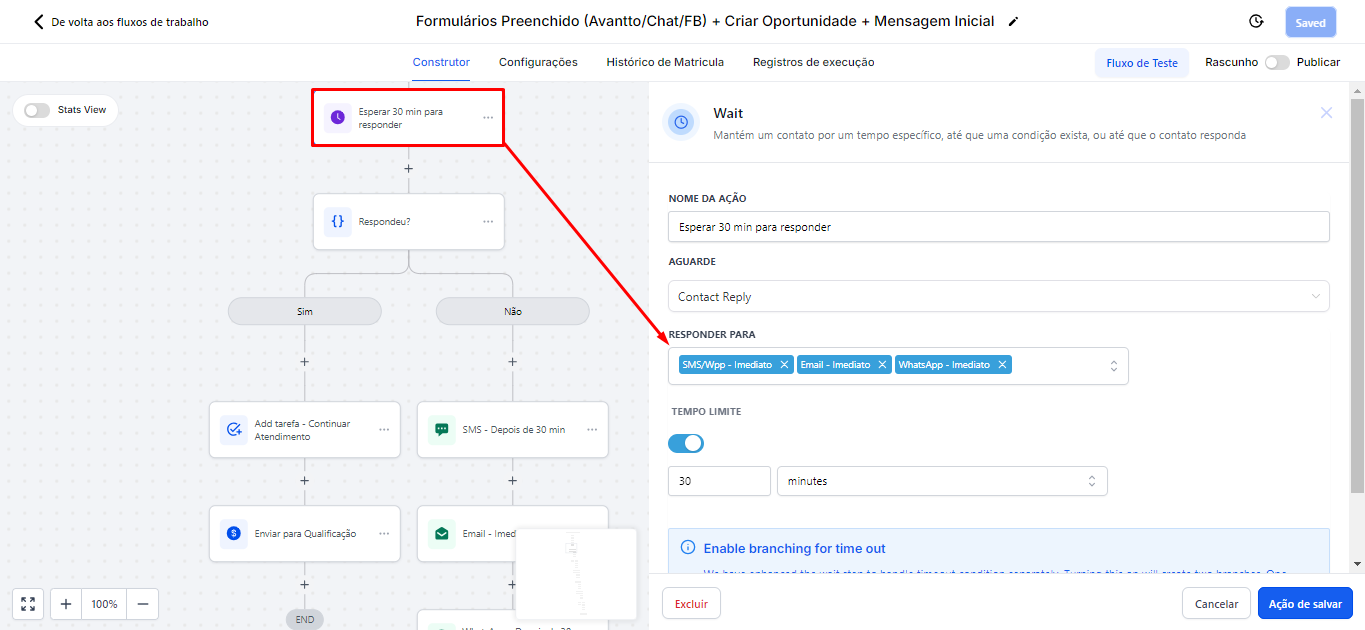
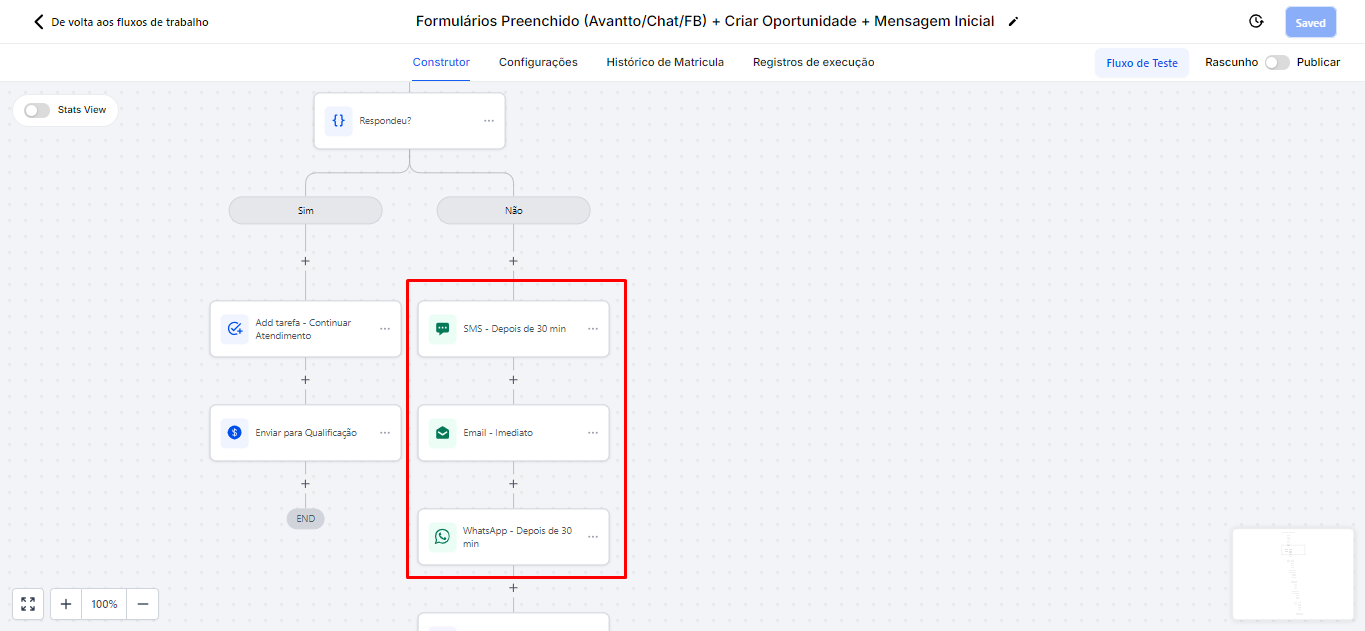
2.1.6 In this action, we can configure the waiting time until the next message is sent, or until the person responds.
In the image, a waiting time of 30 minutes is shown, which serves two purposes: first, this period is intended to wait for the person's response to the three messages sent through the channels of Email, SMS (which is also used for unofficial WhatsApp), and WhatsApp. Secondly, this waiting time also allows the sending of a sequence of messages during this same interval, in case the person does not respond. Thus, you can keep the communication active while waiting for a return, as the automation will proceed to the next action.
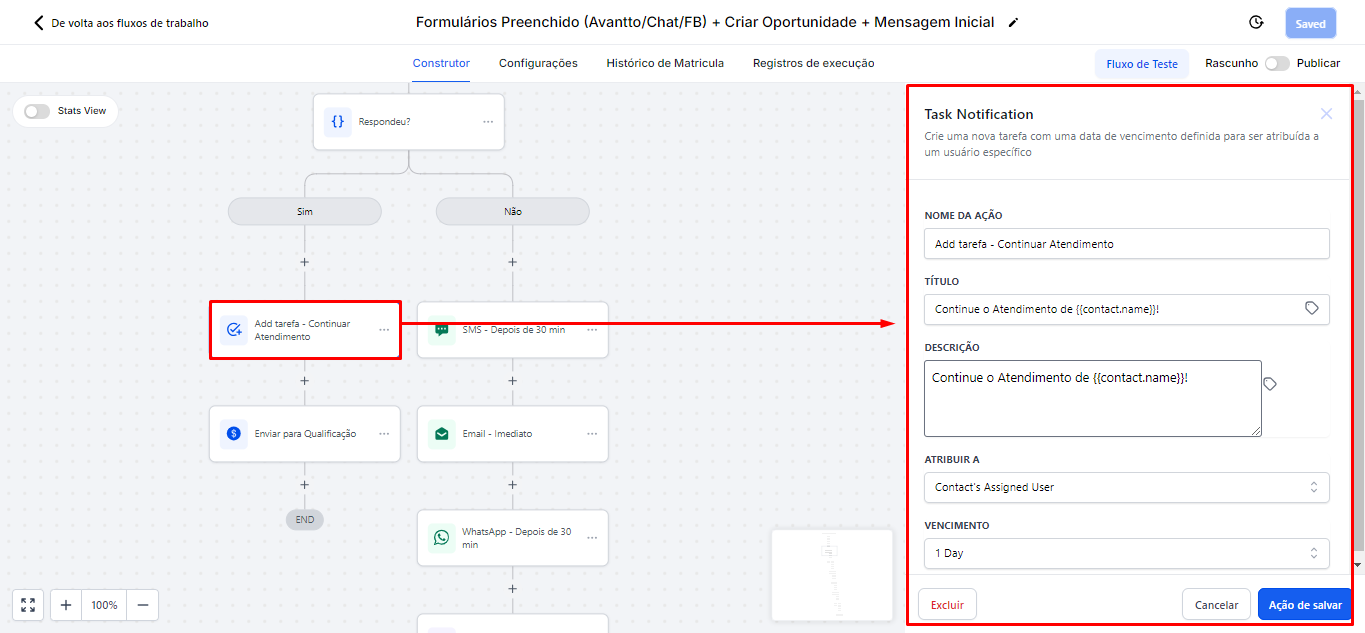
2.1.7 If the contact responds, a task will be created for the person responsible for this opportunity to continue the service, with a deadline of 1 day.
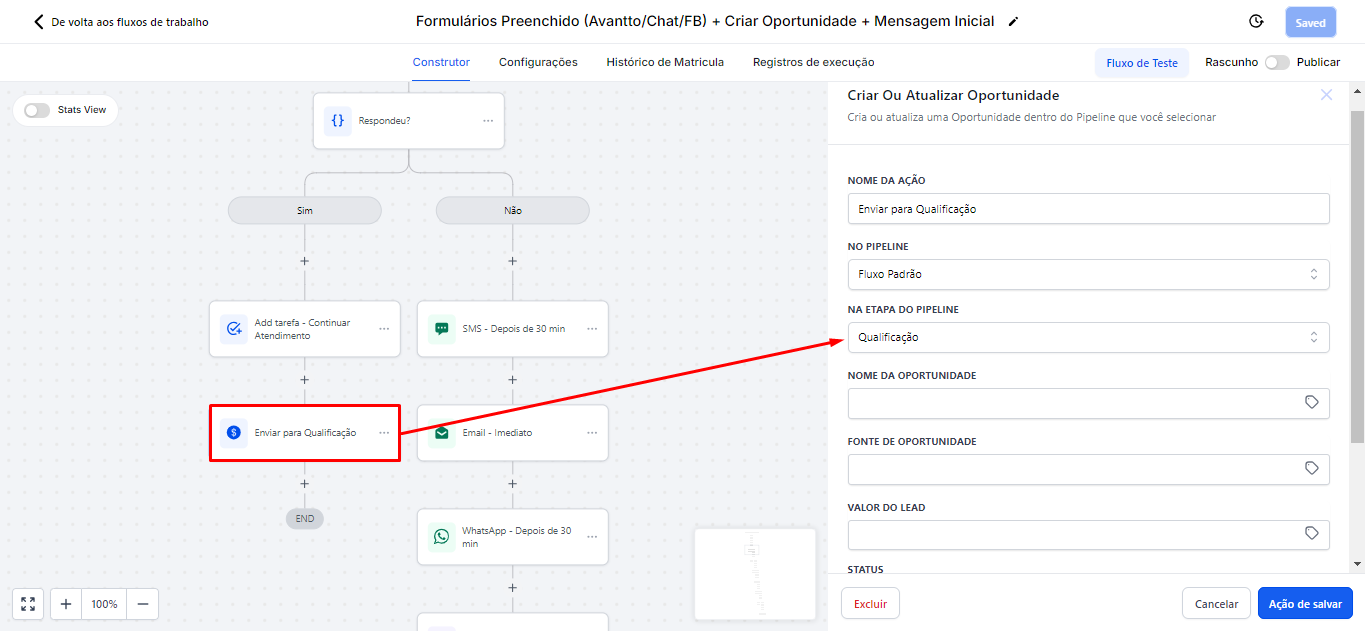
2.1.8 Next, the automation will move the person to the qualification stage.
2.1.9 If the opportunity does not respond during this interval, the sequence of messages will be sent automatically by the automation. This automation will repeat for 10 days, and you can configure the waiting time and the body of the messages.
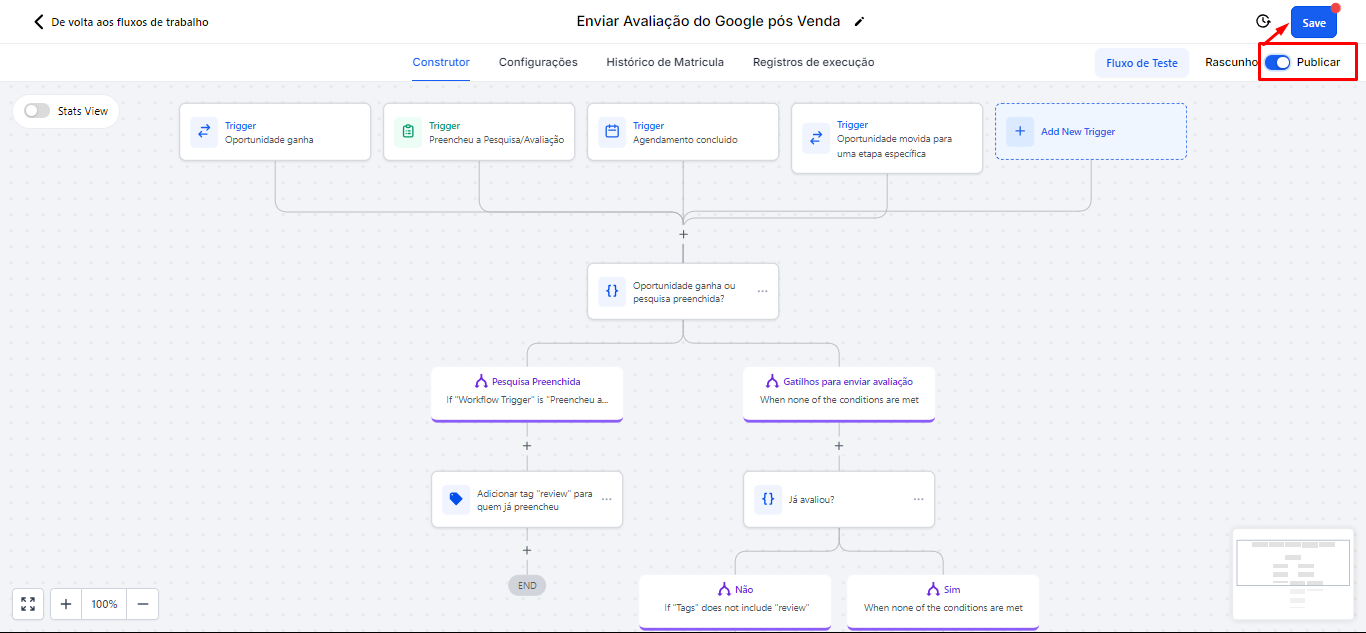
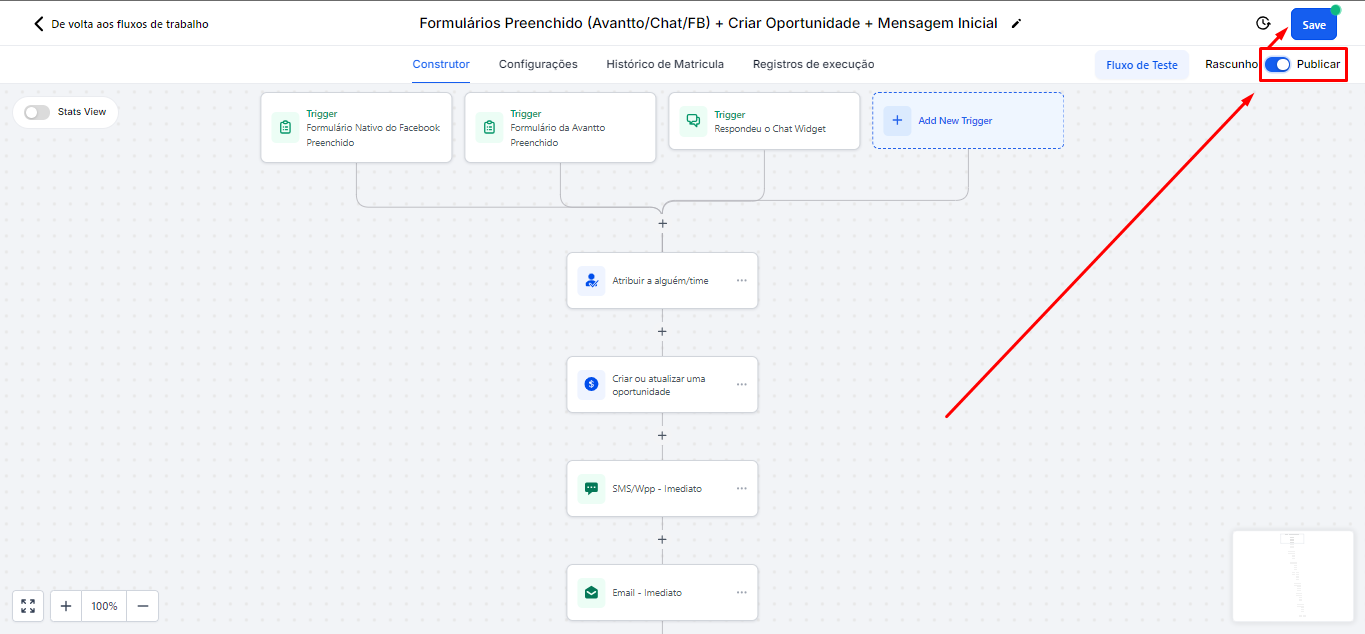
2.1.10 Just Publish and Save for the automation to start working.
2.1.11 The automations for WhatsApp, Instagram, and Facebook Messenger are basically the same concept. Opening WhatsApp, which is the most common, we have the SMS triggers (unofficial WhatsApp) and the WhatsApp (official API).
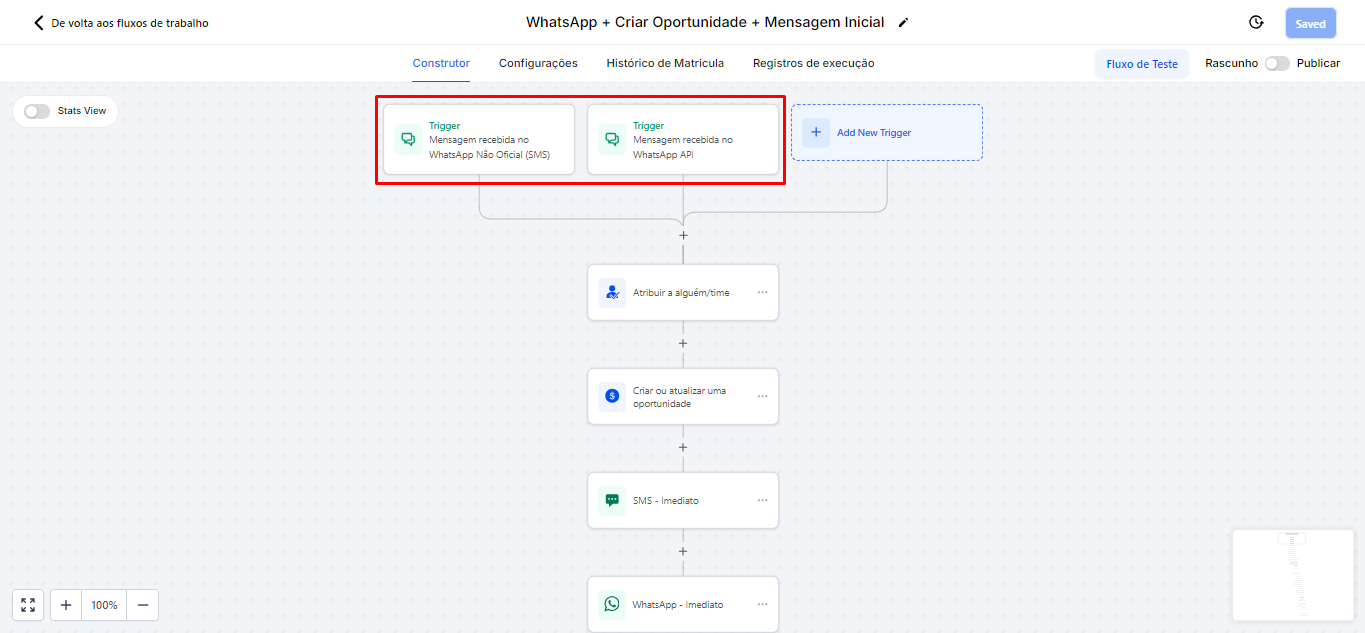
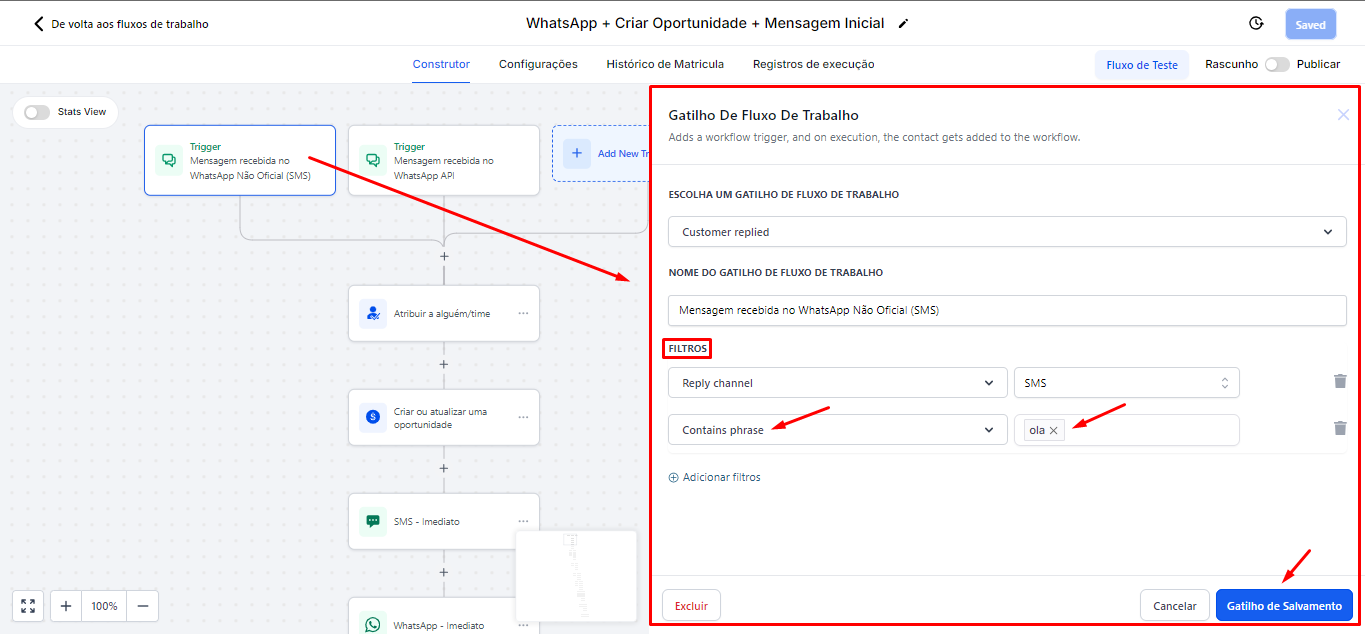
2.1.12 Unofficial WhatsApp Trigger: Everyone who sends a message on WhatsApp will fall into this automation, as there is no message filter in this example.
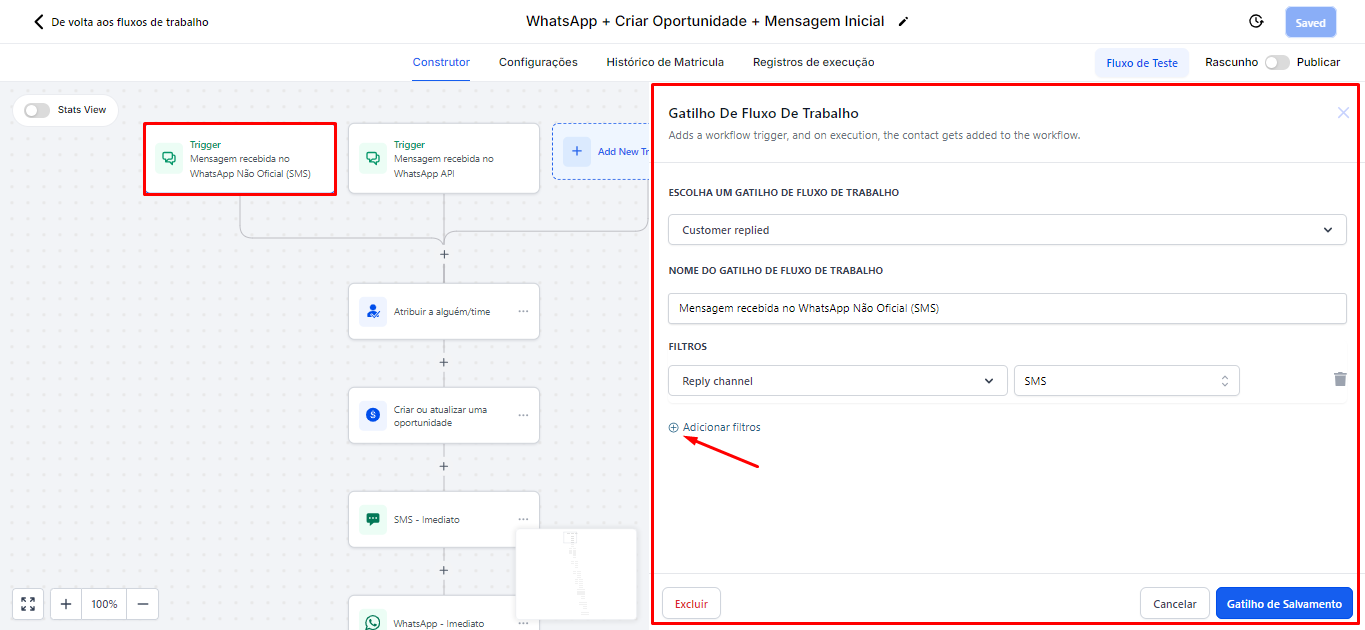
2.1.13 If you want to set it so that only those who send, for example, the message "hello" fall into this automation, just add filters (as shown in the image below, indicated by the red arrow). Select "Contains phrase" and, in the field next to it, write the desired words. Thus, in this example, only those who send messages containing the word "hello" will be directed to this automation. If you want only those who write exactly "hello" to fall into this automation, just select "Exact match phrase" instead of "Contains phrase".
2.1.14 For message campaigns in Meta Ads, it is recommended that you add the same standard message that is sent by the automation in the field containing "hello". For example, if you have a campaign on Facebook that suggests users send a message on WhatsApp with the phrase "learn more", this specific message will be recognized by the automation. Thus, when a contact sends "learn more", they will automatically be directed to the WhatsApp automation. This ensures that the automation is set up to capture exactly the messages you want to monitor and respond to.

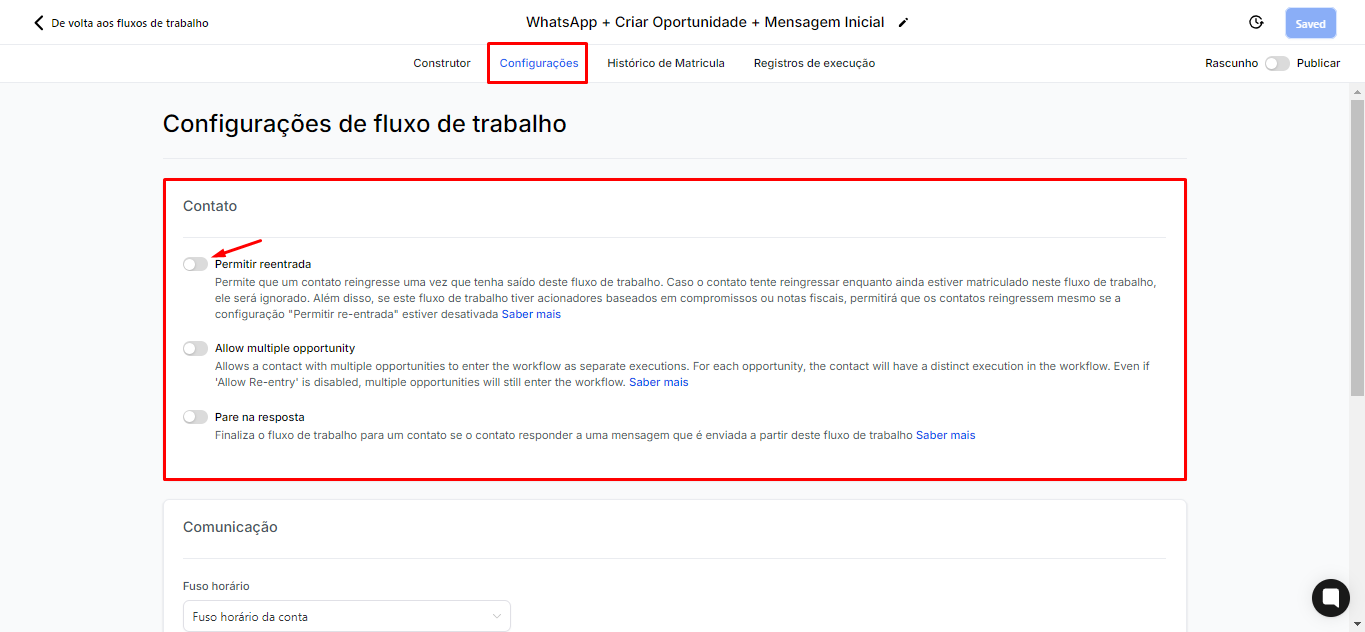
2.1.15 It is important to configure the re-entry permissions for contacts. For example, if re-entry is enabled and the automation is set to trigger upon receiving any message (without filters like "Exact match phrase" and "Contains phrase"), an opportunity will be automatically created and message triggers will start for that contact. This will result in a continuous loop, where every time the contact sends a message, they will be added to the automation again. Therefore, it is crucial to keep this option disabled by default to prevent contacts from getting stuck in this re-entry cycle.
However, if the filters are set so that only people who respond "hello" are included, you can enable re-entry. Thus, when a contact sends "hello," they will re-enter this automation. This logic applies to all other automations, allowing for more efficient control over how and when contacts can be reintroduced into the flow.
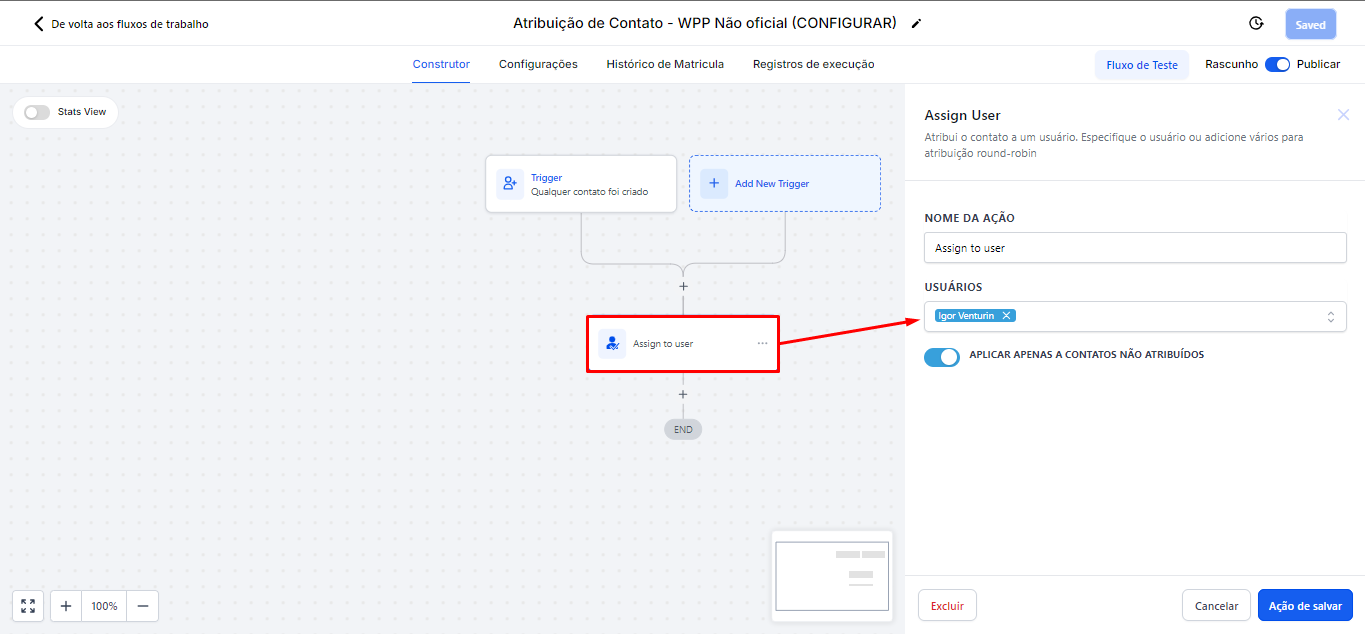
2.1.16 Within the "Contact Assignment - Unofficial WPP" automation, by default, the User field comes empty, so it is necessary to assign it. Whenever a WhatsApp number is connected, it is recommended to open this automation and perform the assignment. If this assignment is not configured, errors may occur when sending messages. Therefore, it is essential that, when connecting WhatsApp, the contact is assigned to a user from Avantto. This ensures that the automation works correctly and that messages are sent without issues.
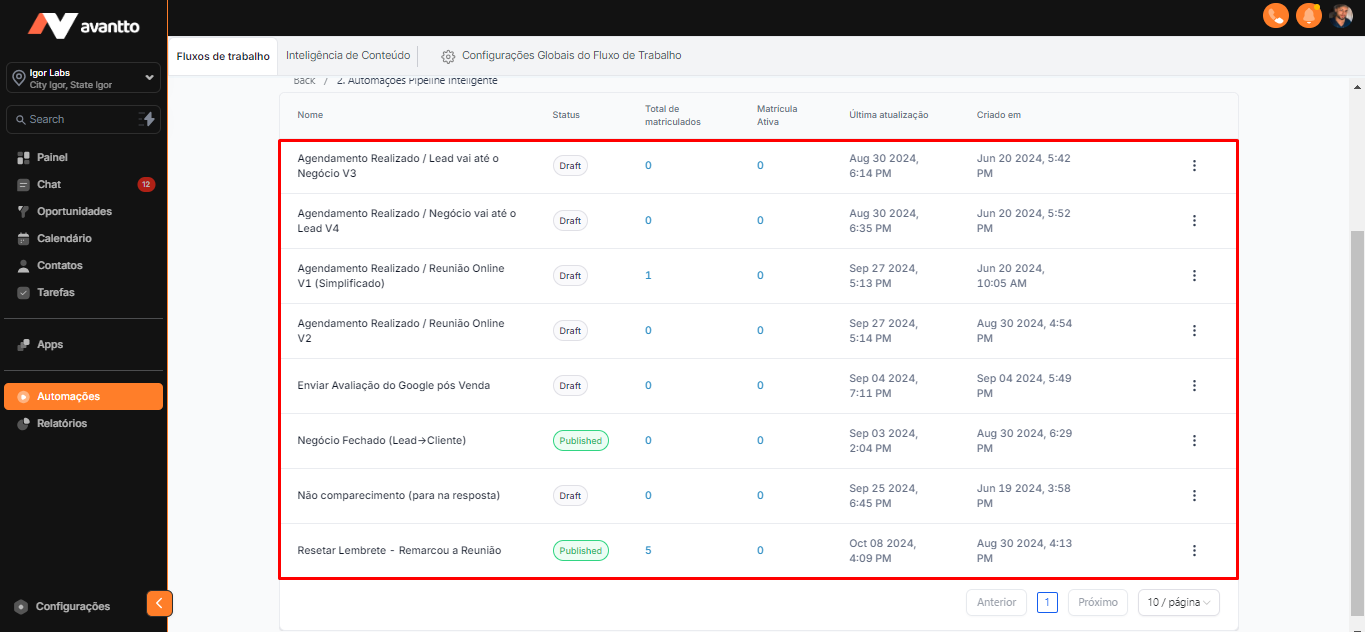
2.2 Folder 2. Intelligent Pipeline Automations
2.2.1 Here there are already a slightly larger number of automations, but in practice, there is not much difference between them. What really changes is the language, which can be immediately identified by the nomenclature used.
For example, "Scheduled / Lead goes to Business V3" refers to cases where the lead attends the location in person. When the scheduling is done, this automation sends a sequence of reminders, reminding the lead about the need to attend the address. These messages will be sent 7 days before, 5 days before, 3 days before, and a few hours before the appointment. Therefore, the main difference between the automations is the standard message sent in each of them.
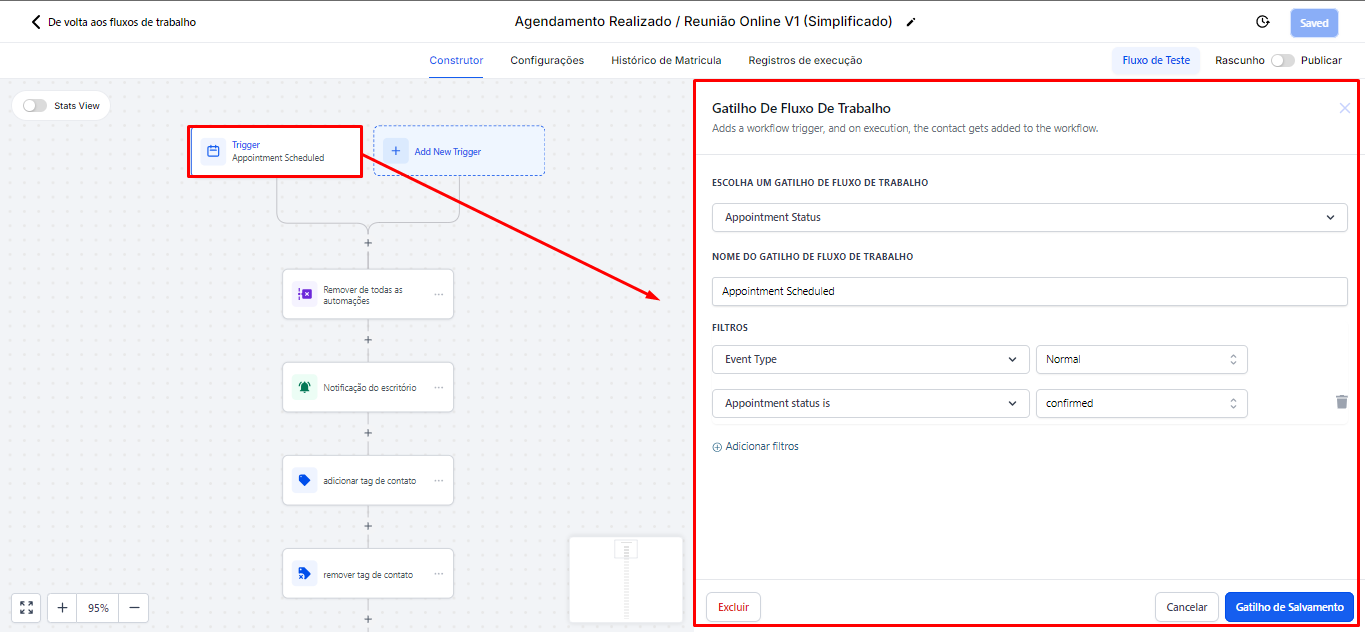
2.2.3 When opening the Simplified Online Meeting automation, which is basically the same as the previous two in this folder 2, the idea of this trigger is that when a scheduling is confirmed (through the agenda created within Avantto), the person will be directed to this automation.
For this automation to work correctly, it is necessary that the account's custom values are filled in, so that the messages are personalized.
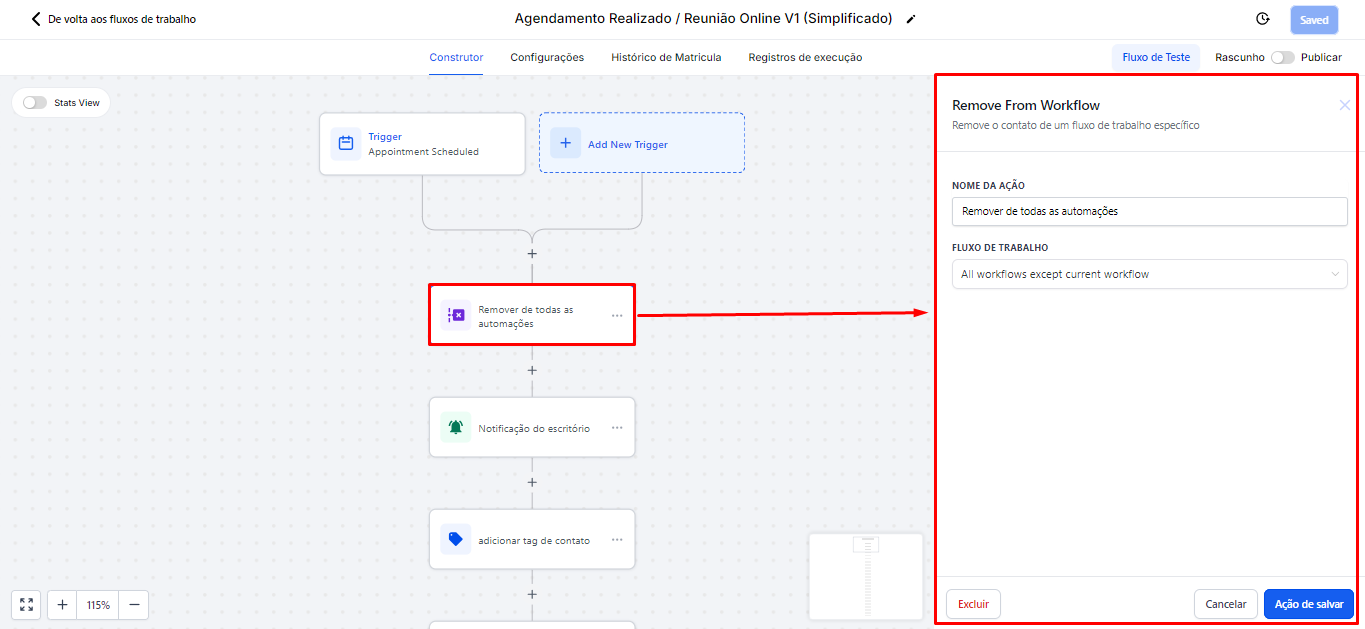
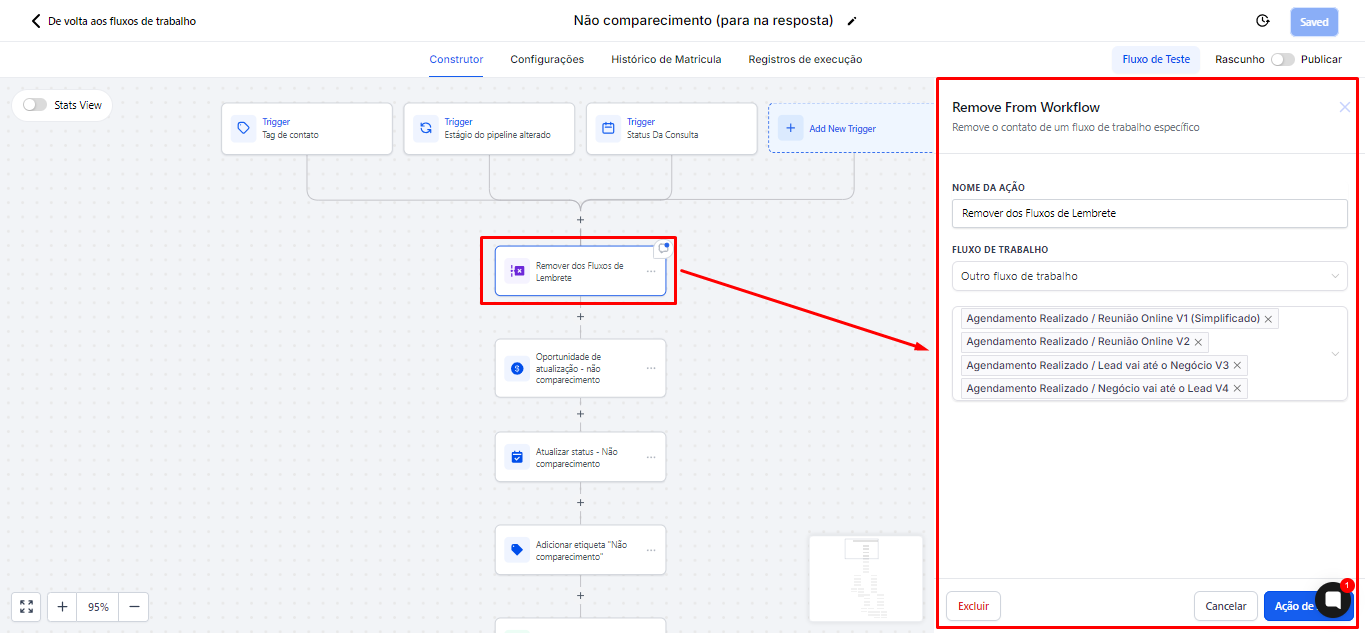
2.2.4 Action of "Remove from workflow"
The first action of the automation is to remove the person from all other flows. For example, if the lead is in a No-Show or nurturing flow, they will be removed from these automations. This happens because, at this moment, it is not ideal to continue sending other messages. The focus now is to wait for the scheduling, and this automation will be responsible for reminding the person about their meeting.
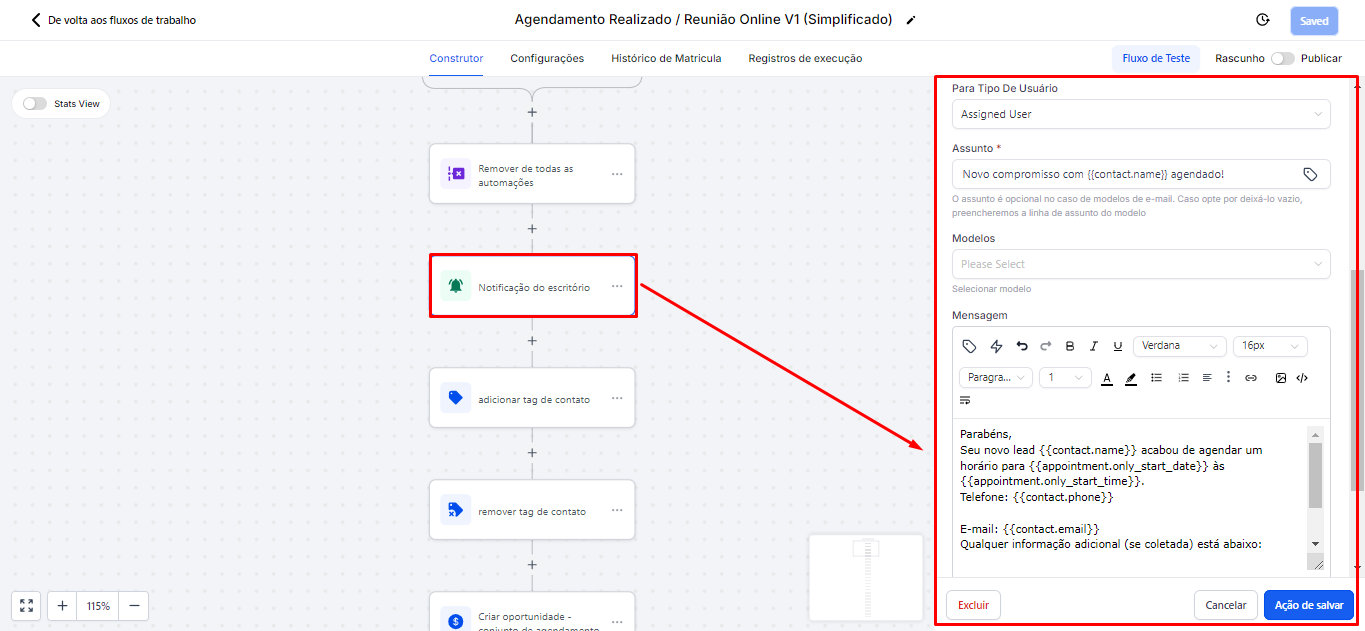
2.2.5 Action of "Internal notification"
The office will be notified that a new appointment has been made.
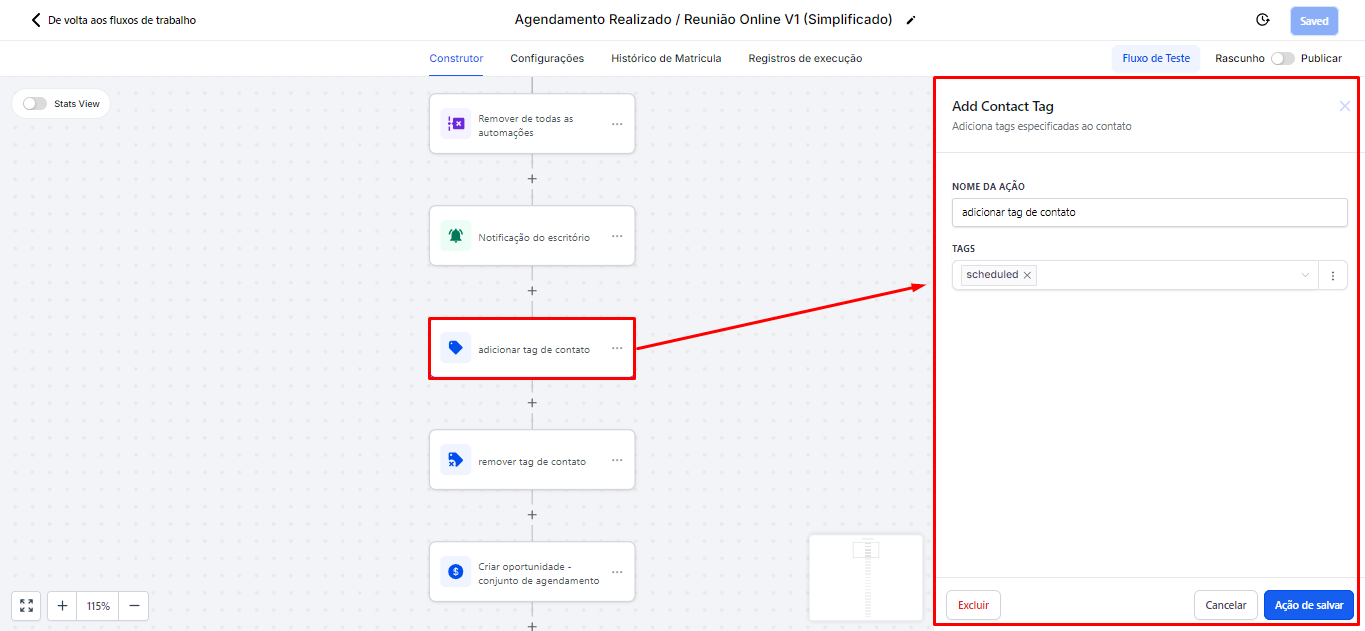
2.2.6 Action of "Add contact tag"
A "scheduled" tag will be added.
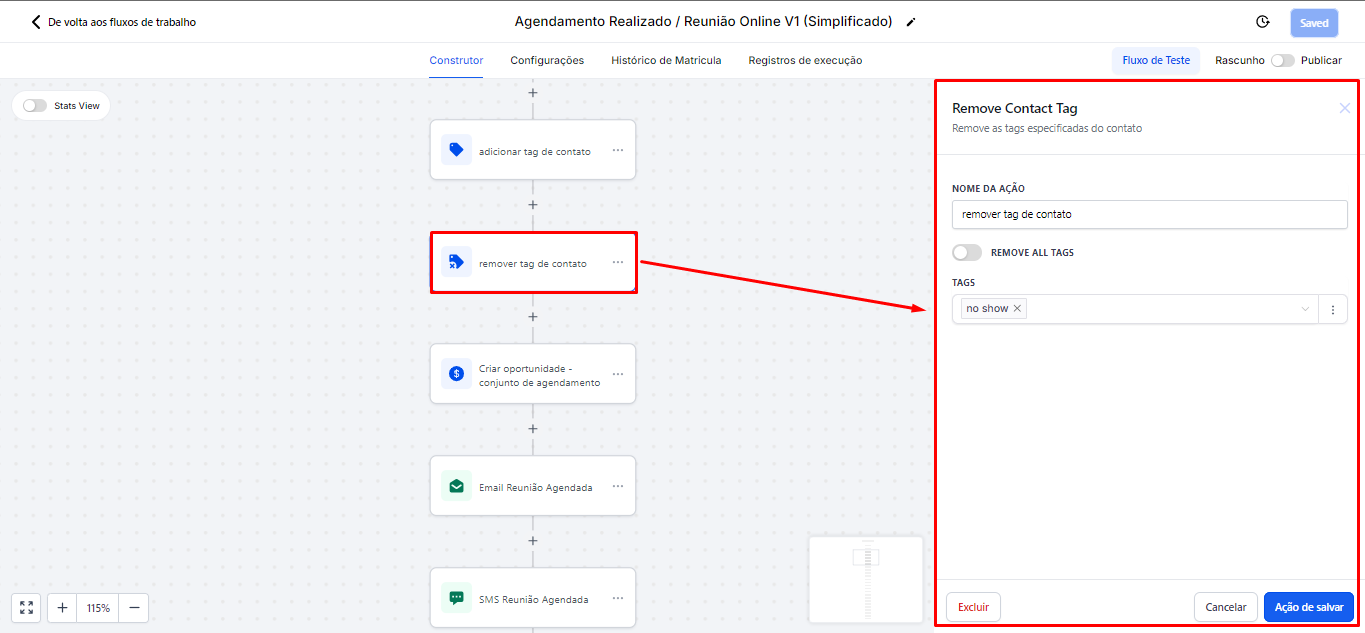
2.2.7 Action of "Remove contact tag"
If the lead has the no-show tag, it will be removed.
2.2.8 Action of "Create or update opportunity"
This opportunity will be moved to the standard flow, specifically to the Scheduled Meeting stage. Set the status to Open and select the option that allows the opportunity to return to any stage of the flow.

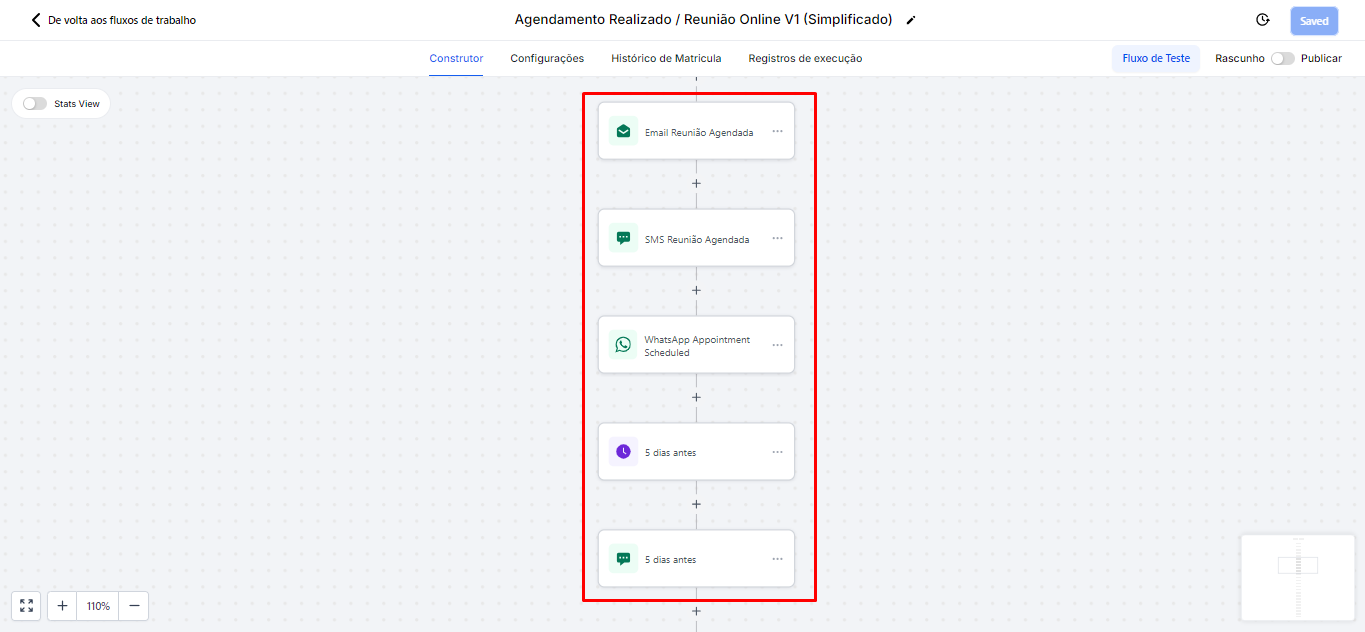
2.2.9 Now, there will be the same sequence of messages as in other automations, including sending messages and wait actions. The messages will have a fully editable text body, allowing customization. Between message sends, there will be scheduled waiting periods, ensuring that communications are sent at appropriate times and do not overwhelm the contact.
The lead will receive a message with the meeting link, so it is very important to configure the previous videoconference and calendar steps to avoid errors.
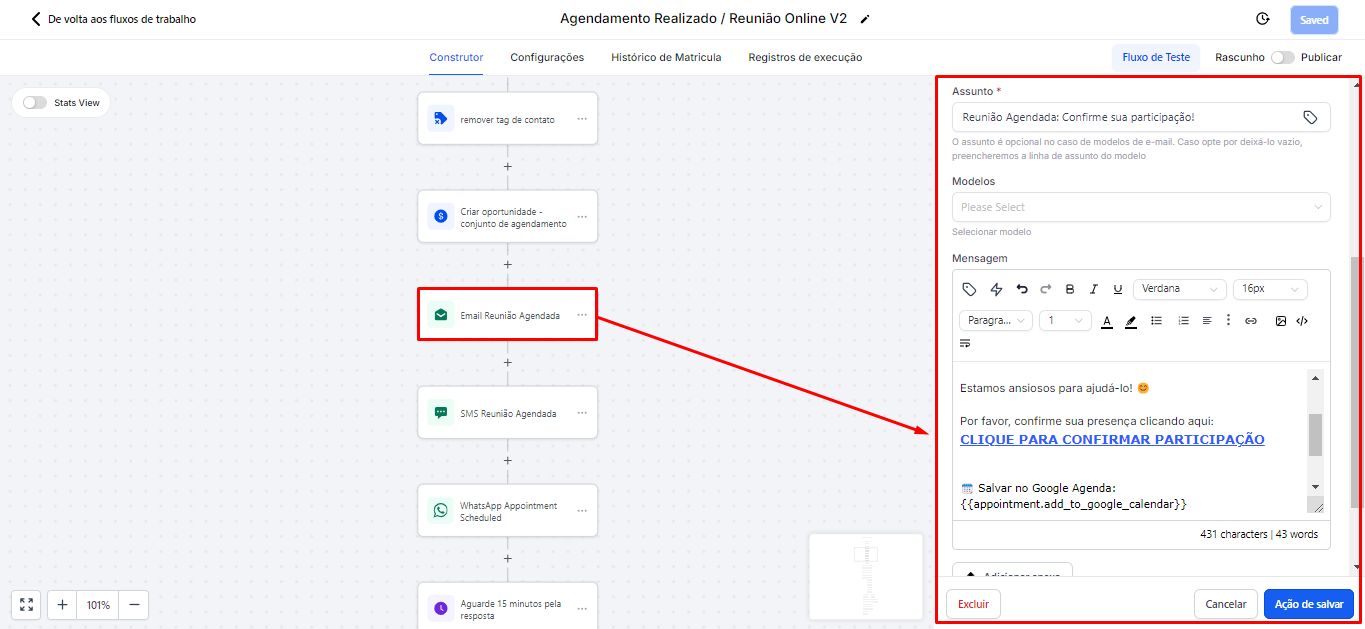
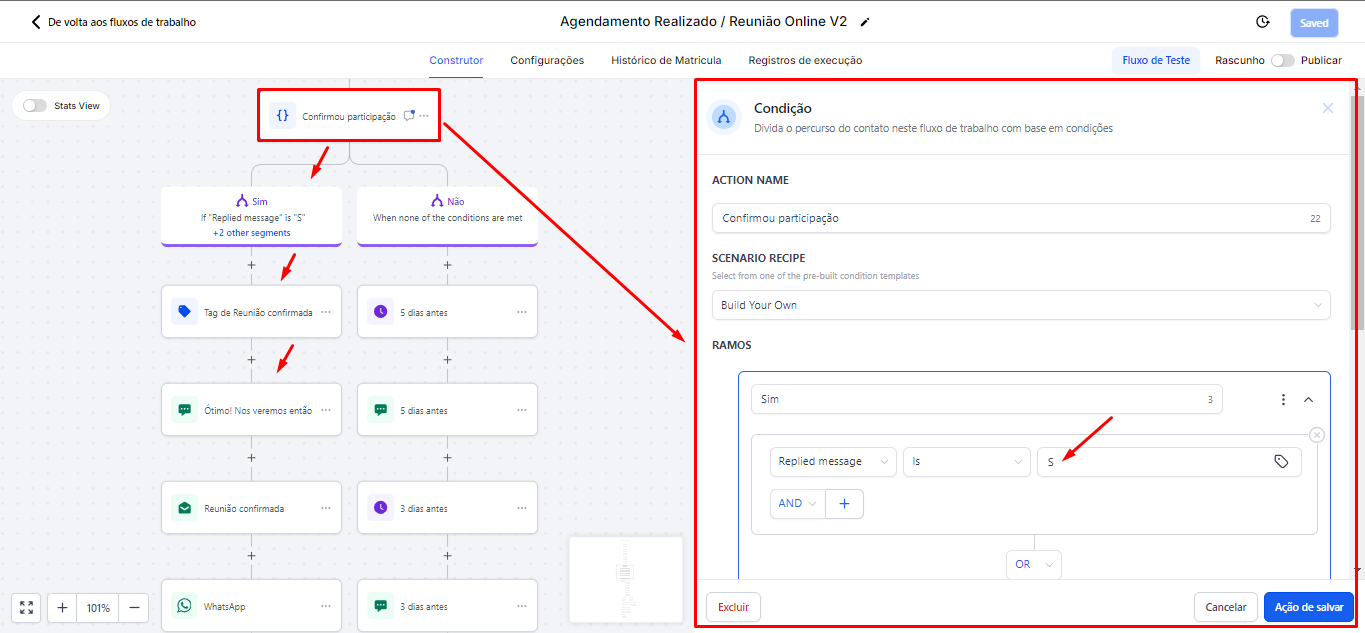
2.2.10 In the automation Scheduled Appointment / Online Meeting V2, there is an important difference that requires additional settings, as this automation includes meeting confirmation. Although the trigger flow and actions are the same as the previous automation, the message will have a specific request for the person to respond with "Y" to confirm their attendance.
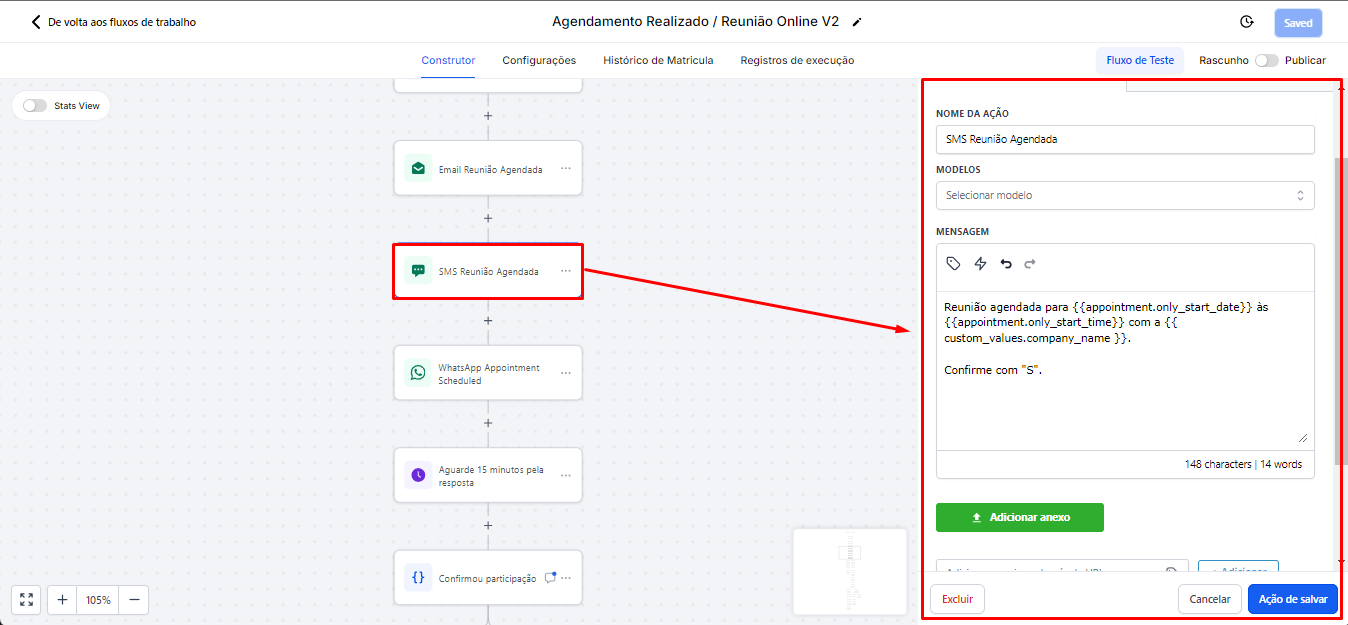
2.2.11 The difference between SMS and email is that, in the email, there is a confirmation link. This link allows the person to click to confirm their attendance at the meeting, while in SMS the confirmation is done directly by replying "Y".
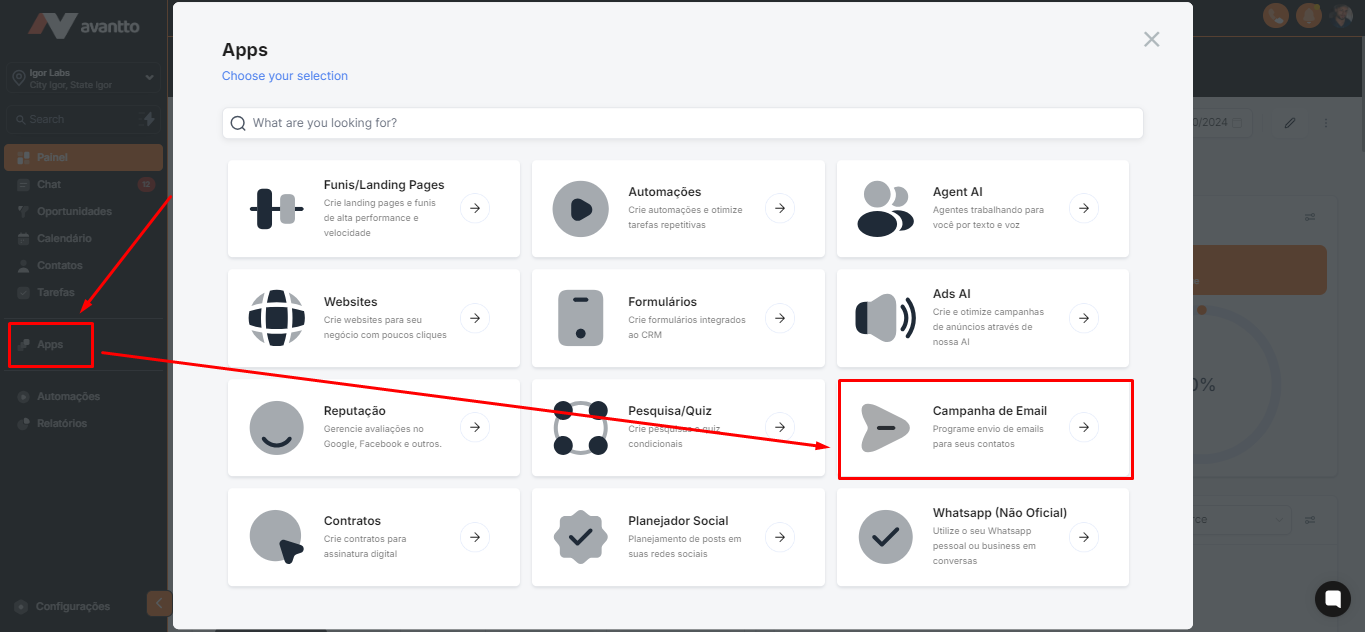
2.2.12 To get the email link, in the left side menu, click on Apps, then Email Campaigns
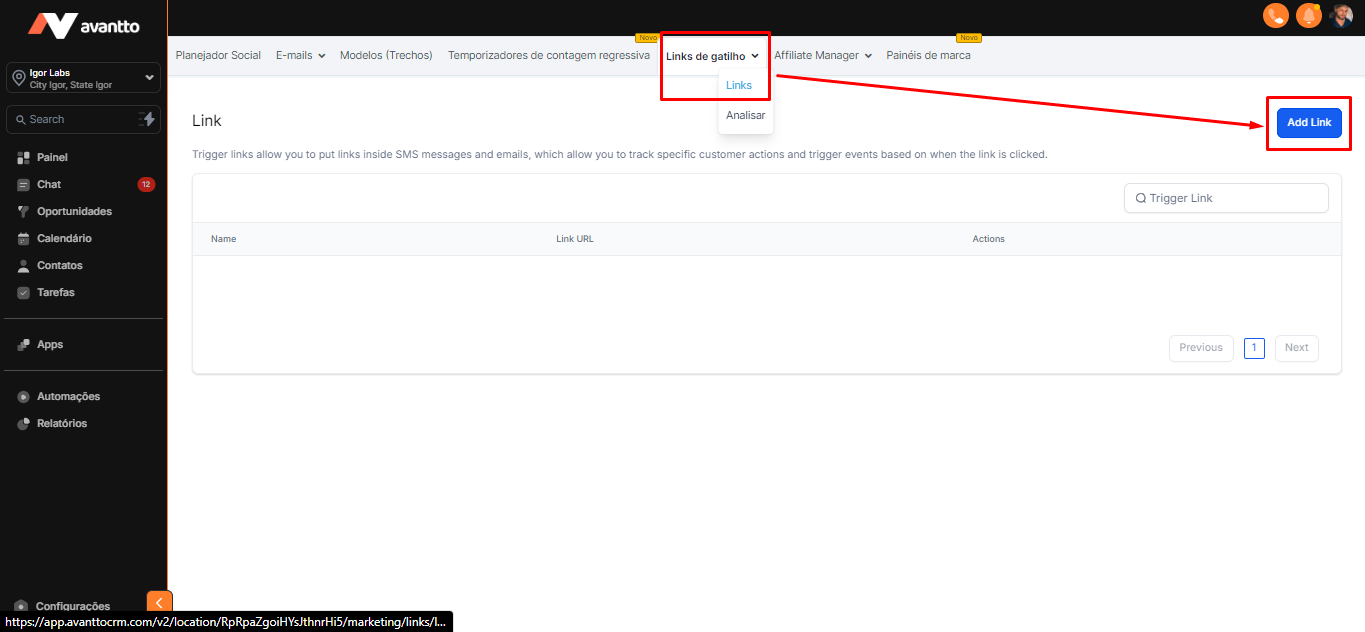
2.2.13 Click on Trigger Links, and then Add link
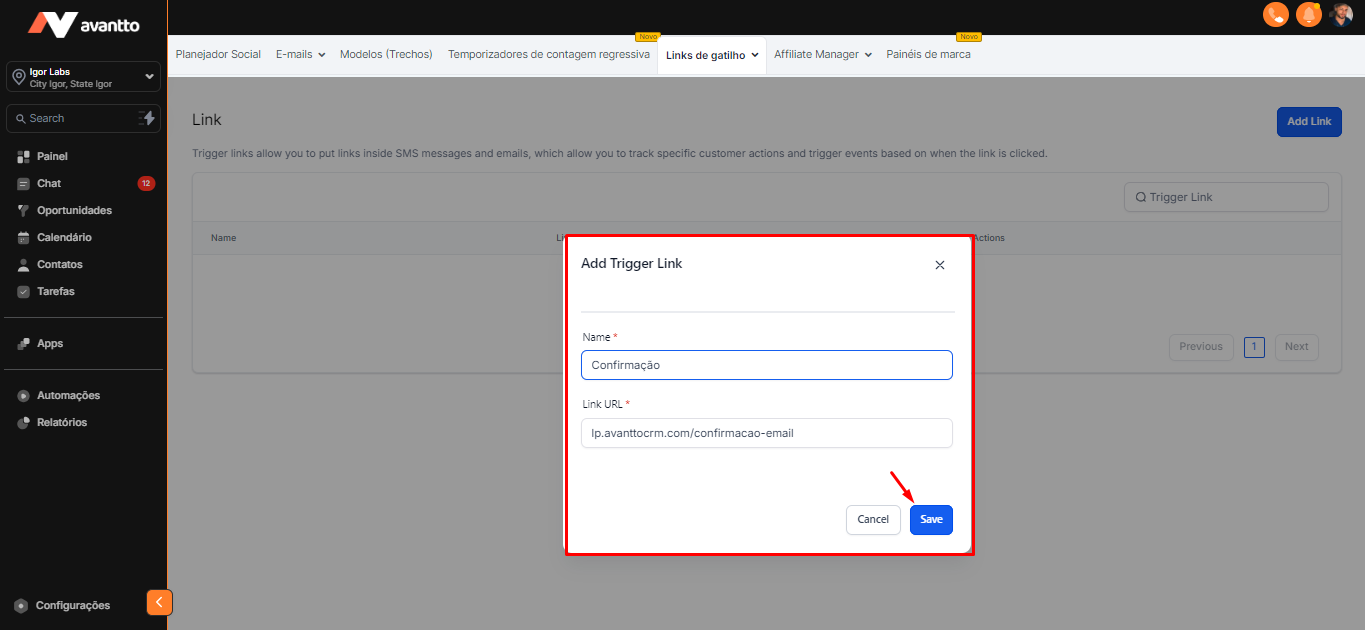
2.2.14 Just add the link of any of your pages or domains.
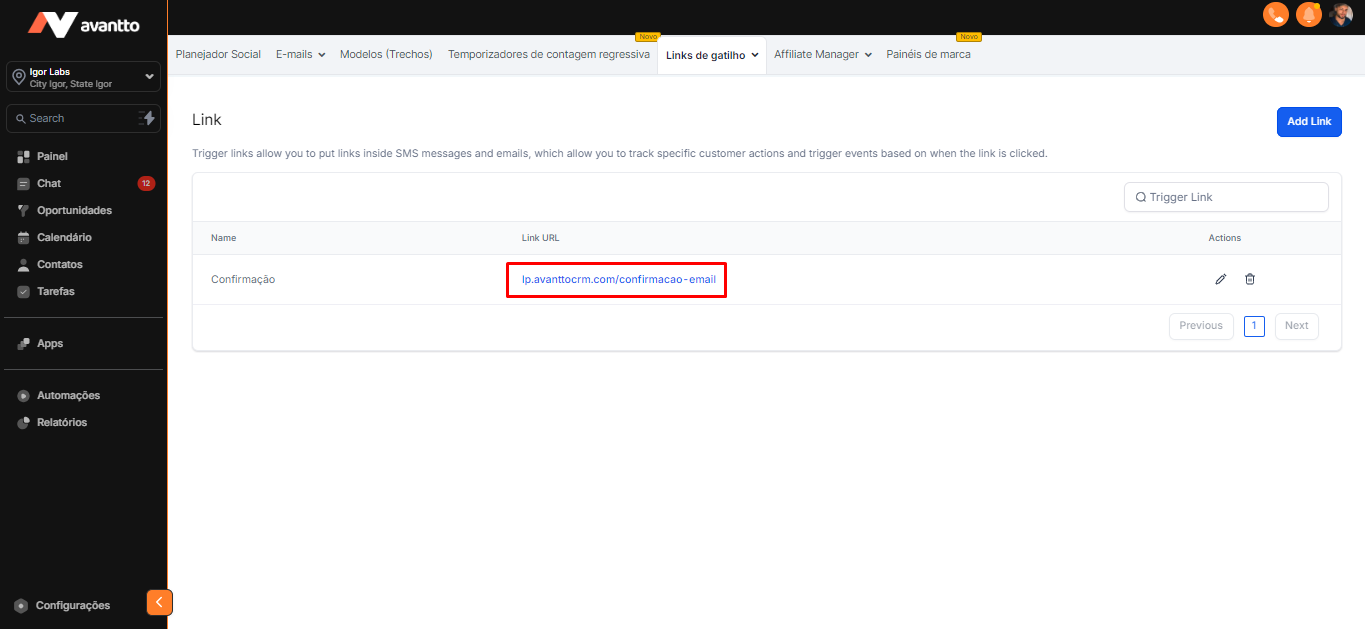
2.2.15 It is exactly this link that will be used in the automation.
2.2.16 A condition was created so that if the person replies "S" on WhatsApp, the automation automatically sends messages thanking for the confirmation.
2.2.17 If the person does not respond, the automation will continue sending reminder messages about the meeting, scheduled to be sent 5 days before, 3 days before, and so on.
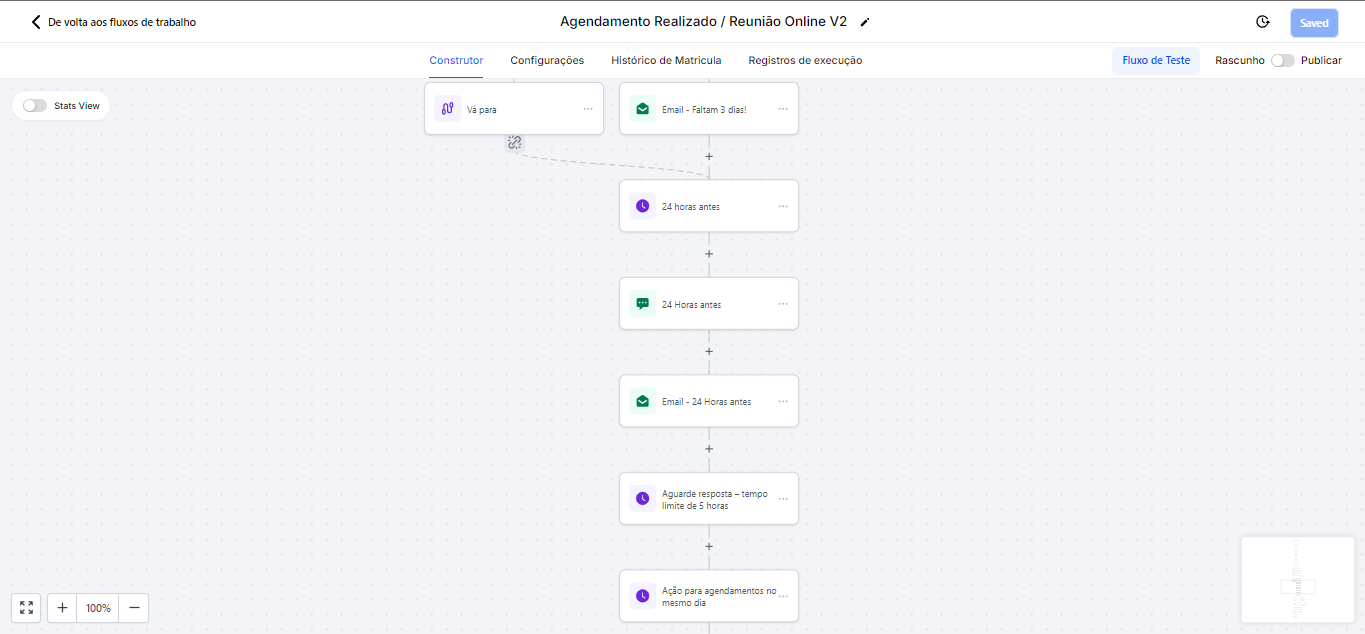
2.2.18 With 24 hours remaining for the meeting, the automation will send new confirmation messages, regardless of whether the person has responded previously or not. If, for example, the person did not respond to the messages sent 5 days before, these new 24-hour confirmation messages will reinforce the request, asking again for the person to confirm their attendance.

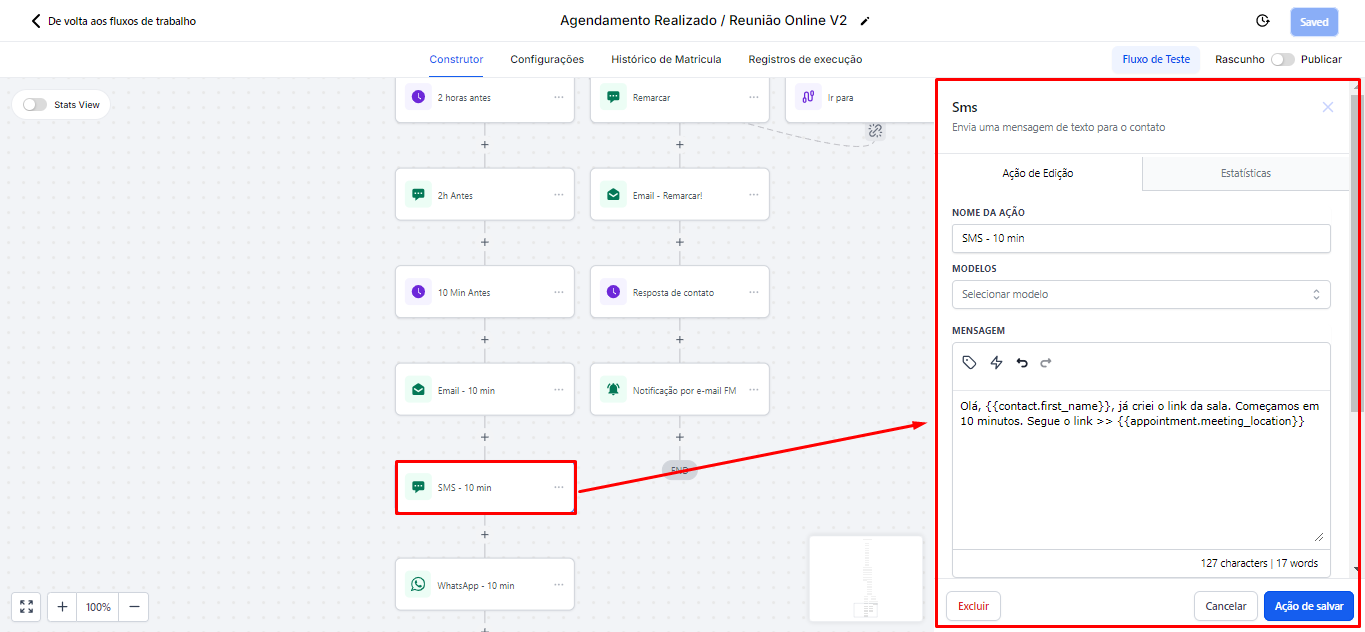
2.2.19 With 10 minutes remaining for the meeting, an SMS and an email containing the invitation link to join the meeting will be sent.
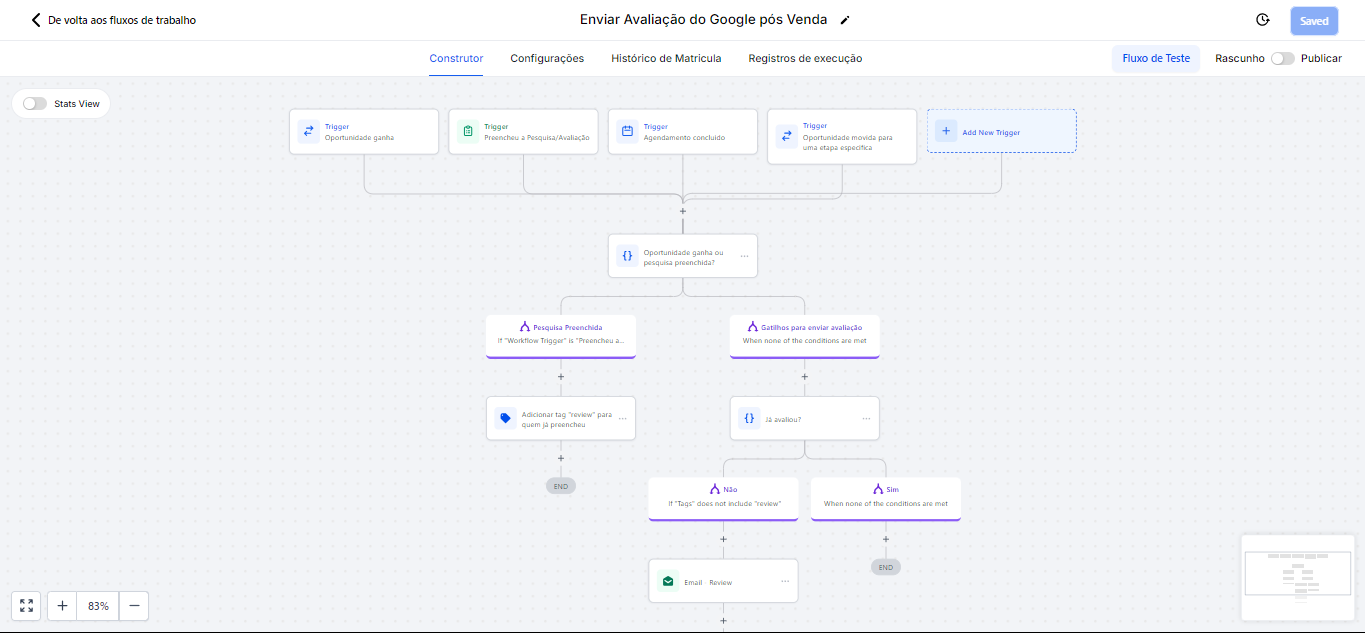
2.2.20 Automation of Send Google Review Post-Sale, click here to see the instructions.
2.2.21 Closed Deal (Lead -> Client): When an opportunity is won in the standard pipeline, the contact status is automatically changed from lead to client, facilitating the filtering and organization of contacts.
2.2.22 No-show (stops at response), this automation is specifically designed to handle situations where the person misses or cancels the meeting. In it, we have three different triggers:
Contact Tag: If you are manually conversing with the person and realize that they did not show up or will not show up, just add the no-show tag. This will automatically enter them into this automation.
Pipeline stage changed: When the opportunity is moved to the no-show stage in the pipeline, the contact will be directed to this automation.
Appointment Status: This action occurs when the appointment status is changed to no-show, either automatically or manually. Thus, the contact will also be included in the automation.
2.2.23 The action "remove from workflow" will remove the person from all reminder flows. Once they have had a no-show, it makes no sense to continue sending reminder messages to a contact who did not show up.
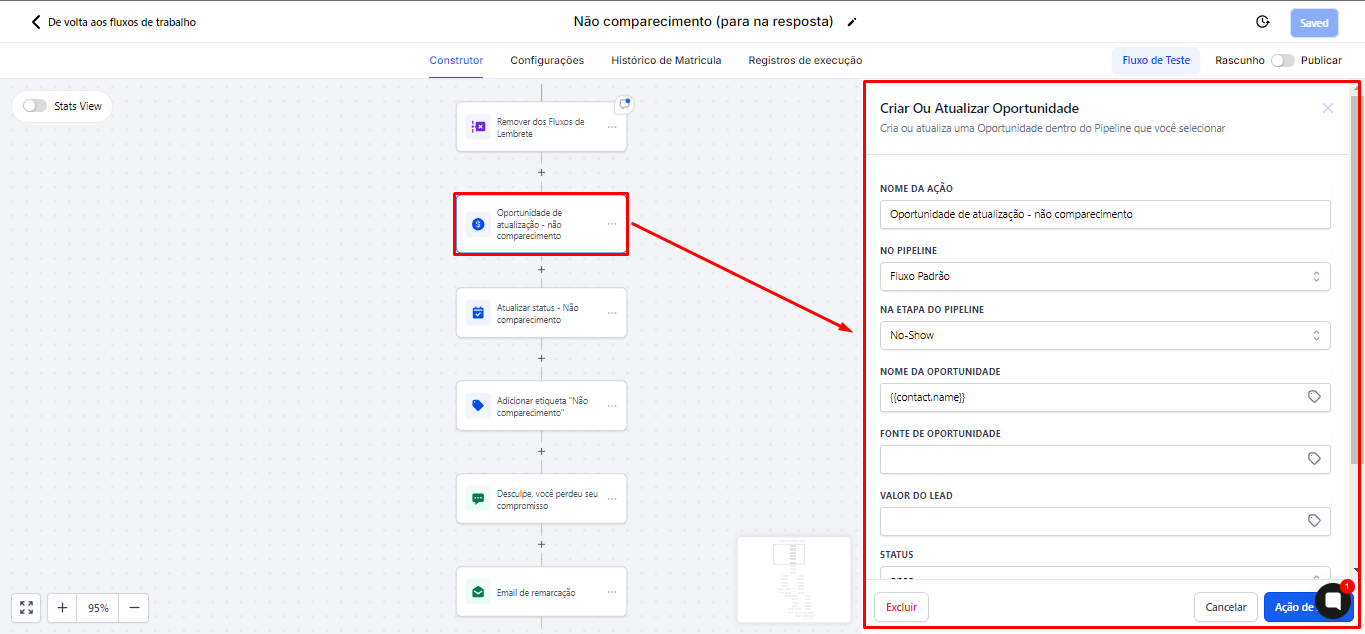
2.2.24 The person will be moved to the no-show stage through the action "Create or update opportunity."
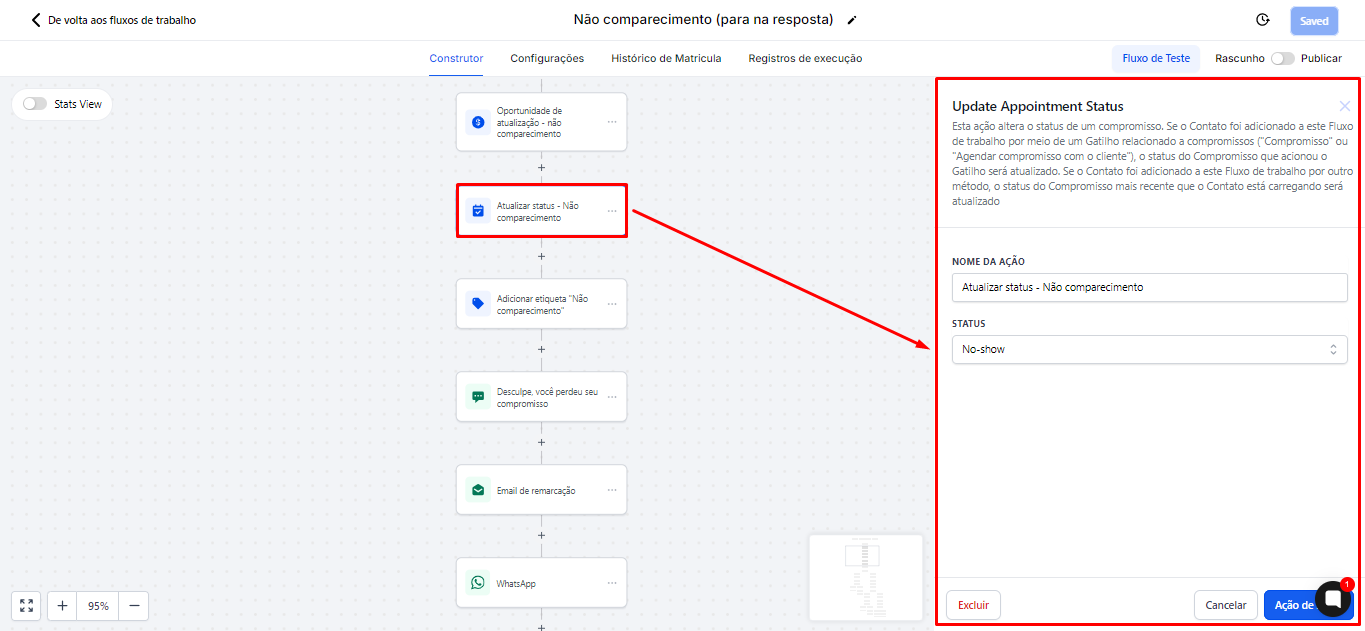
2.2.25 The action "update appointment status" will update the status to no-show.
2.2.26 The action "add contact tag" will add a tag if the contact comes from the trigger "Pipeline stage changed" or "Appointment Status"

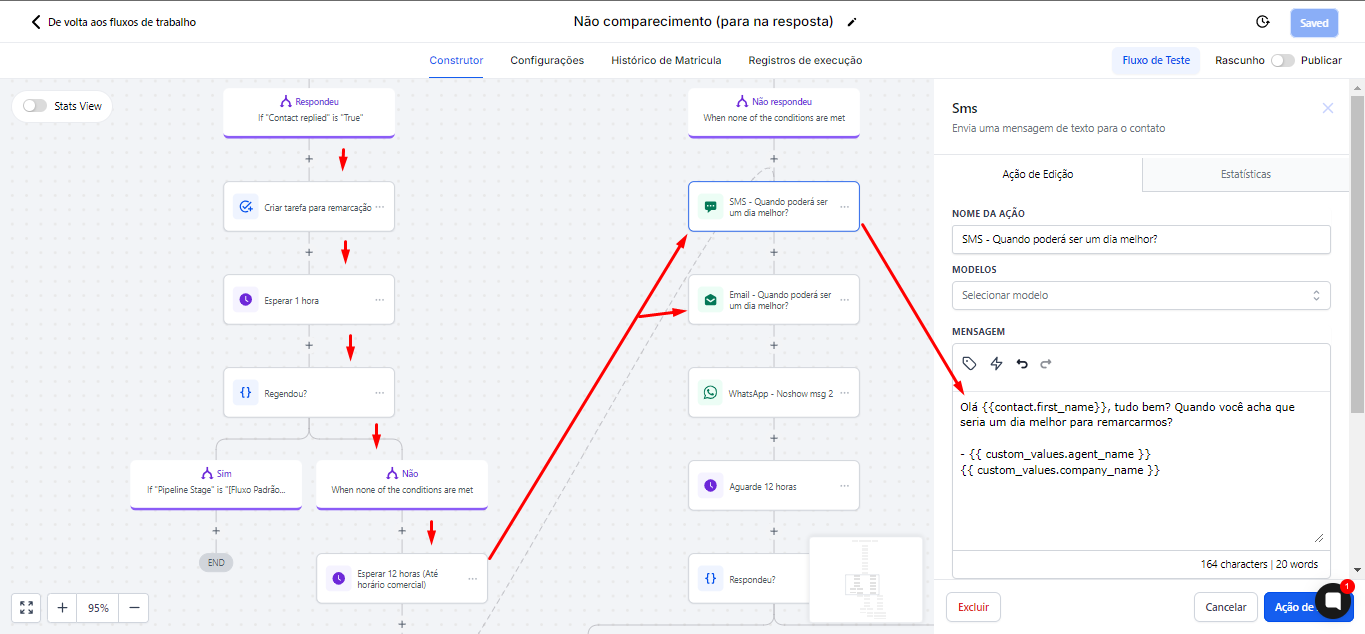
2.2.27 An SMS and an email will be sent to the person, regretting the no-show and asking if they want to reschedule. The contact can reply to the SMS or email to express their interest in rescheduling the meeting.

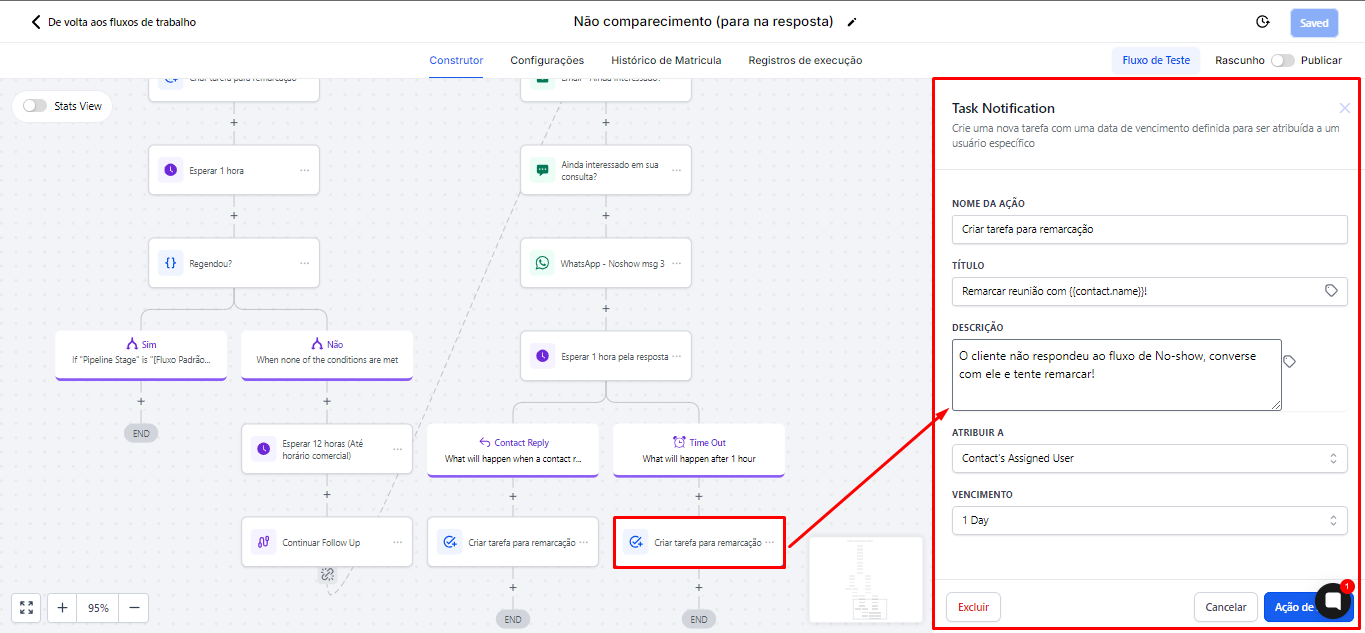
2.2.28 If the person responds, a task will be automatically created for the service to reschedule. After the task is created, the automation will wait for 1 hour. If the person does not reschedule within this period, the automation will wait another 12 hours and, after that time, will send a new message requesting the person to reschedule the meeting.
2.2.29 For two days, the automation will try to reschedule the meeting with the person. If the person does not respond during this period, a task will be created for the service to talk and try to manually reschedule with them.
2.3 Folder 3. Engagement Automations
2.3.1 This folder contains only two automations. As the name suggests, the purpose of these automations is to generate engagement with contacts. They were created to keep communication active and promote meaningful interactions with contacts.
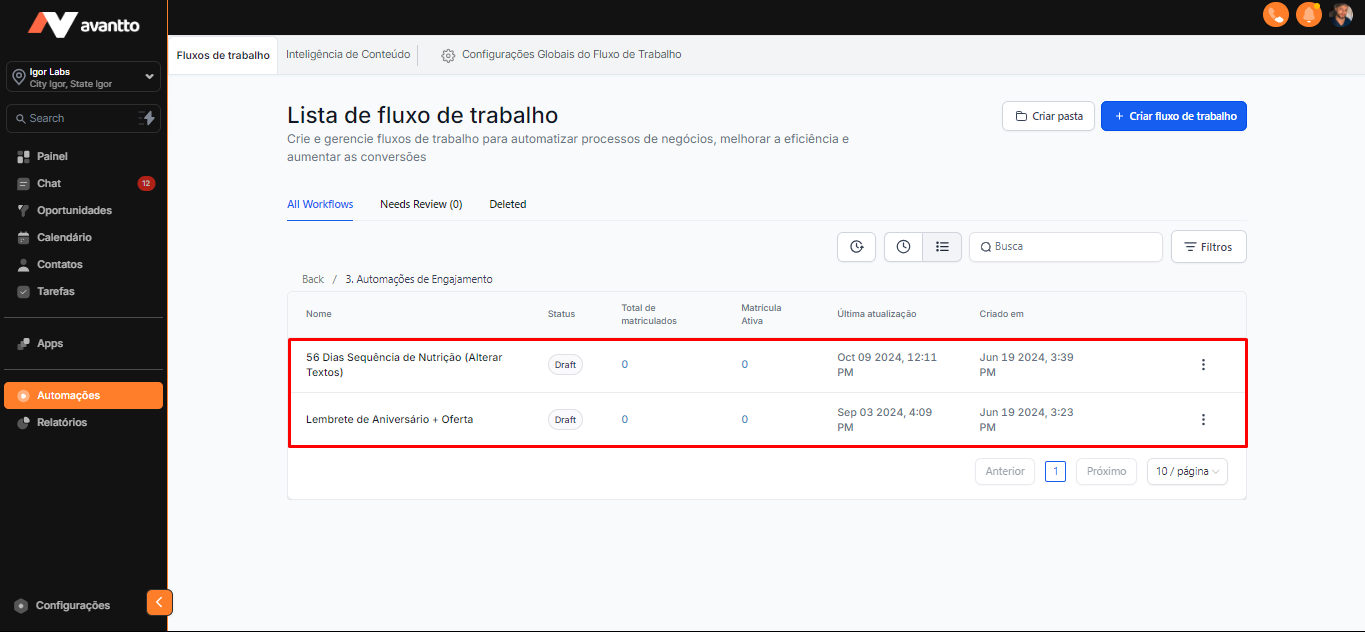
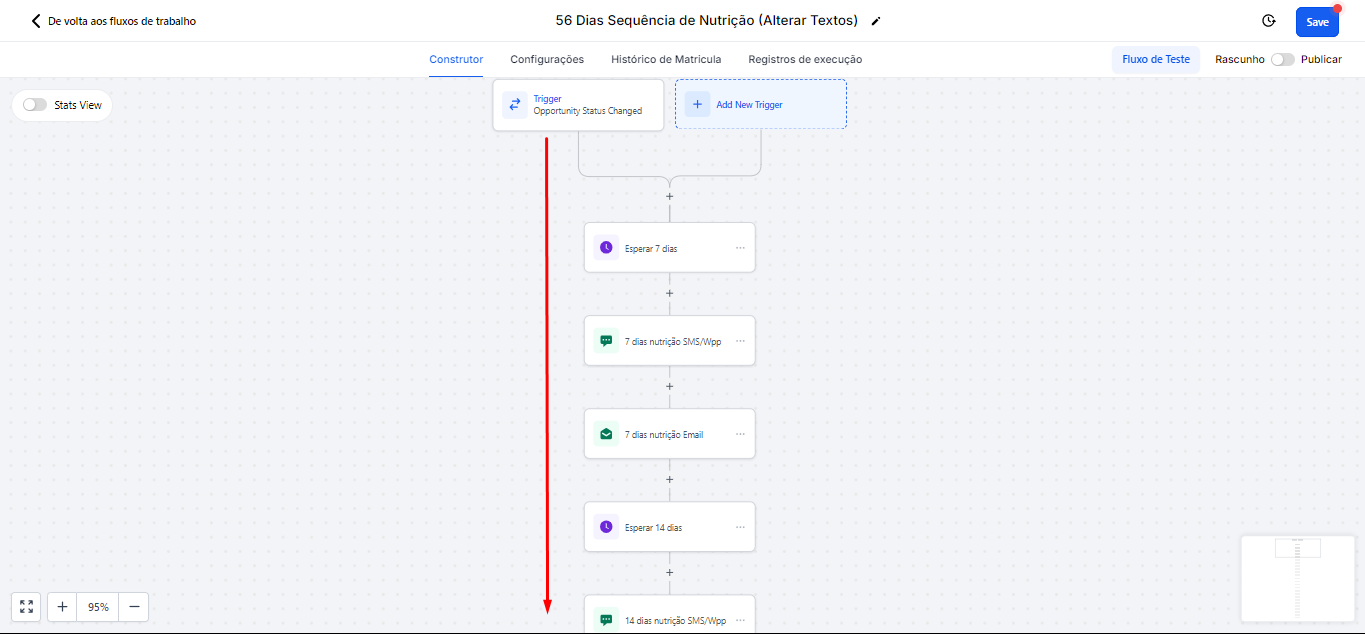
2.3.2 The automation 56 Days Nurture Sequence (Change Texts) aims to add value to the relationship with customers. In it, you can create engagement messages that will be sent via email and SMS/WhatsApp. For example, if a customer does not respond after 7 days, just add them to this nurture funnel until they engage again.
This automation will work for up to 56 days or until the contact interacts, allowing you to keep communication active during this period. The title of the automation also indicates that you should change the message texts, personalizing them according to your needs and preferences.
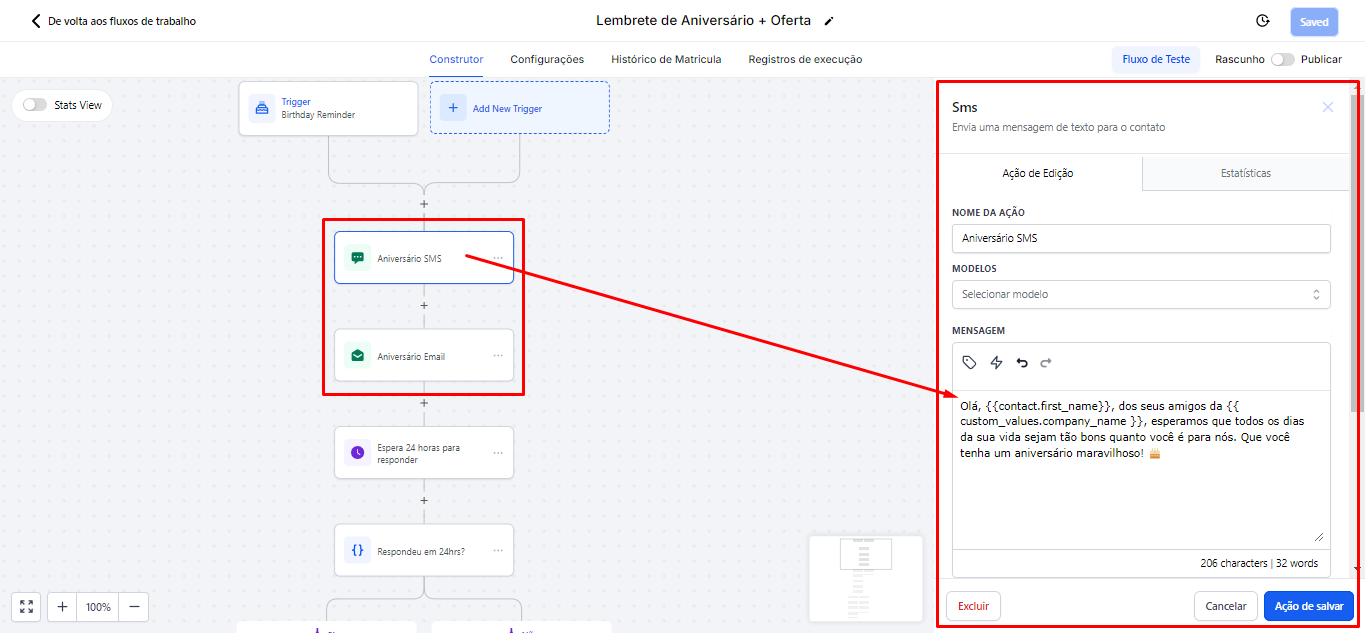
2.3.3 The automation Birthday Reminder + Offer aims to send a happy birthday message to customers whose birth dates we have captured. This message already includes a standard personalized text, but it can be changed and personalized according to your needs or strategies.
If the person responds to this birthday message, a second message with a "special offer" will be sent. If the person responds to this second message, a task will be created for the attendant to make the offer, such as offering a product or service that is currently on promotion.
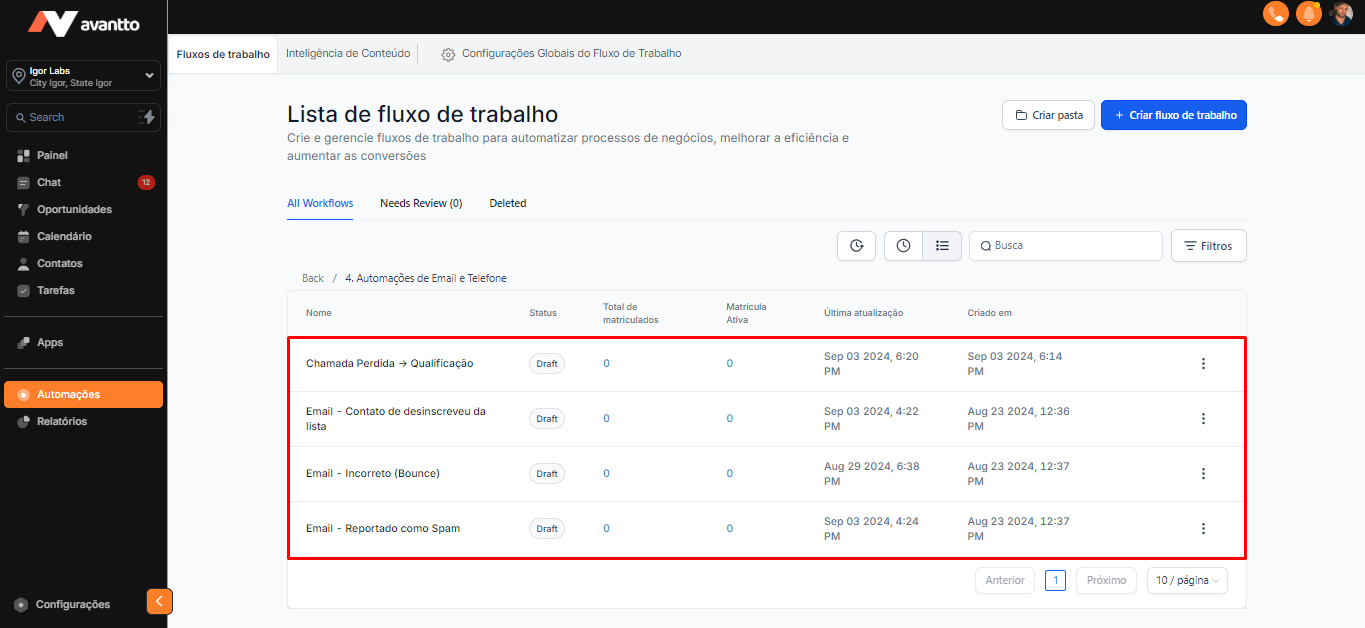
2.4 Folder 4. Email and Phone Automations
2.4.1 These are specifically for when you are doing email marketing. So it's a good idea to review these automations before doing email marketing.
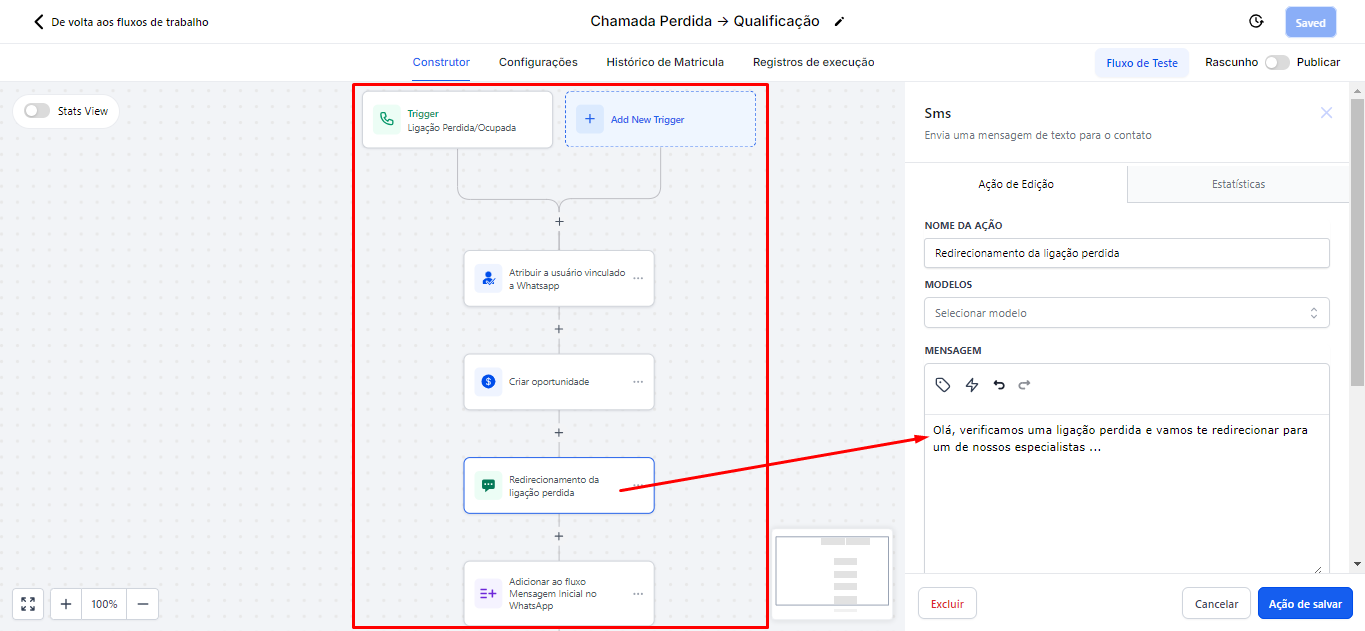
2.4.2 The automation Missed Call -> Qualification works as follows:
If you have a number registered with Avantto and receive a call, the call will ring within the platform. But if there is no number redirected to your number or if you do not answer the call, the automation will be triggered, assigning the contact to you if it is not already assigned. An opportunity will be automatically created within the pipeline, and the contact will receive a message informing them that a missed call was detected. Finally, the contact will be automatically added to the lead management automation in the "Initial Message on WhatsApp" flow, to receive the initial follow-up message.
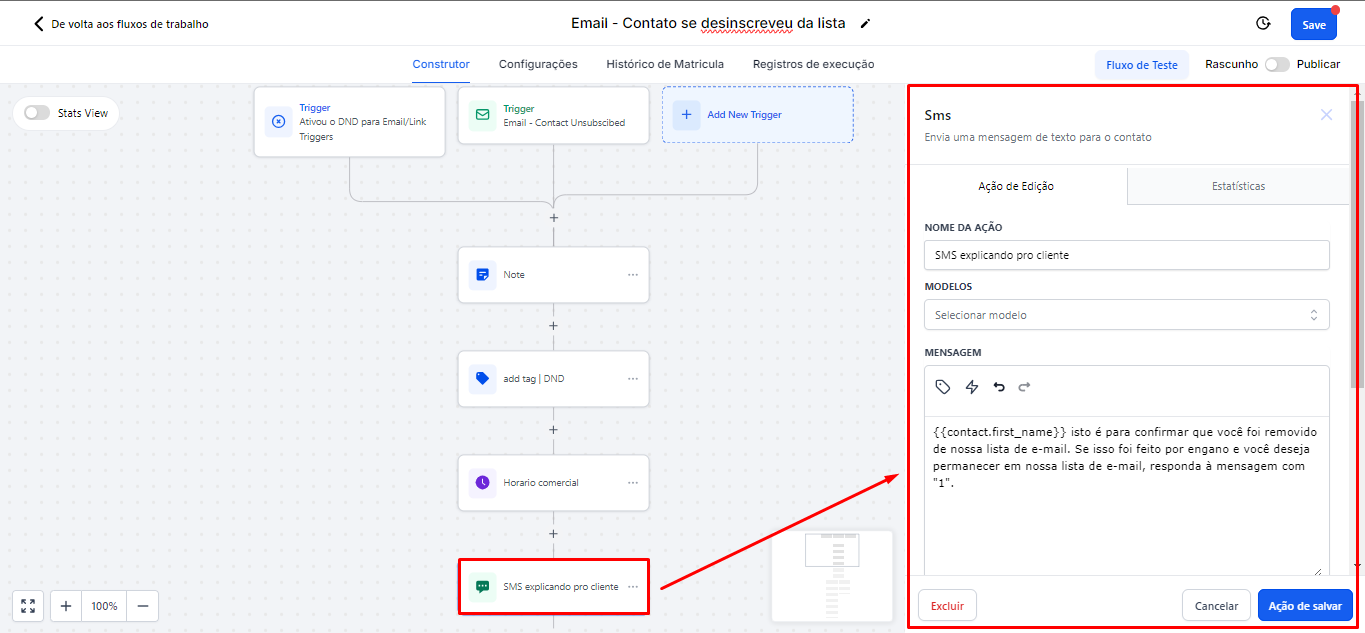
2.4.3 The automation Email - Contact unsubscribed from the list is designed for when a contact decides to unsubscribe from the list. When this happens, a message will be sent to them confirming the cancellation.
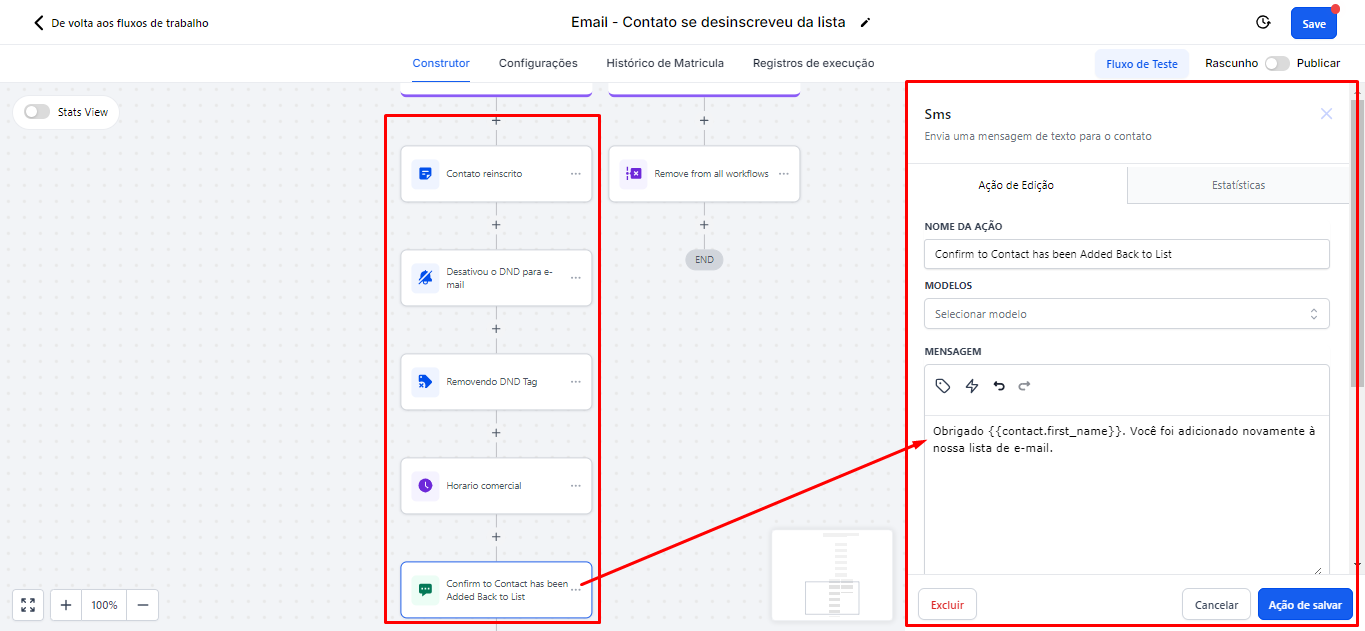
2.4.5 If the contact chooses to return to the list by replying "1", they will be automatically reintegrated into the automation. This will remove the DND tag that was previously added. Then, a thank you message will be sent, informing the contact that they have returned to the email list.
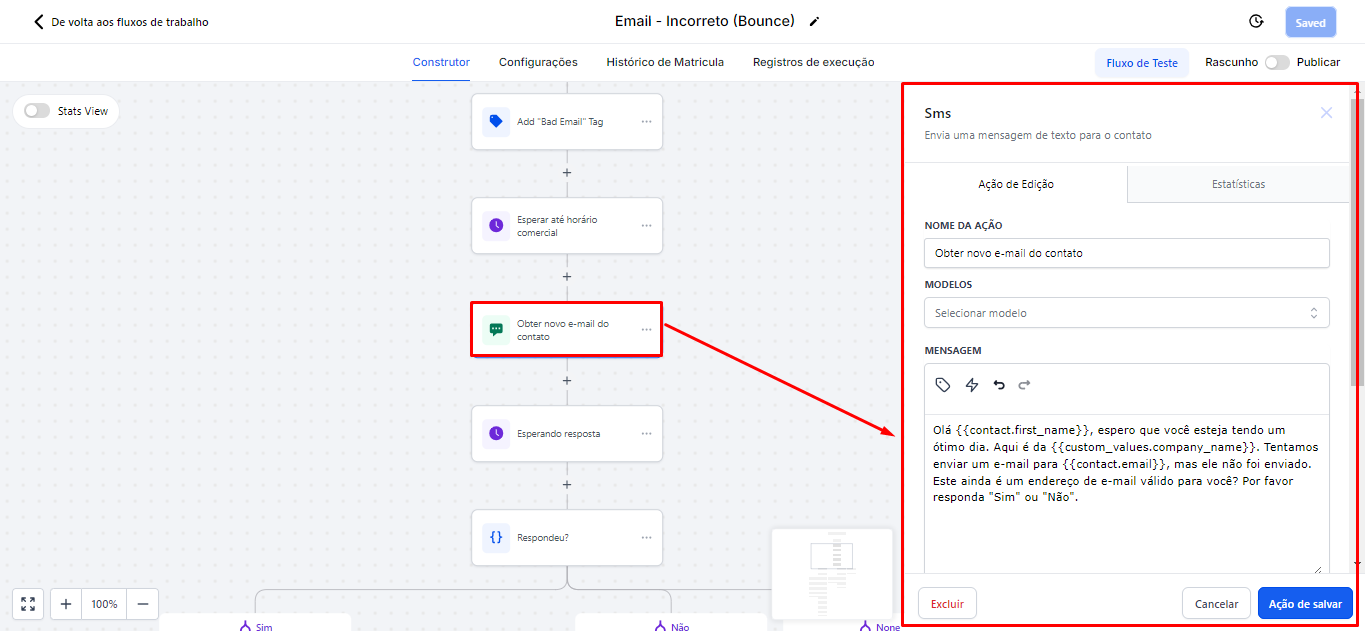
2.4.6 Email - Incorrect (Bounce)
It is quite similar to the previous one, and aims to verify and correct email addresses that had delivery issues. When an email is identified as incorrect, the automation will send a message to the person asking if the email is correct.
If the person responds no, the automation will send a message requesting the correct email. As soon as the new email is received, it will be automatically updated in the system, and a message will be sent informing the person that their email has been successfully updated. If the contact does not respond, a task will be created for the responsible person to contact and obtain the correct email.
2.4.7 The automation Email - Reported as Spam is basically the same as the previous automation. When a contact reports an email as spam, the automation will be triggered to handle this situation.
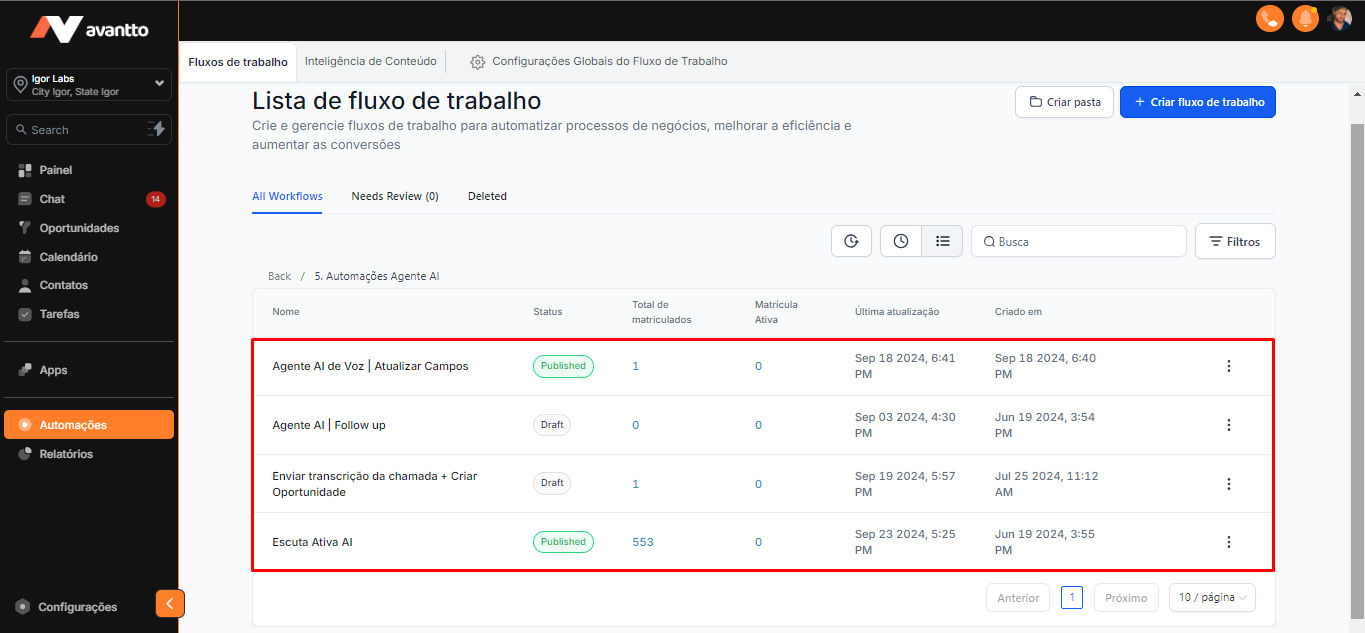
2.5 Folder 5. AI Agent Automations
2.5.1 There are four automations associated with this process:
Voice Agent (automatically updates the contact's name and email fields when the client provides them), Follow-up, Send Description, and Active Listening
We already have a guide exclusively dedicated to AI Agent automations. Click here to view.
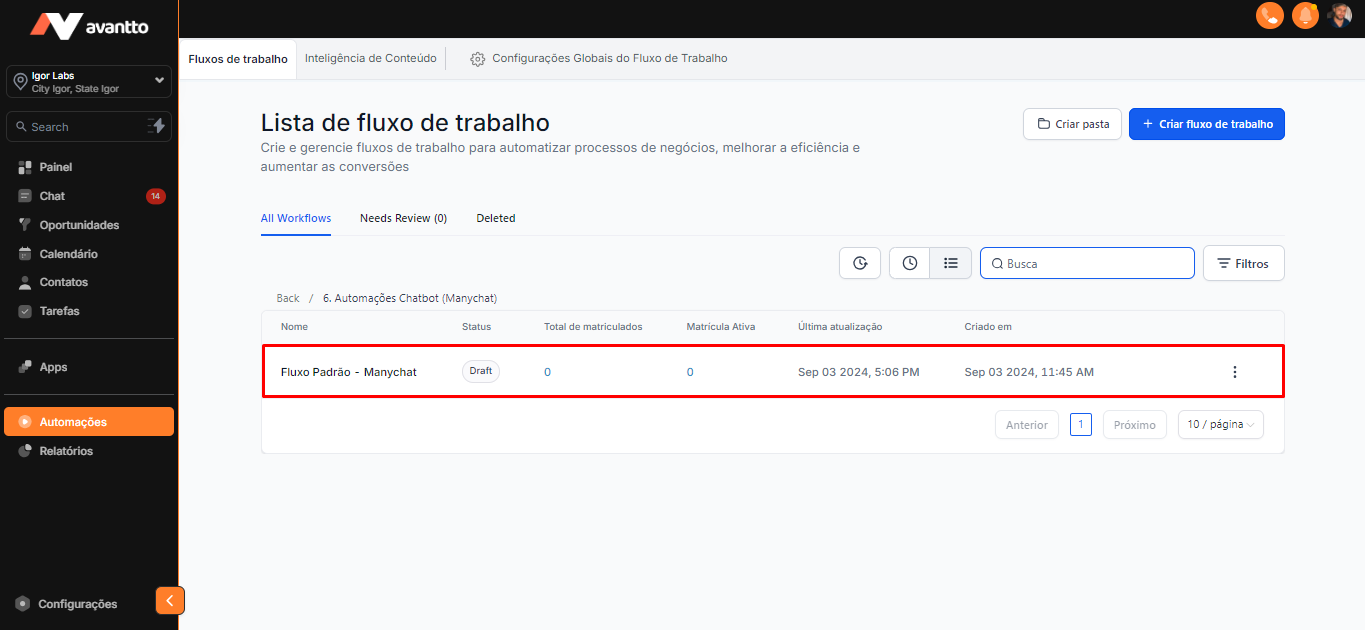
2.6 Folder 6. Chatbot Automations (Manychat)
2.6.1 This automation works similarly to ManyChat. When a customer sends a message in the chat or responds to a comment with a trigger phrase or word that was suggested in an Instagram campaign, the automation is triggered. Click here to see the guide.
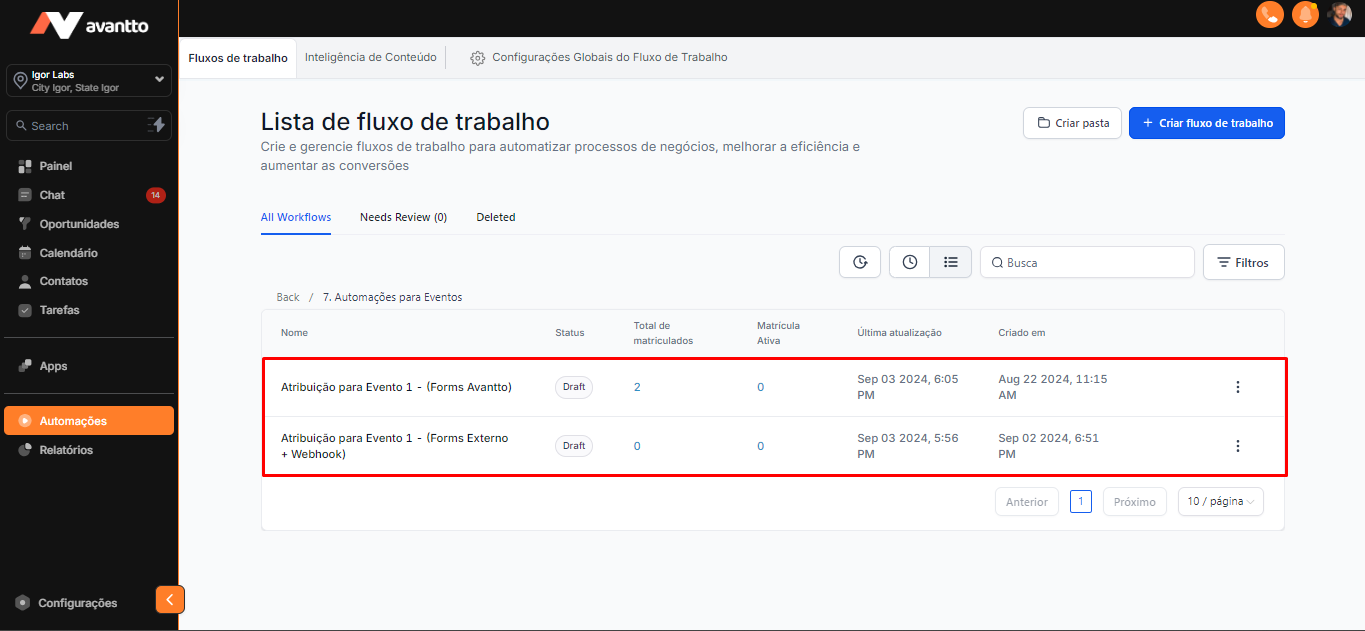
2.7 Folder 7. Event Automations
2.7.1 Finally, we have automations for events, which perform assignments, confirm the client's presence, and set the date. It is also possible to work with external forms and webhooks to integrate data from other platforms.Click here to see the full guide.
3.1 After selecting and customizing the automations, just publish and save to activate them.