This guide addresses the process of updating custom values and setting up automations for events on the Avantto platform, essential for optimizing event management and improving communication with participants. The first step is to access the "Custom Values" in the Settings section, where you can find a dedicated folder for events, allowing the user to fill in essential information such as date, address, time, and event name. In the second step, the user should locate the "Automations for Events," which include specific flows for Avantto's native forms and external payment methods. The third step details how to set up automation using Avantto forms, where the contact can be assigned to a specific user and tags can be added for identification. Registration confirmations are automatically sent via email and WhatsApp, followed by customizable countdown messages. The fourth step addresses setting up automations through an external form with a webhook, where the user must map the data received from the payment and create contacts within Avantto. The main goal of this procedure is to ensure that event information is managed efficiently and automatically, improving the participant's experience and facilitating the tracking of registrations.

We will use Custom Values to customize the data of this flow. Avantto already has some standard custom values, such as name, logo, among others. However, there is a separate folder specifically dedicated to events. This organization facilitates access and use of custom values that are relevant to event automations, ensuring that you have all the necessary information clearly and accessibly.
1.1 To find these custom values, click on "Settings" in the left side menu of the screen.
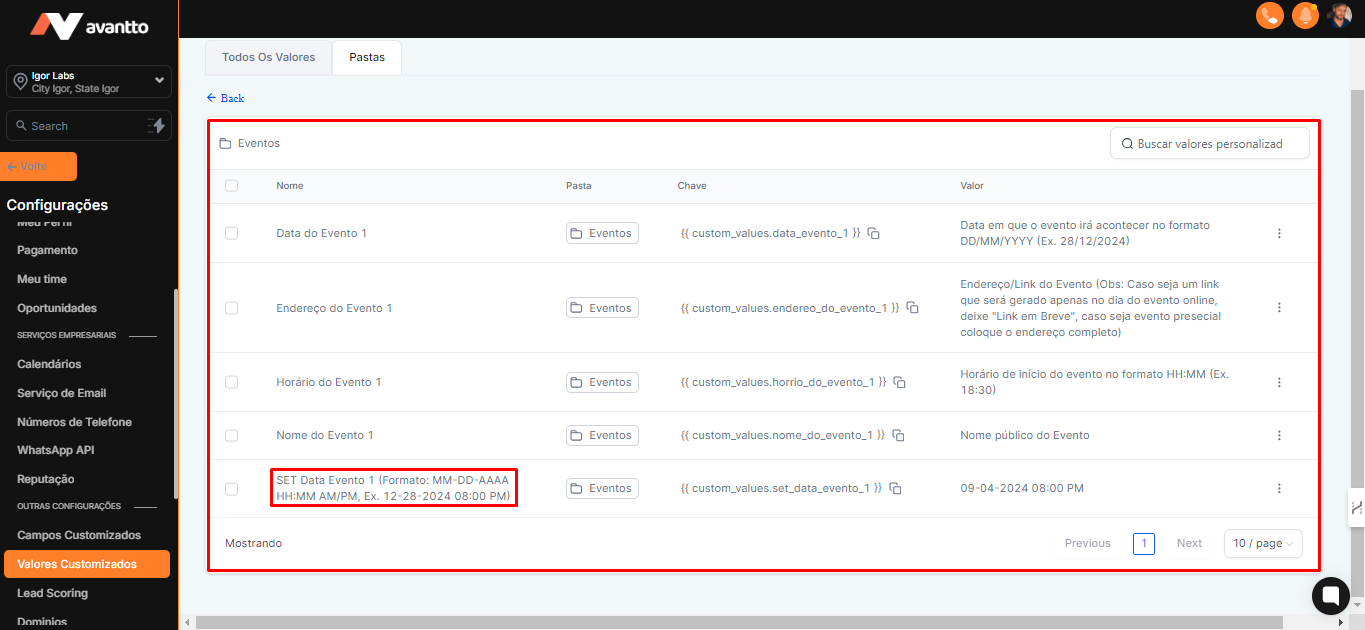
1.2 Click on "Custom Values," then on "Folder," and finally select the "Events" folder.

1.3 Here are the values you need to fill in, such as:
Event Date: This information will be displayed to visitors on the website.
Event Address: You can enter a link or the address if it is a physical location. If you do not have the link yet, just write "link coming soon." This information will appear in automations, and when you have the link, just add it. All automations from the update date will already include the new link.
Event Time: Provide the time when the event will take place.
Event Name: This is the name that will be displayed in messages and also on the website.
We will use these four custom values on the website and the landing page (LP). We will create a standard LP that will include these custom values as parameters. To make it easier, we will add basic information, such as a formatted event name and the form, to speed up the building process.
SET Event Date 1: This is the most important field, as it is essential that the date is entered in the English format MM-DD-YYYY HH:MM AM/PM (for example, 12-28-2024 08:00 PM). Otherwise, the automation will not work correctly and reminders will not be generated.
The information in your folder will be empty, but just follow the guidelines presented here in this step-by-step to fill them in correctly.
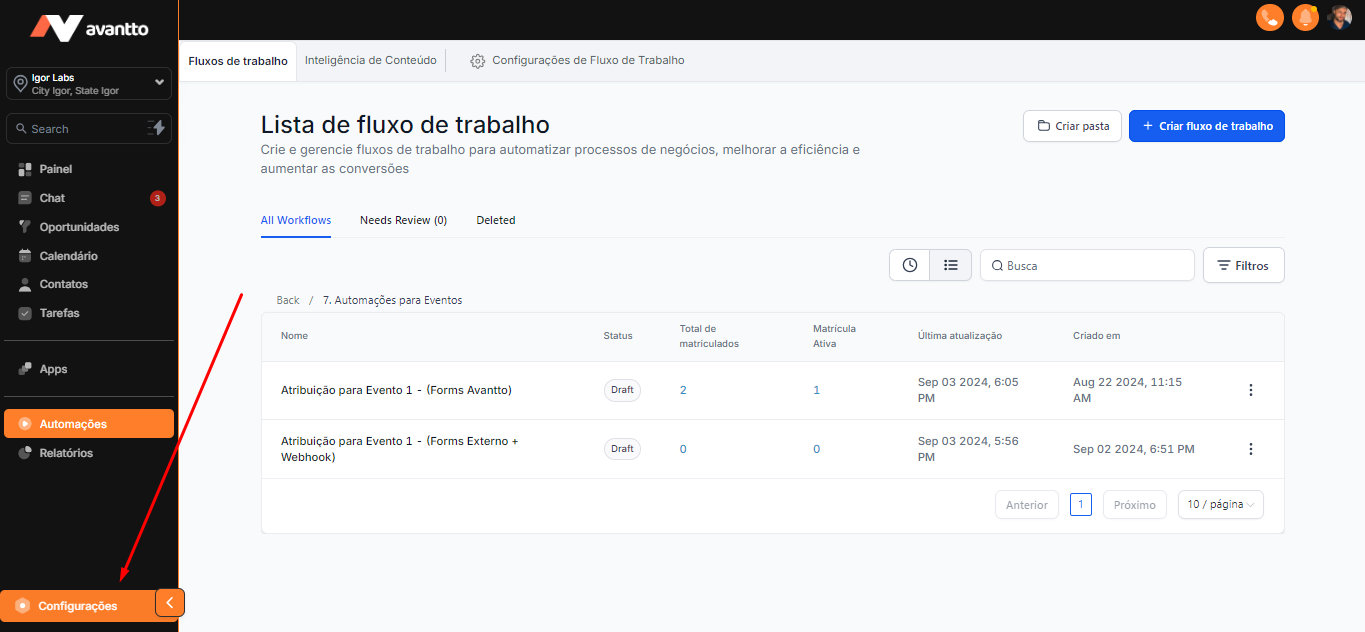
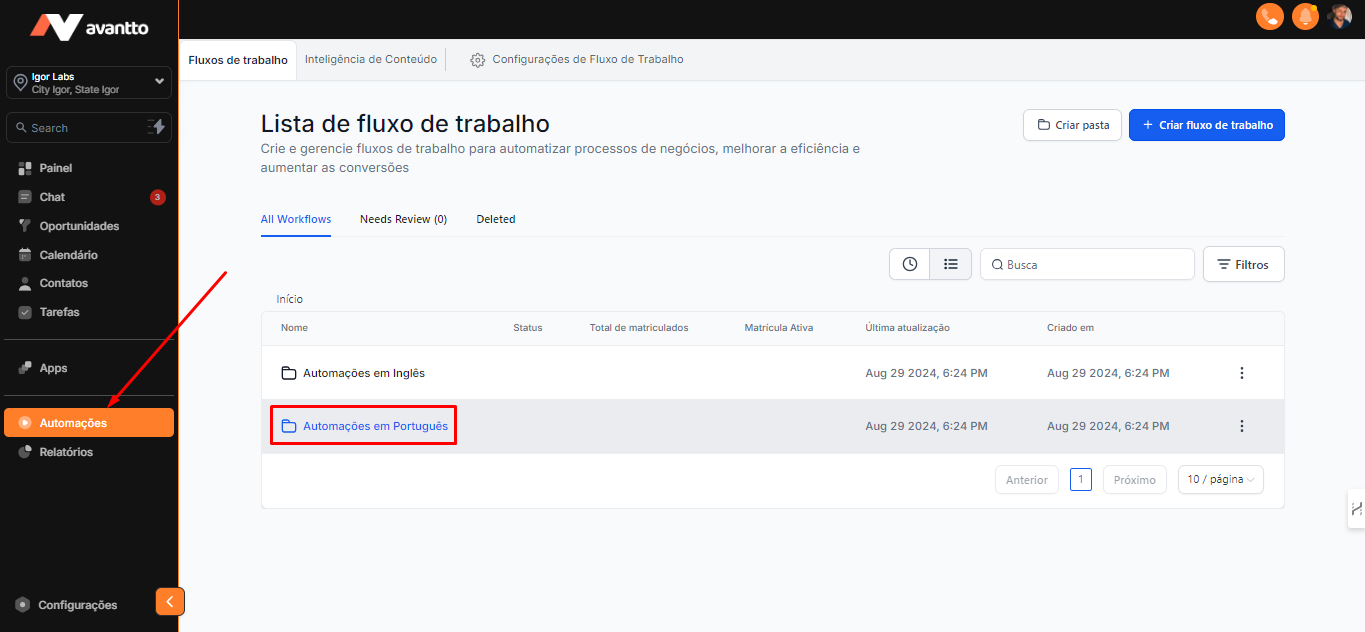
2.1 In the left side menu, click on "Automations" and open the folder "Automations in Portuguese".
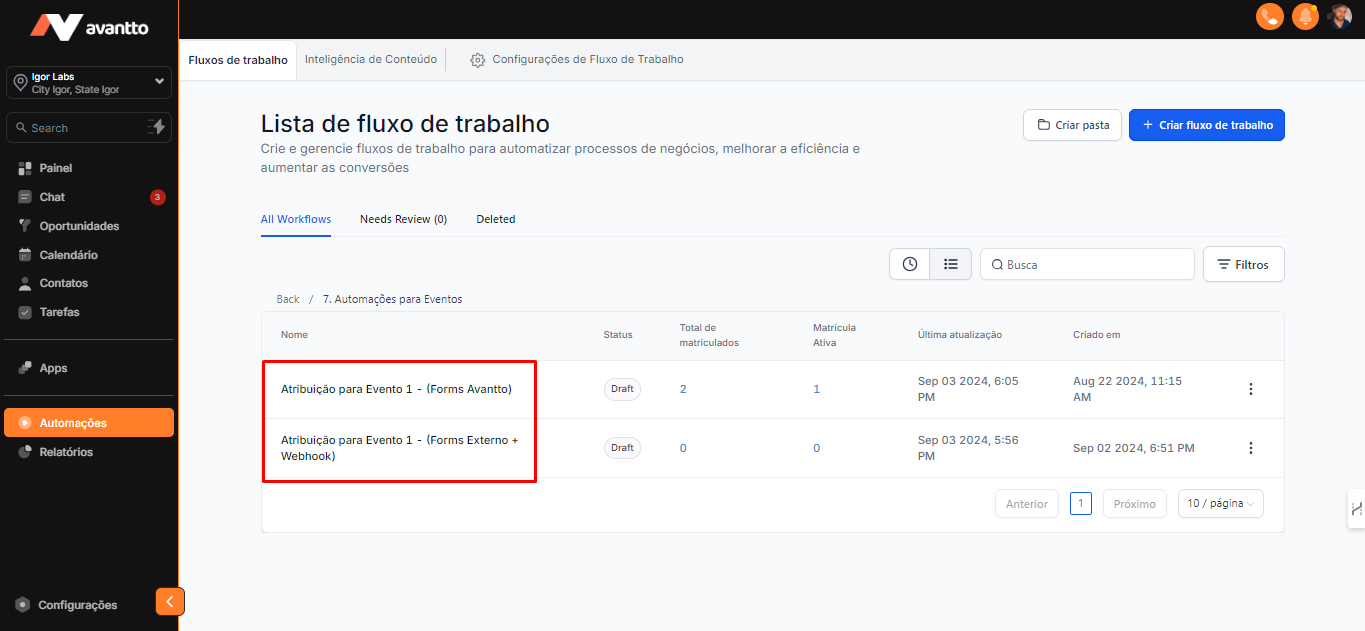
2.2 Scroll down until you find the folder "Automations for Events" and click to open it.
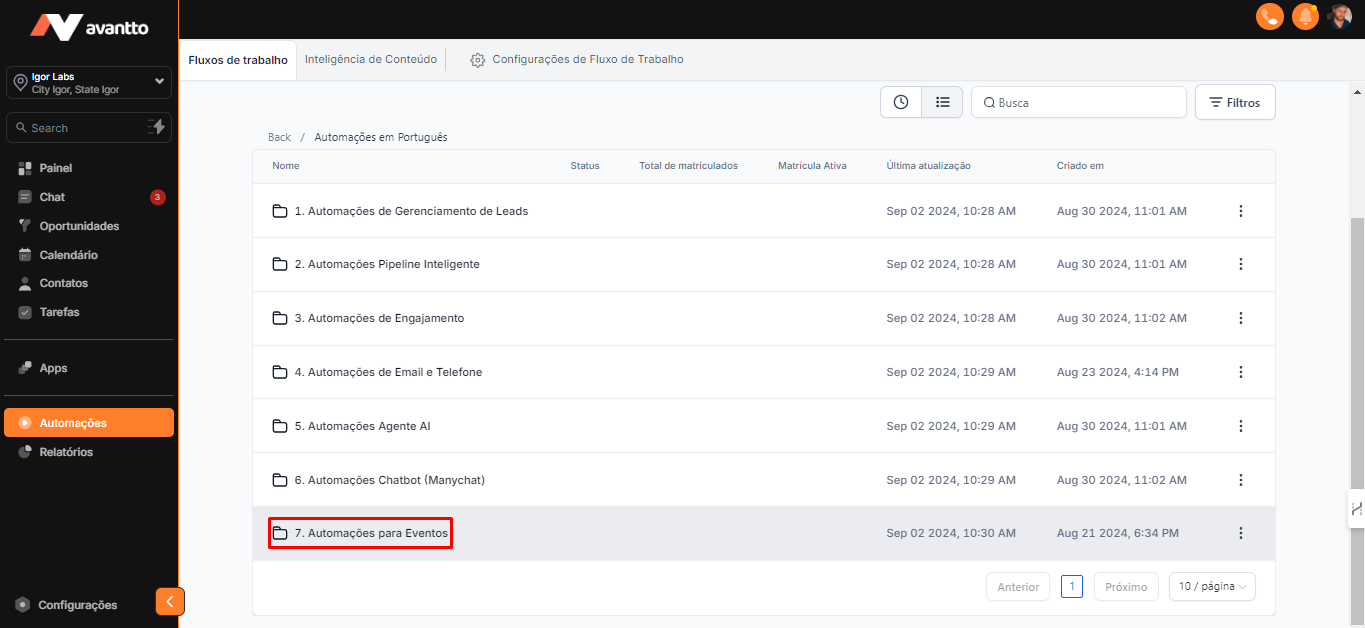
2.3 In this section, you will find two automations.
The first automation is focused on Avantto's native forms, meaning those that were created directly within the platform. This approach offers greater ease for automation because, when filling out the form, the contact is automatically created in Avantto, eliminating the need for manual creation.
The second automation is intended for situations where you use an external payment method. For example, if the event is paid, you can use a payment system that generates a webhook after payment confirmation. As soon as the registration is completed and the webhook is sent, we can integrate this information here and configure it within an automation.
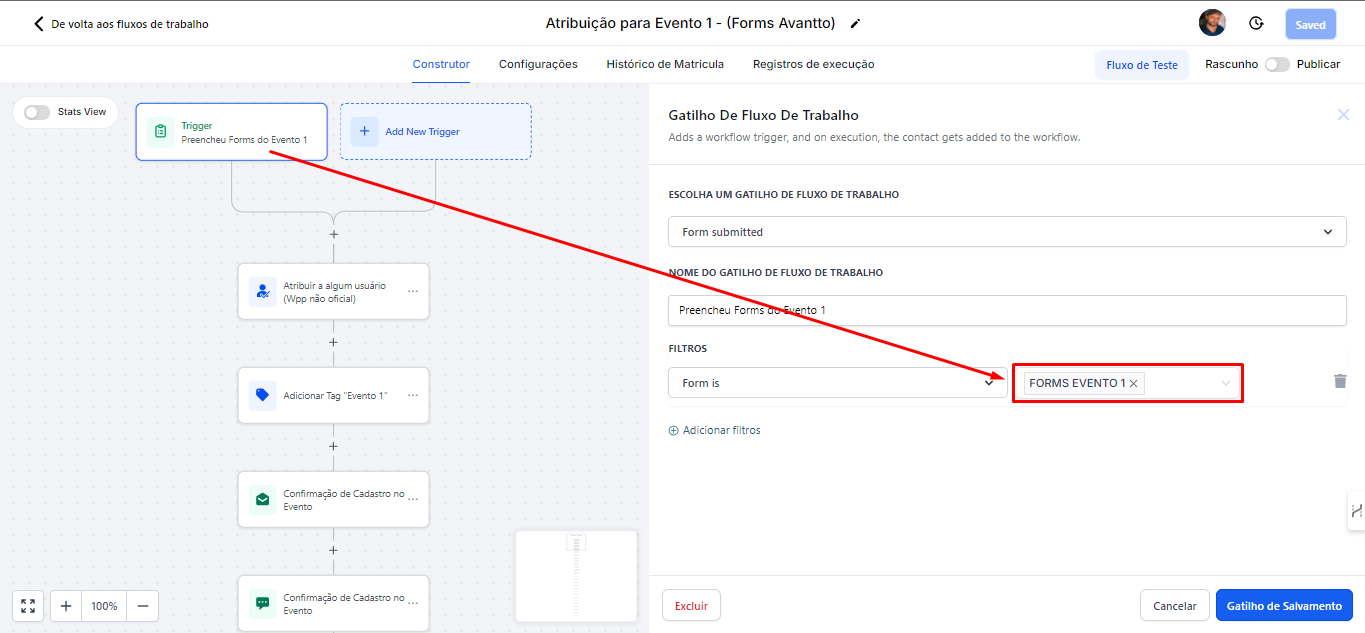
In the first flow, "Forms Avantto," you just need to select the desired form. It is important to note that this example form is a standard from Avantto, created specifically for events, but you can also create your own and customize it as you prefer.
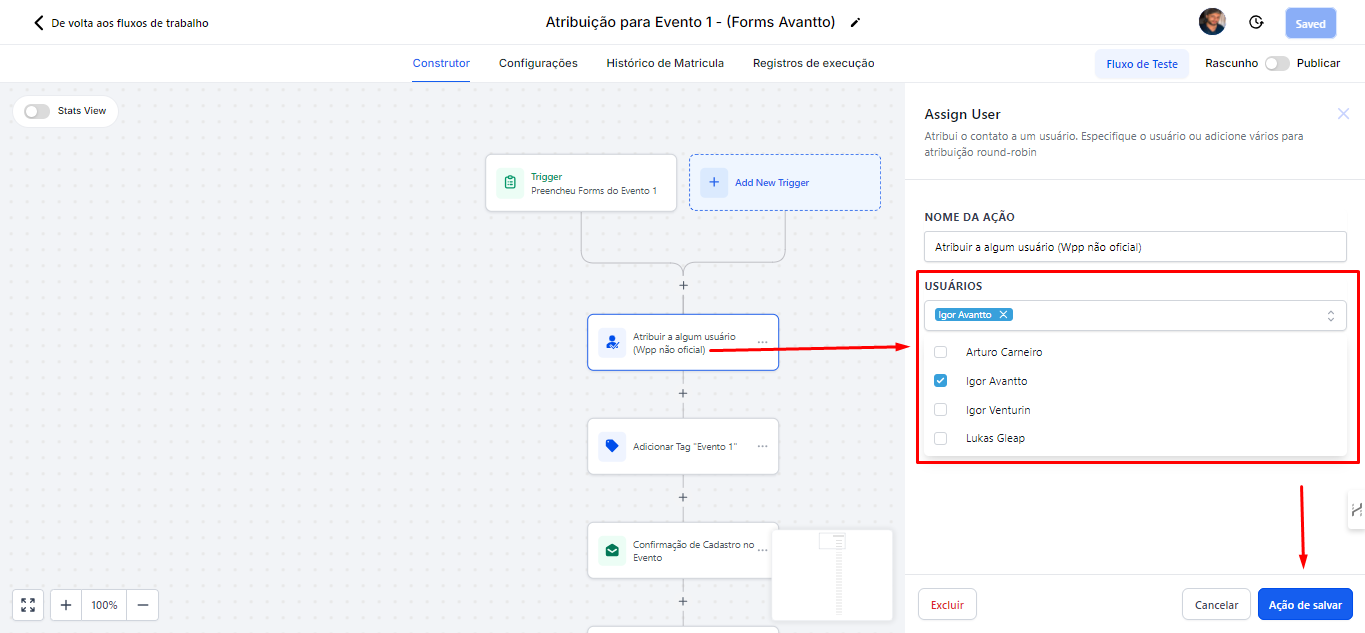
3.1 The first step is to assign the contact to someone, which is more related to the use of unofficial WhatsApp. If you want to use a specific number, just assign the user who is linked to that number, as shown in the image.
Then, save the action.
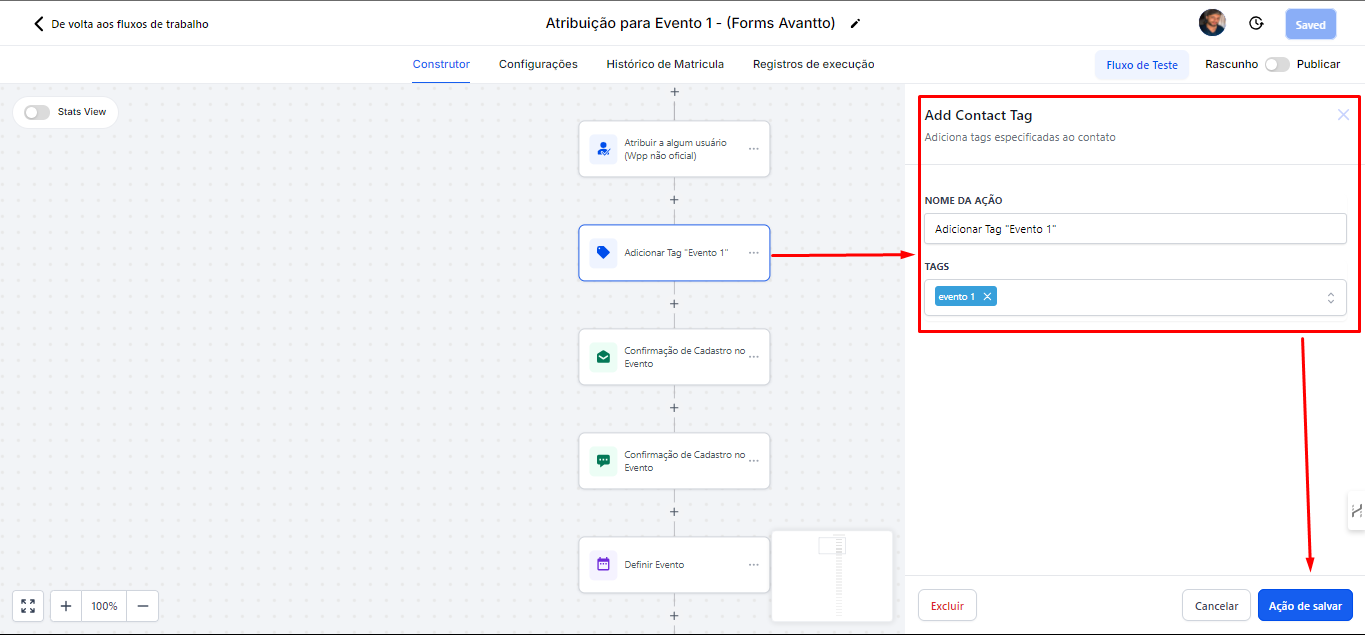
3.2 In "Add Tag," you can include any tag you want. In the image, for example, I added "Event 1" just to identify that people signed up for event 1.
Then, save the action.
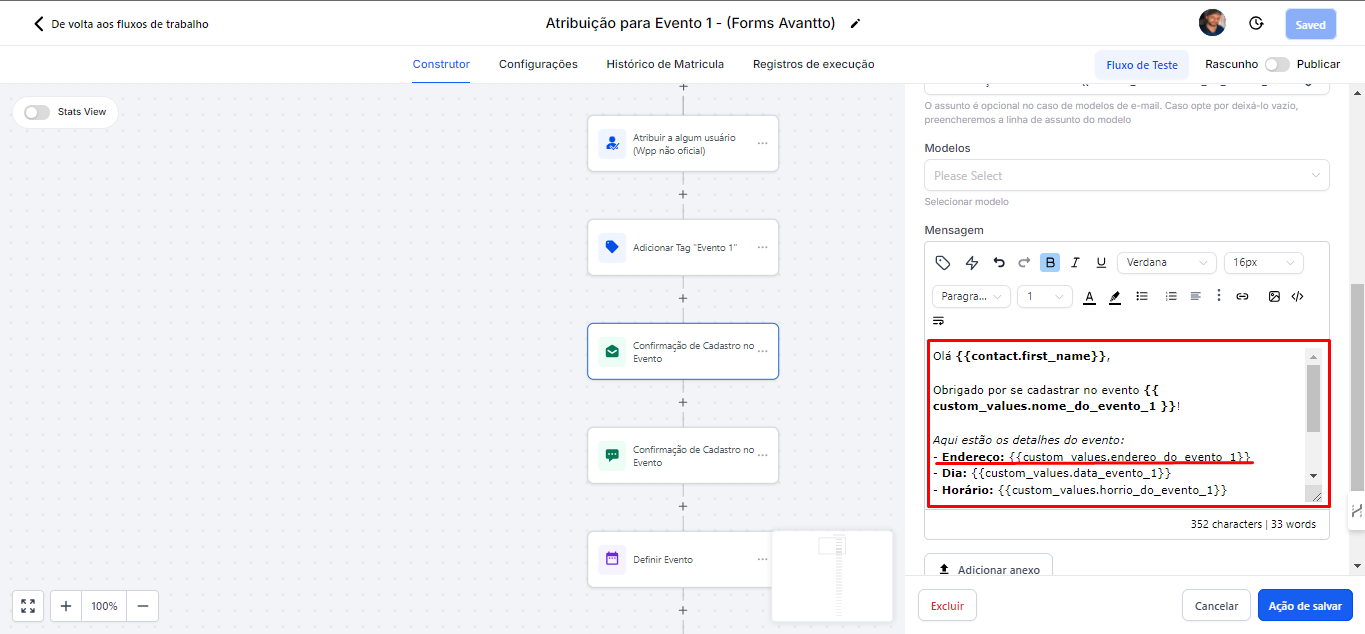
3.3 After signing up, people will receive a confirmation email and WhatsApp message. Both options already contain basic text that you can edit as needed.
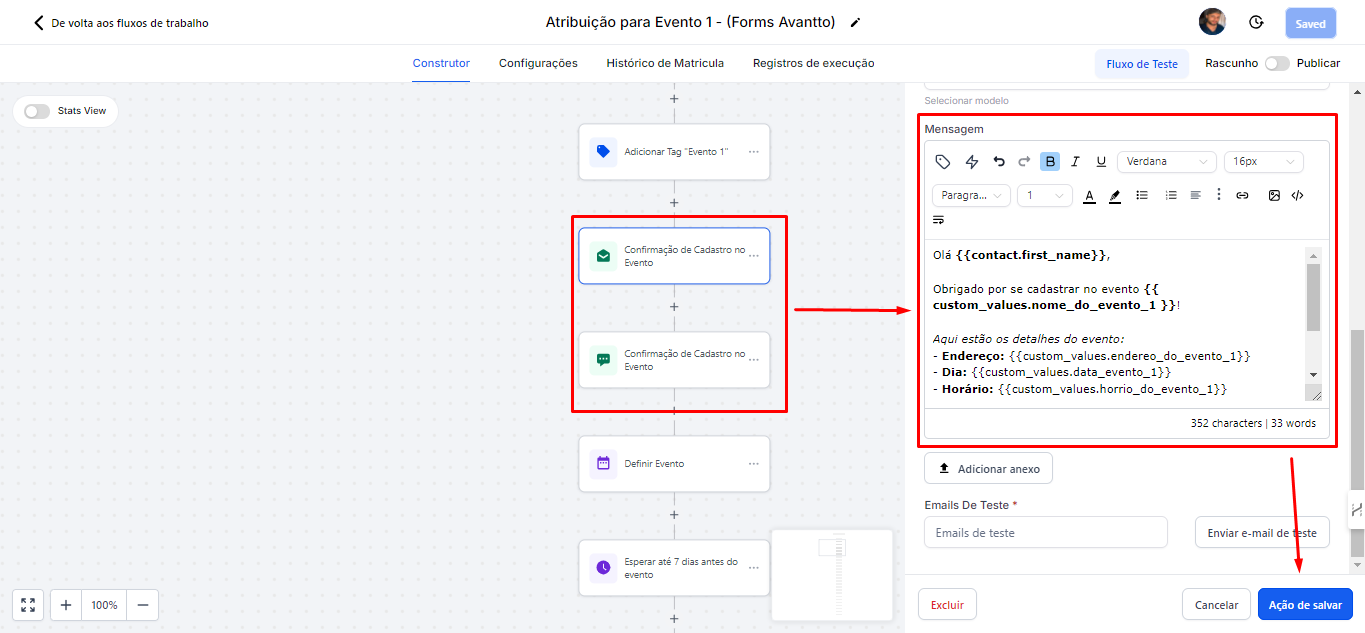
In the next steps, there will be more emails with countdown information, such as "7 days left," "5 days left," "1 day left," "it's today," and "6 hours left."
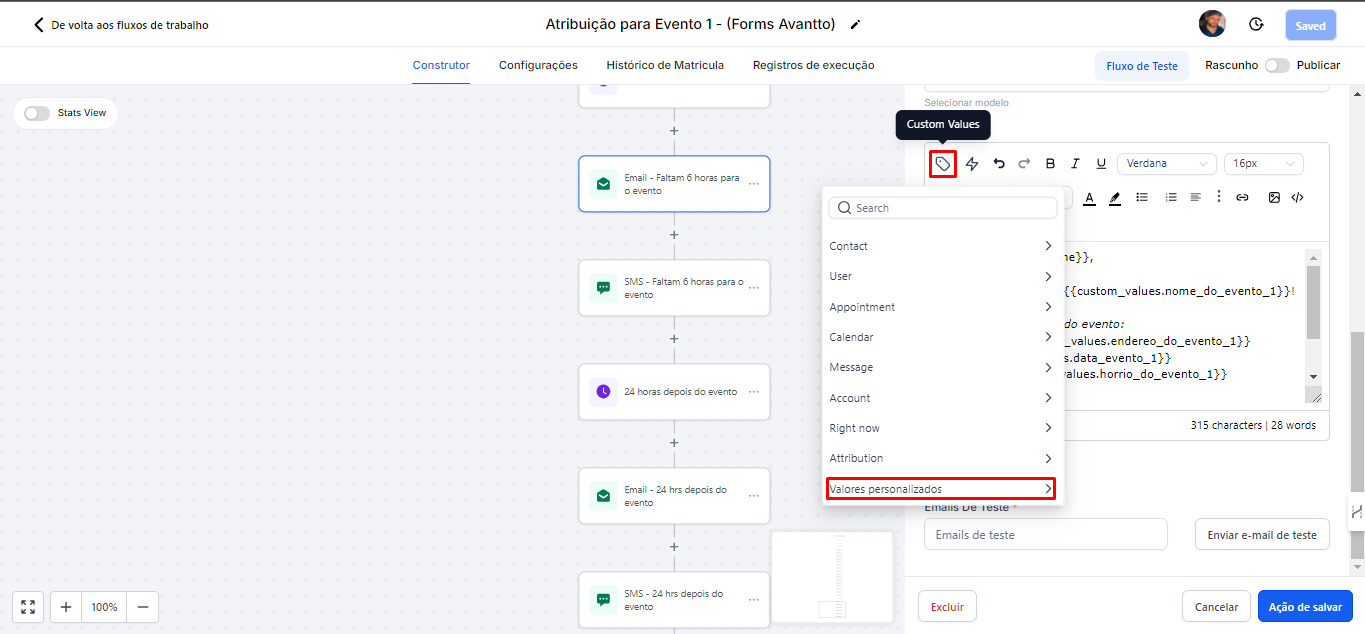
All these messages in the flow can be edited and customized using Custom Values. You can choose which fields you want to use, both at the contact level (such as name, address, etc.) and the custom fields you created, for example, the event fields themselves. To use the event fields, click on "Custom Values" and scroll to "Custom Values."
To change information in the messages without having to alter them individually, just update the Custom Values. This way, by modifying the information in the custom values, all messages will be automatically updated.
In the image below, you can see that I used a Custom Value for the address field, filling it with the corresponding information. This same system applies to all messages.
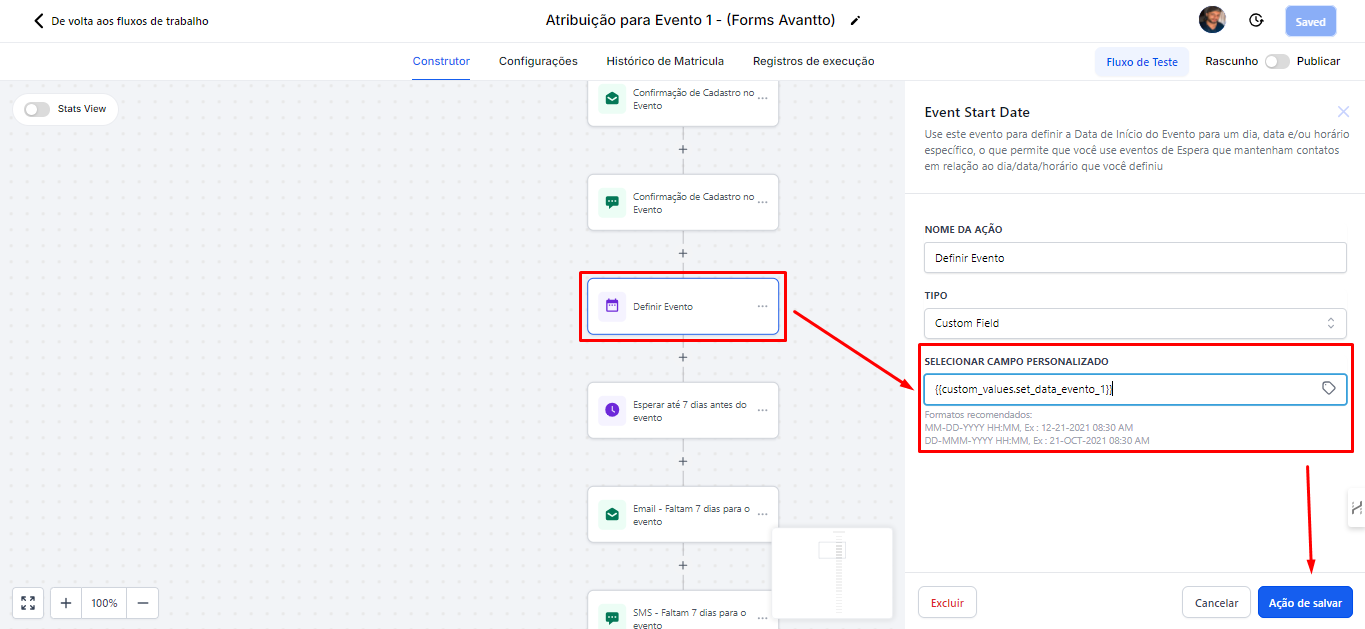
3.4 This system also applies to the "Set Event" action, which refers to setting the event date.
For this, just use {{ custom_values.set_data_evento_1 }}, which should be in the English format MM-DD-YYYY HH:MM AM/PM.
3.5 The rest of the automation is worked at the follow-up level, following this same path.
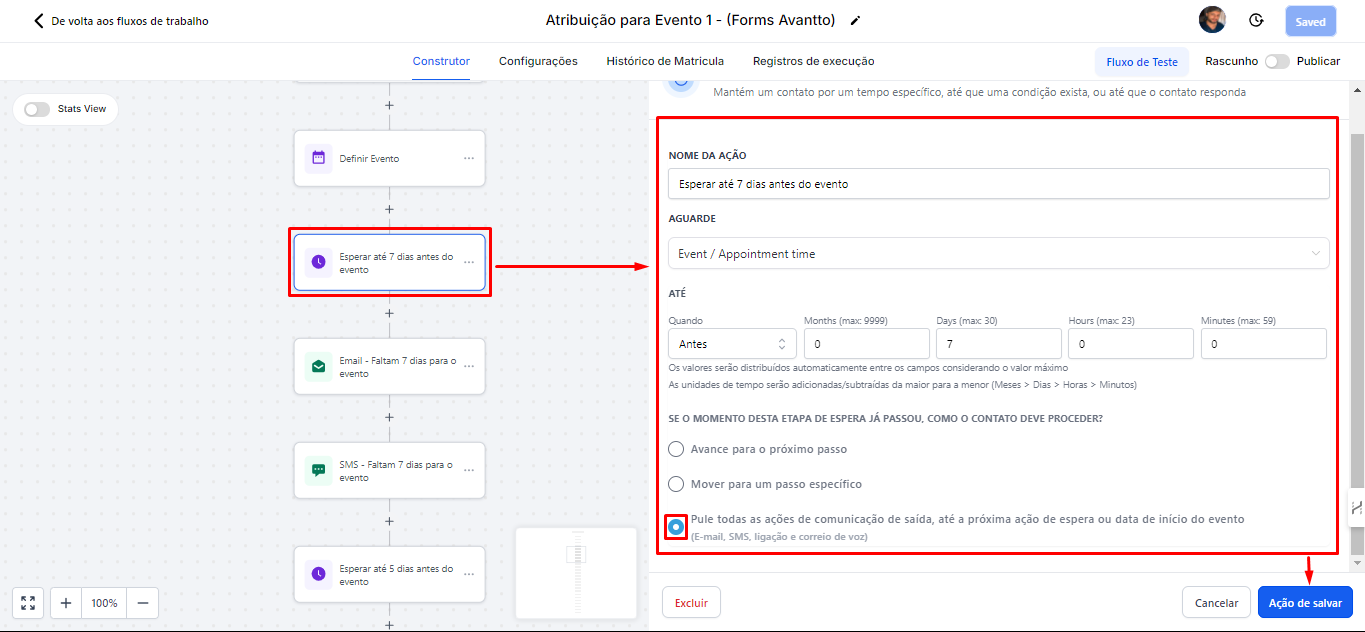
In the image, you can see that this action is scheduled to wait 7 days before the event.
Select "Skip all outgoing communication actions until the next wait action or event start date." This option will ensure that in situations where registration is done after the periods of 7,5,3 ... days, all messages are skipped until the corresponding period is reached. For example, if the person registered with only 5 days left for the event, it doesn't make sense for them to receive messages referring to 7 days before, but rather to skip to the messages for 5 days left.
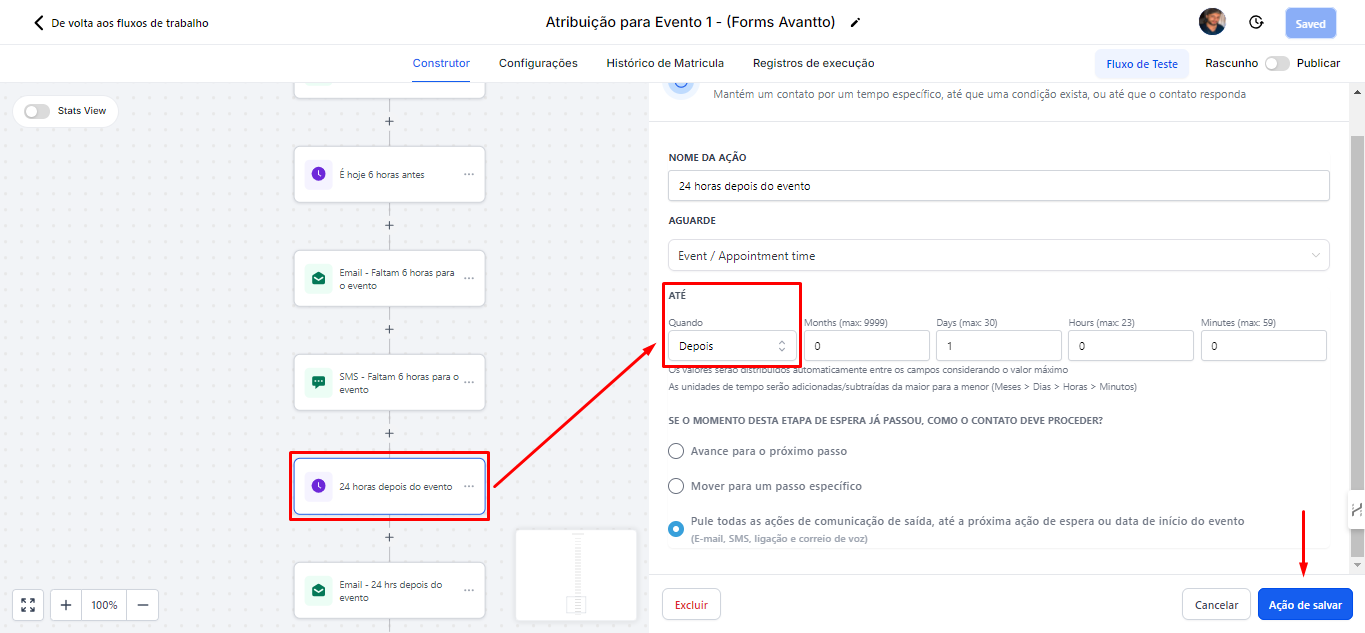
To send messages after the event, the only change needed is in the "When" setting. Instead of selecting "before," you should choose "after." This way, one day after the event, a message will be sent thanking for the participation.
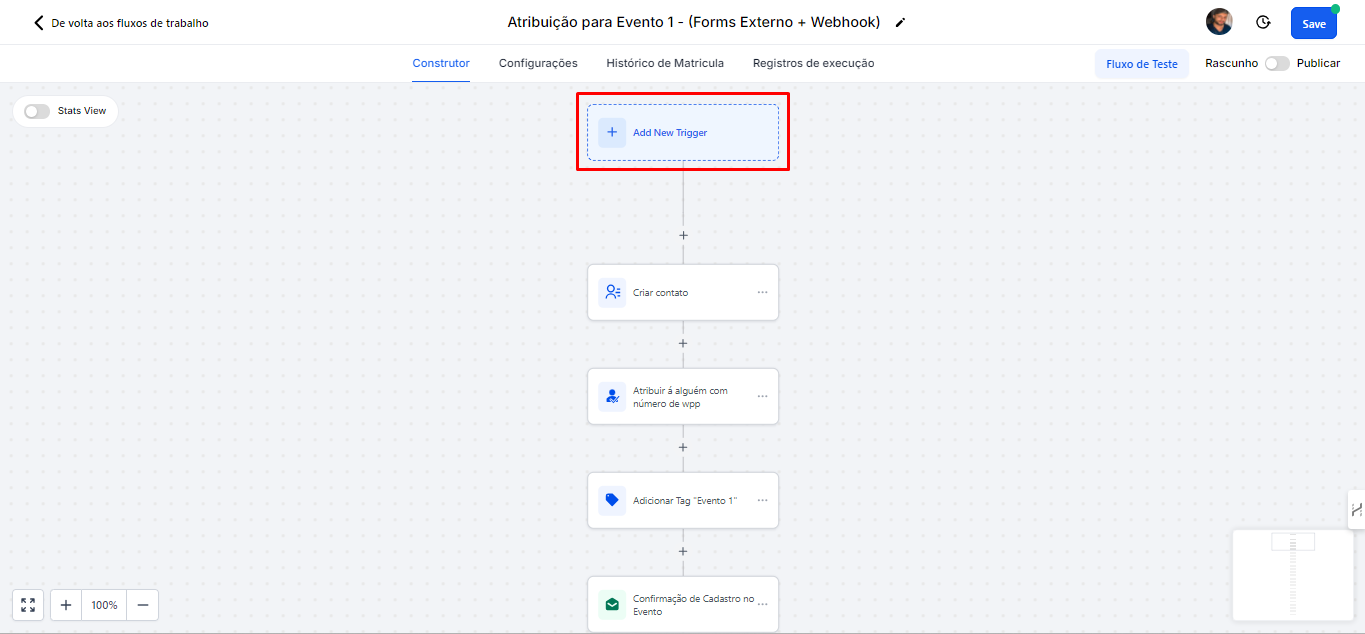
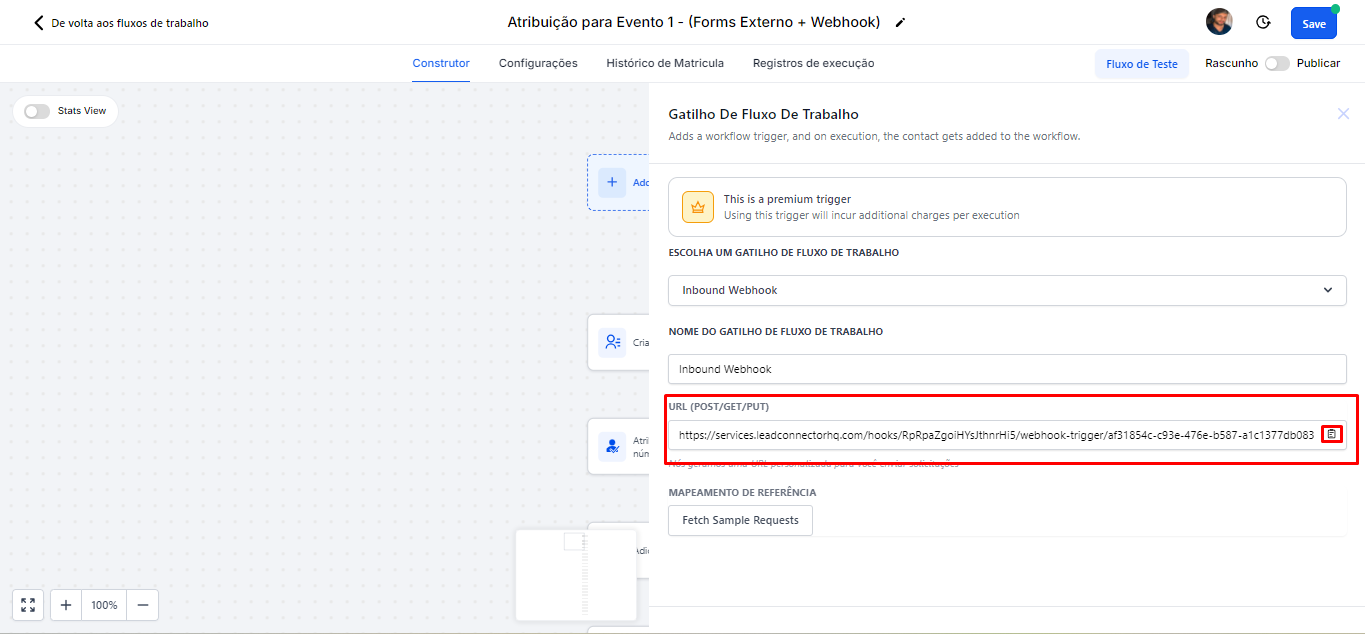
4.1 In the second flow "External Forms + Webhook" click on "Add New Trigger"
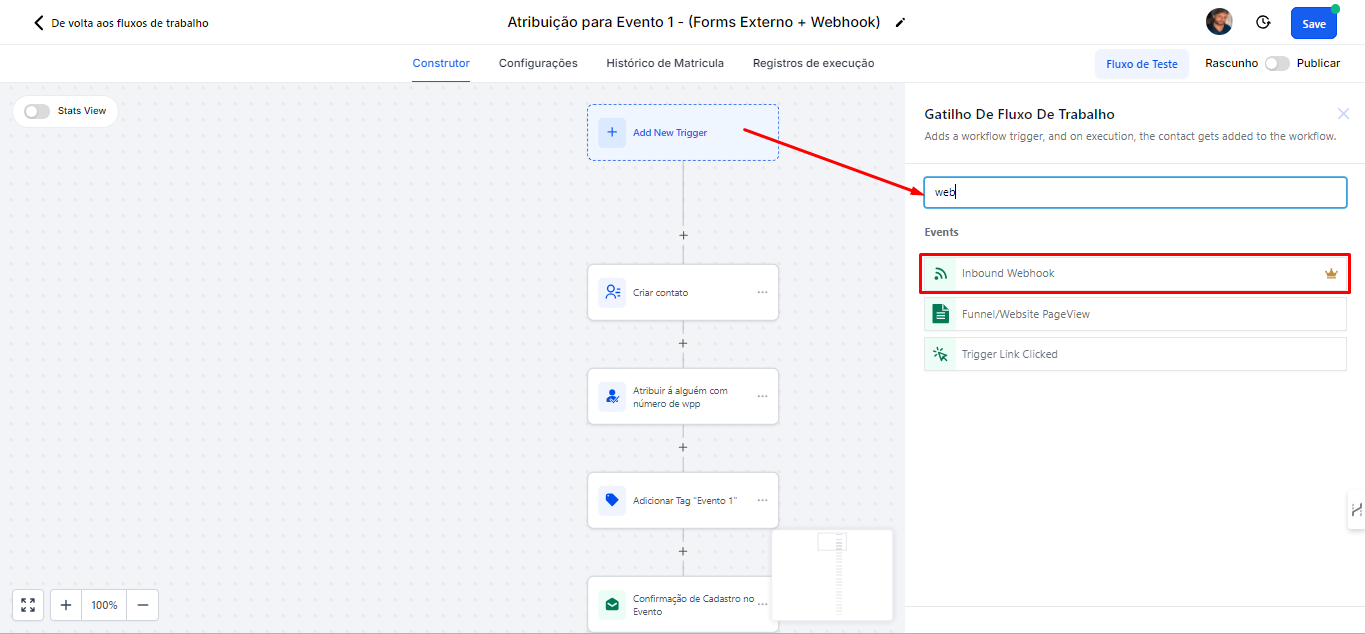
4.2 In the search bar, type "webhook" and select the "Inbound Webhook" option.
4.3 Now, copy the webhook link and paste it into the platform you are using to process the payment. This way, the data will be sent to the webhook correctly.
Another important point is that it will only be possible to save the changes made in the automation after mapping the Webhook. To generate a reference mapping of the webhook, you will need to send a test event.
4.4 The idea of the "Create Contact" action is to capture the values received from the webhook and create the contact within Avantto to use it in the automation sequence. For this, you should fill in the contact field values with the fields mapped in the webhook, so select "Inbound Webhook Trigger" from the Custom Values options.
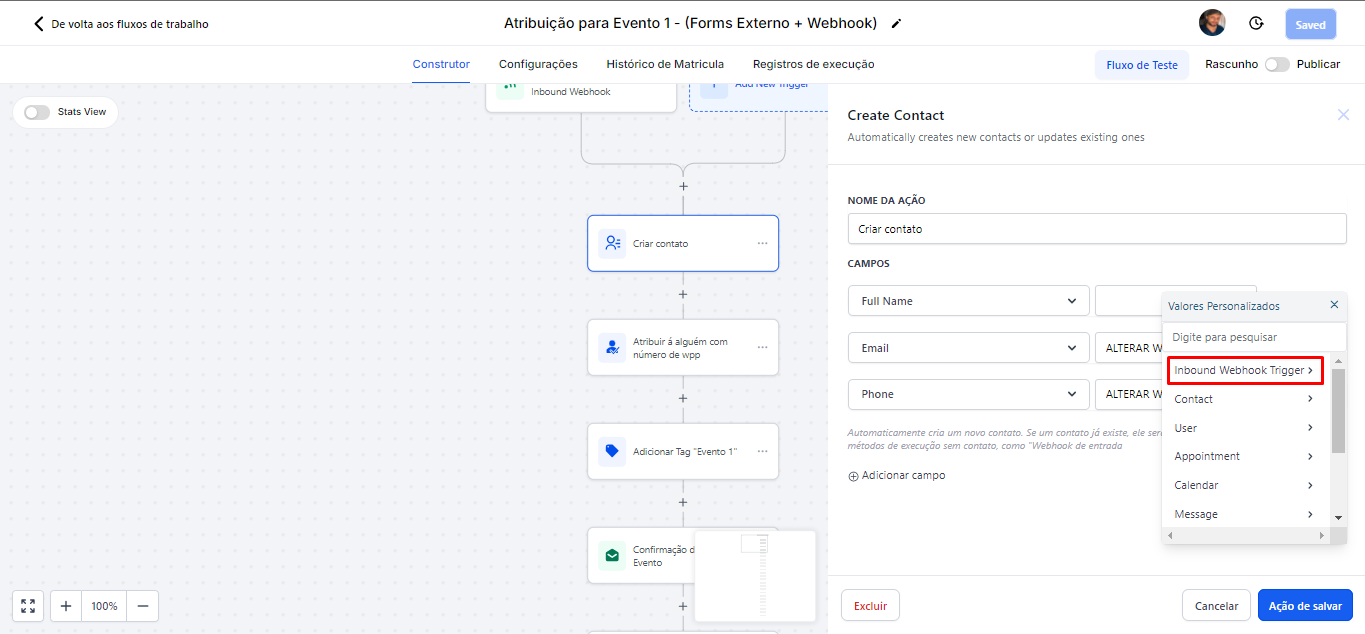
4.5 Click on "Headers." Next to it, a list will appear that you can scroll down with various options, including the name, email, and contact of the person who registered. For example, in the field you selected as "Full Name," use the corresponding custom value for the full name.
Don't forget to save this action.
(The image is just a test example, so no name or email was displayed.)

The remaining steps of this flow are identical to those of Flow 1.
Therefore, you can follow the same process and settings to complete the automation.