This guide covers the step-by-step process for setting up essential integrations that optimize meeting management, customer service, and more. These are the main integrations you should perform as soon as the account is created. The process begins by navigating to Settings and selecting Integrations, allowing connection with platforms like Google, Facebook, and other tools, ensuring that all messages and conversations are centralized. Next, it is necessary to set up Calendars and Video Conferencing, enabling integration with services like Google Meet and Zoom. The user should then define their Availability for meetings and choose the location where meeting links will be generated, ensuring that both they and the participants receive the necessary information. In the end, these actions aim to facilitate schedule management, providing a more organized and efficient experience in the digital environment.

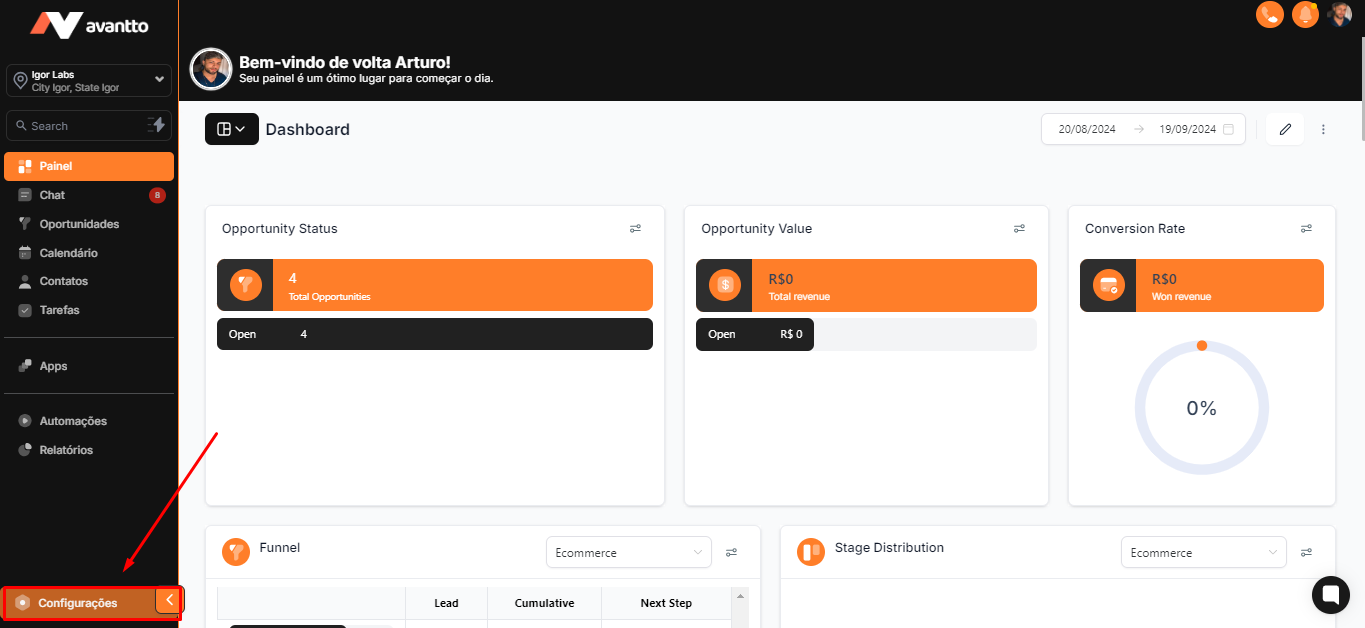
1.1 In the left side menu of the screen, click on Settings
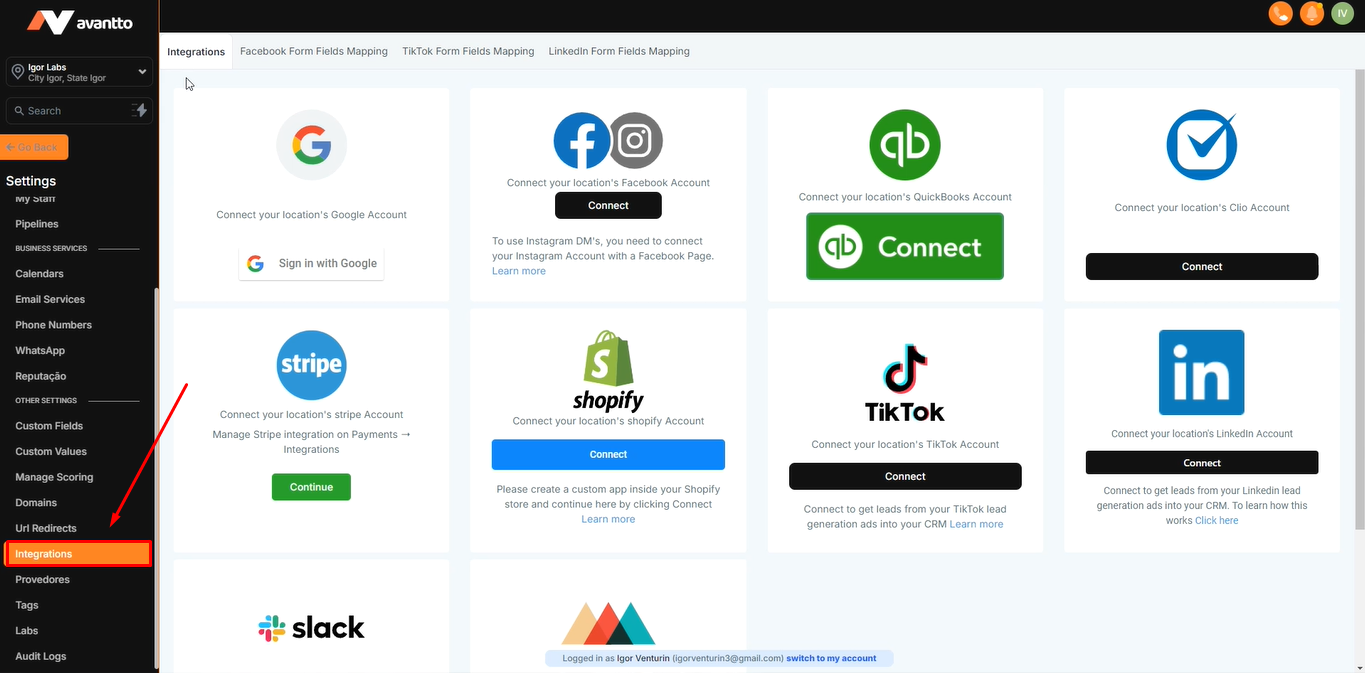
1.2 Scroll down until you find the Integrations section and click on it to view the main native integrations available in Avantto. You will find a wide variety of options, including Google, Facebook, QuickBooks, Shopify, LinkedIn, TikTok, Clio, Stripe, Slack, Printful, and Shippo. For example, by selecting Google, you can connect various tools, such as Google My Business, Google Location, and Google Ads, covering practically all the Google functionalities you want to integrate.
2.1 When connecting Facebook and Instagram accounts, select the page you want to use. The same can be done with other tools available in this tab, integrate with the tools according to your needs.
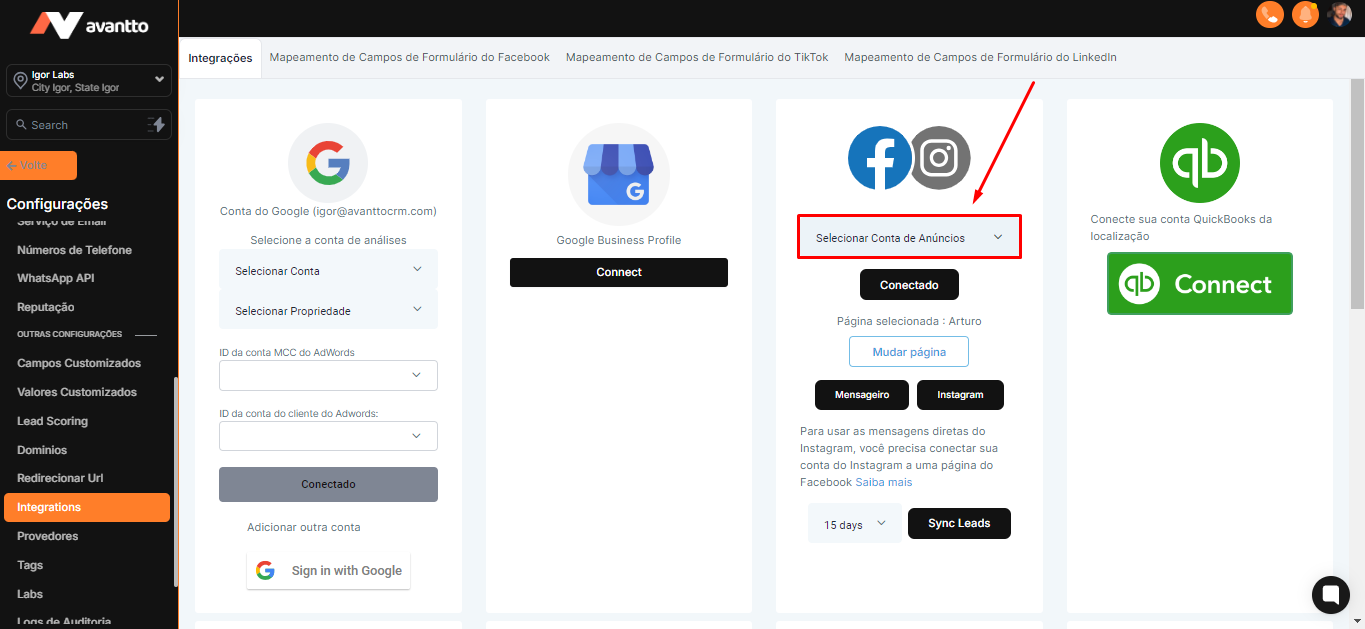
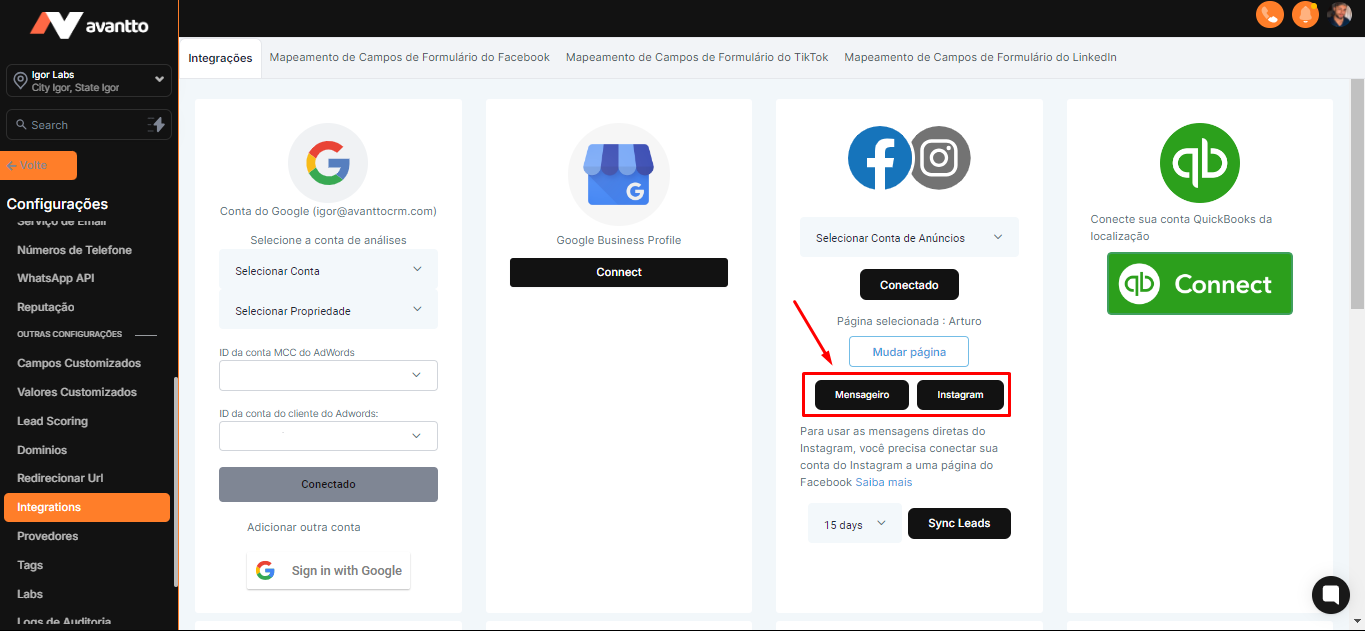
2.2 To centralize Messenger and Instagram messages and conversations in Avantto, click on the Messenger/Instagram option. After clicking on one of the options, make sure to keep this field active so that all messages and conversations are available in the Chat section.
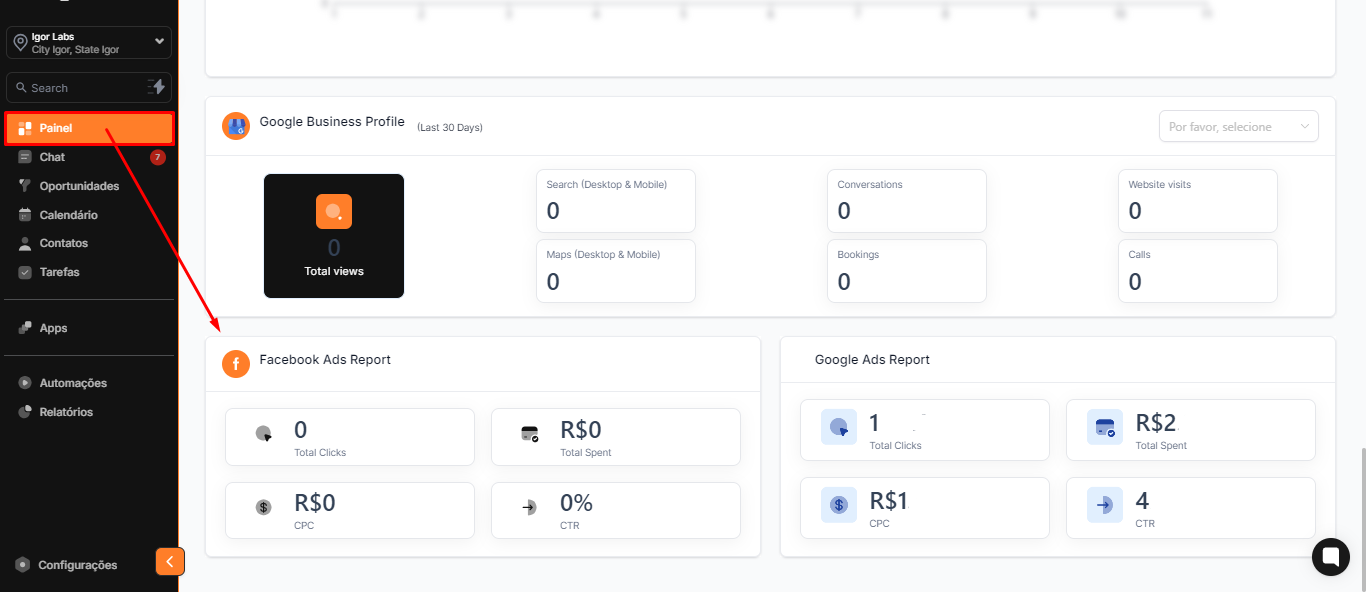
2.3 It is essential to perform all these integrations to enable data analysis on the Dashboard. As you scroll down the dashboard, you will find relevant information, such as Facebook Ads data.
After completing all integrations, the next step is to set up the Calendars and Videoconference.
If your account does not yet have a calendar set up, access the link and scroll down the page until you find Step 2 - Calendar Creation.
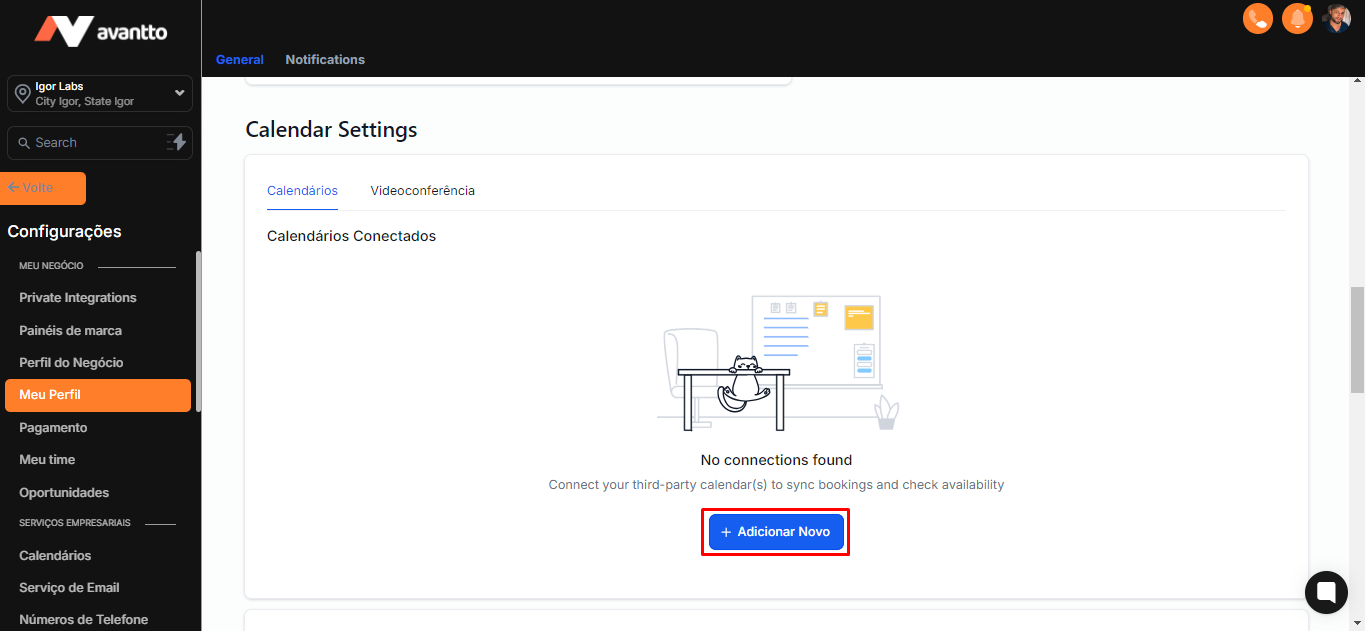
3.1 Still in the Settings menu, access the My Profile option and scroll down until you find Calendar Settings. In this field, you will have the possibility to add or integrate your calendars.
Click on Add New.
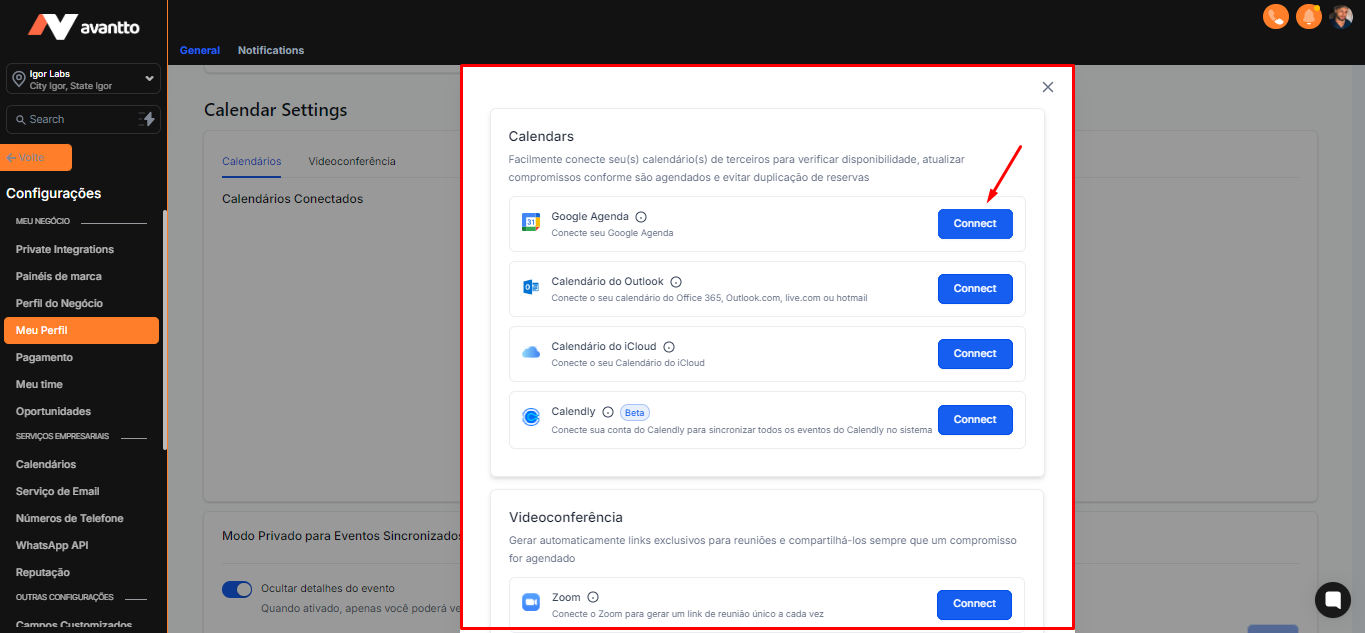
3.2 With the Calendars option, you can easily connect your schedules, including Google, Outlook, iCloud, and Calendly. Additionally, video conferencing options like Google Meet and Zoom are also available. This integration is essential for those working in a digital environment and needing to manage their schedules efficiently, automatically generating meeting links. To perform the integration, just click Connect. After completing this process, the integration will be configured, allowing you to use the Calendar, Google Meet, or any other platform you choose to connect.
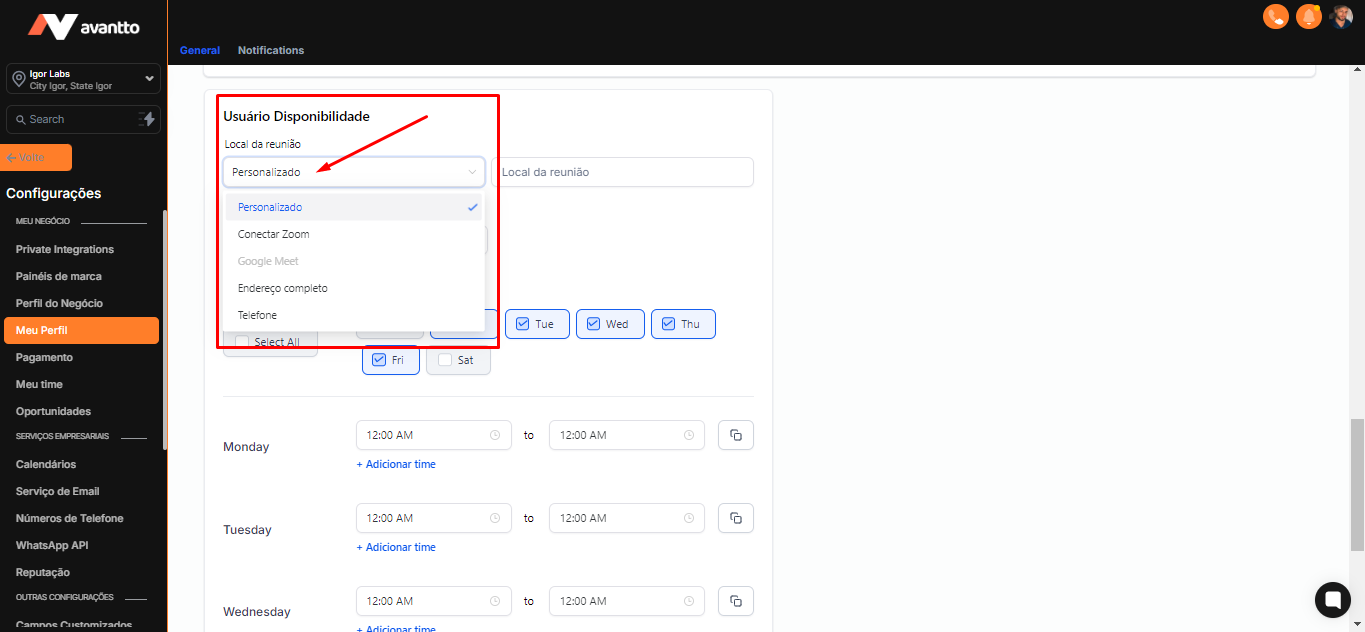
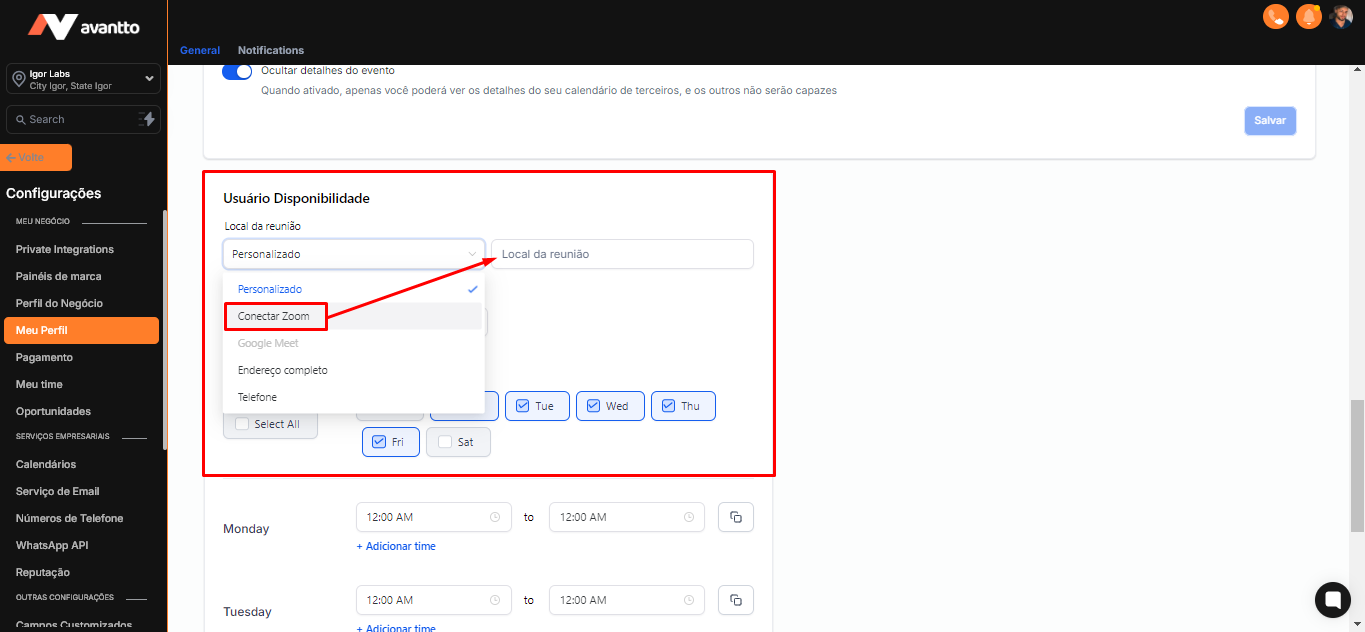
3.3 To ensure that your calendar will be used in automations and that links will be created automatically, scroll down to the User Availability section. In the Meeting Location option, click Custom to define where your meeting link will be generated, choosing between Google Meet or Zoom if you have an online meeting.
3.4 After choosing the meeting location, such as Zoom, a link to the Zoom meeting will be automatically added to the event description and sent to the client through automations. This link will be sent to both you and the other participants on Zoom. The same process applies if you choose Google Meet.
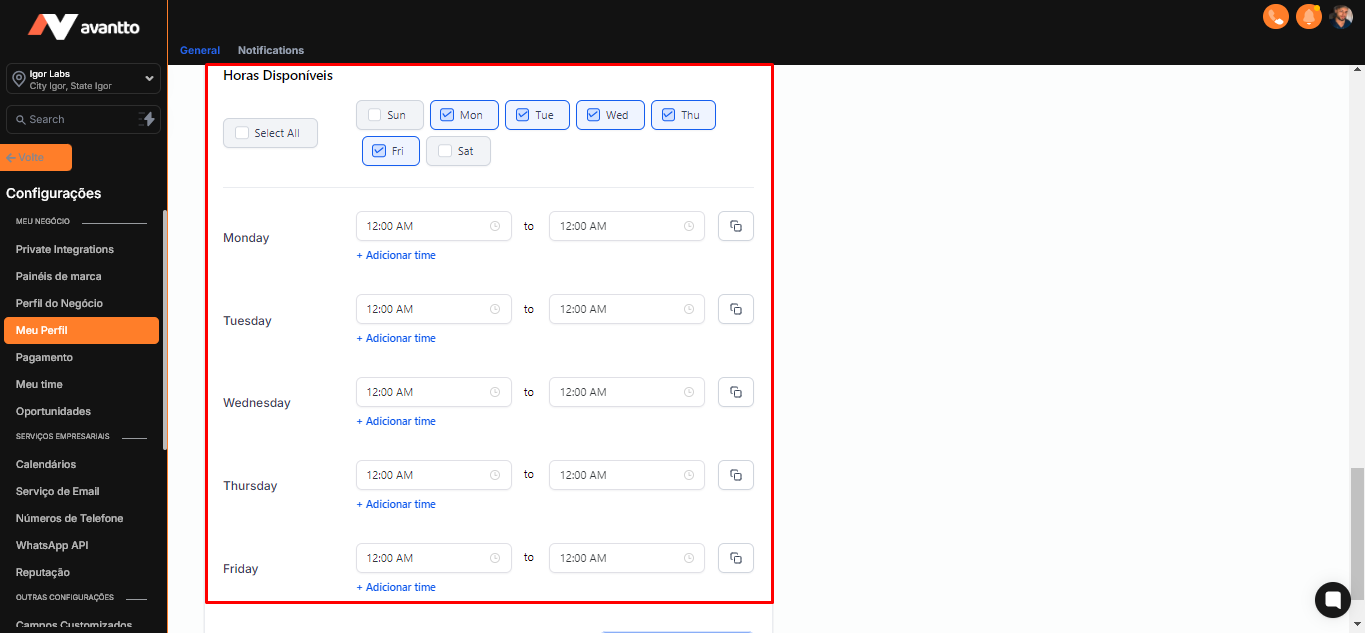
3.5 You can easily set up the times and days you will be available for meetings.
These are the main integrations you should implement to optimize your experience and organization. By setting up these tools, you will make managing your meetings and appointments much more efficient.