This guide is about managing calendars on the Avantto platform, offering a step-by-step process to facilitate the creation and organization of schedules. The first step involves recognizing the "Calendar" tab, where the user can view all scheduled meetings and events, switch between different views (day, week, or month), and access the scheduling history. In the "Calendar Settings" section, it is possible to adjust preferences, availability, and connect external platforms like Zoom and Google Meet. The second step is creating a new calendar, where the user can choose between the "Simple Calendar," ideal for a single person in charge, or the "Round Robin," which distributes schedules among team members. During the setup, it is necessary to define the calendar name, select participants, specify the duration of the schedules, and customize the appearance. Additionally, advanced options allow adjusting the distribution of schedules, intervals between meetings, and customizing notifications. At the end of the process, the user can edit, duplicate, or share the created calendar, including permanent links for scheduling. The main objective of this procedure is to optimize time management and facilitate the coordination of meetings within the Avantto platform.

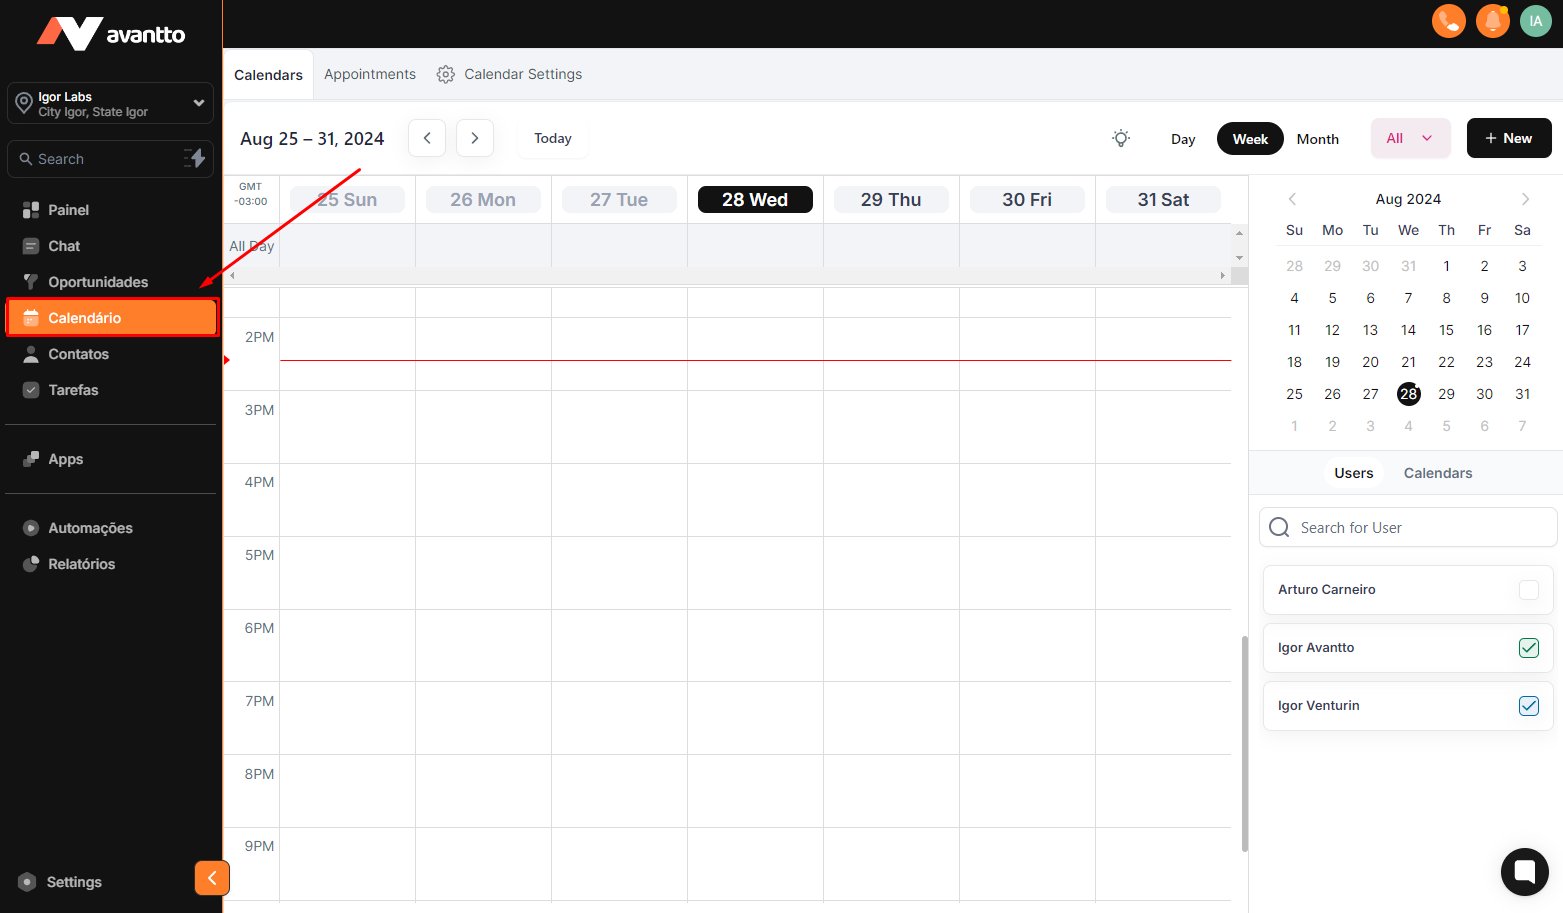
1.1 Click on "Calendar" in the left-hand menu to open the calendar management tab. You will see a centralized view with all scheduled meetings and events. You can change the view by day, week, or month by clicking the respective buttons in the upper right corner. In the same upper right corner, there is a button to create new schedules. Below, you will find an overview of the days of the currently selected month in the calendar, as well as options to view created calendars or each user's schedules.
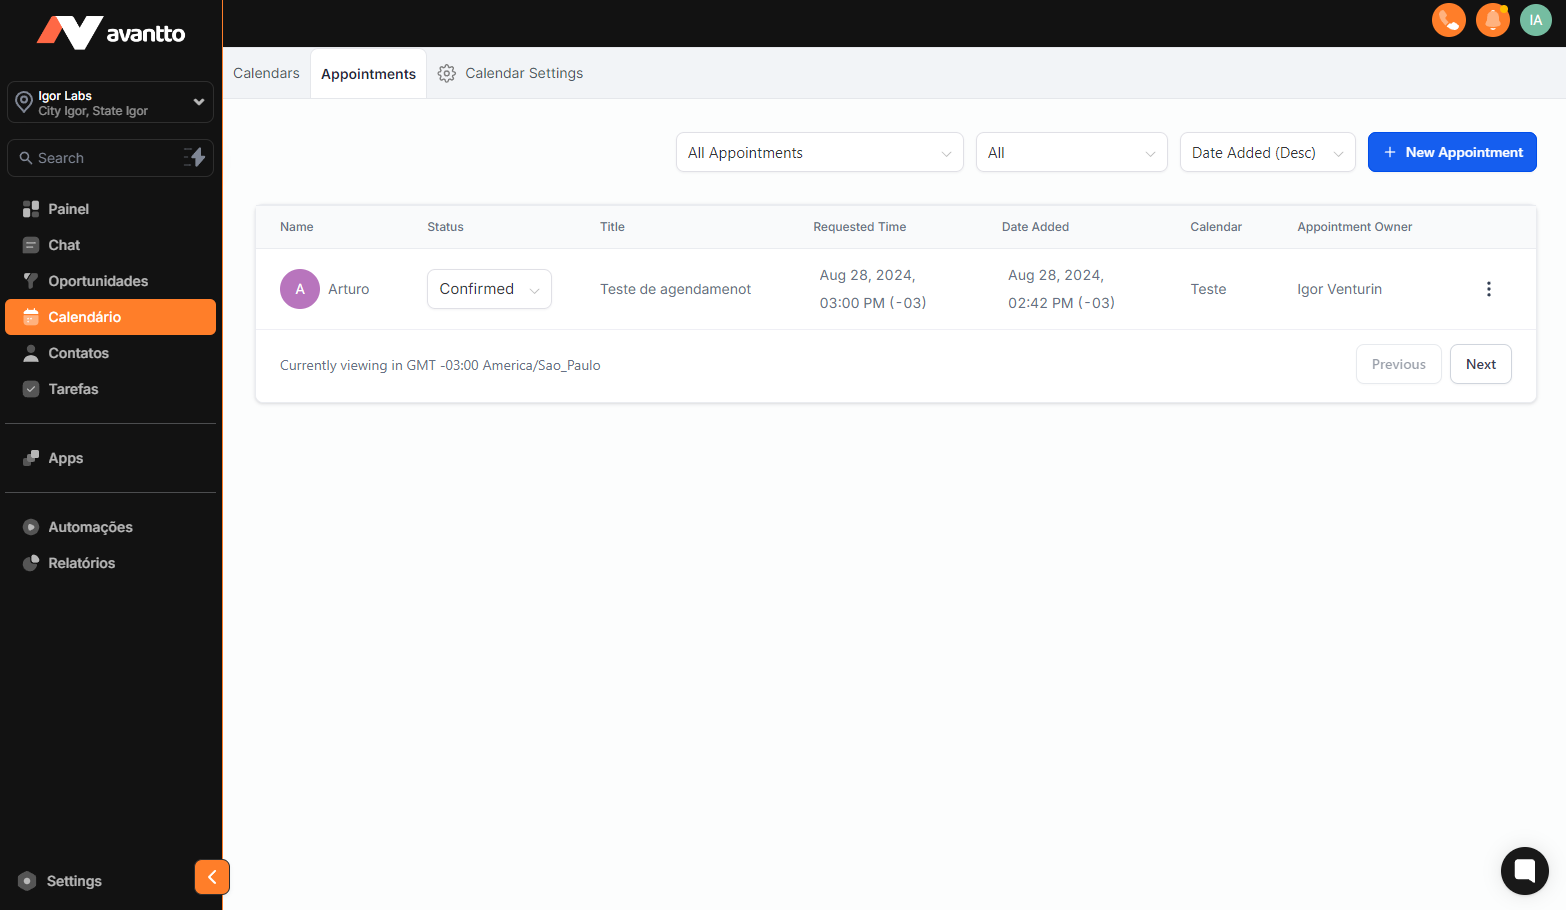
1.2 In the upper left corner, you will find the tabs "Calendar," "Appointments," and "Calendar Settings." By clicking on "Appointments," you will have access to the history of all scheduled appointments, as well as their data and status; you can also create a new appointment in this section.
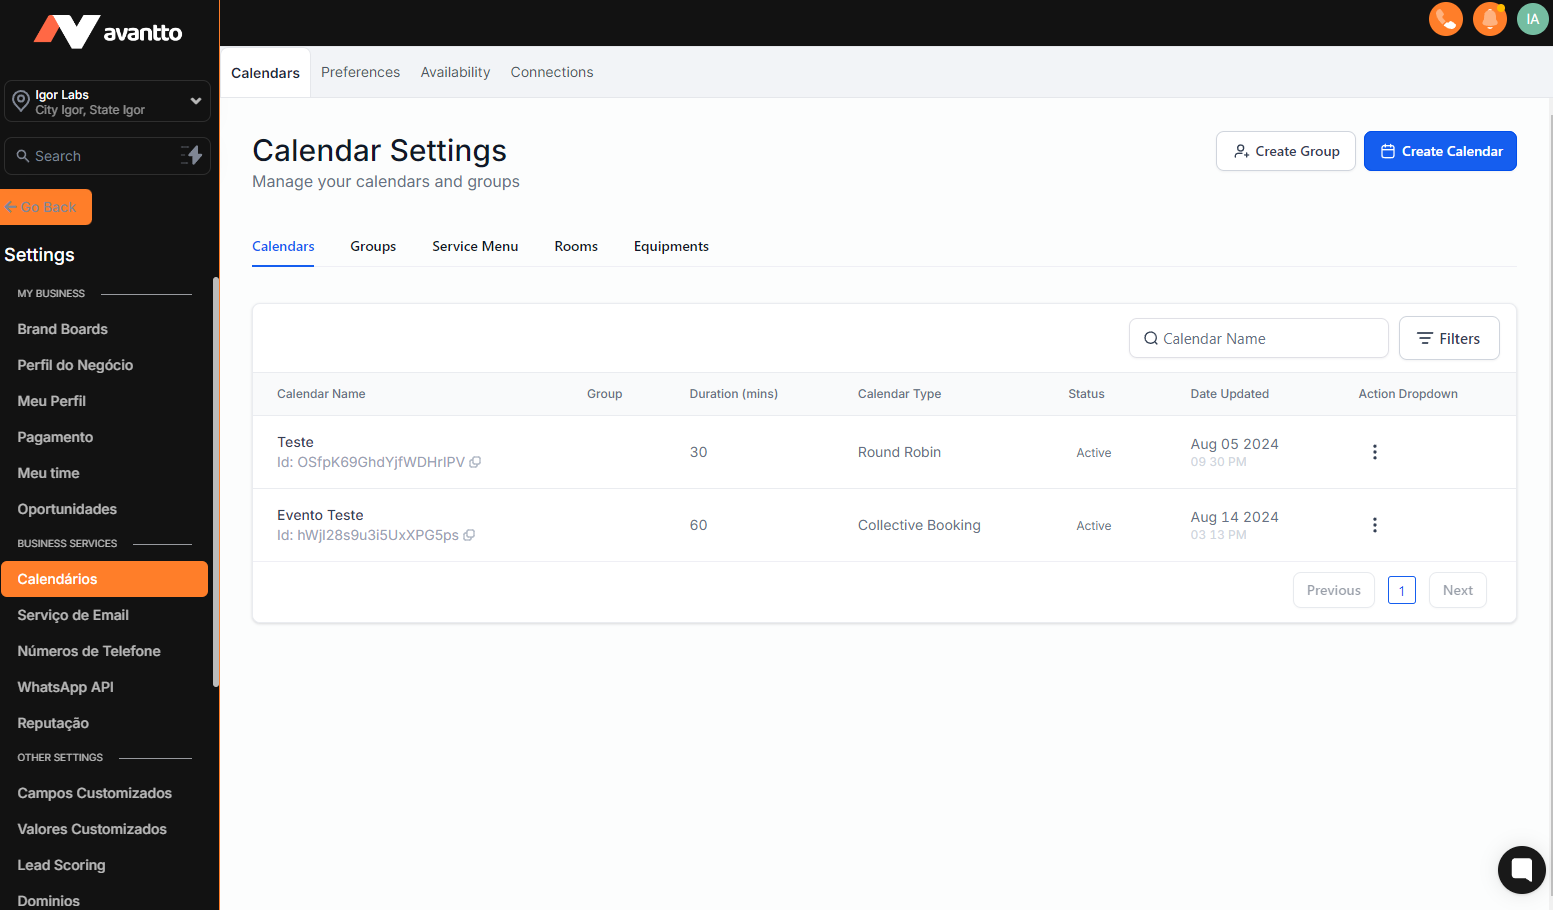
1.3 By clicking on "Calendar Settings," the view will change to show more options in the upper left corner related to calendar settings, such as "Calendars," "Preferences," "Availability," and "Connections." In this tab, you will see all created calendars and can create new ones or edit existing ones.
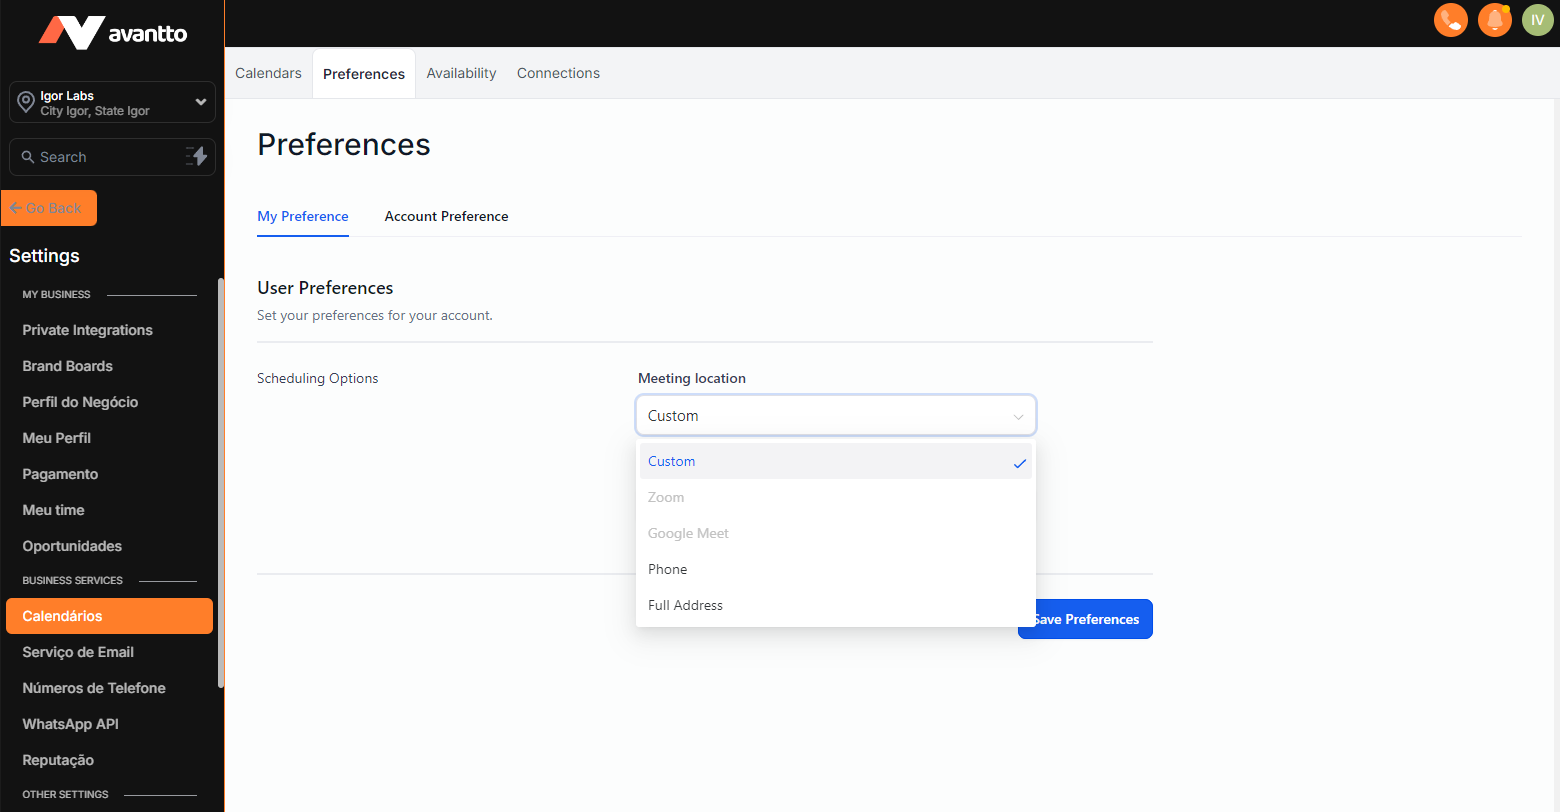
1.4 In the "Preferences" tab, you will find the user and account preference settings. It is crucial that in "Meeting Location" the platform or method by which meetings will be held, whether online or in-person, is selected. In "Account Preference," you can set viewing formats and the language of the Avantto account itself, which is not restricted to your own user.
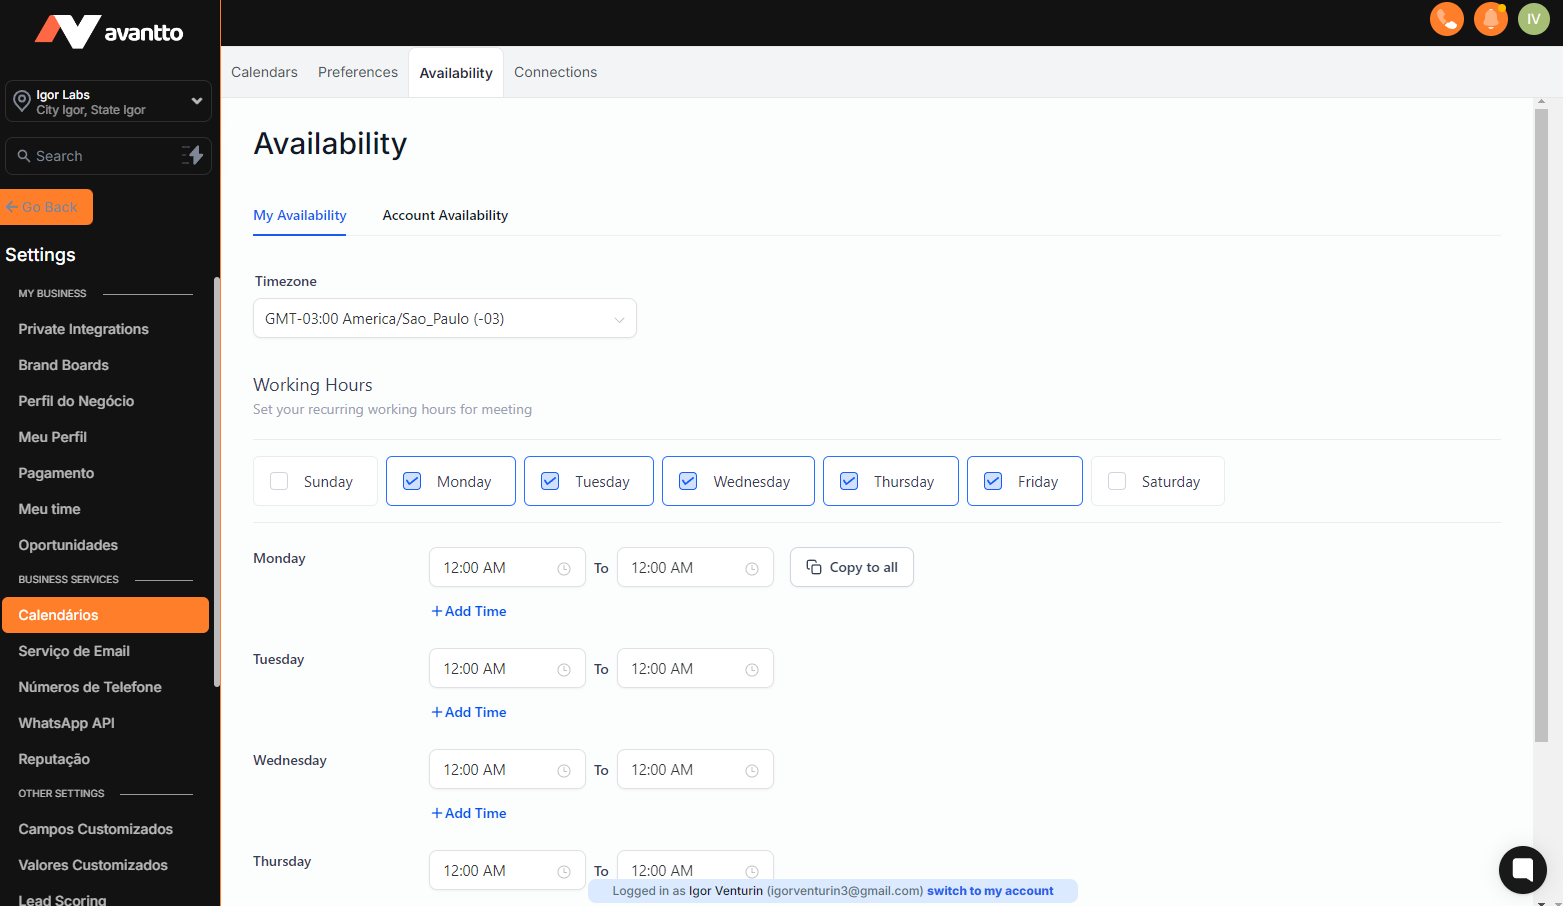
1.5 In the "Availability" tab, you can configure both your availability and the general account availability, specifying the days and times of the week you will be available.
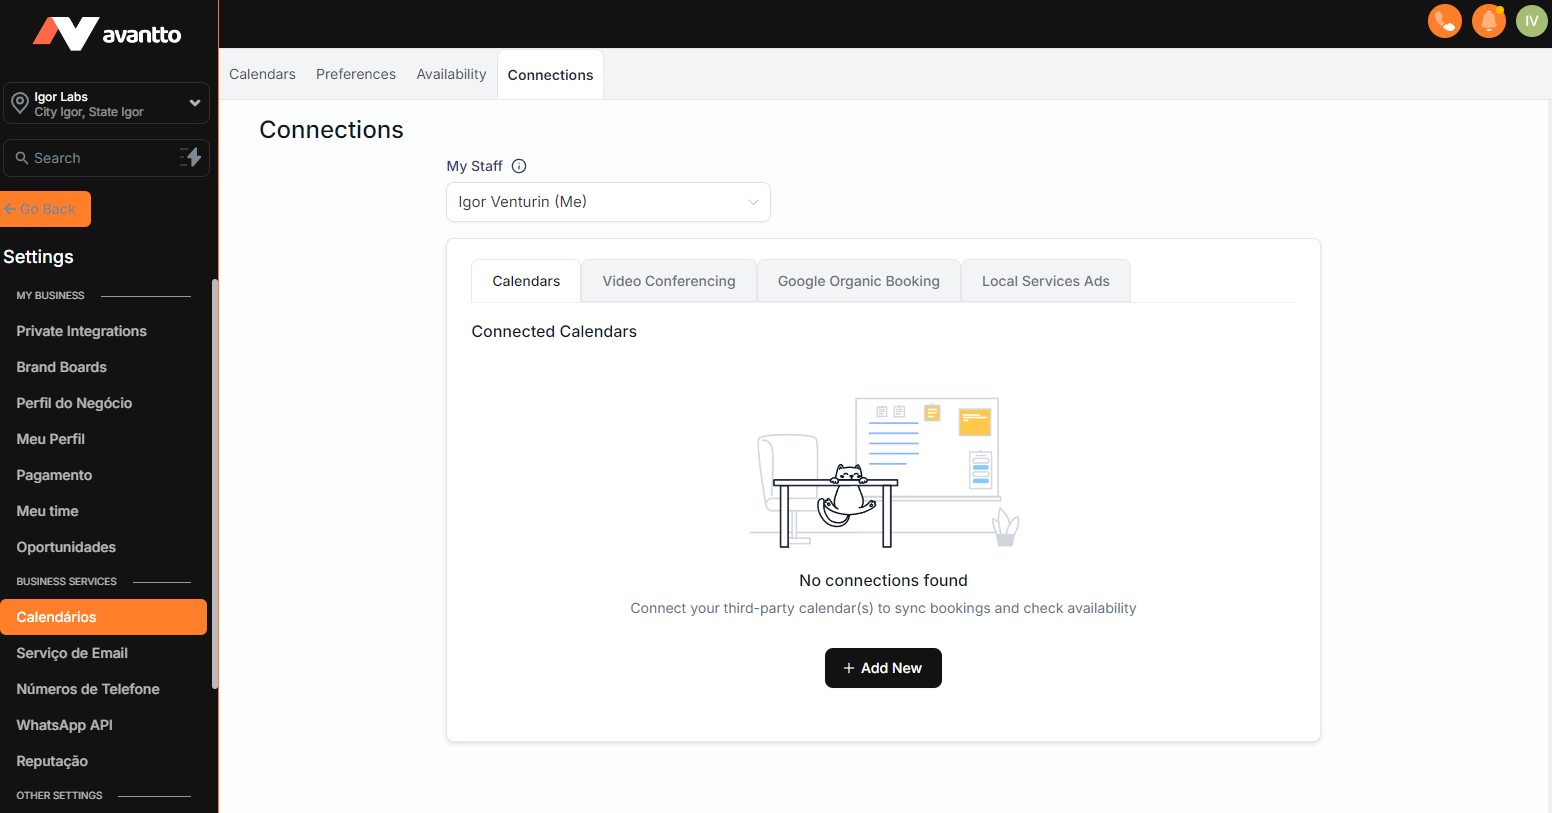
1.6 Finally, in the "Connections" tab, you can connect external calendars and video conferencing platforms to Avantto, such as Zoom, Google Meet, Calendar, Calendly, iCloud Calendar, and others. Additionally, you can view the connections made by your team by clicking on "My Staff."
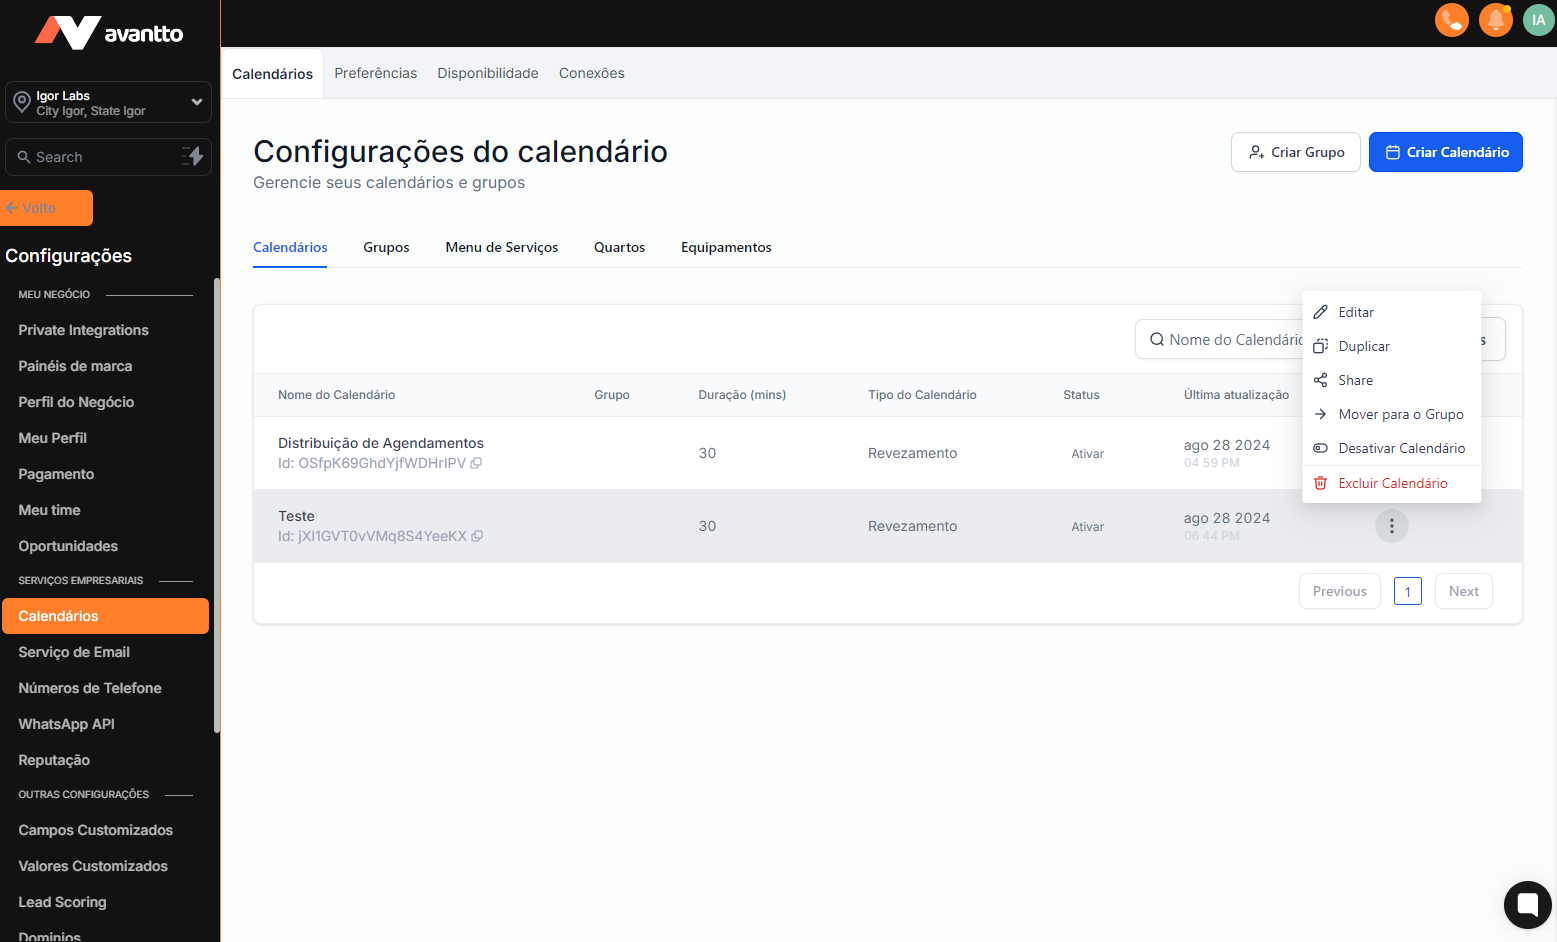
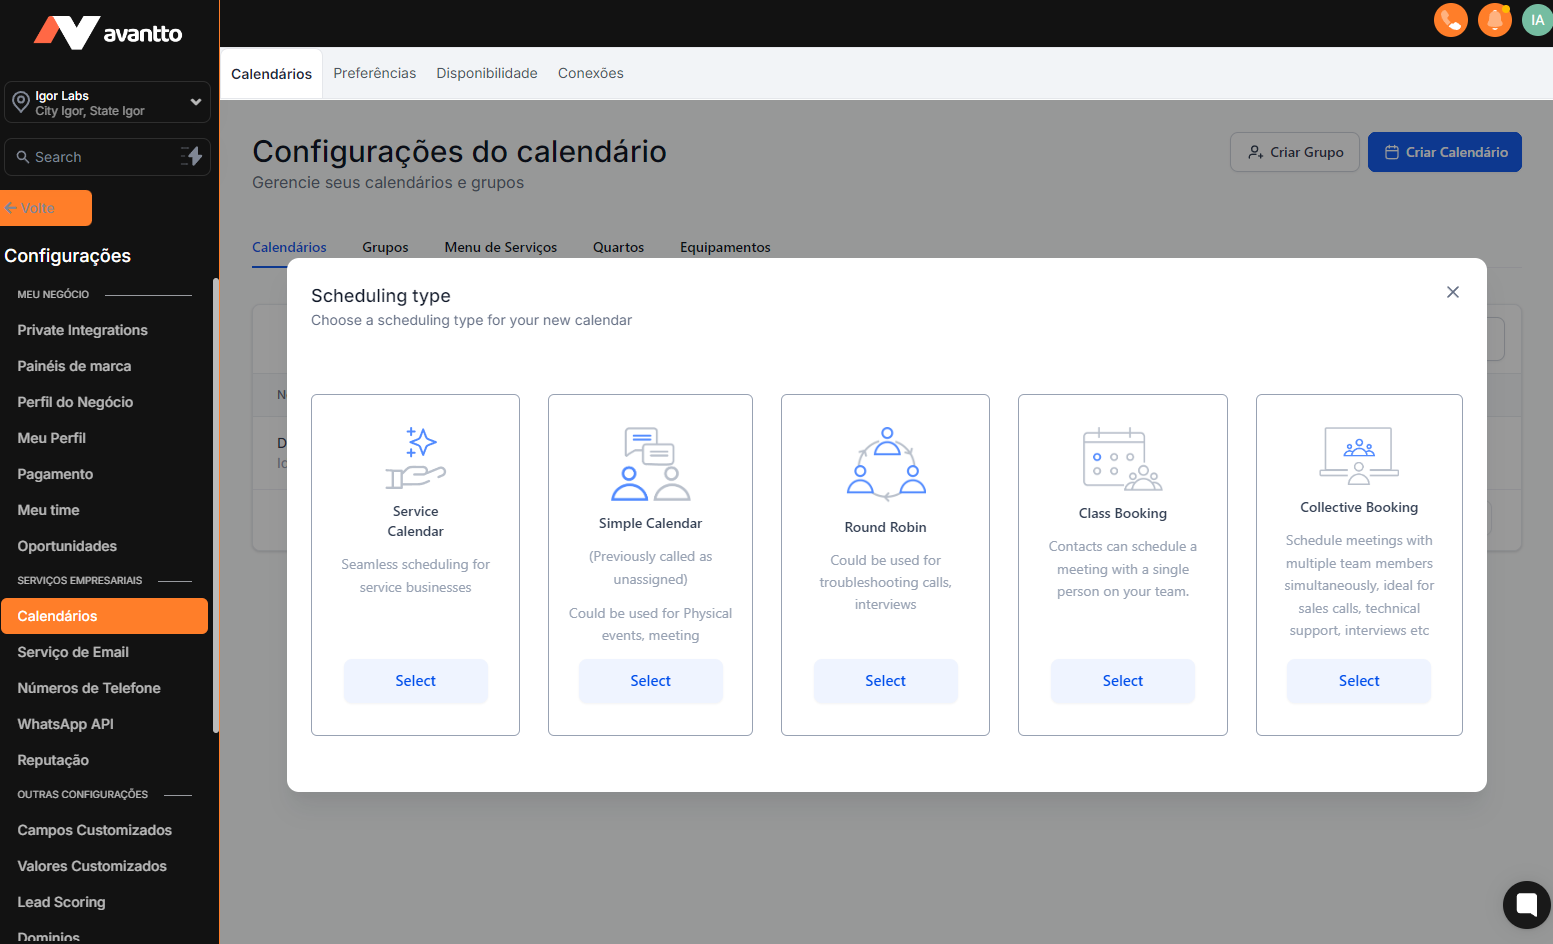
2.1 Returning to the Calendars tab, click on "Create Calendar". Five options will appear; the most used are the "Simple Calendar", which is ideal when only one user will be responsible for scheduling this calendar, and the "Round Robin", which distributes the scheduling among team members (for example, if your sales team has 3 SDRs). Remember to configure each user's calendar and video conferencing preferences to ensure the proper functioning of the general calendars.
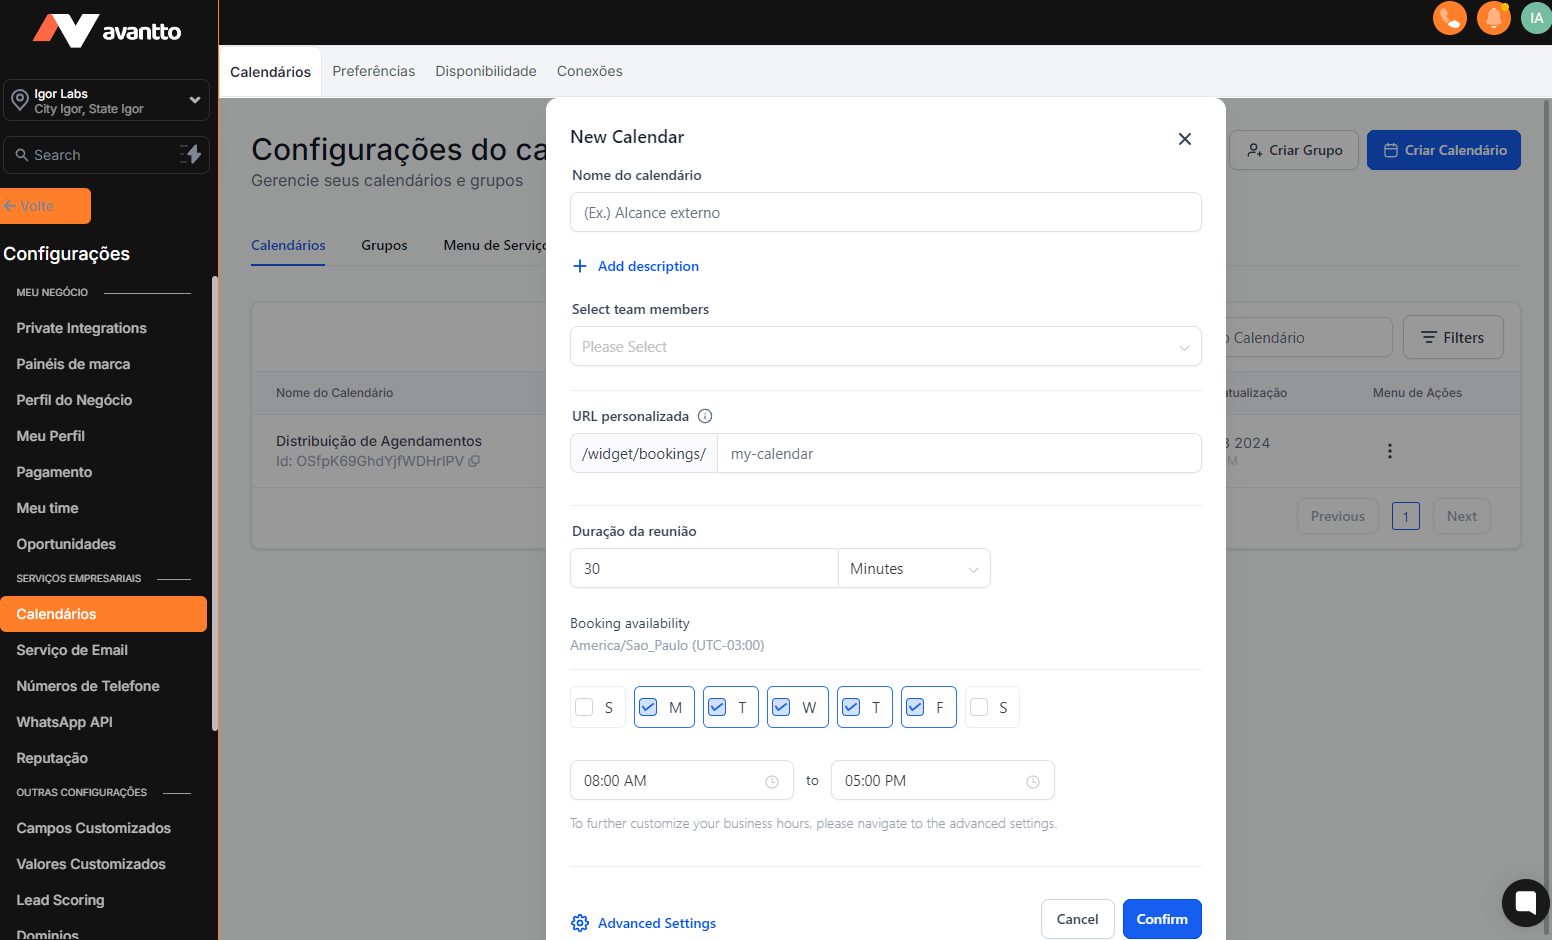
2.3 By clicking on "Select" to create one of the two types of calendars mentioned, a tab with initial settings will appear where you must fill in the calendar name, select the members who will participate in it, choose a custom URL, set the duration of each appointment, and specify availability with the desired days of the week and times.
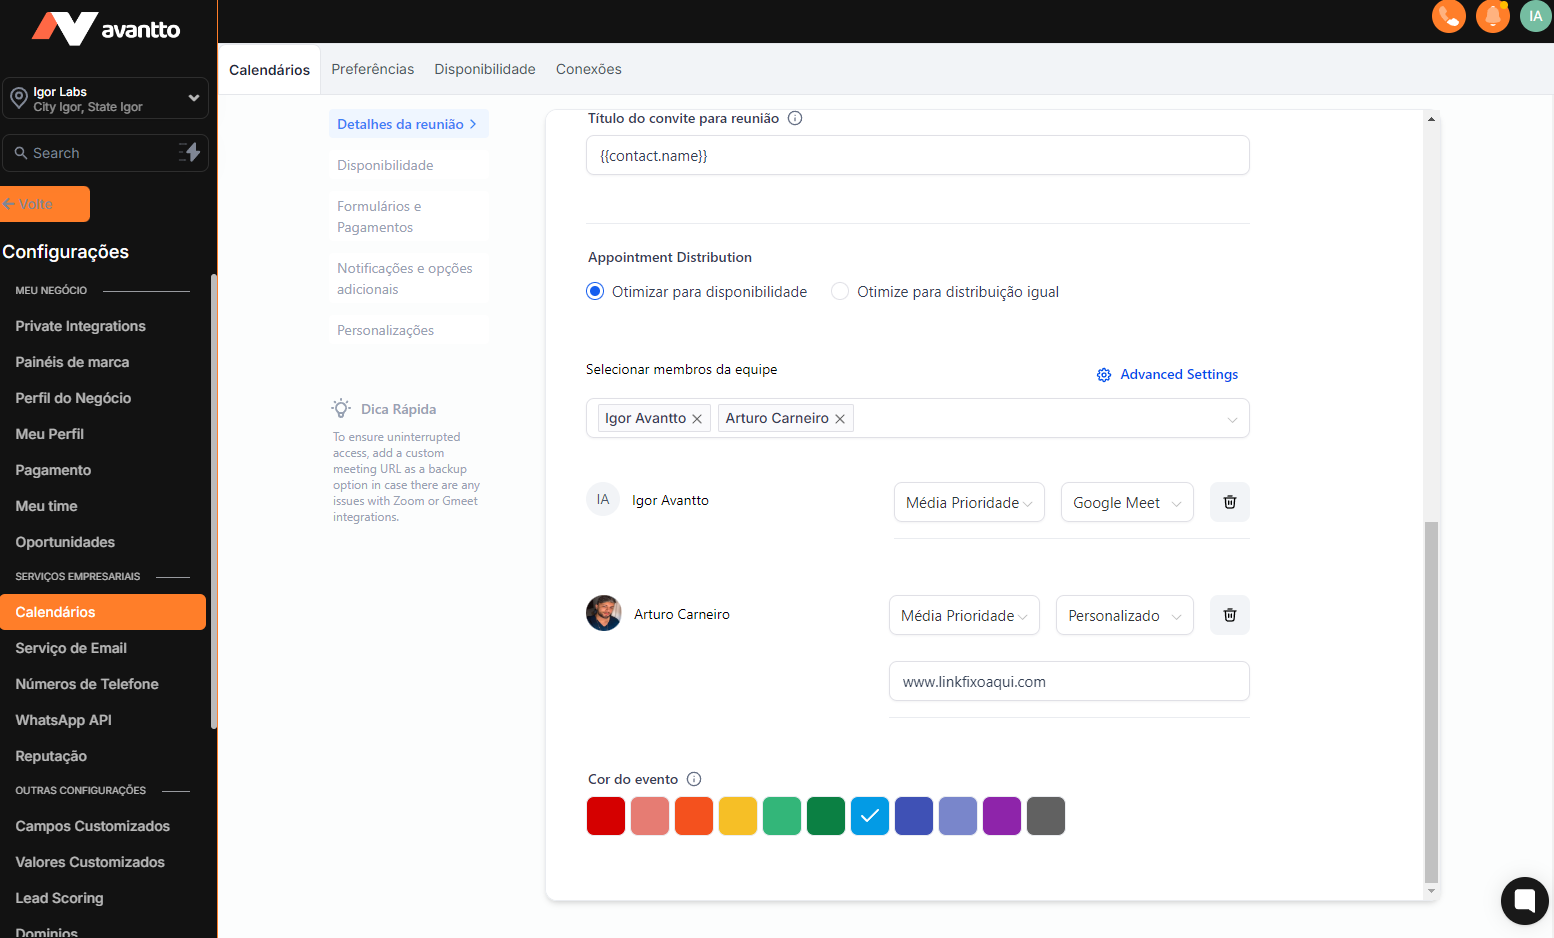
2.4 For the Round Robin/scheduling calendar, clicking on "Advanced Settings" will bring up the option to distribute the schedules. Here you can choose the distribution method (equal or by availability), select the members involved, set priorities, and an important point: choose the scheduling channel or link (for example, Google Meet or Zoom). Remember that the user needs to have previously connected their video conferencing platform preferences; finally, you can set the calendar color to facilitate identification among multiple calendars in the same account. The difference between the Simple Calendar and the Round Robin is that in the former it is not possible to distribute the schedules; it is unique.
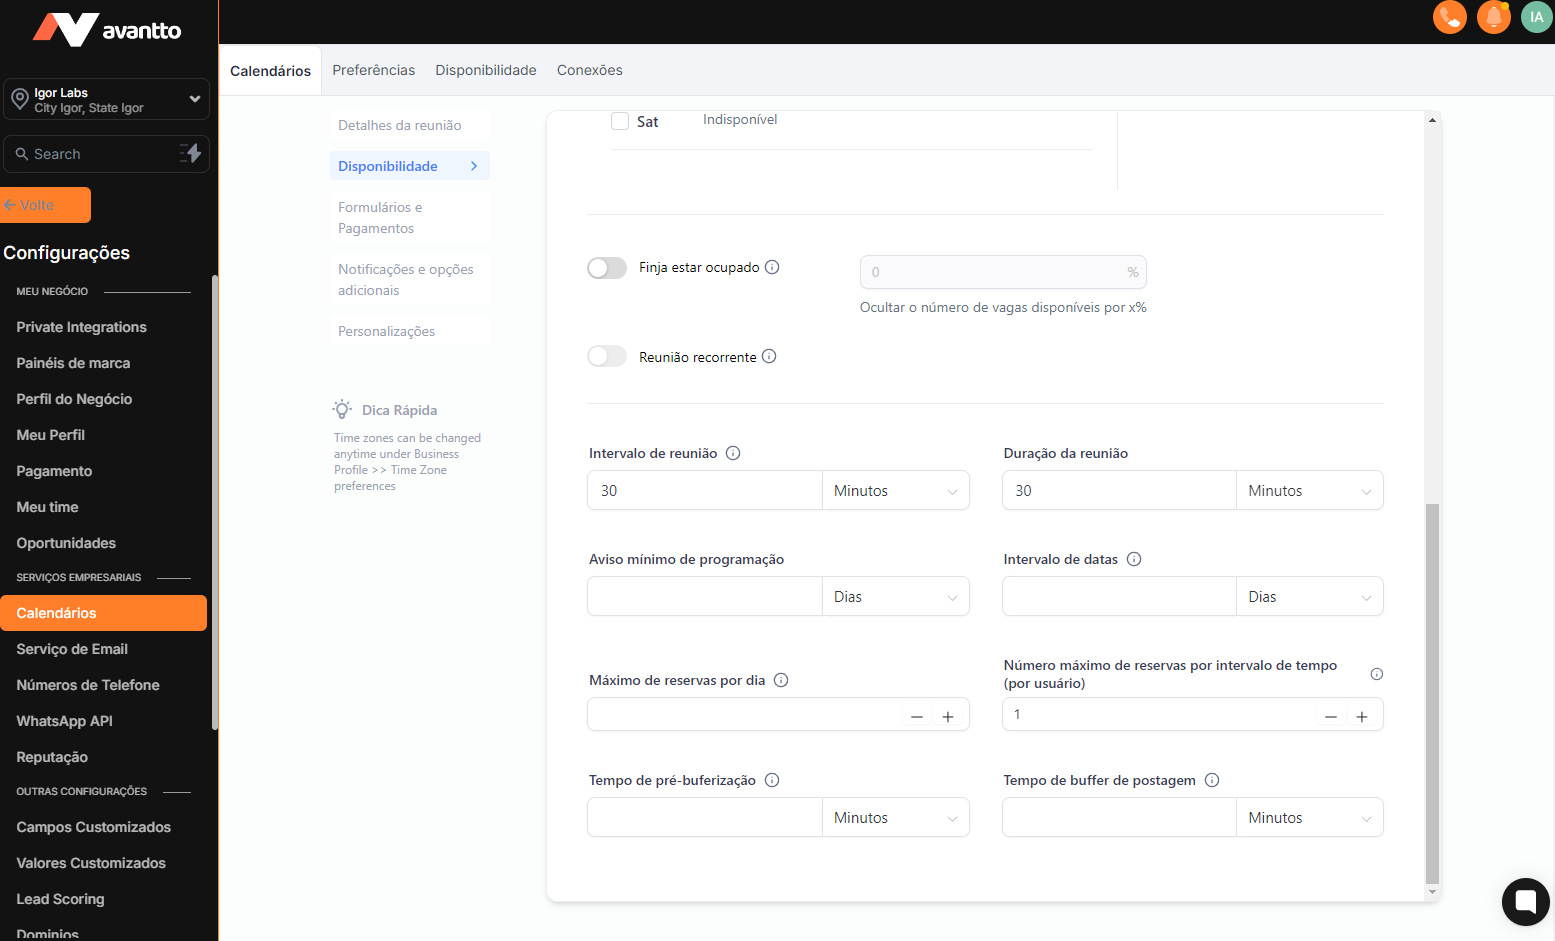
2.5 In the advanced calendar settings, you can review availability options and set intervals between meetings, minimum scheduling time, maximum reservations per day, and maximum number of reservations per interval (per user). Buffer options are useful for schedules that require prior organization time.
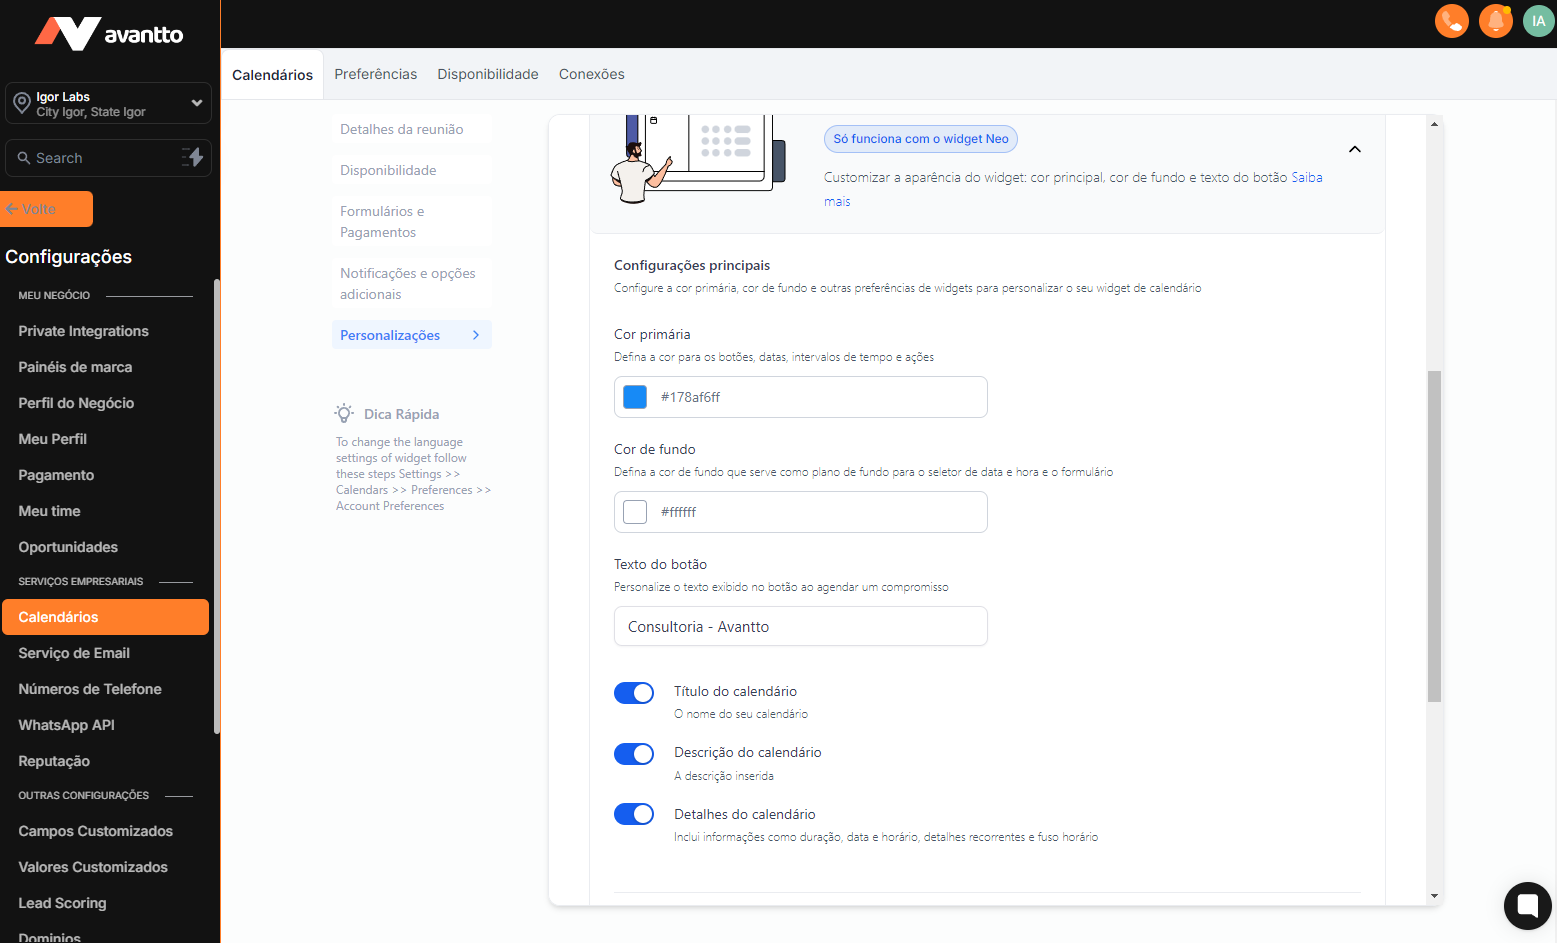
2.6 In the Customization section, you can change the name that will appear to the client in the schedule if it is displayed on any page; you can also modify the primary and background color of the calendar. It is possible to change the calendar cover among the available styles and even allow the client to choose with whom they will schedule in the cases of Round Robin/scheduling. As for topics related to notifications and additional options or Payment Form, we will not go into detail here as there are specific automations for each one.
2.7 After completing the steps above, you can easily deactivate or edit the created calendar. You will also have the option to duplicate and share it. An interesting feature of sharing is that you can send links for single appointments, as well as create permanent links that can be used for scheduling. Additionally, it is possible to generate an embed code to integrate the scheduling calendar into websites.