What Is the Add to Google AdWords Workflow Action?
The Add to Google AdWords action allows you to send conversion events from Avantto into your Google Ads account. This feature is ideal for tracking offline conversions such as form submissions, chat replies, purchases, or appointment bookings that happen after a user clicks your ad. By tying those actions back to the original click, you gain deeper insight into your campaign performance and can feed that data into Google’s optimization engine.
To make this work, Avantto uses unique identifiers like GCLID, GBRAID, or WBRAID that are passed during the ad click. These values must be present on the contact record in order for the conversion to be properly attributed.

Gain better campaign insights and eliminate manual work with seamless conversion syncing.
Offline Conversion Tracking: Tracks offline events like form submissions, chat replies, or booked appointments for better attribution.
Direct Event Syncing: Sends conversion events straight to Google Ads no need for Zapier or manual data uploads.
Enhanced Campaign Optimization: Improves ad performance by giving Google better data to optimize around.
Click ID Support: Compatible with GCLID, GBRAID, and WBRAID for comprehensive tracking coverage.
Flexible Trigger Options: Works with multiple workflow triggers including form submissions, link clicks, and page views.
Lead Quality Attribution: Helps you accurately measure the source and quality of your leads, improving ROI tracking.
Understanding how to properly set up the “Add to Google AdWords” action ensures your Google Ads campaigns can accurately measure and attribute conversions. This step-by-step guide walks you through how to configure the action inside a workflow, including where to find it, how to set it up, and how to ensure it’s firing correctly.

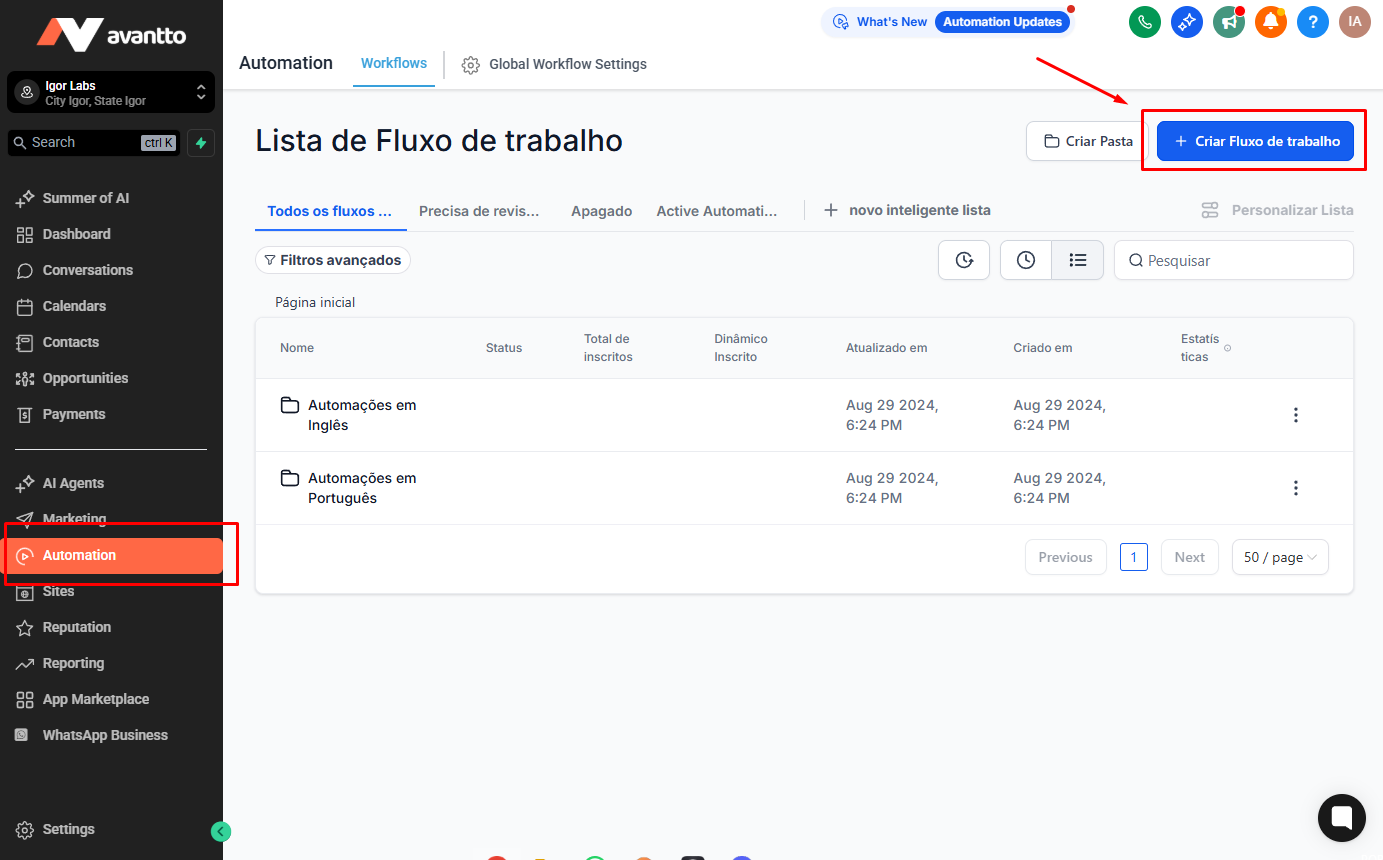
To begin, head over to the Automation section inside your Avantto sub-account. This is where you manage and create all your workflows. You can either Click + Add New Workflow to start from scratch, or Select an existing workflow where you’d like to add the Google Ads conversion action.
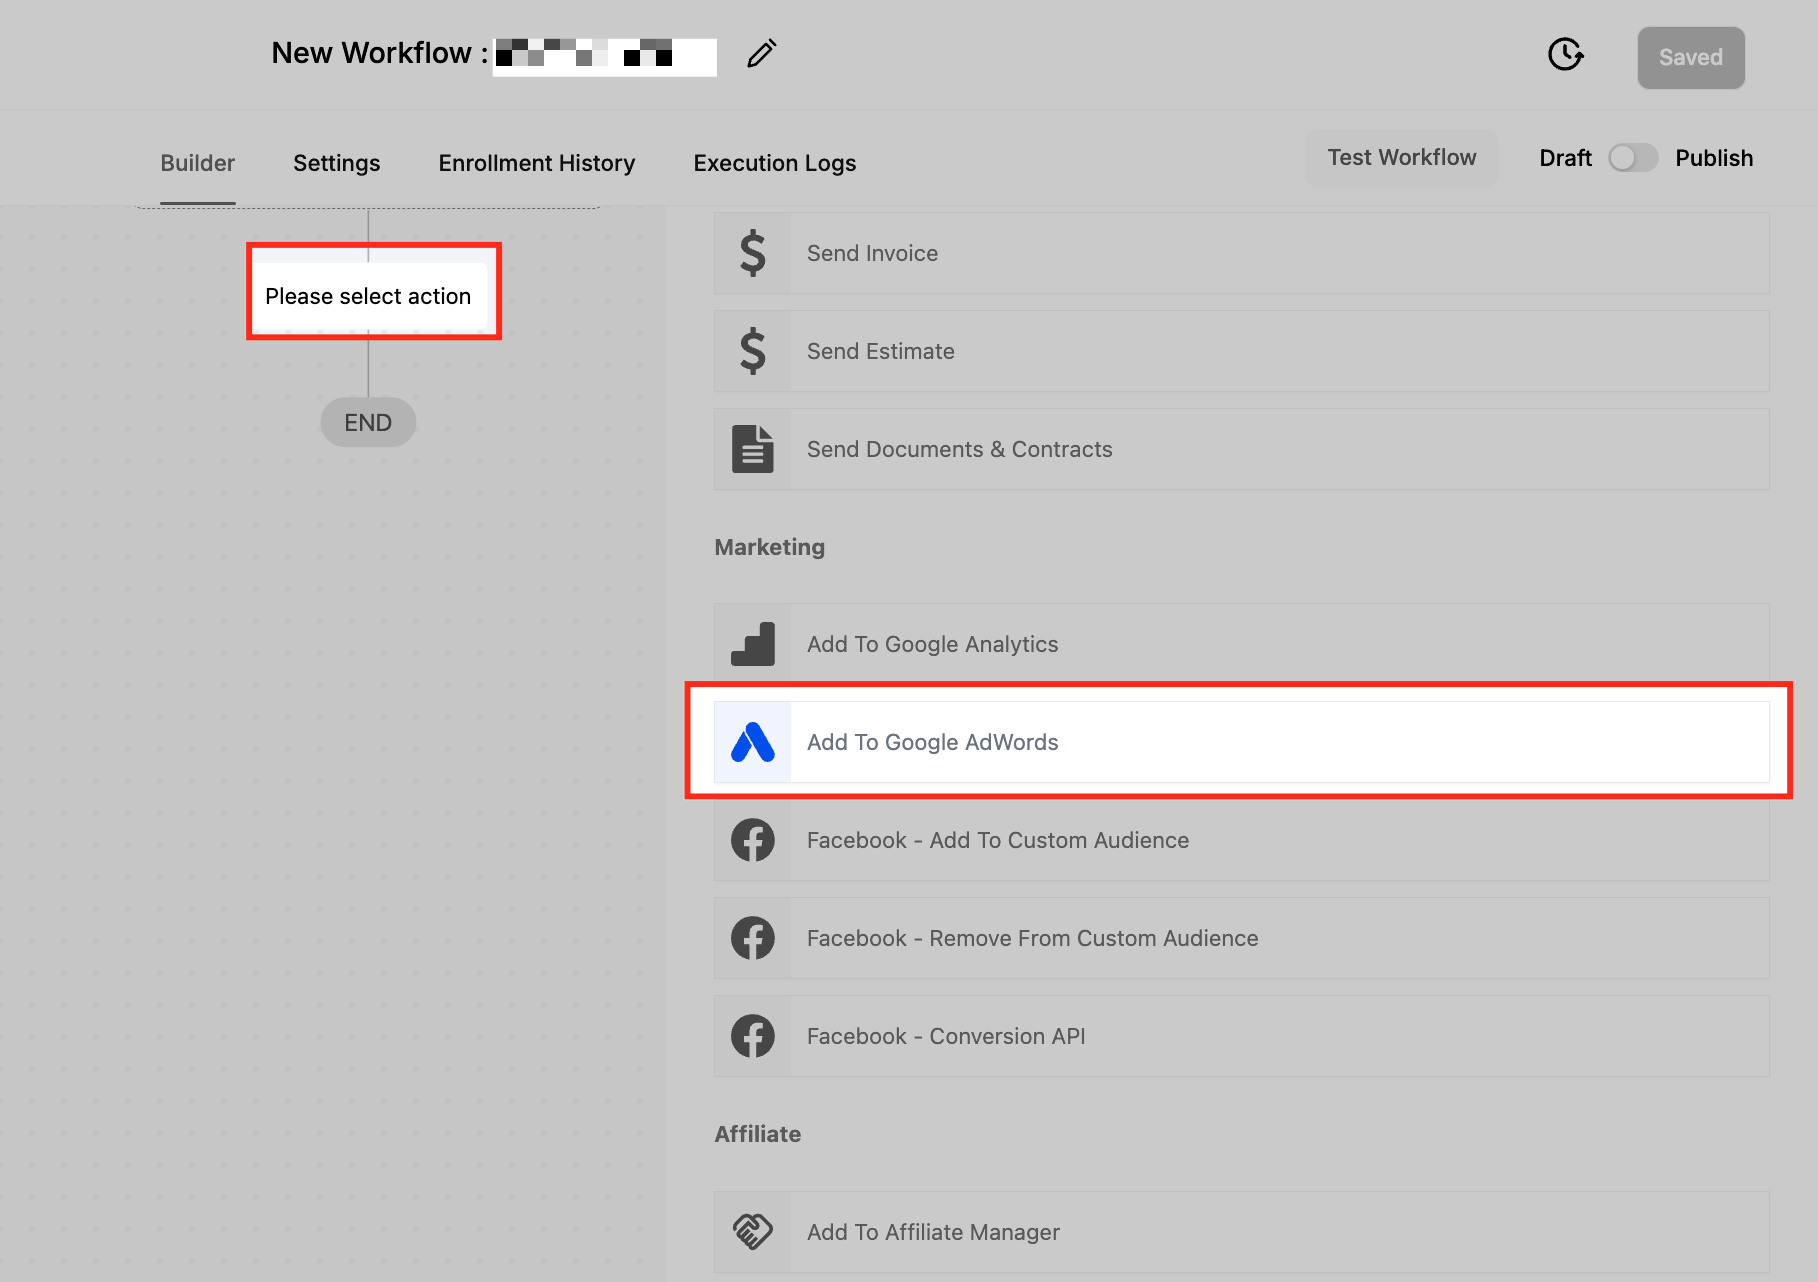
After your trigger is in place, click the “+” icon at the point in the workflow where you want the conversion to fire. This opens the action selection panel. Scroll through the list and choose “Add to Google AdWords.” This action allows you to send conversion data directly to your connected Google Ads account via API.
Once the action is added, you’ll see the configuration panel on the right-hand side.
Setting up the conversion action correctly is essential for data to flow from Avantto to Google Ads. This step involves linking your workflow to the proper conversion event and ensuring all tracking parameters are accurately in place. Missteps here such as typos in the conversion name or missing click IDs can prevent your conversion from syncing entirely.
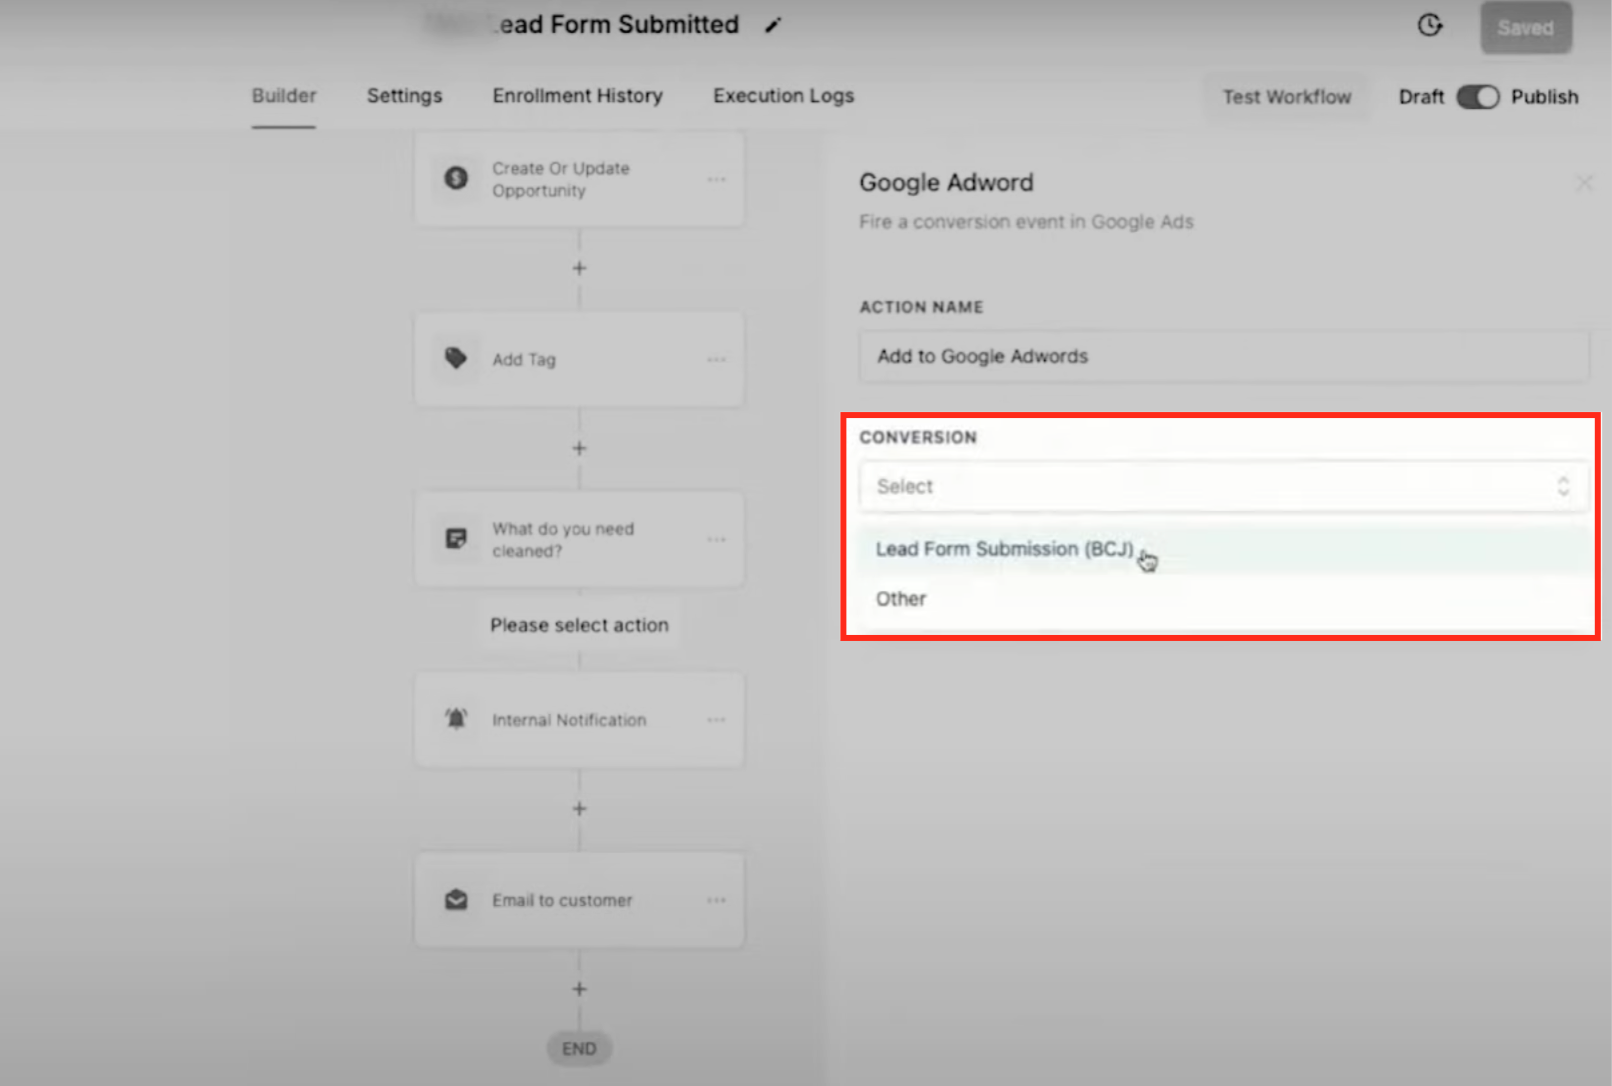
Give your action a clear and descriptive name something like “Submit Lead Conversion” or “Book Appointment Conversion.” This name will appear in your workflow logs, so it should clearly reflect what the conversion is for.

In this dropdown, select or paste the exact name of the conversion event from your Google Ads account. The name must match exactly including capitalization, spacing, and punctuation or the action will be skipped. Your workflow action will not fire the conversion unless the names align perfectly.
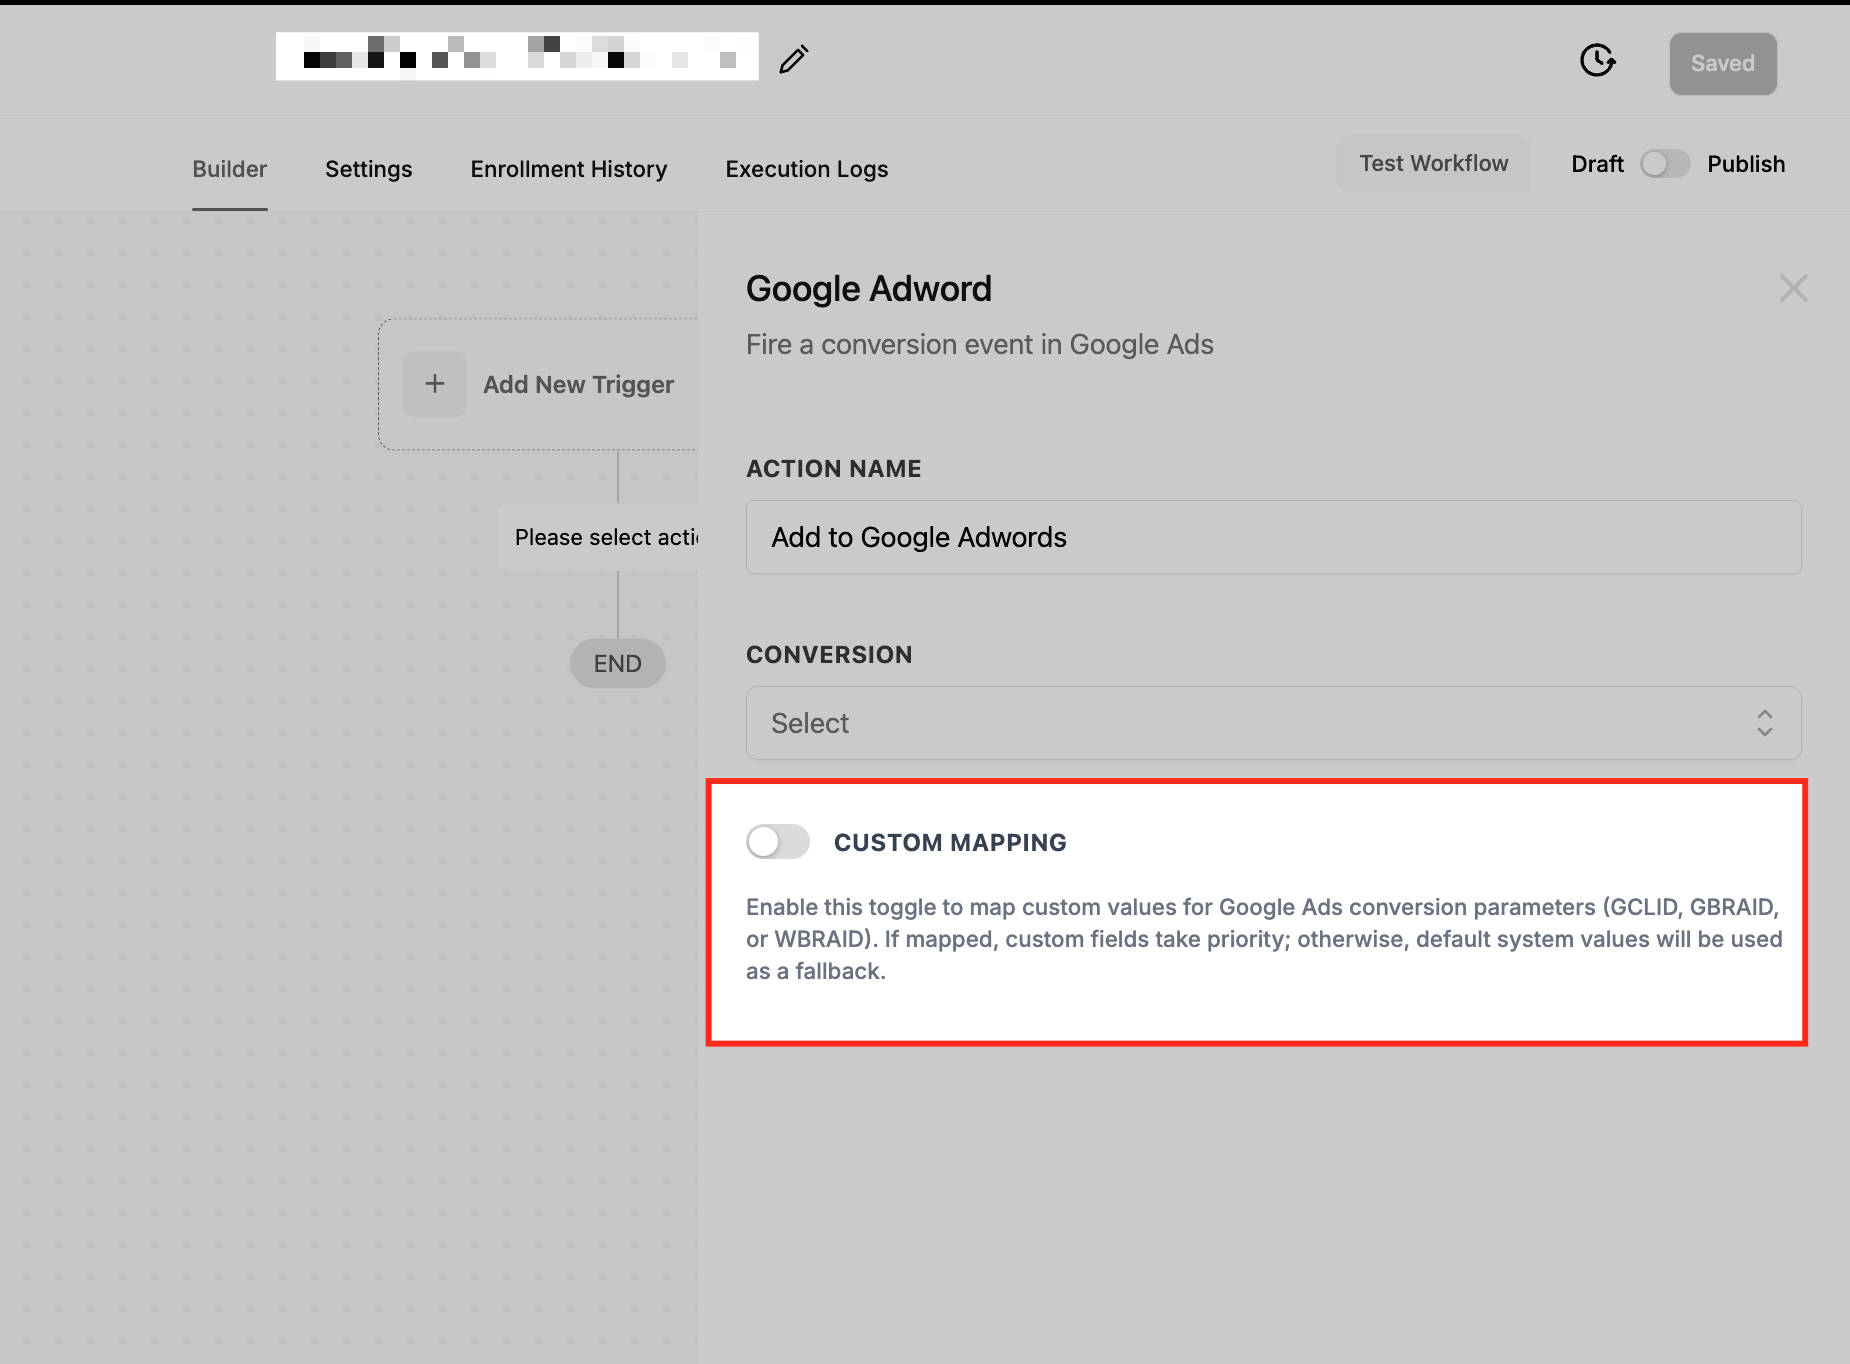
Toggle on the Custom Mapping switch if you want to manually map specific Google Ads conversion parameters (like GCLID, GBRAID, or WBRAID) to fields within your workflow. This is helpful when you’re working with custom fields or want more granular control over how the click ID is passed back to Google Ads.
To make sure this action actually sends data to Google Ads, it must be paired with a meaningful conversion event. This is where selecting the right trigger becomes crucial. Popular Triggers Include:
Form Submitted: Ideal for capturing leads from opt-in or contact forms.
Appointment Booked: Tracks booked meetings or sales calls.
Trigger Link Clicked: Measures high-intent actions like pricing clicks.
Order Form Submission: Captures purchase-based conversions.
Customer Replied (Chat Widget): Tracks incoming messages from your site chat.
Step 5: Monitor Workflow Execution Logs
Once your workflow is active, it’s important to monitor its execution to ensure the action is firing properly.
Go to the Execution Logs tab within the workflow. Look for the “Add to Google AdWords” action and its result:
Executed: The conversion was successfully sent to Google Ads.
Skipped: Something went wrong (e.g., missing GCLID or mismatched conversion name).