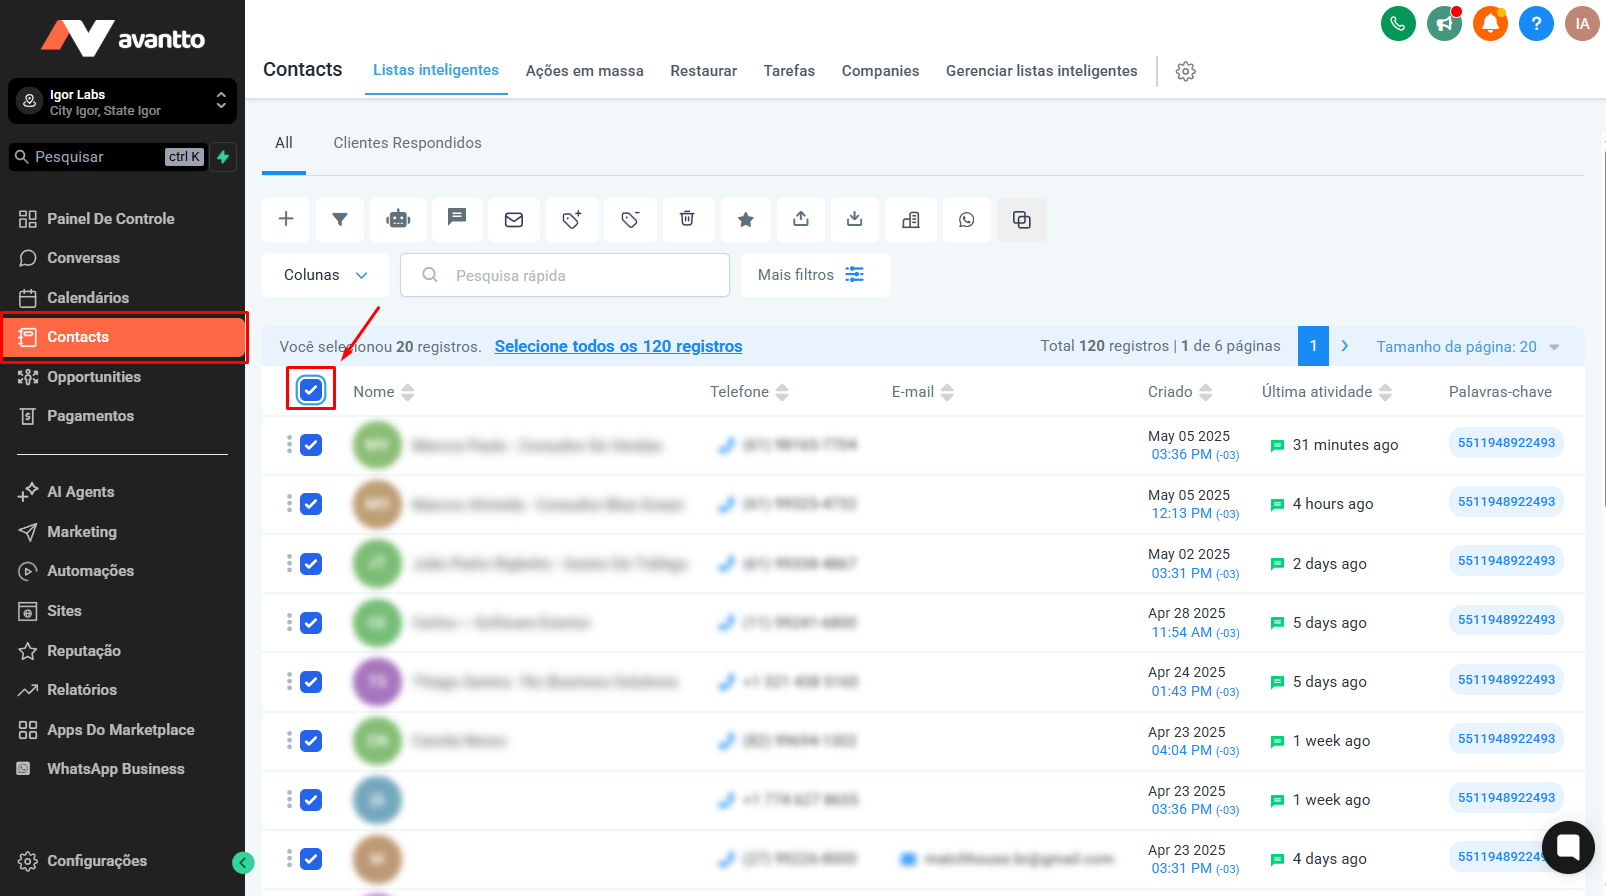
Before doing any mass action, you need to select the contacts you want to work with.
1. Go to the Contacts menu.
2. Use the selection tools:
- Select current page: Click the checkbox at the top to select all contacts visible on the page.
- Select all leads: If the option exists, select all leads from the list.
3. Or use the filters to find specific contacts (Optional):
- Example: Filter by Pipeline Stage, Status, Tags, etc.
- Practical example:
- Click on Filter
- Select Pipeline Stage > Default Flow > Step X
- Confirm the filter applied
4. After filtering, select the contacts you want by clicking the checkboxes next to each name or in the first box.
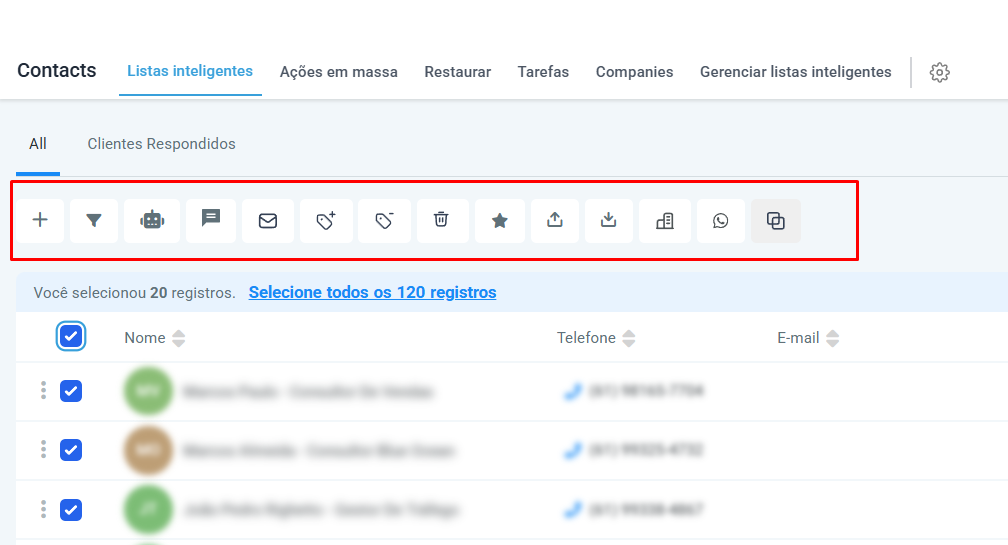
With the contacts selected, click the action buttons at the top of the screen. The following actions are available:
Add/Update opportunity: Adds or updates an opportunity in the pipeline
Add to automation: Includes the contacts in a pre-configured automation
Send SMS / Email / WhatsApp: Sends mass messages directly
Add or remove tags: Updates the contacts' tags
Delete contacts: Removes the selected contacts
Export contacts: Exports contact data to CSV or Excel
Bulk edit: Edits general contact fields at once
Merge contacts: Combines two or more contacts into a single record

Steps:
1. Select the contacts you want.
2. Click on Add/Update opportunity.
3. Choose:
- Pipeline: Select the pipeline you want (eg: “Standard Pipeline”)
- Pipeline Stage: Set where the contacts will be added
- Opportunity Name: You can enter a fixed name or use dynamic variables:
- Example: {{contact_first_name}}
- Opportunity status (active, lost, won, etc.)
4. Give the action a name (so you can identify it later).
5. Click Save to execute the action.
If there's no direct option to send unofficial WhatsApp messages with the standard actions, you can build a custom automation and add your contact list to that automation.
1. Go to the Automations menu.
2. Click on Create automation from scratch.
3. Name your automation: Ex: "Workflow - WhatsApp Sending"
4. In Triggers, leave it empty because this automation will be triggered manually.
5. Add a condition (optional):
- Ex: "Contact has phone number filled in"
6. Add an action:
- Select the responsible user (with number linked to WhatsApp)
- Choose SMS / unofficial WhatsApp
- Write the message, you can include variables:
- Ex: Olá, {{contact.first_name}}, tudo bem?
7. Save and activate the automation.
1. Go back to the Contacts menu.
2. Select the contacts you want.
3. Click Add to automation.
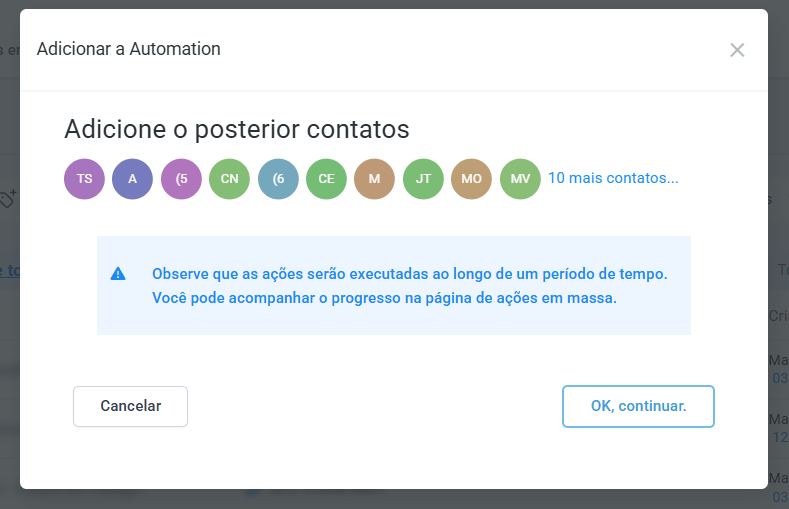
4. Select the automation you created: “Workflow - Envio de WhatsApp”
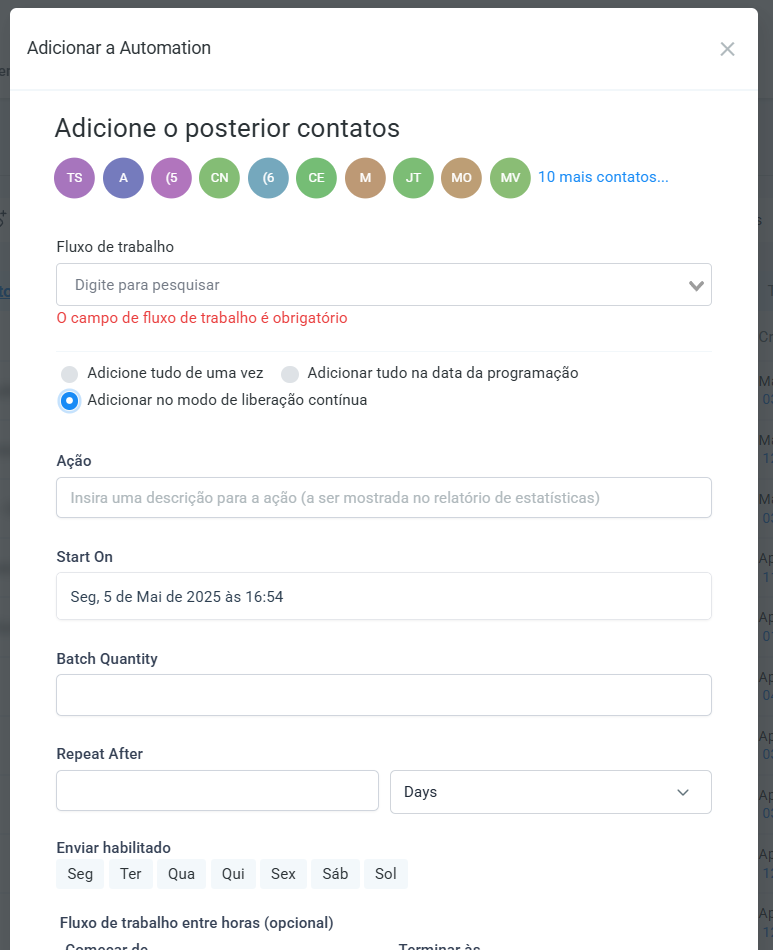
5. Choose the add mode:
- All at once
- Scheduled data (ex: tomorrow at 04:00am)
- Continuous release (send in batches, ex: 10 contacts per business day)
6. Additional settings:
- Action name: Ex: "Bulk WhatsApp"
- Frequency: Repeat daily
- Days of the week: Monday to Friday
- Time: From 9am to 6pm
7. Click on Add to automation
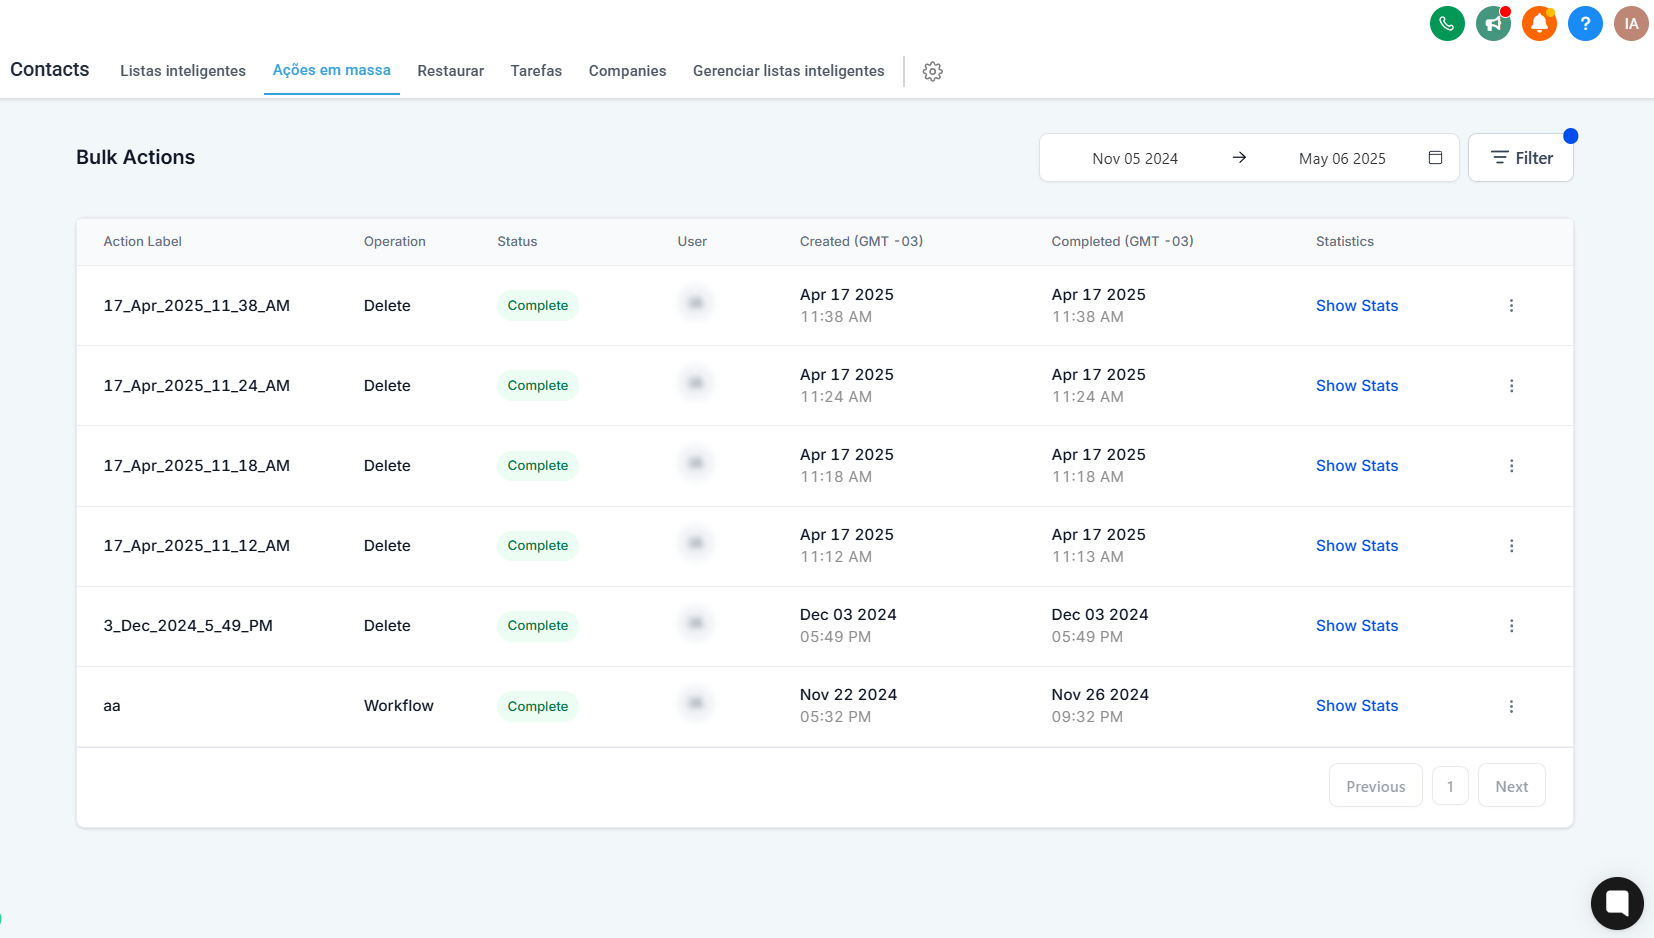
After running a bulk action, you can track its status:
1. Click on the Bulk Actions icon at the top of the tab.
2. A screen will open with all recent actions.
3. Available info:
- Action status (in progress, completed, paused)
- Number of contacts processed
- Error details (if any)
4. Options:
- Pause action
- View logs
- Repeat action
- Always use specific filters before picking contacts to avoid mistakes.
- When sending mass messages, use the continuous sending mode to avoid getting blocked on WhatsApp.
- Test first with a few contacts to make sure everything’s working as expected.
- Keep descriptive names for your actions and automations to make organizing easier later.
- Use custom variables in your messages to make your content more personalized.