This guide details the process of setting up message templates in the official WhatsApp API, allowing you to customize your communications with customers. The step-by-step covers everything from the initial API connection, through the creation and editing of templates, to the use of these templates within your CRM automations. The goal is to ensure that your messages are sent efficiently and aligned with your company's communication needs.
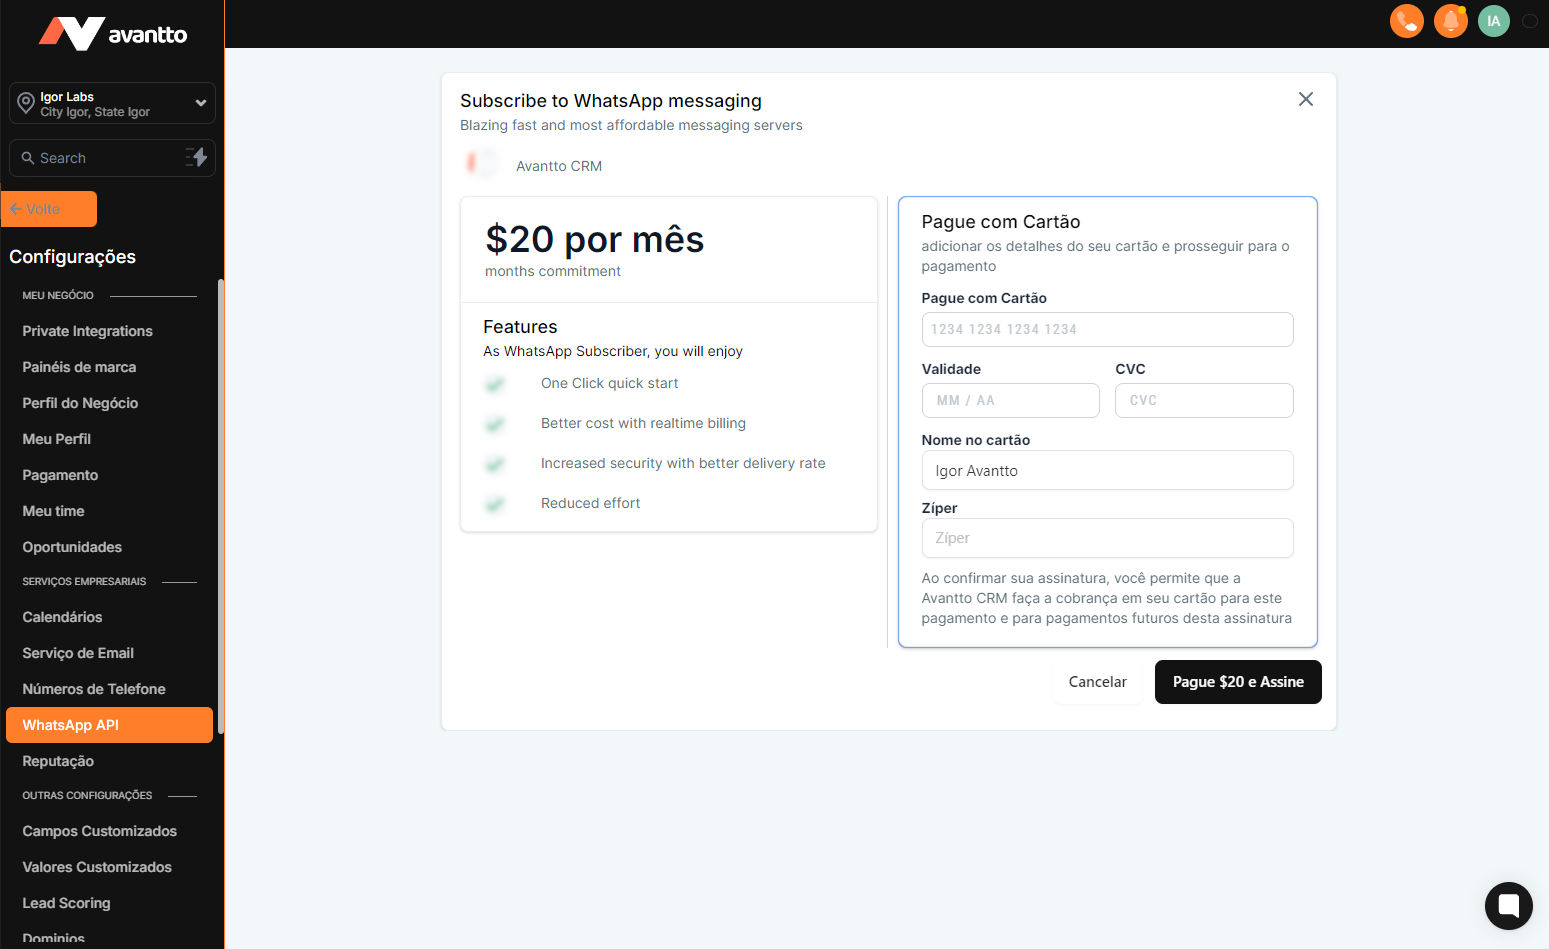
1.1 First, click on "Settings" in the menu on the left. Then, locate the "WhatsApp API" option also in the menu on the left. When you click on it, if you have not yet enabled the API, you will be presented with the option to subscribe to the official API. Fill in your payment details and confirm the subscription; there will be a monthly charge for using the service. After completing the subscription, you will see the option to add a WhatsApp number. Remember that only verified Facebook Business Manager (BMs) accounts can use the official WhatsApp API. When you click "Add", you will be directed to Meta's pages, where you can choose or register your WhatsApp Business number. It is important to note that the number added to the API cannot be used on any other device.
1.2 After adding the WhatsApp number, you will be directed to a panel where you can view the added numbers, sent messages, and add new numbers. Additionally, the templates option will appear, which you should click to proceed.
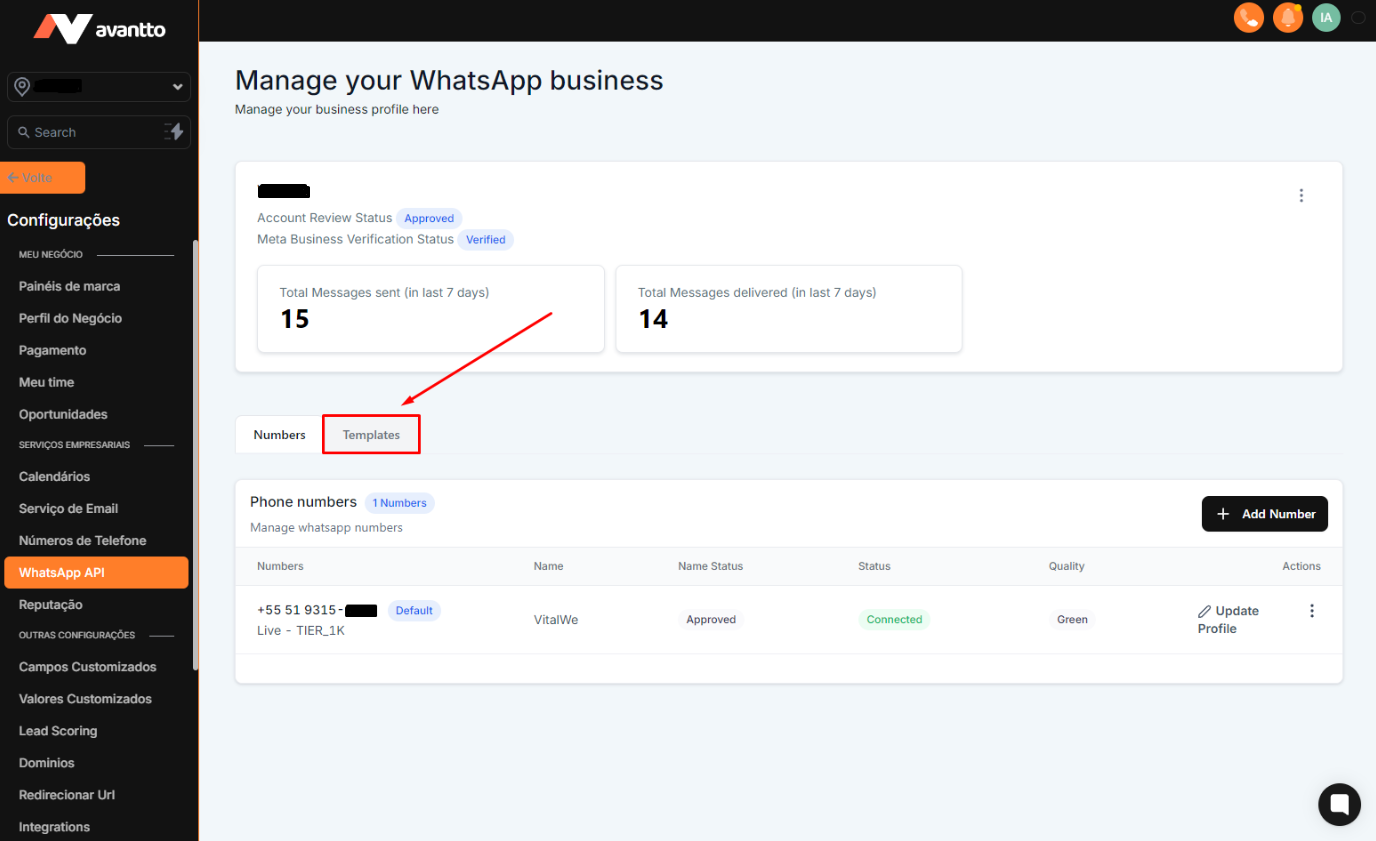
2.1 In the templates section, you can view and edit already created templates, as well as create new ones by clicking the "Create Template" button.

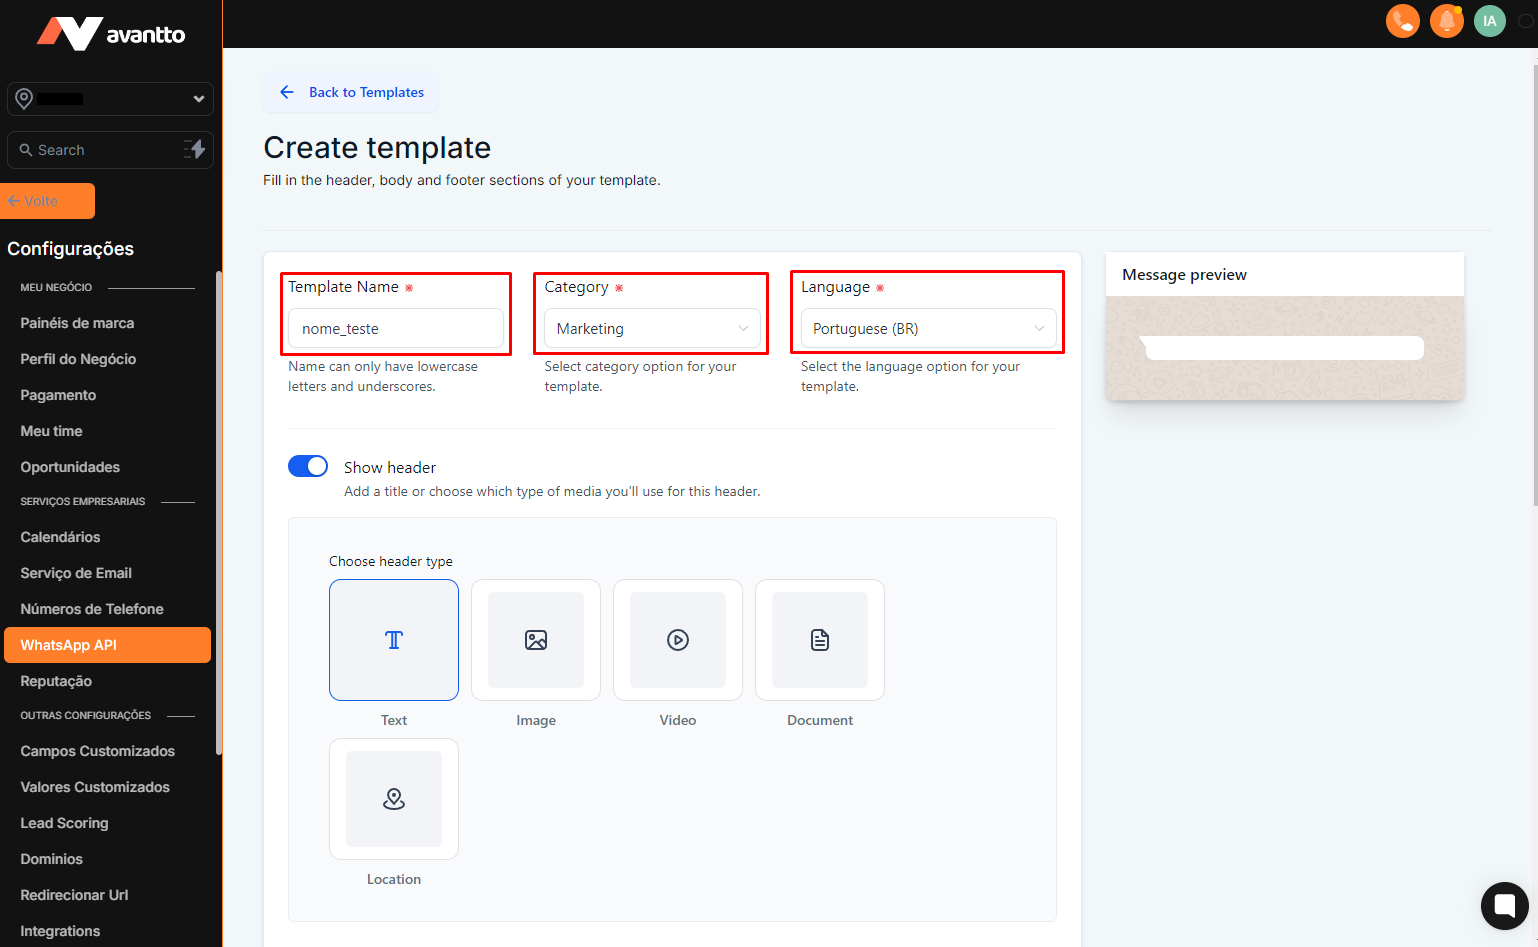
2.2 During the creation of templates, there are three important initial settings: the template name should be easily identifiable and cannot contain special characters or spaces; always use "Marketing" as the default category; and select the appropriate language according to the message content. You can also preview the message on the right side of the screen and use headers with images, videos, documents, locations, and texts. The files have size limits that will be indicated during the process.
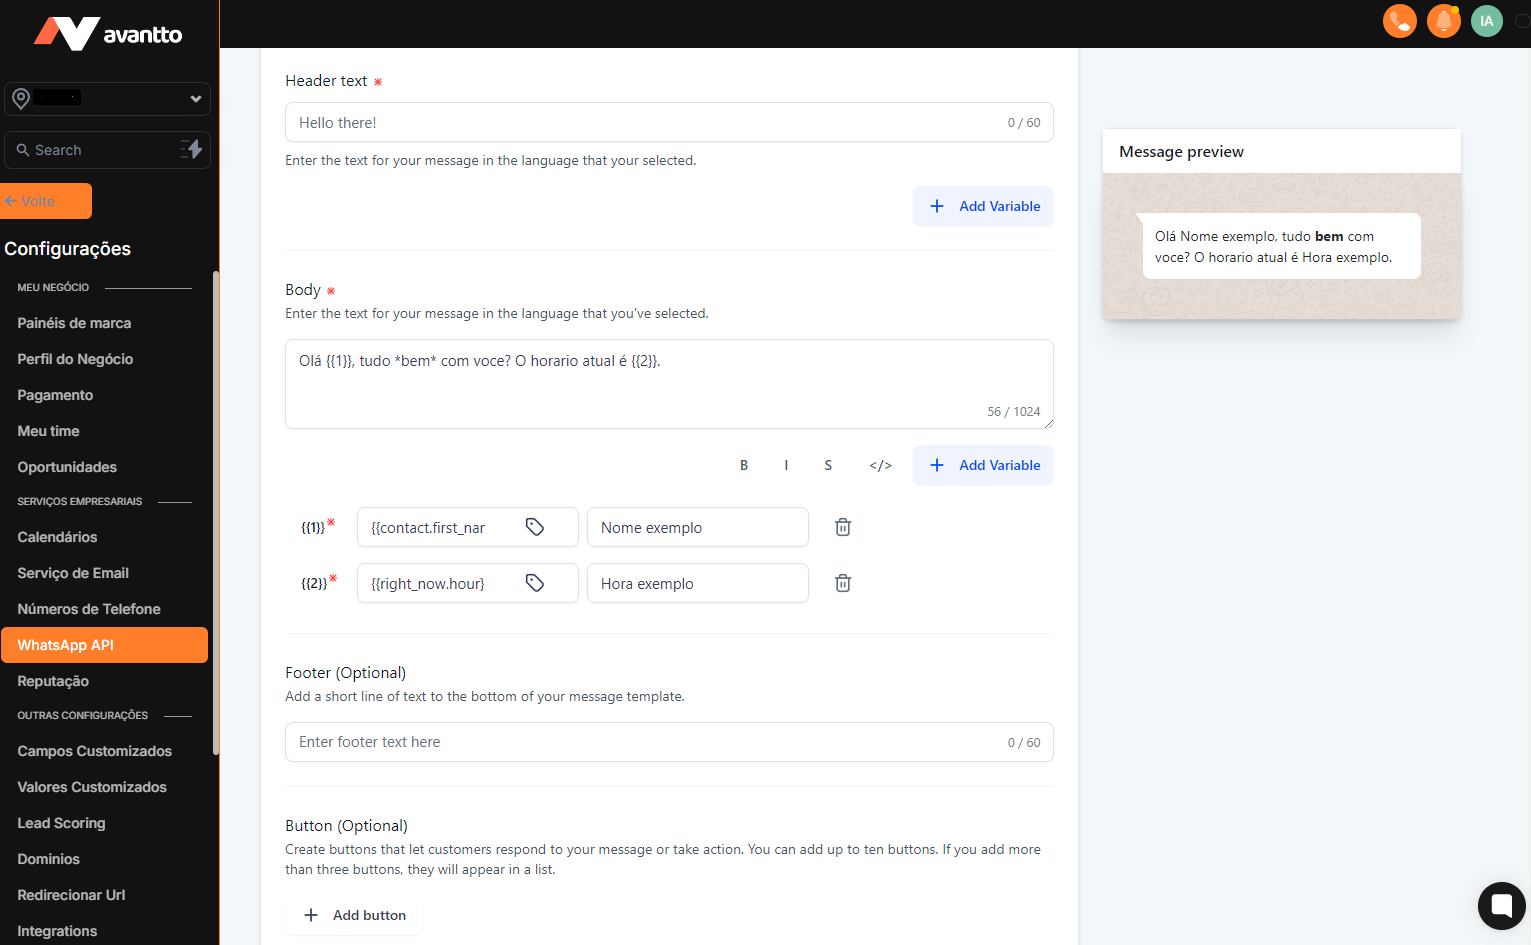
2.3 In the template creation tab, you will find the message body. The dynamic for using custom values is a bit different: by clicking "Add Variable", you create a variable {{x}} within the body of the text and configure what the custom value will be in the fields below. You can see in real-time how the message is turning out with the preview on the right. Besides the message body, you can configure a footer, although this is optional, as well as add buttons. After configuring the message body, click "Create" to create the template and check if its status was approved in the previous panel. Pay attention to the name and variables in the body of the text; if they are configured incorrectly, the template will be rejected.
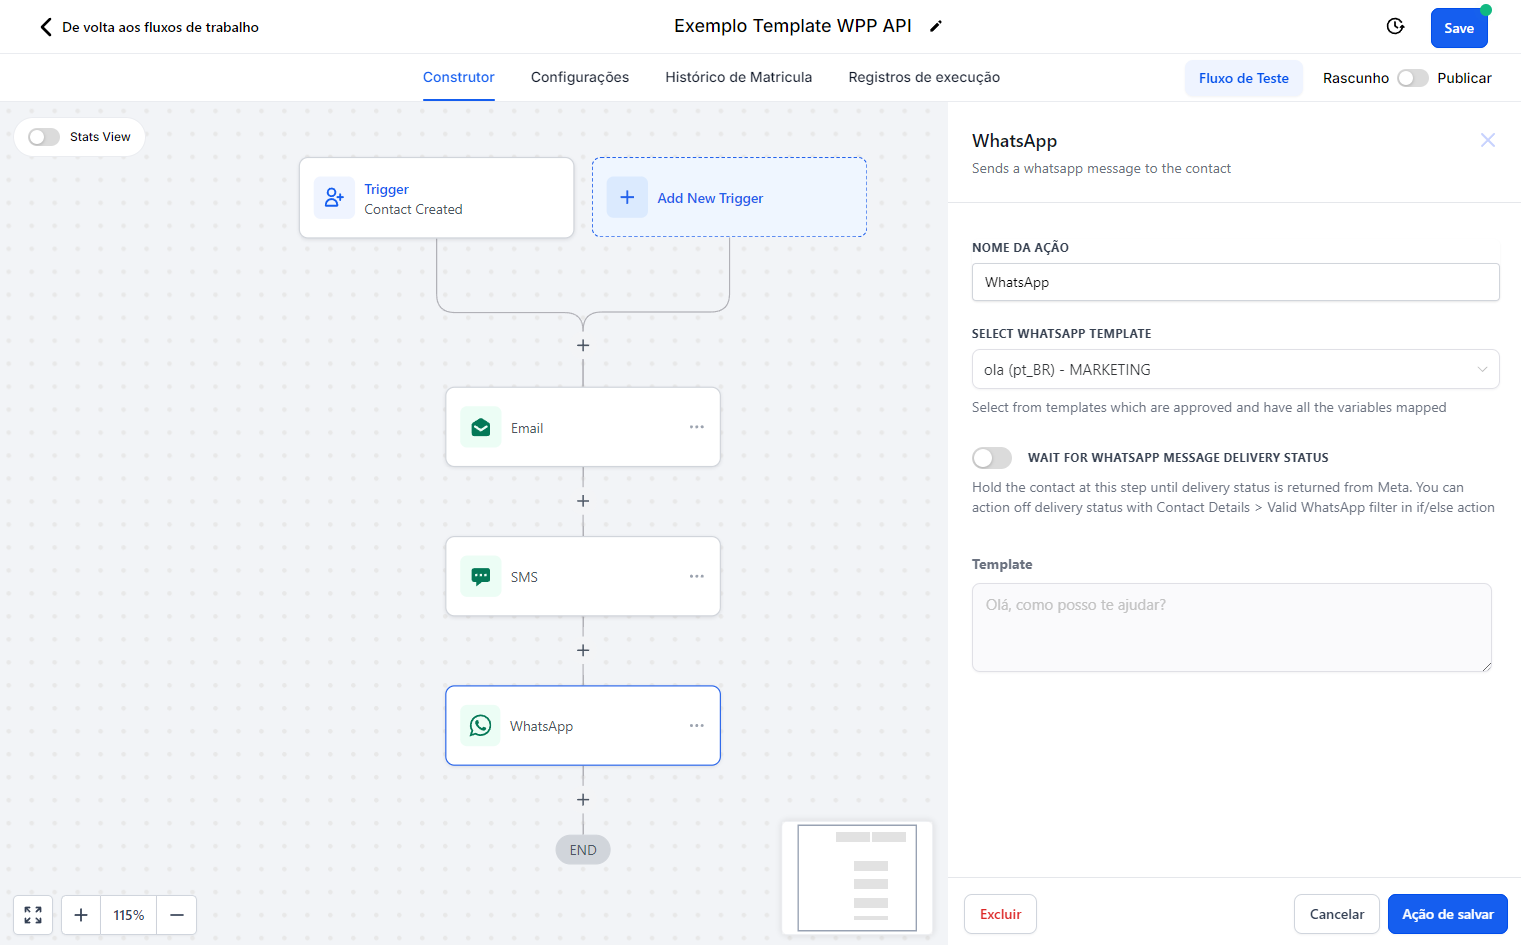
3.1 Within the automation, choose the "WhatsApp" action and select the template you want to use at this stage of the automation. You can confirm the message body below. It is important to remember that all WhatsApp messages that came by default in the account are not configured; therefore, it is necessary to update your templates within the automation before proceeding.