This guide addresses the process of creating and managing users and teams on the Avantto platform, highlighting the necessary steps to configure access and integrations. The first step is to find the "Teams" field by accessing "Settings" and clicking on "My staff/Meu time," where you can add new users and manage those already registered. Next, when creating access and users, it is essential to fill in the mandatory information, allow users to set their own passwords, customize email signatures, and manage permissions according to each collaborator's responsibilities. It is also important to assign appropriate roles, such as "User" or "Admin," to ensure efficient control of permissions. The third step involves integrating users with external tools, such as Google Meet, Zoom, and email platforms, allowing calendar synchronization and meeting automation. The main objective of this procedure is to optimize team management in Avantto, facilitating communication and collaboration among organization members.

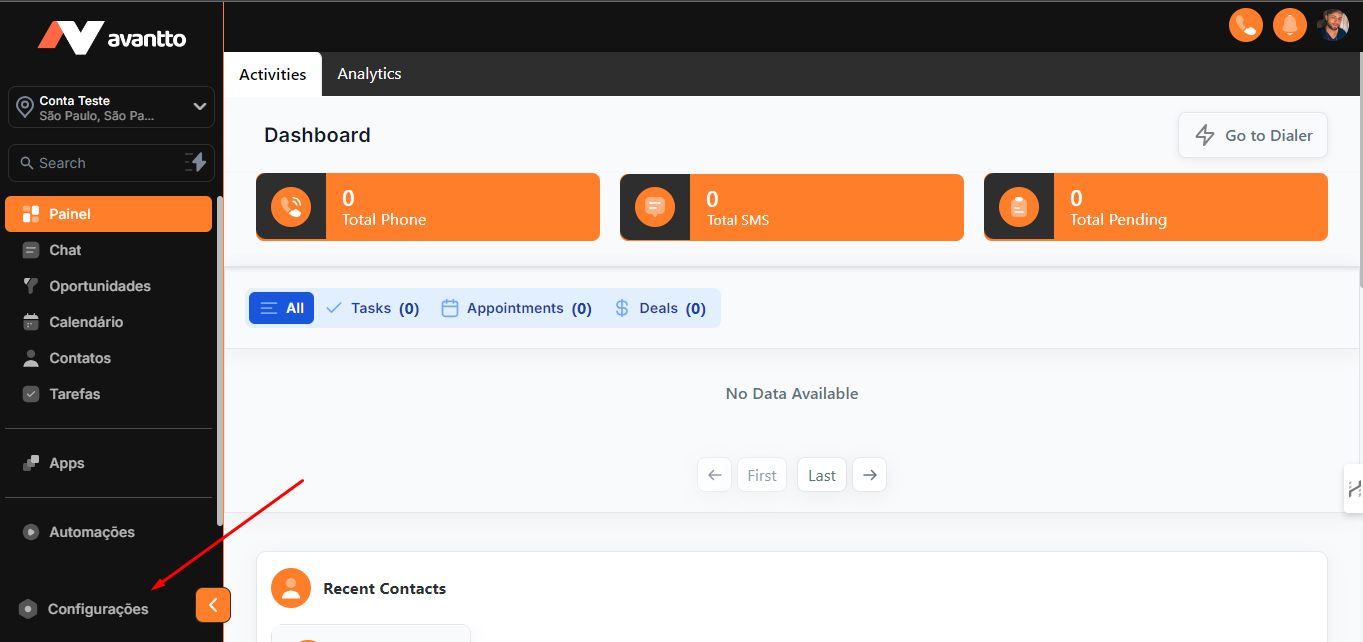
1.1 To start, click on "Settings" in the left-hand menu.
1.2 Then, in the same menu, further down, find and click on "My staff/Meu time".
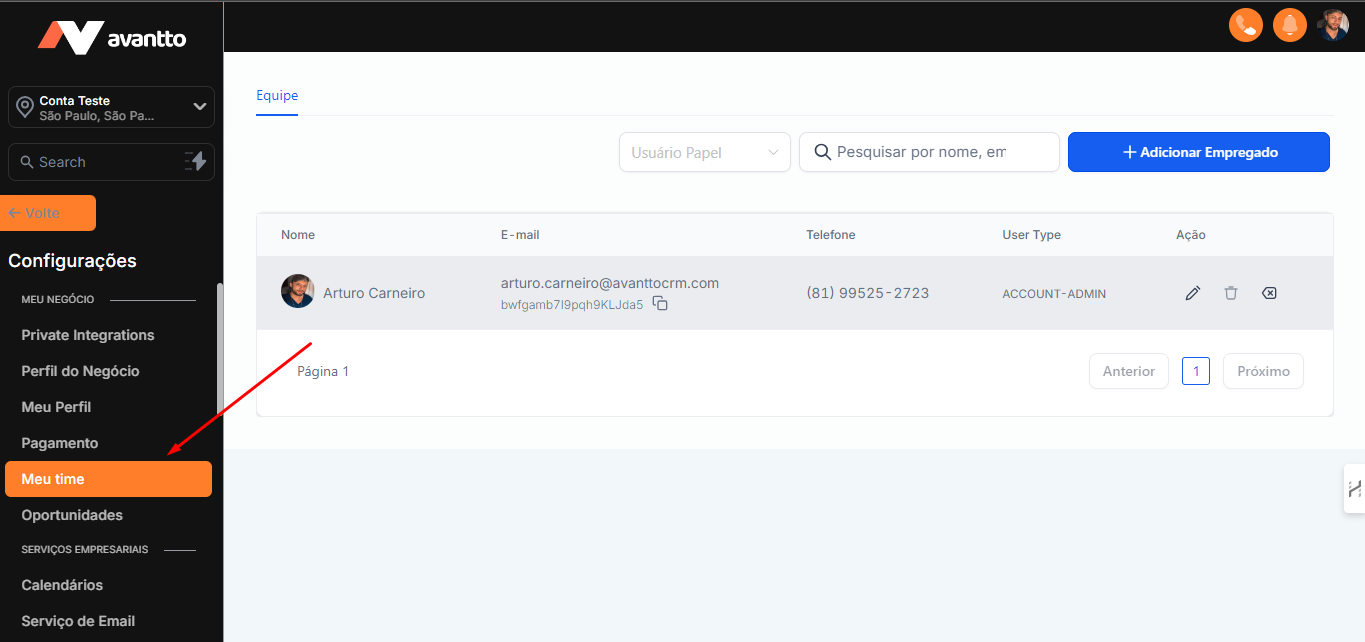
1.3 In this section, click on "Adicionar/Add" to include new users. In this field, you can also manage and edit the users already registered in Avantto as needed.

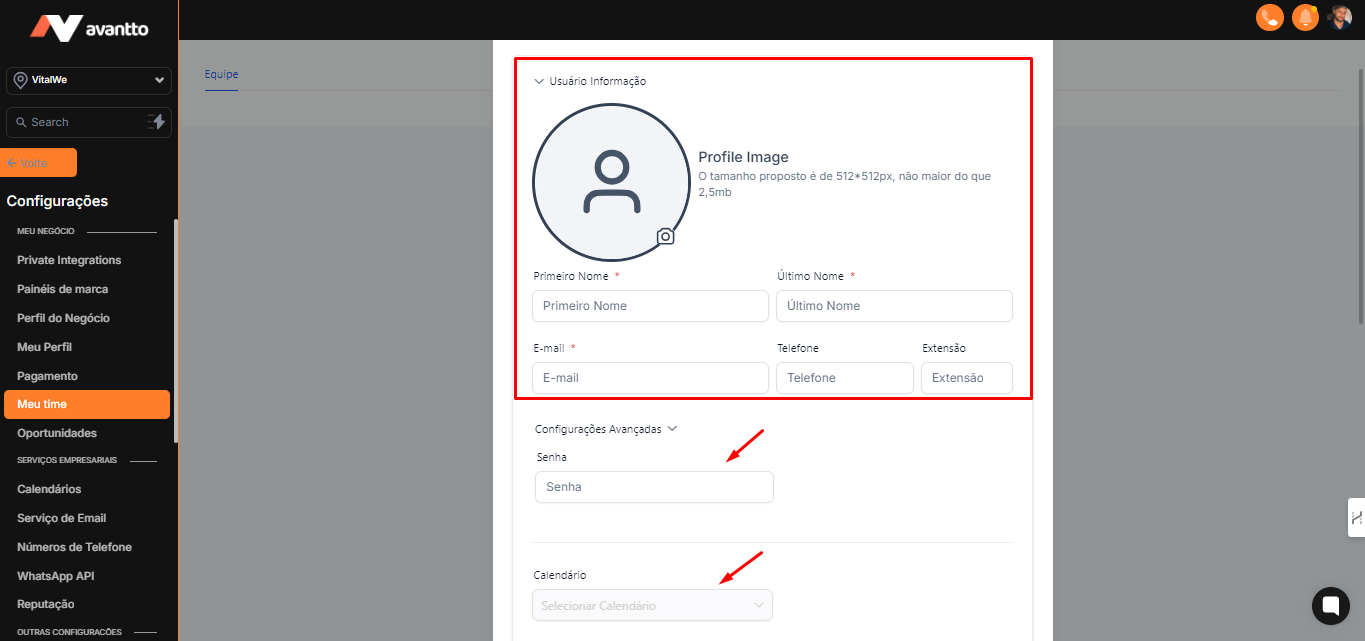
2.1 Fill in the mandatory user information. In "Advanced Settings", further down, there is an option to create a password, but it is recommended that the user sets it themselves. In the "Calendar" section, you can link users to the created calendars.
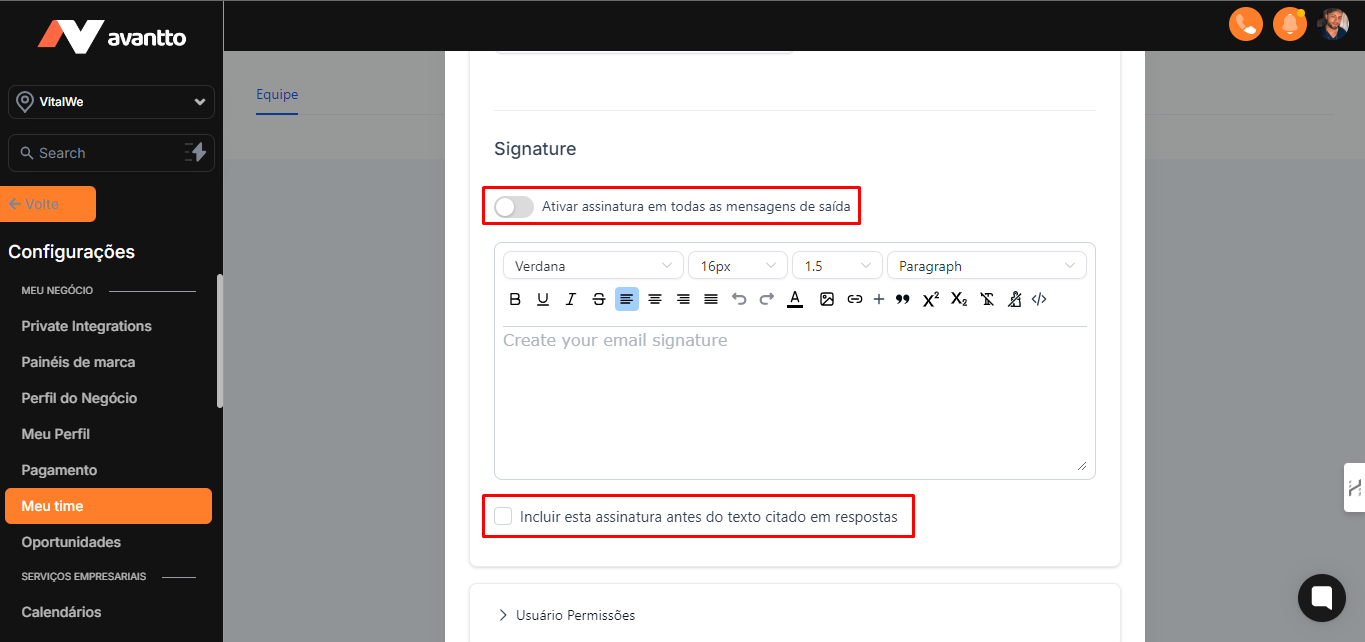
2.2 Personalize the email signature. In the top highlight, there is the option "Enable signature on all outgoing messages". At the bottom, set "Include this signature before quoted text in replies".
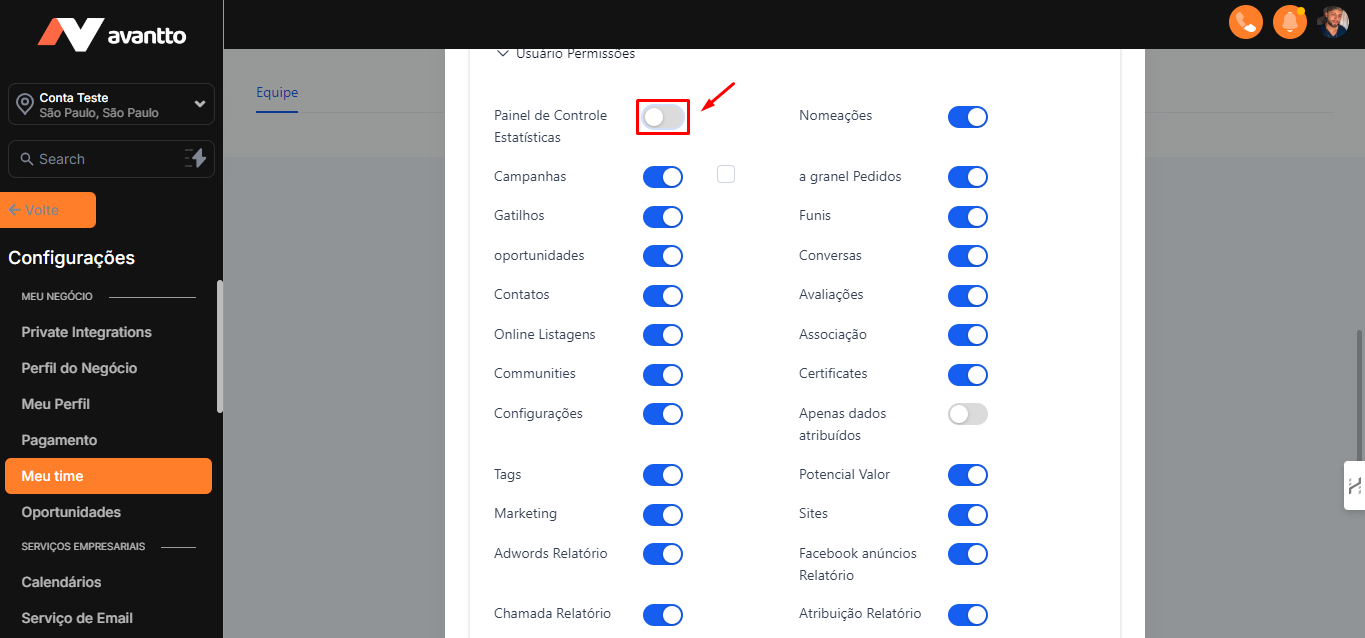
2.3 Manage permissions by adjusting or assigning according to the levels and area of expertise of the employee. This allows efficient control of functions and access according to each one's responsibilities.
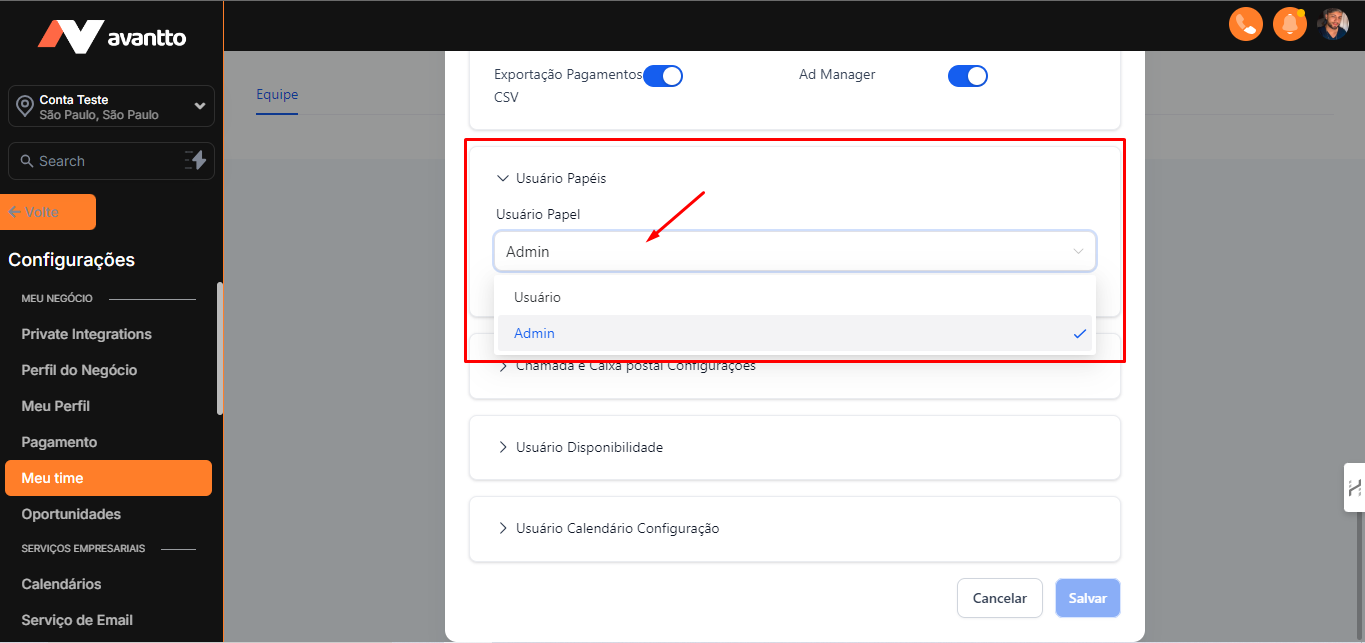
2.4 Select the user's role:
User: Cannot change their own permissions.
Admin: Has full access to make all changes.
If there is this hierarchy in the organization, it is recommended to set employees as "User", ensuring a more secure and centralized control of permissions.
2.5 Configure "Call and Voicemail":
Assign registered numbers to the person.
Choose where the call will be forwarded.
Set the default channel.
If the call goes to voicemail, configure the voicemail messages and set the call time (e.g., 10s).
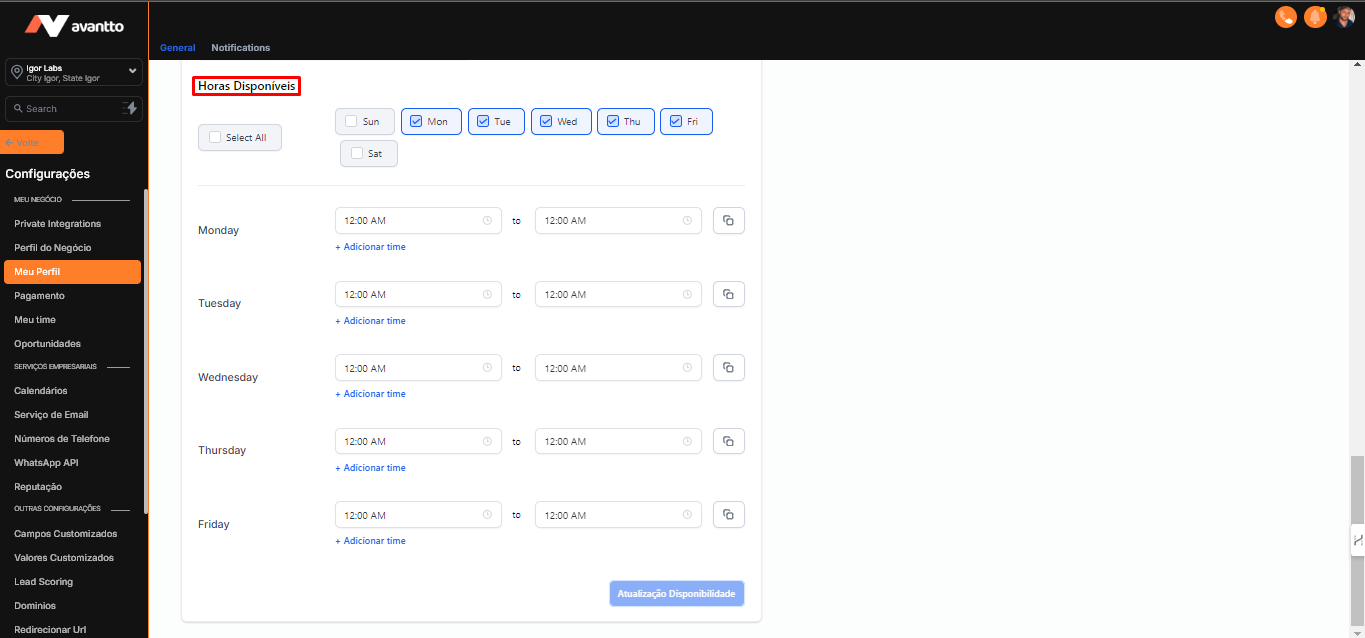
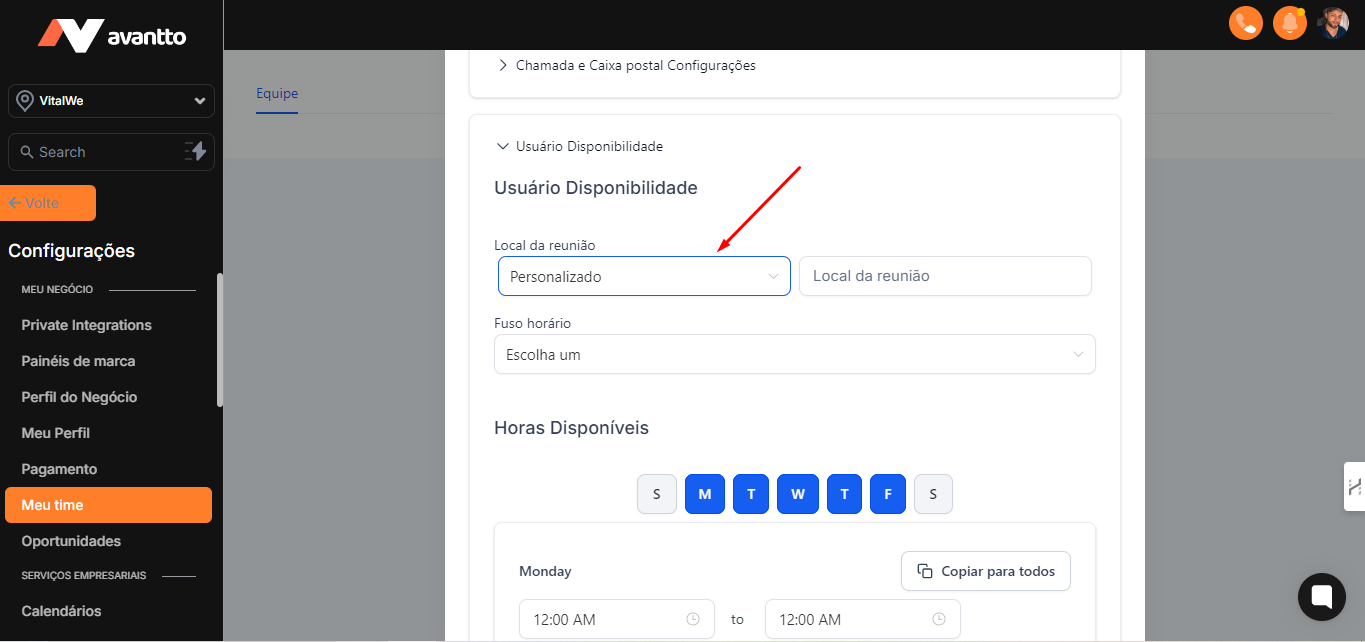
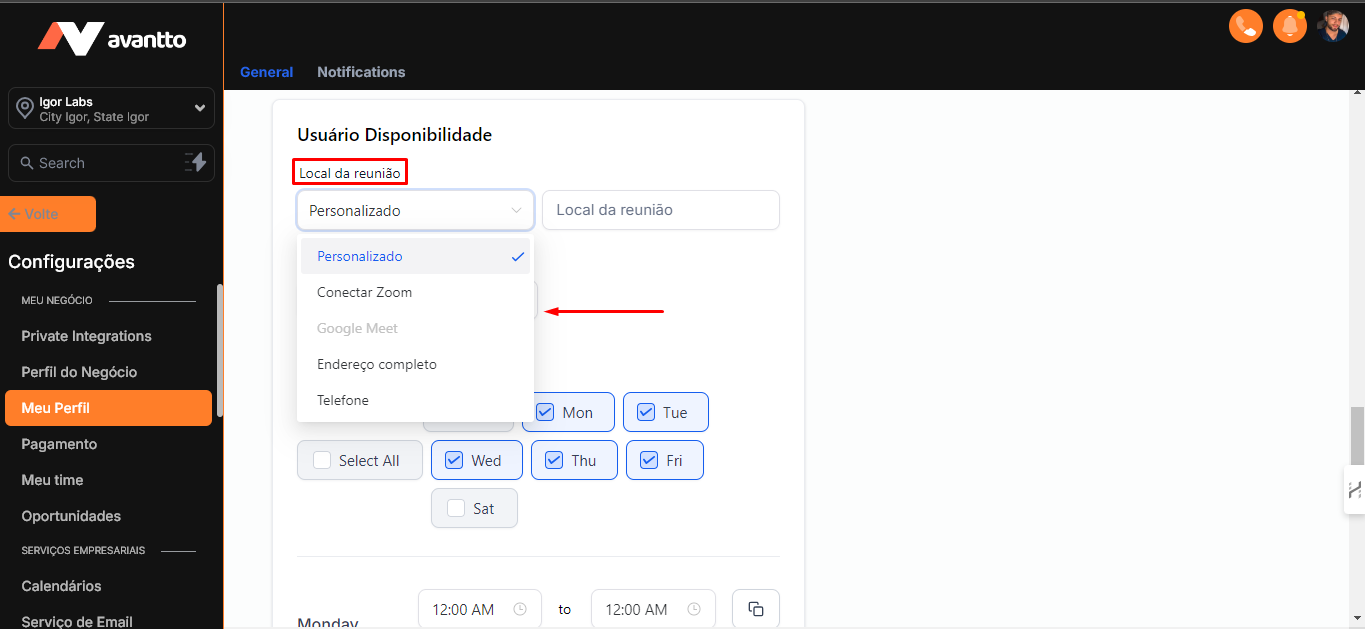
2.6 Adjust the schedule availability in the "User Availability" field. After integrating with the calendar, the user can change the meeting location and add the video conferencing channel, detailed below.
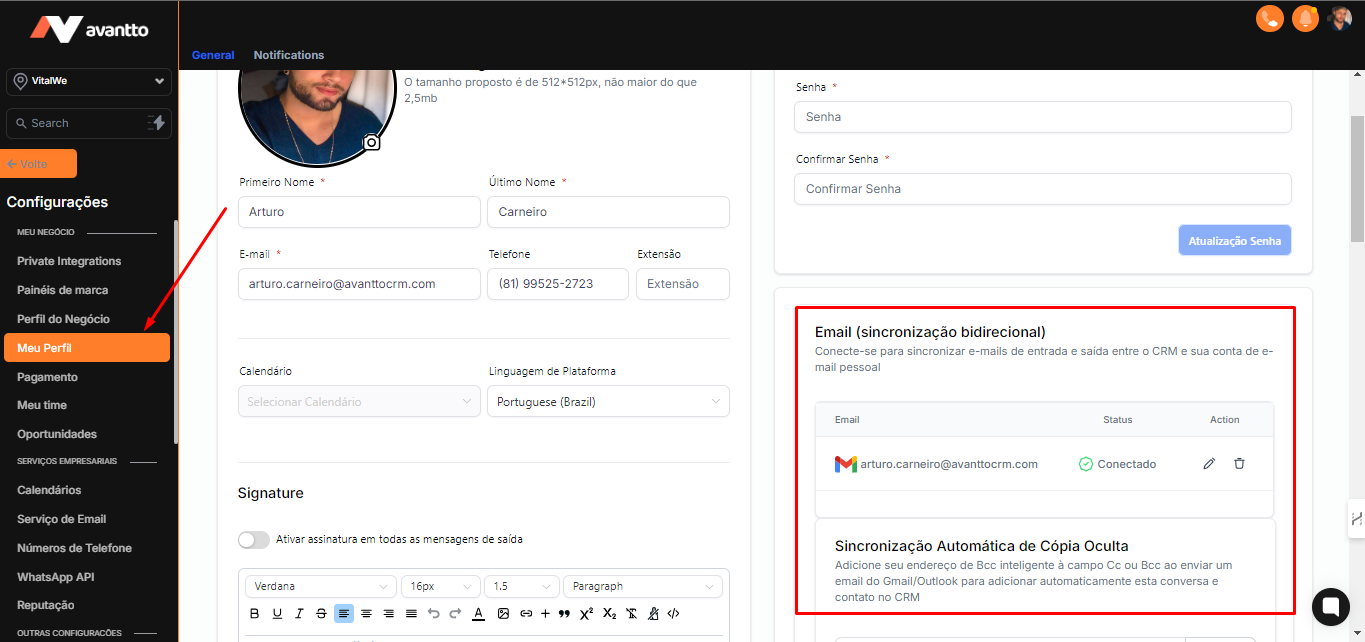
3.1 To integrate the email tool used, go to the "Settings" > "My Profile/Meu Perfil" menu, scroll to the "Email" option and synchronize with your main email tool.
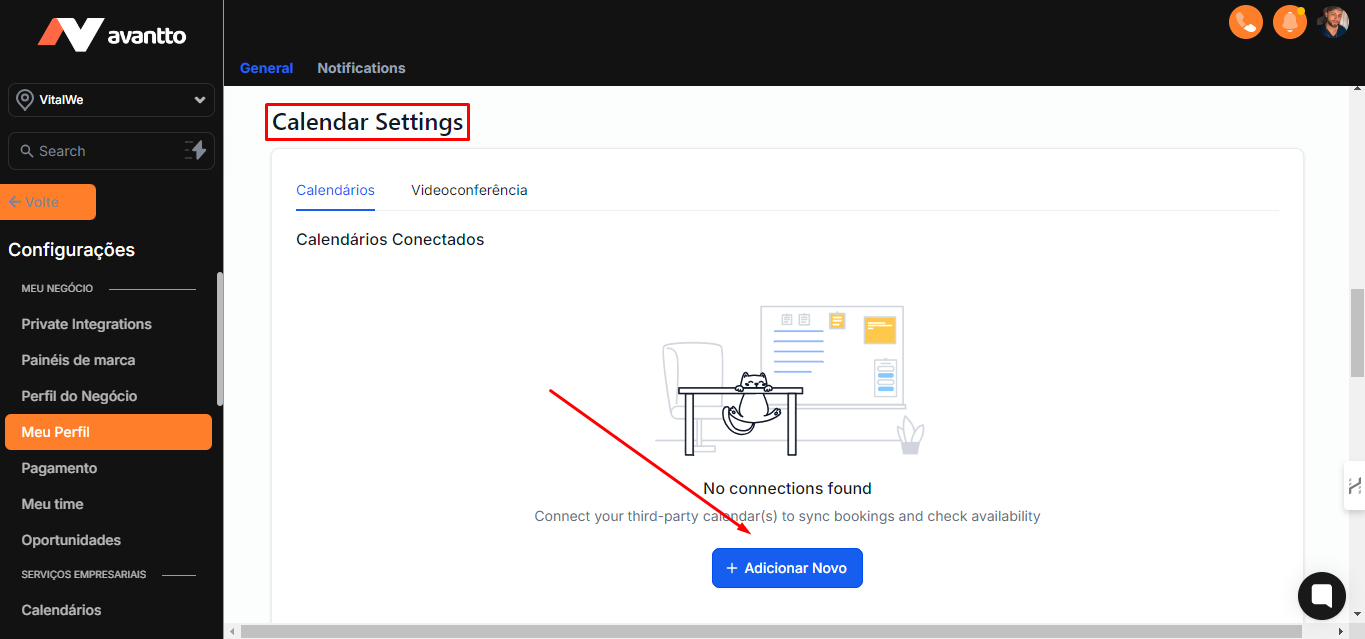
3.2 Integration with the calendar is also essential. For this, in the "Calendar Settings" > "Calendars" section, click on "Add/Adicionar" in the corresponding option.
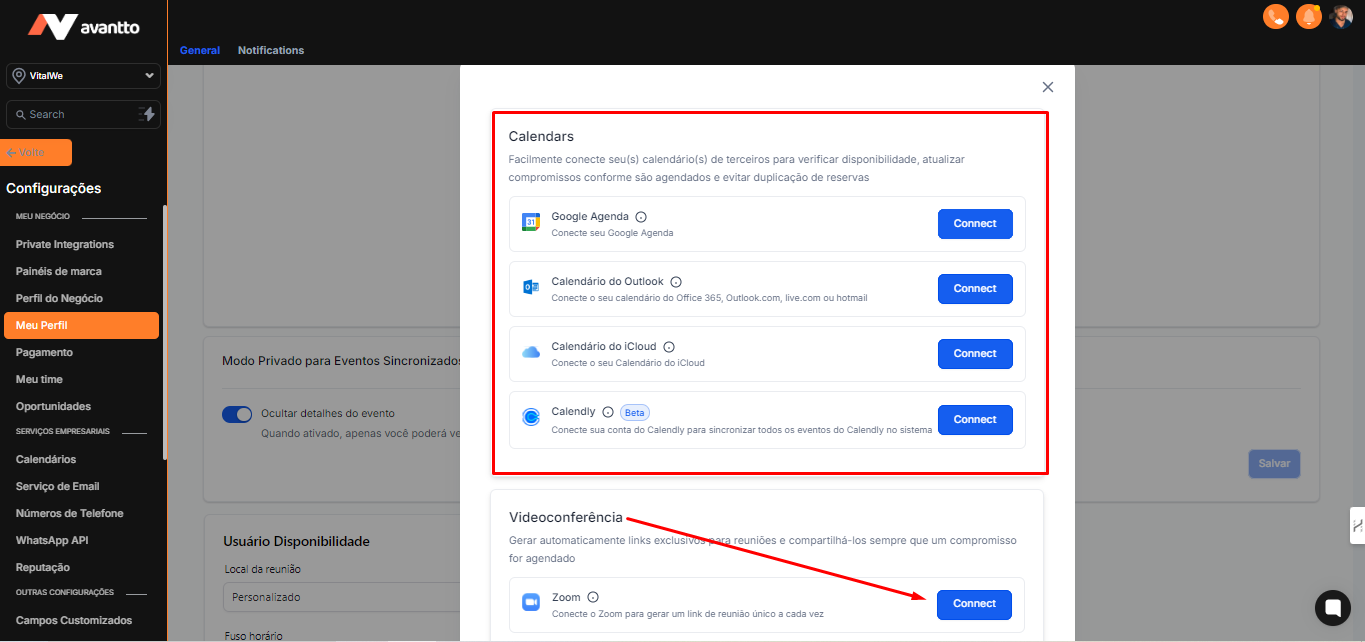
3.3 In the "Calendars" option, integrate with Google Calendar, Outlook, iCloud, or Calendly, as needed. In the "Videoconferencing" option, connect with Zoom or Google Meet.
3.4 To ensure that your calendar is integrated and being used in automations, click on "Meeting Location/Local da Reunião" and select Google Meet or Zoom. Thus, whenever a meeting is scheduled, a link will be automatically created in Meet or Zoom.
3.5 Finally, set up the days of the week and times when you are available.