The Contact fields are located on the left-hand side within the contact view.
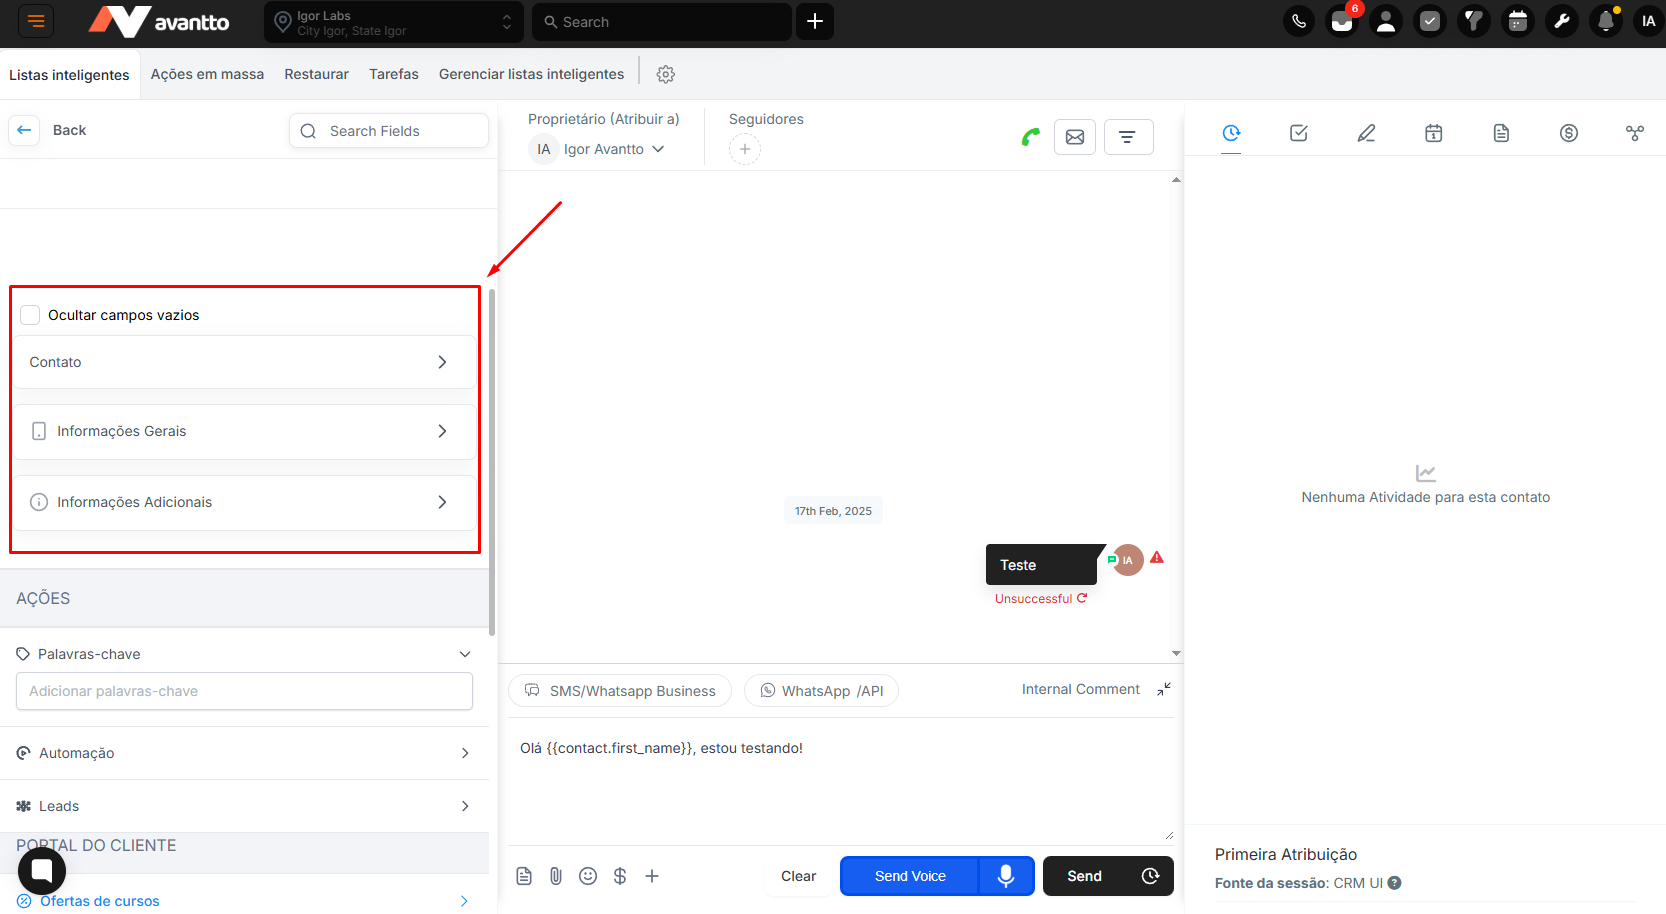
The Opportunity fields, on the other hand, are located within the Opportunity Card.

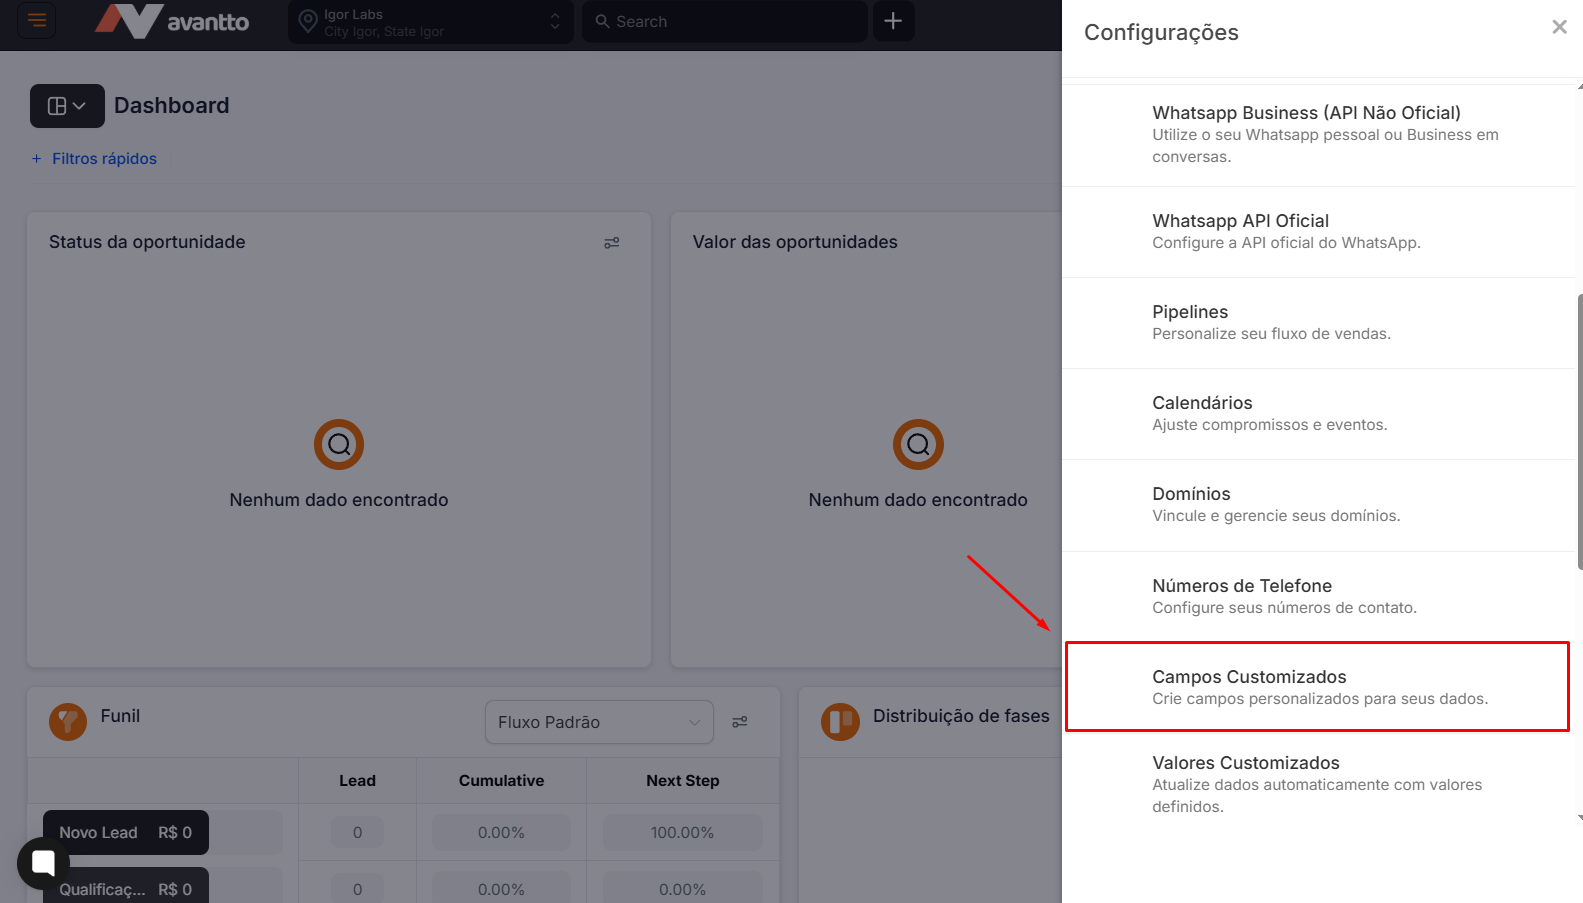
1. Access Opportunity or Contact Fields
To see the existing fields, click on "Settings" and then on “Customizable Fields”. Here, you’ll see all the fields and be able to interact with them (add, hide, or reorganize). Additionally, you can also check the unique field keys for use in automations or personalized messages.
2. Set Up Custom Fields
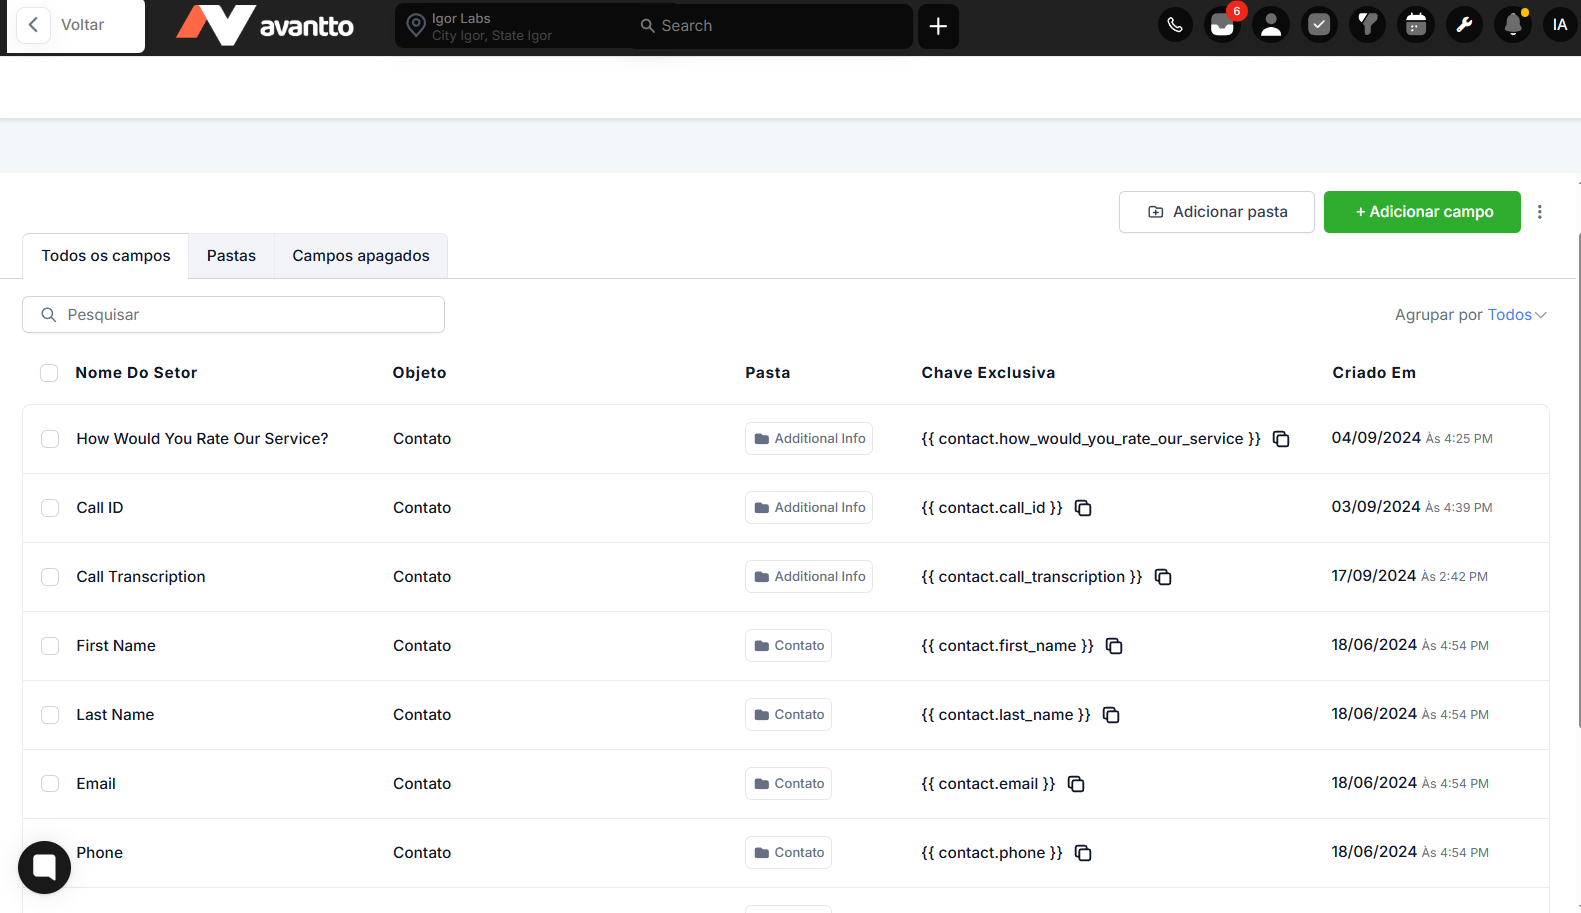
2.1 Add New Custom Fields
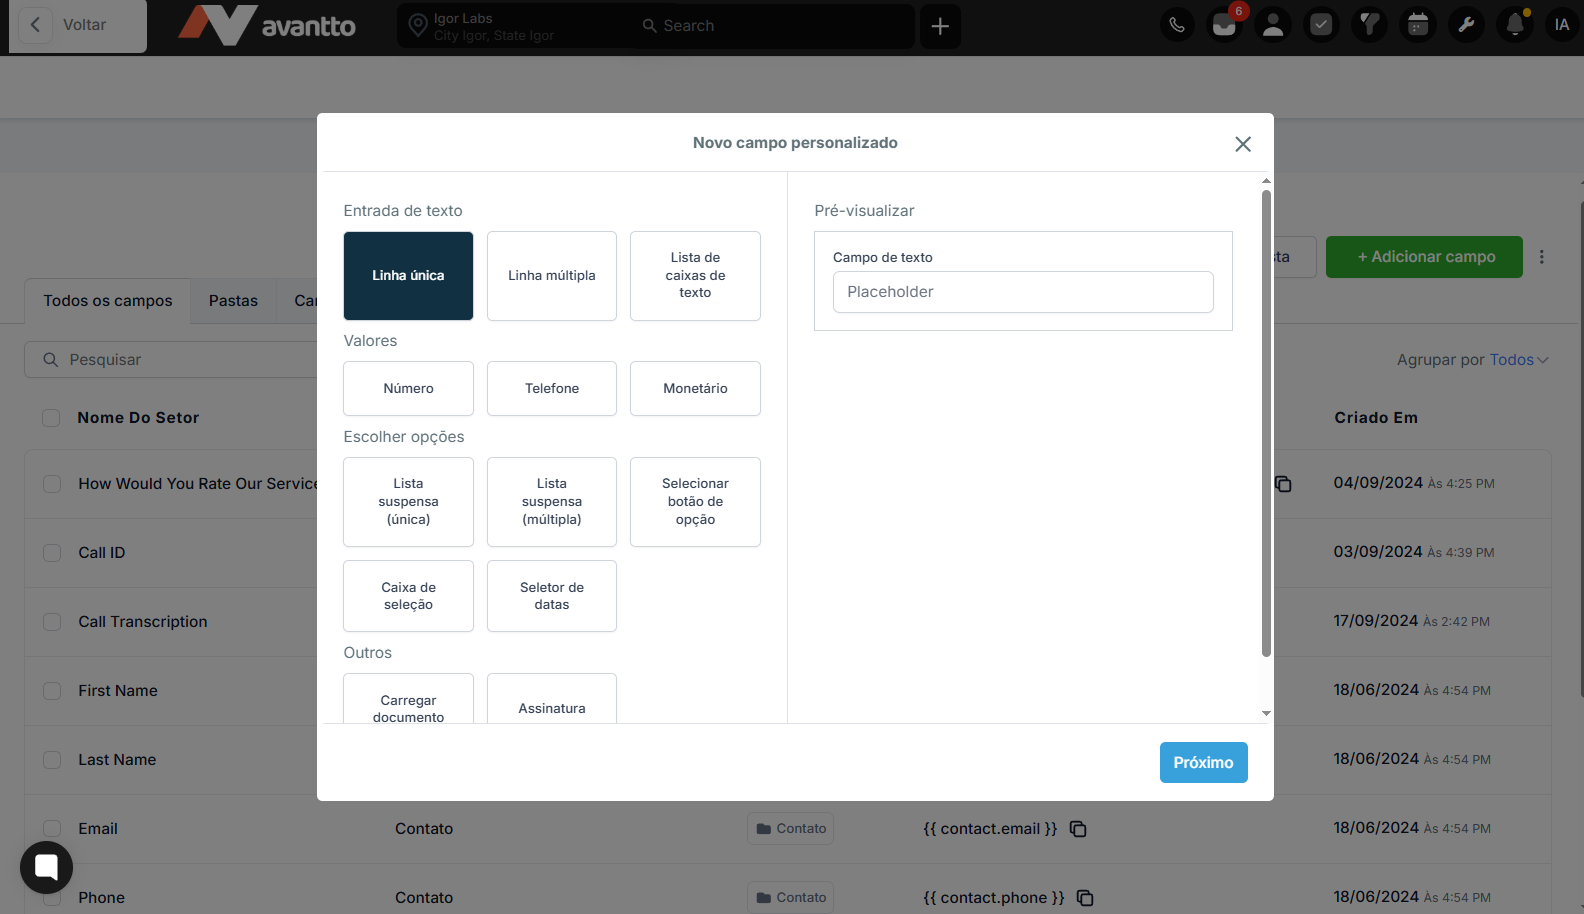
Click on "Add Field" and select the desired format (short text, multiline, numeric, date, drop-down, etc.). Once selected, you'll see a preview of what the field will look like.
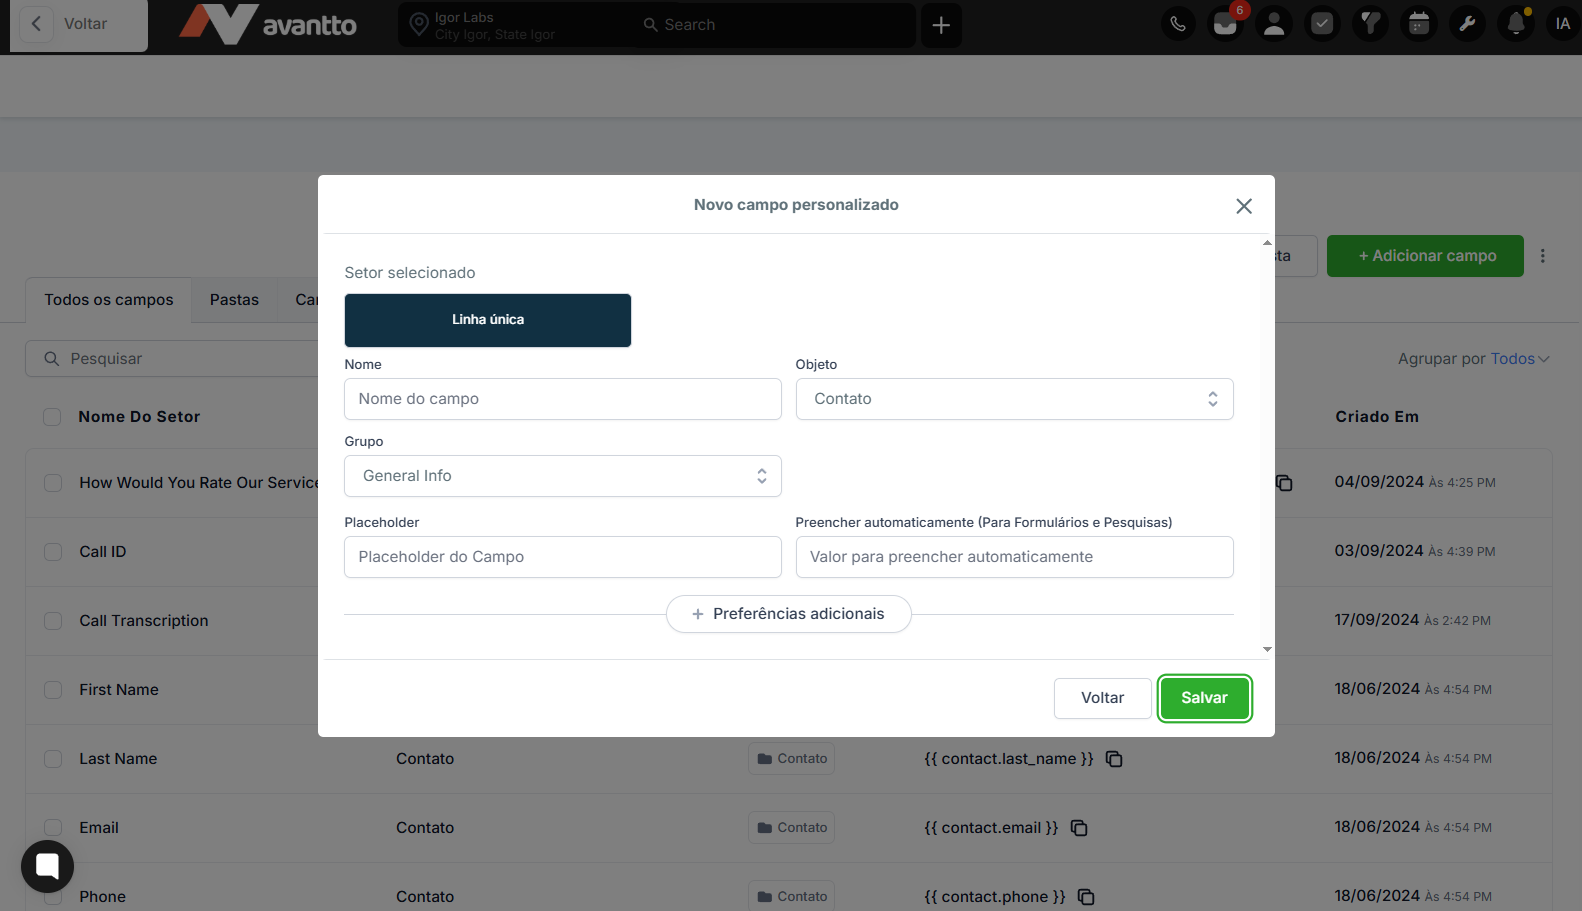
Set the field preferences, making it mandatory:
Name: The title of your Field;
Object: Whether the created field will be for Contact or Opportunity;
Group: In which folder you want to save your field.
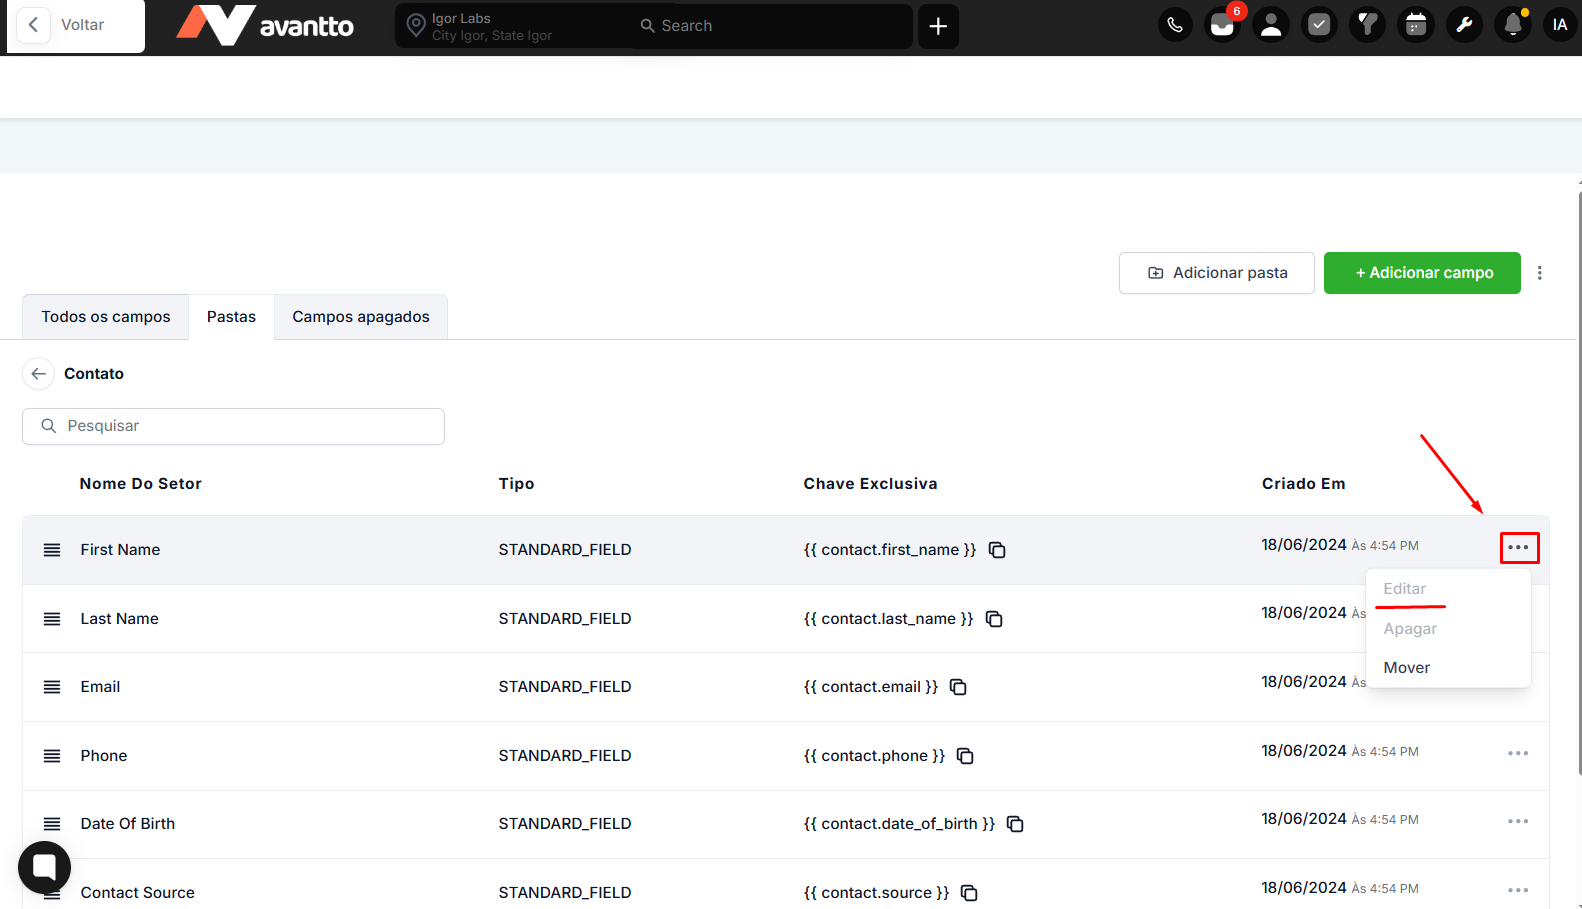
2.2 Reorder or Edit Existing Fields
To reorder the fields, you need to enter the folder where the field is located. Therefore, click on the respective folder, and finally, click on the icon with 3 bars and drag them to the desired position.
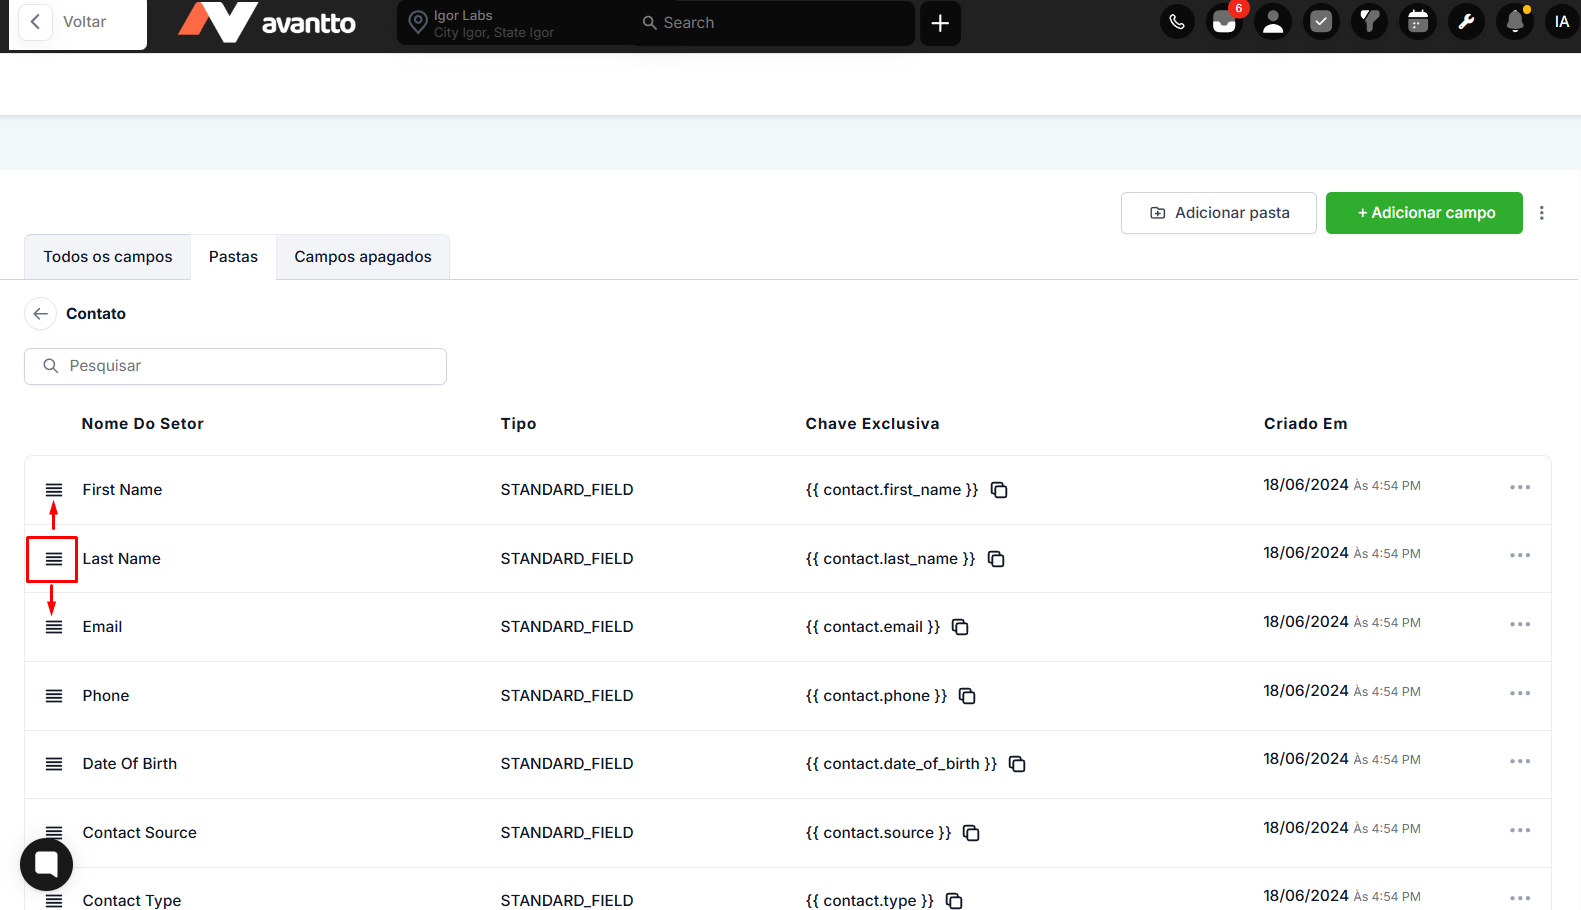
To edit a field, find it inside the folder, click the 3 dots on its right side, and adjust its properties (name, preferences, group, etc.). Note that default fields (Emails, Names, etc.) cannot be modified, only reordered.