1.1 In the left menu, click on Settings.
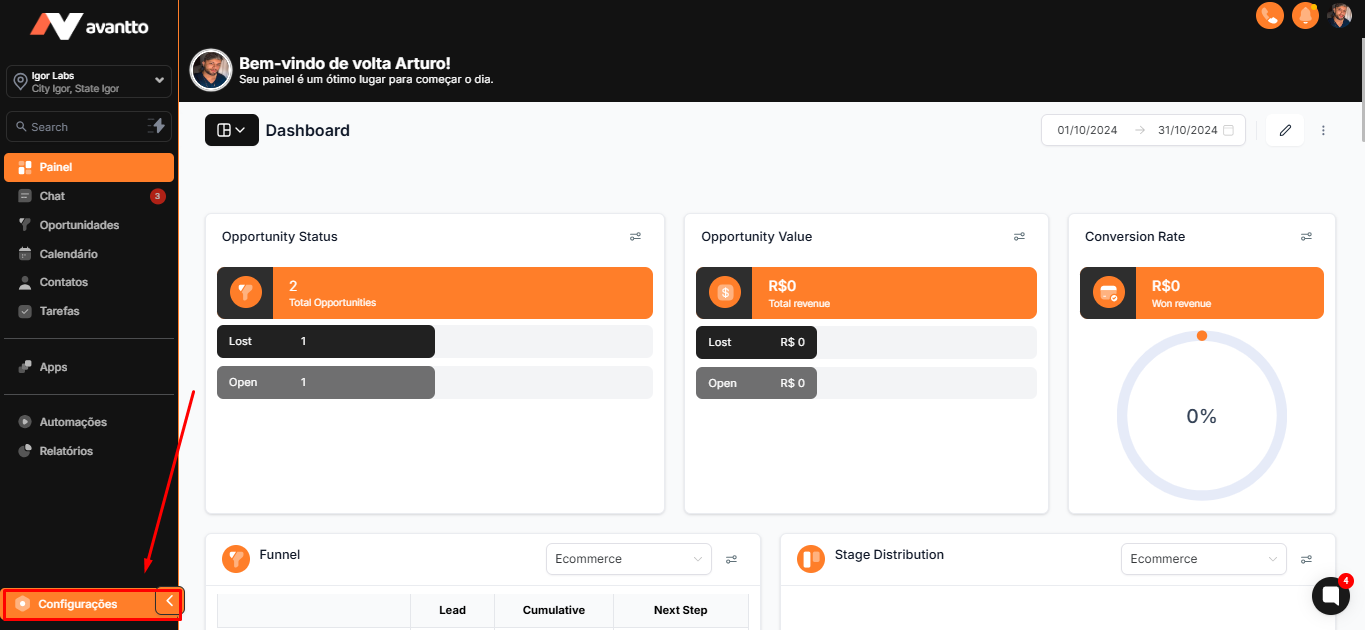
1.2 Select the option My Profile.
Scroll down the page until you find the Calendar Settings and click on Add New.
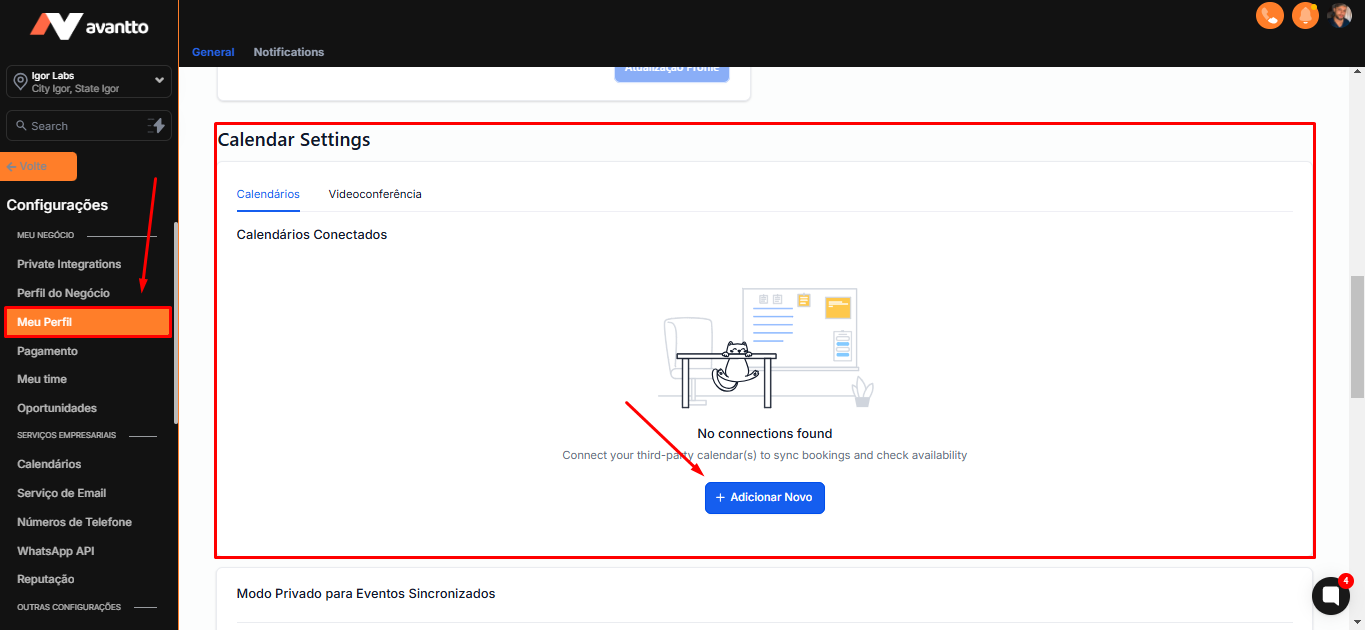
1.3 When clicking on Add New, select Connect. You will be redirected to the integrations page.

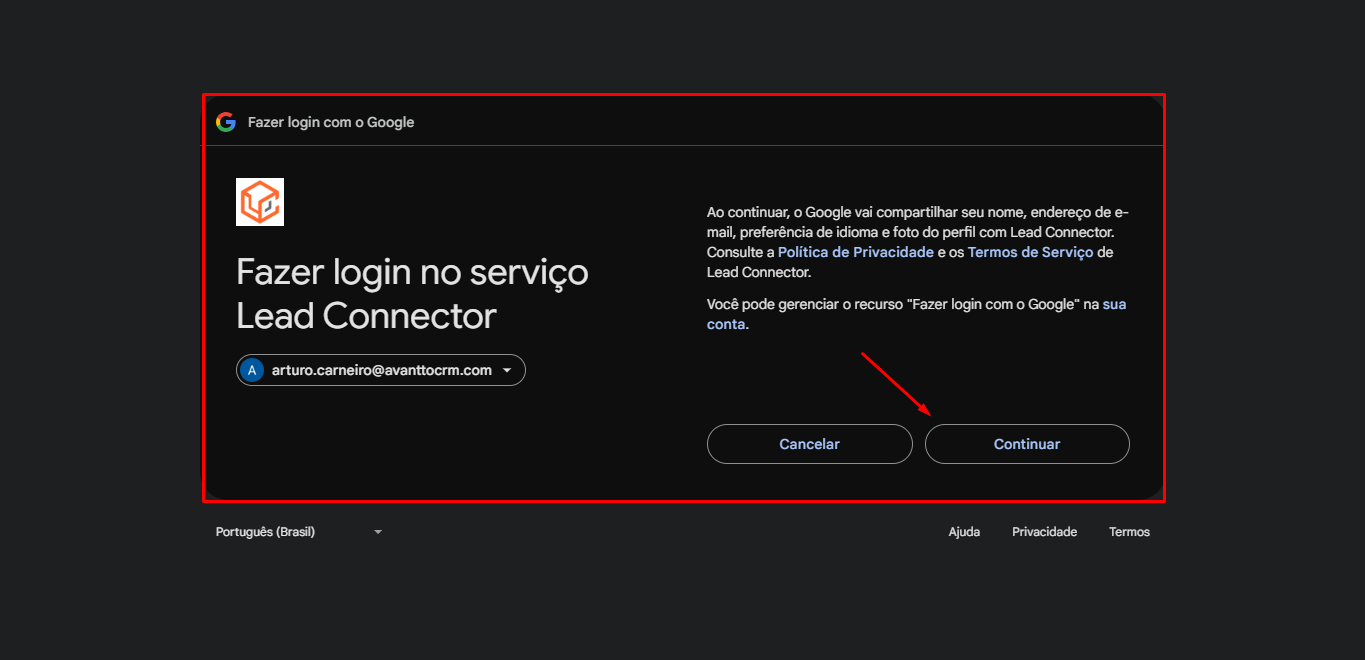
1.4 If you already have an account added (such as a Google Ads account), you will see the account already connected. To add a new account, click on "Sign In with Google" below "add another account".
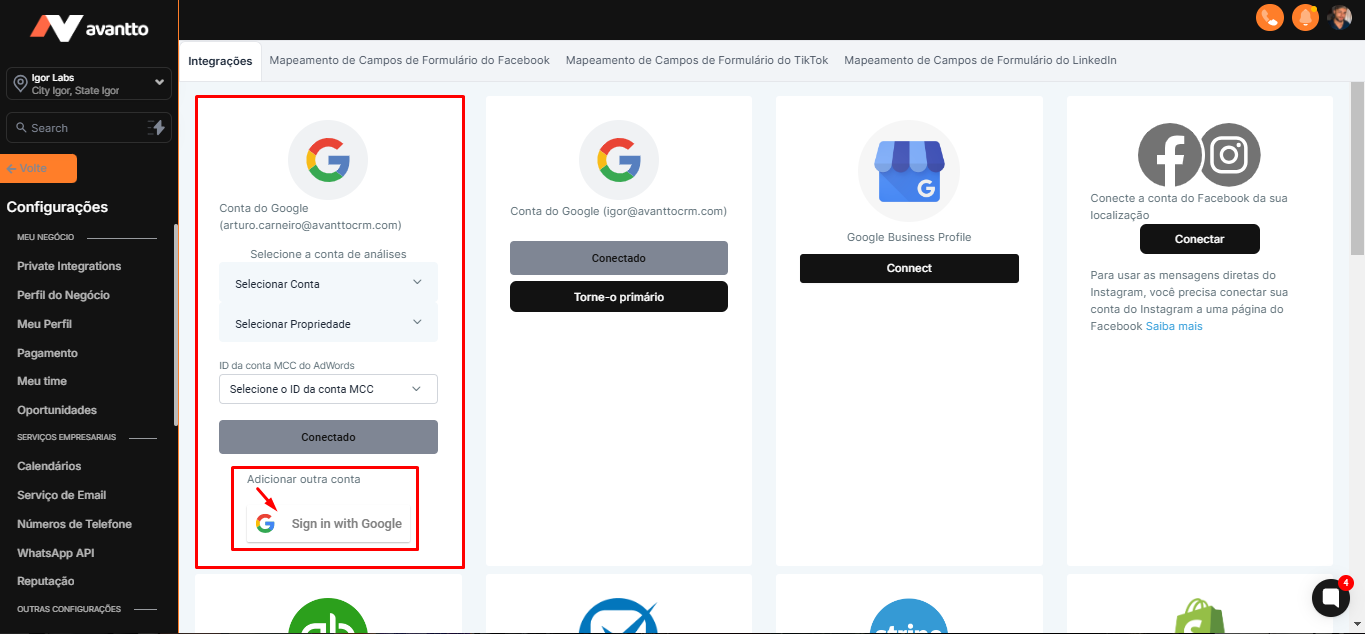
1.5 Select the Google account you want to connect (for example, Igor Venturin) and click on Continue. Then, allow the requested permissions to complete the connection.
1.6 After connecting, go back to your profile and check if your calendar is connected, as shown in the image. If not, click again on Add New to sync Google Calendar (performing steps 1.2 to step once again).
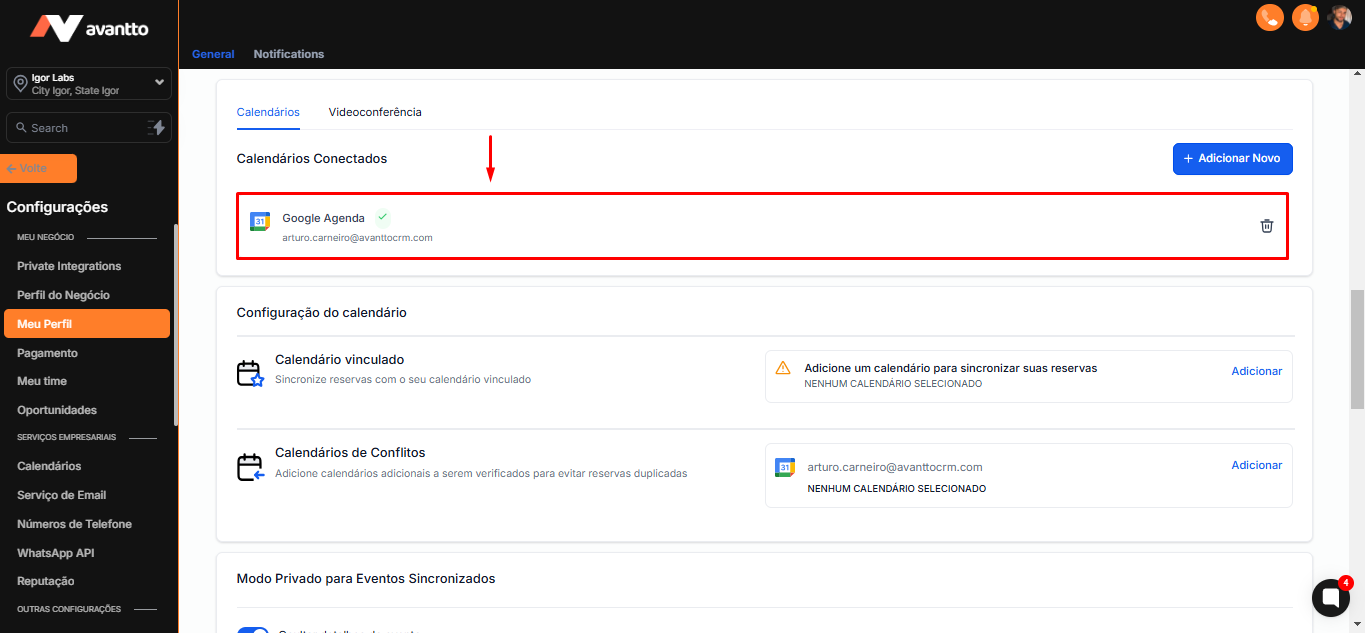
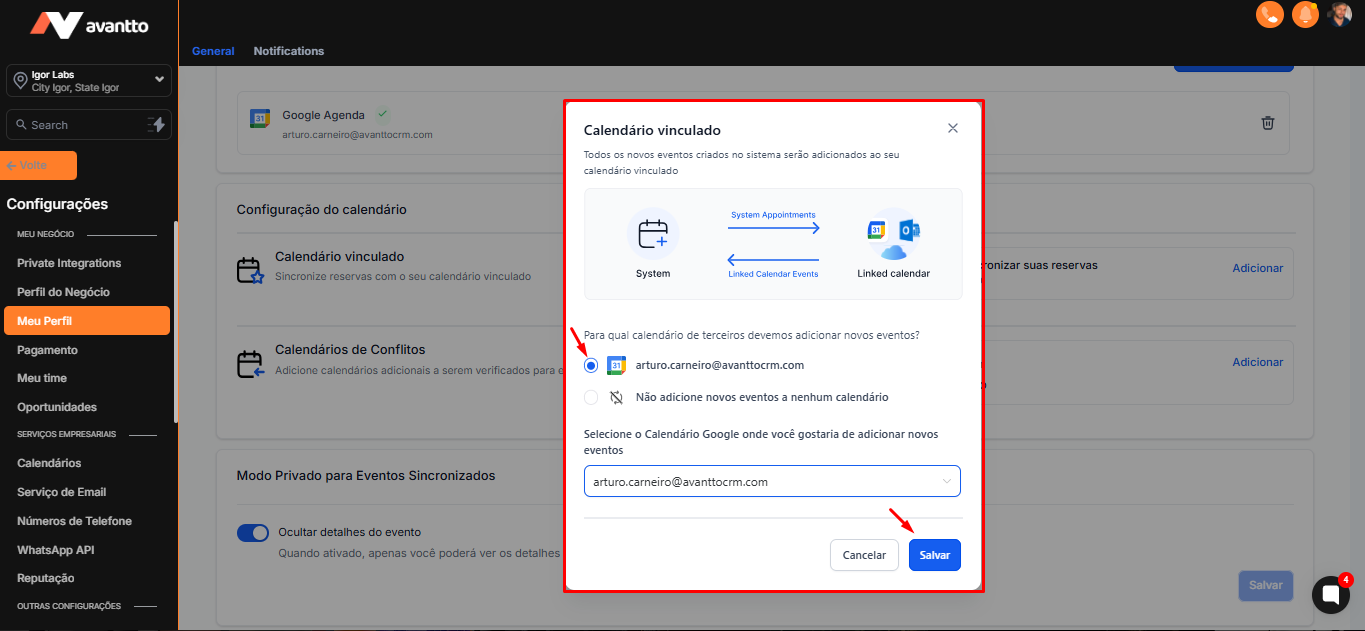
1.7 The linked calendar is where meetings created in Avantto will be recorded.
1.8 Select your account and click save.
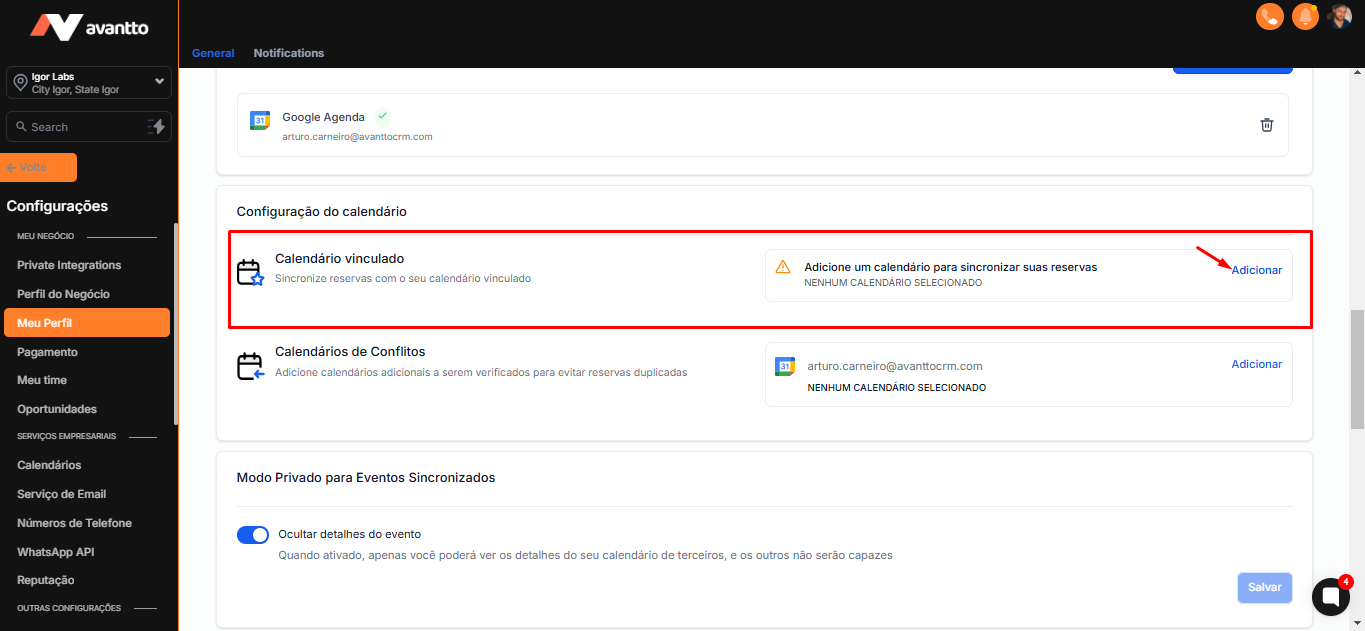
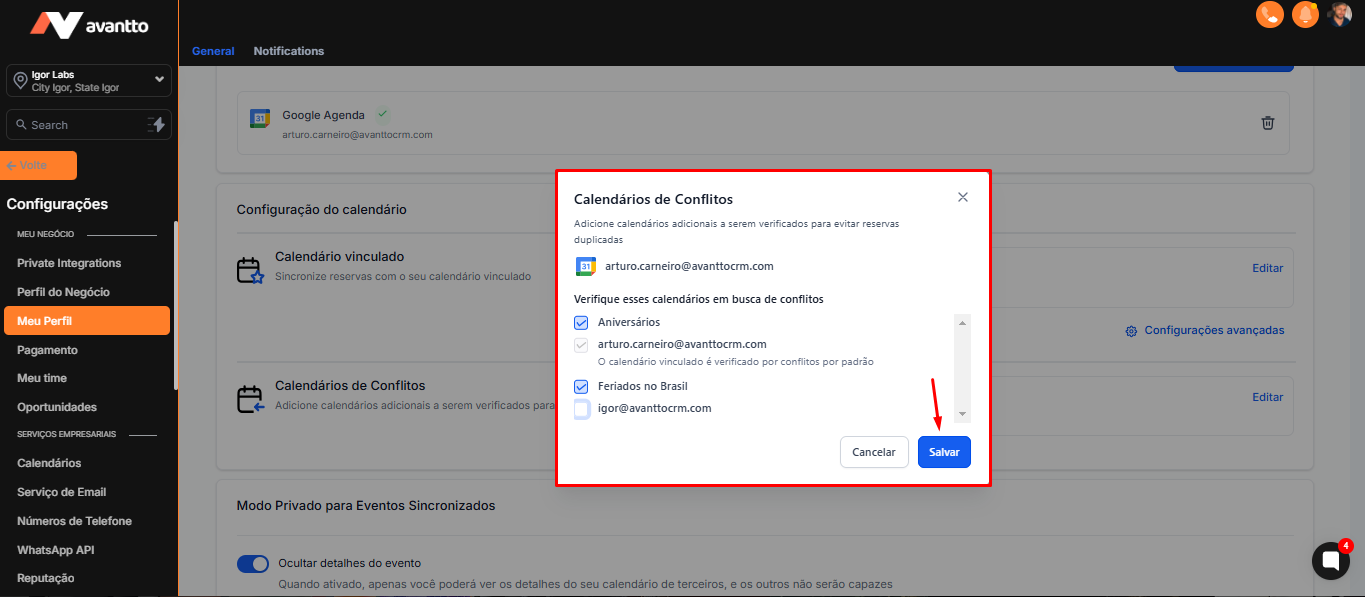
1.9 To avoid scheduling conflicts, you can add other calendars.

1.10 Click on Edit in the Conflict Calendar to select other calendars you want to be considered (e.g., birthdays or specific appointments).
After selecting the desired calendars, click on Save.
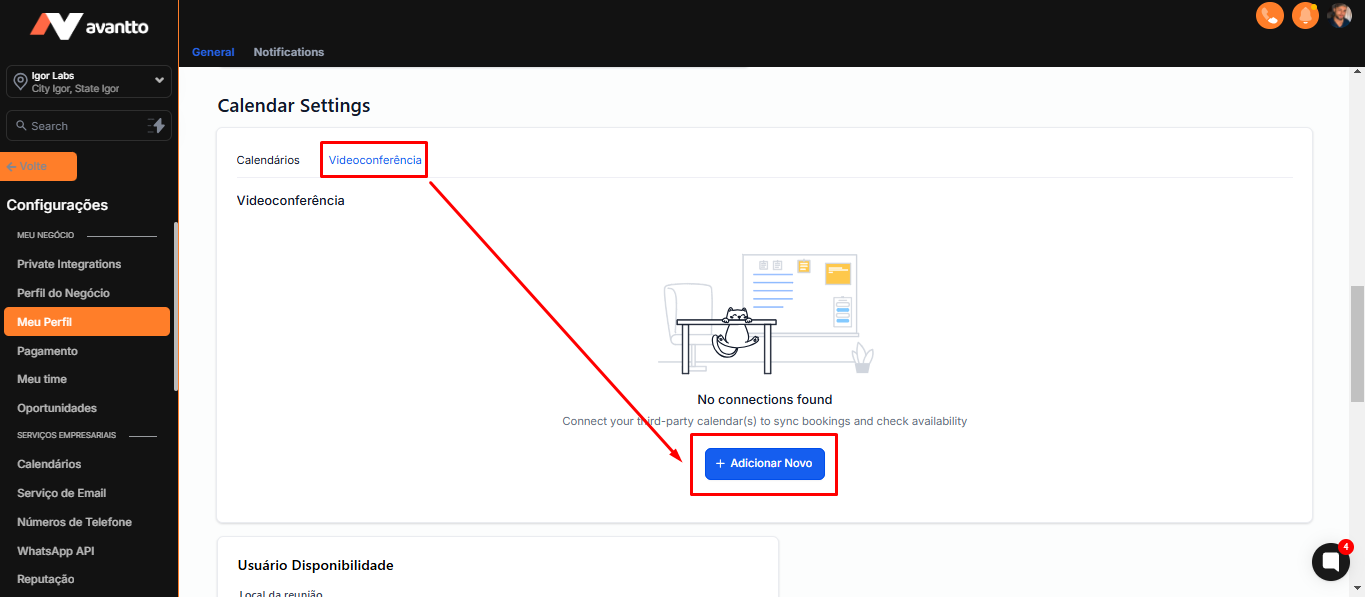
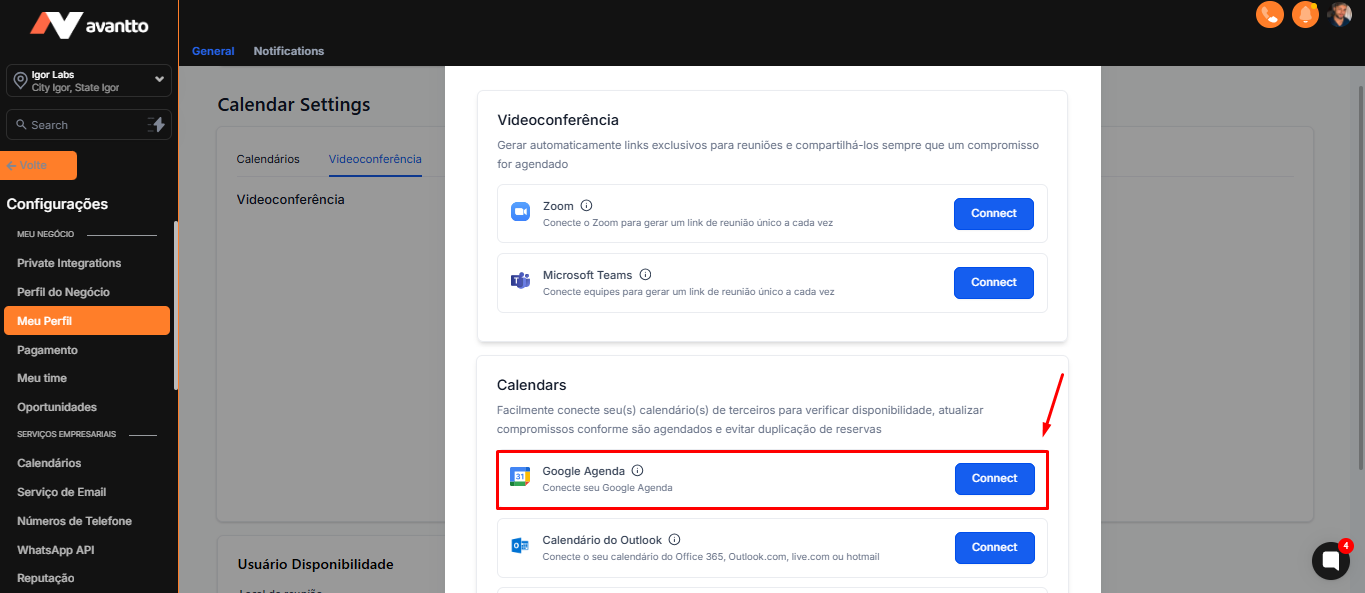
2.1 To connect Google Meet, go to the Video Conference section and click on Add New.
2.2 Google Meet will not appear directly, but you will see the option to connect Google Calendar. Click on Connect Google Calendar to link Google Meet.
If you want to choose Zoom, just connect it and follow the next steps by selecting Zoom instead of Google Meet.
2.3 After connecting, return to your profile and access the Availability Users section in Meeting location to confirm that Google Meet is available.
It is essential to set up the meeting location, as this ensures that the link will be generated automatically, both when creating an opportunity within calendars and through automations. For example, at Avantto, we have an automation that sends the online meeting link 10 minutes before the start. If this setting is not applied, that is, if Google Meet is not selected as the meeting location, the link will not be generated. Consequently, the automation will send a message with an empty link, which can cause confusion and delays in attending the meeting. Therefore, always check this setting to ensure a smooth and efficient experience.
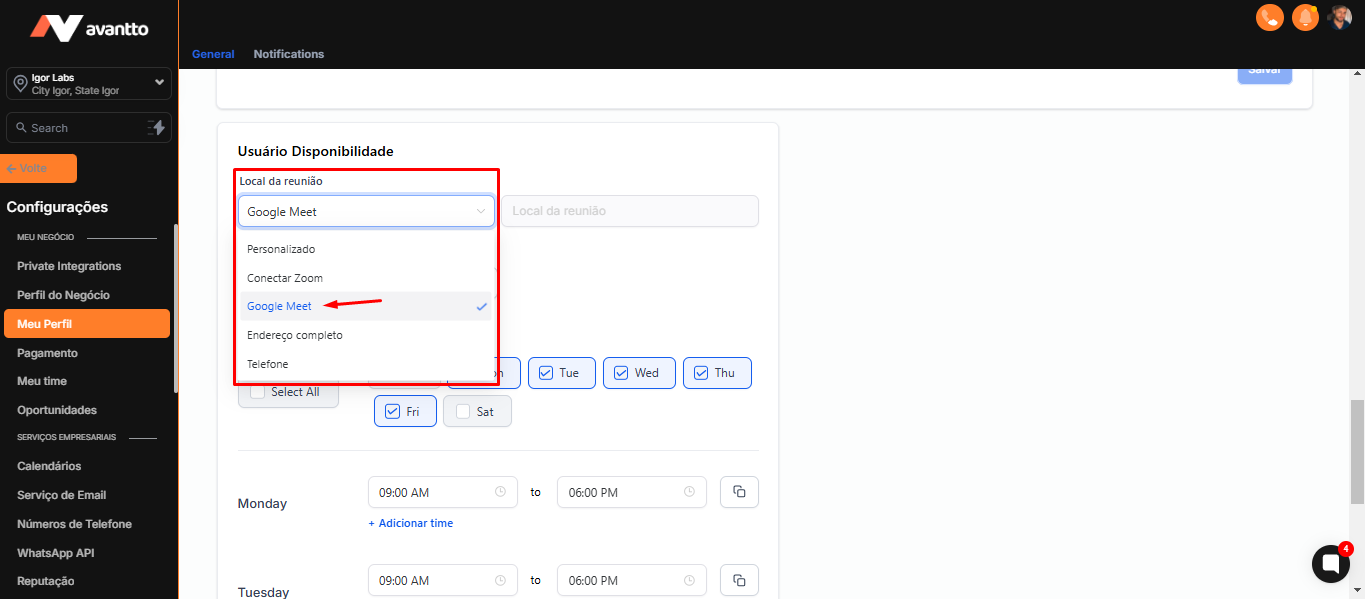
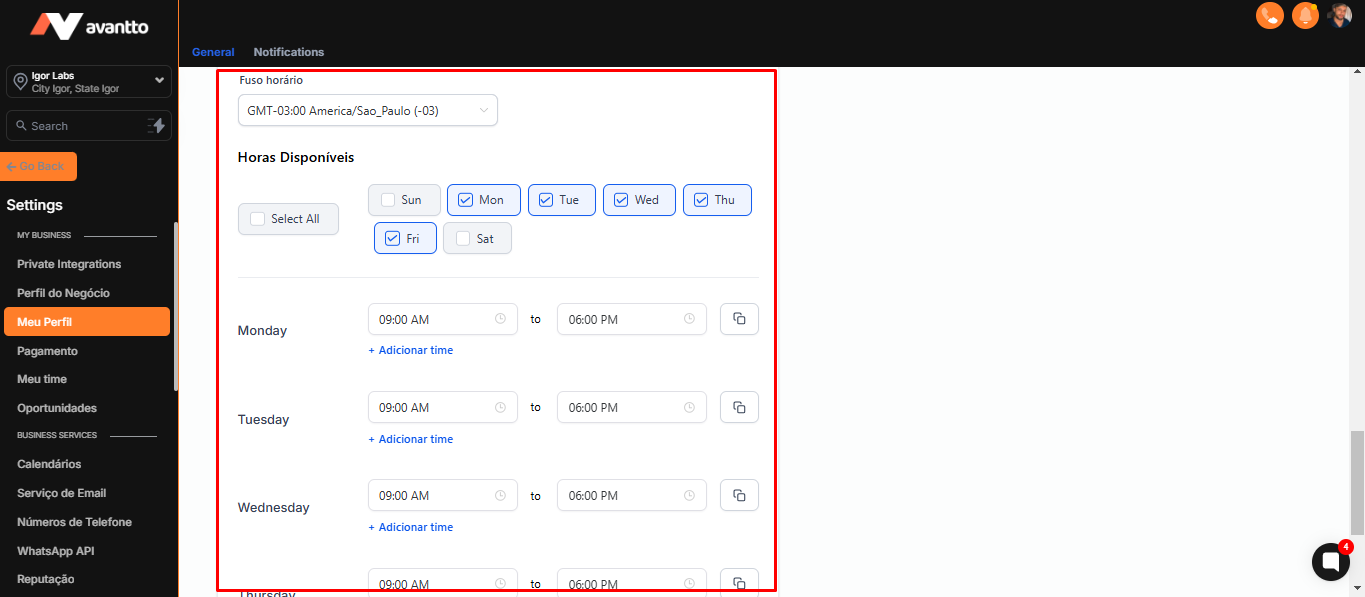
2.4 After setting the location, choose the time zone (for example, São Paulo) and set the available times (for example, from 9:00 AM to 6:00 PM).
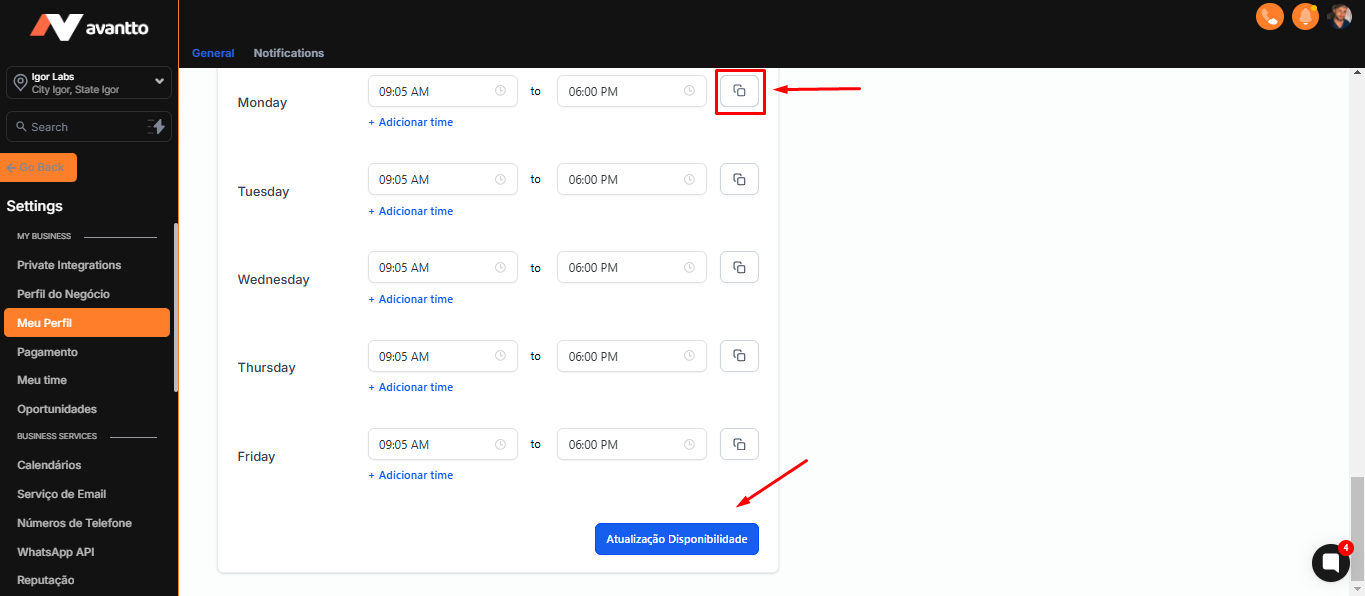
2.5 To duplicate the settings for other days (for example, duplicate the chosen time on all other days), click on the option indicated in the image and then click Save to update your availability settings.
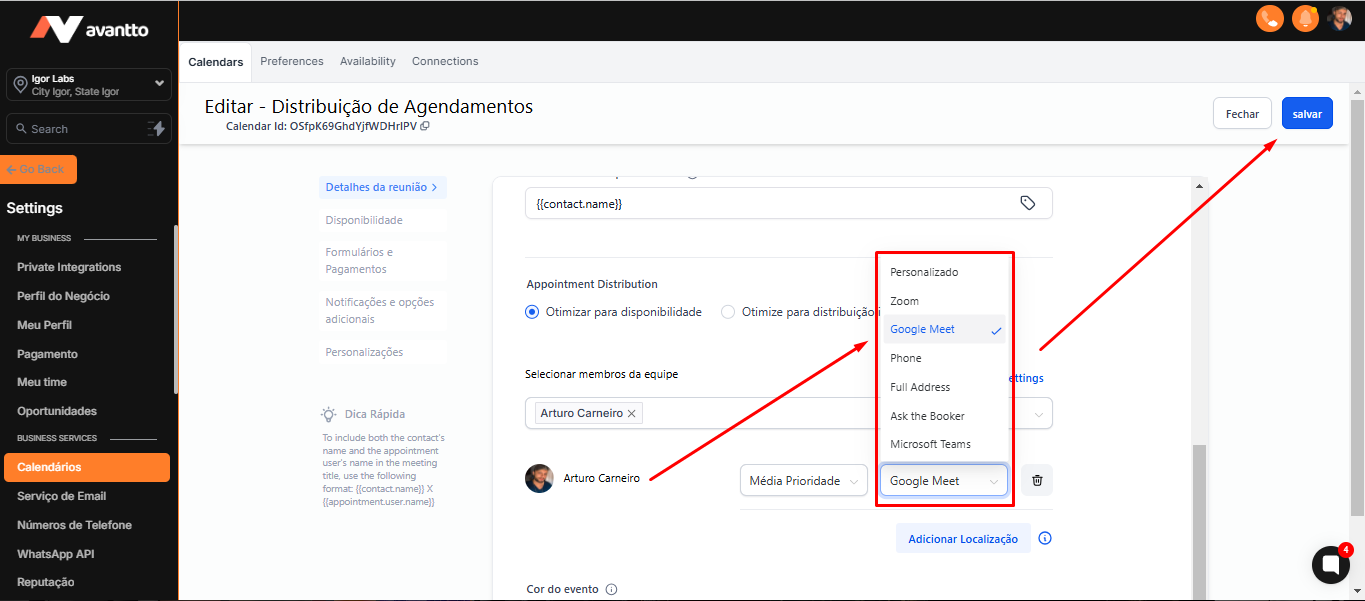
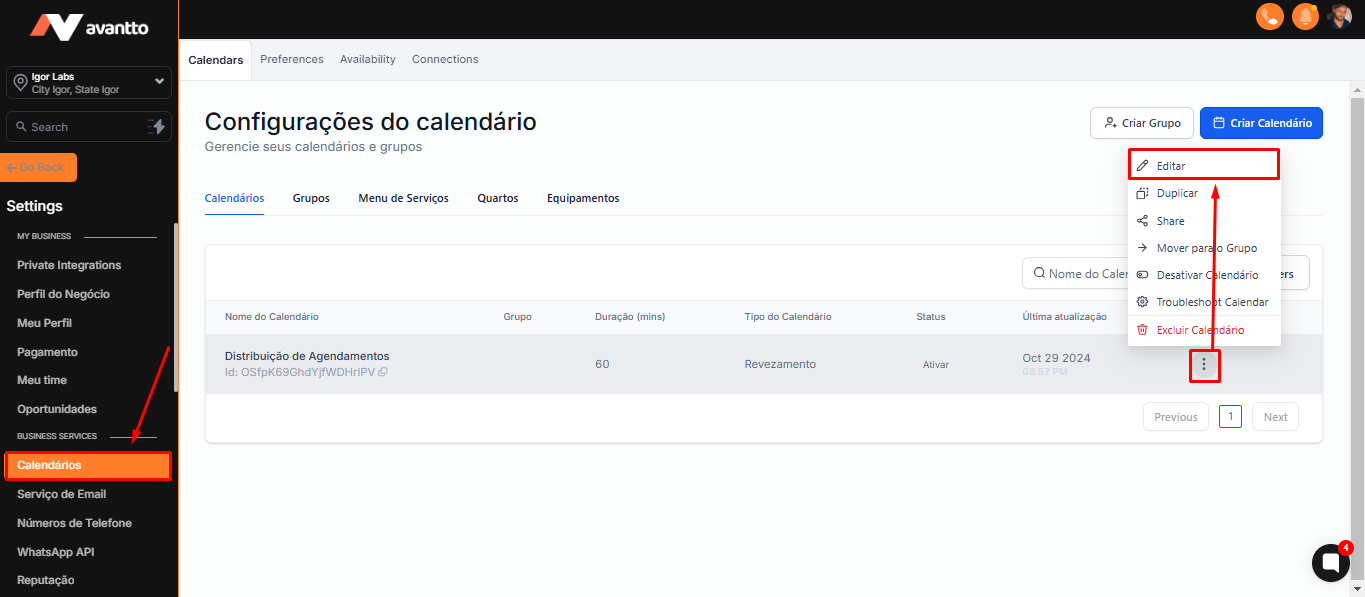
3.1 After integrating and configuring your schedule and video conferencing, it is important to confirm that the calendar configuration is correct, in order to use your preferred video conferencing to create the locations of the appointments.
Still in the settings menu, go to the Calendars section, and edit the desired calendar.
3.2 Select the desired members.
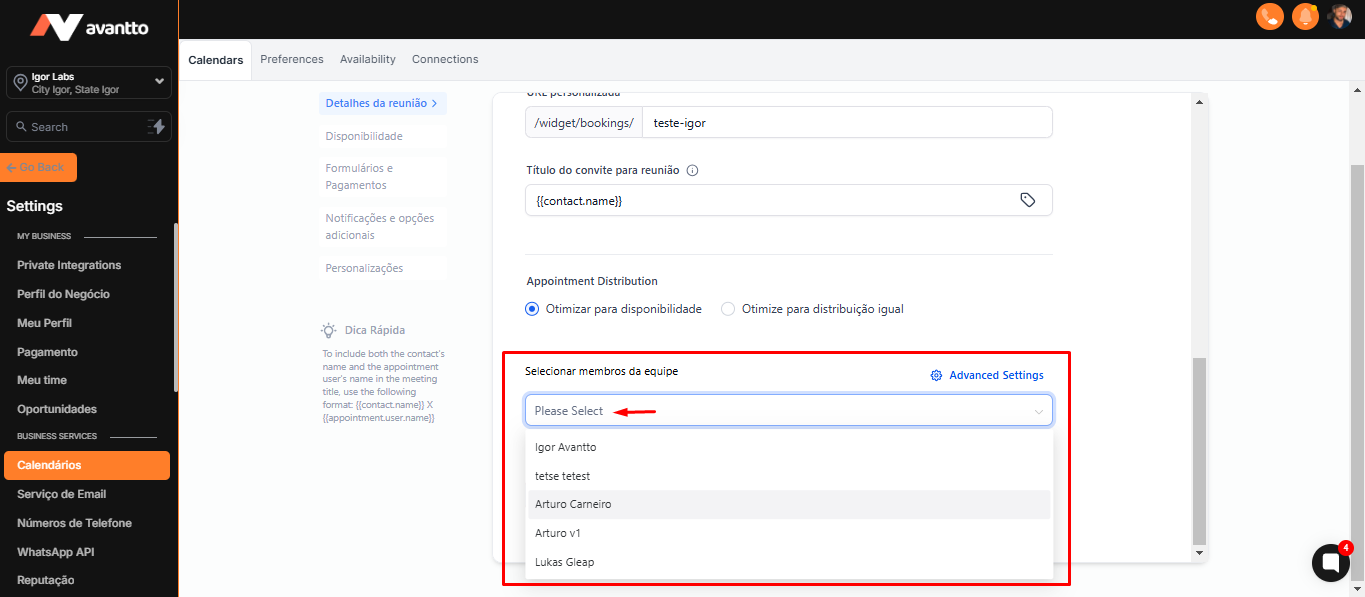
3.3 Add your user with the Google Meet option. This ensures that when creating appointments, the correct link will be generated, whether it is an in-person or online meeting.
Click on Save to complete the setup.