This guide covers the process of setting up the sender and creating email campaigns on the platform, highlighting the necessary steps to optimize communication with contacts. The first step involves accessing the profile settings, where the user can sync email accounts like Gmail or Hotmail and integrate their own domain. After setting up these options, the user can create email campaigns by clicking on "Apps" and selecting "Email Campaigns," where it is possible to create custom templates using an intuitive editor or HTML code. The guide details how to create new templates, including using a specific model for campaigns, and setting up A/B tests to optimize open and click rates. Additionally, it is possible to schedule sends, customize the sender's address, and select recipients based on smart lists or tags. Finally, the guide mentions the option to automate campaigns through nurturing flows, allowing continuous communication with contacts. The main goal of this procedure is to ensure that email campaigns are created and managed efficiently, improving interaction with customers and enhancing the results of marketing actions.

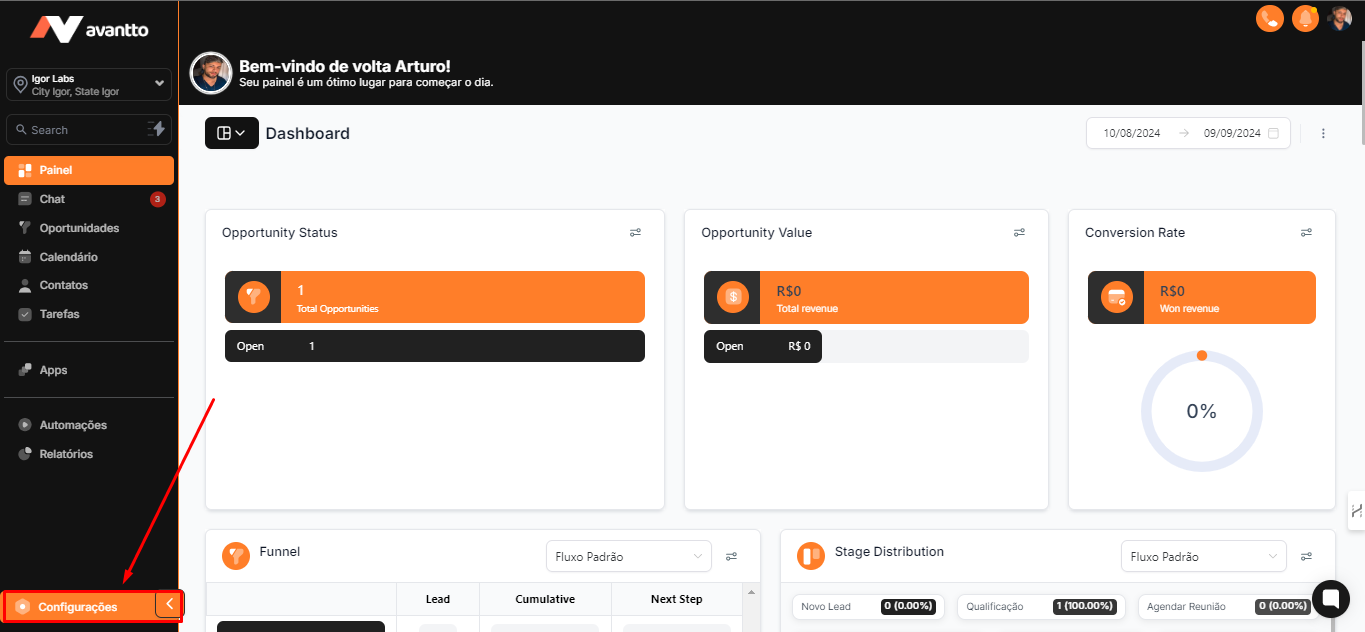
1.1 On the left side menu of the screen, click on "Settings"
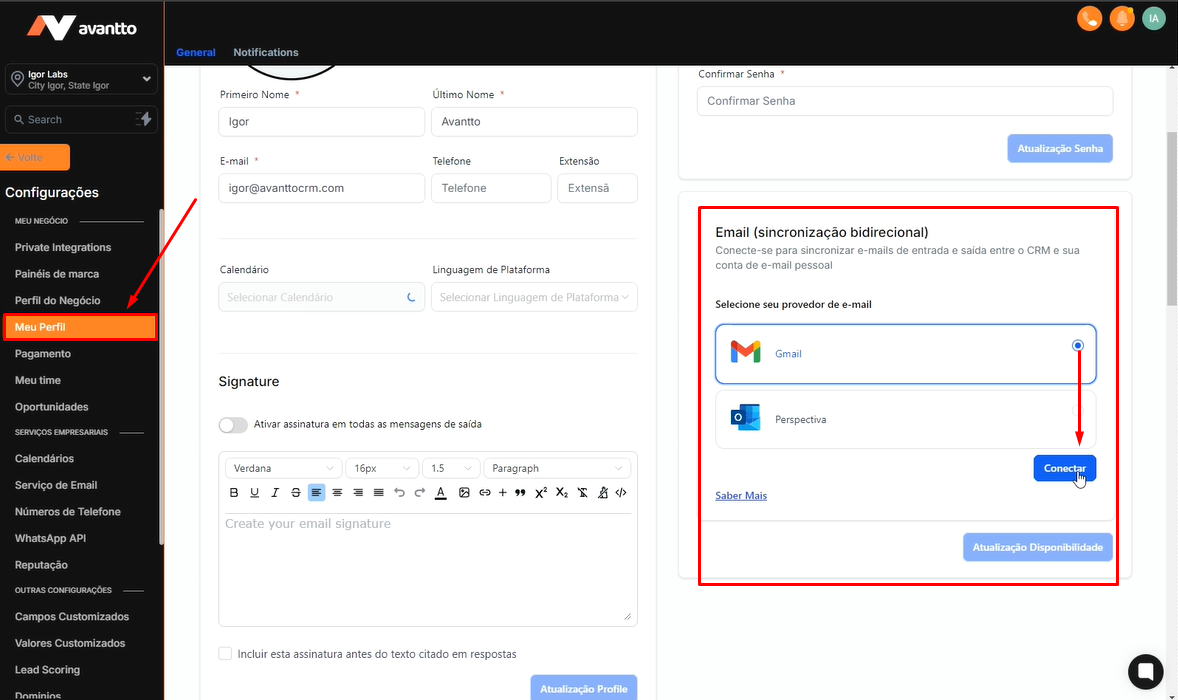
1.2 Click on "My Profile". As you scroll down, you will find the "Email (bidirectional synchronization)" field. In this space, you can perform native synchronization for both Gmail and Hotmail.
To proceed, click on the desired option and then on the "Connect" button.
You will be redirected to a page where you can complete the connection process.
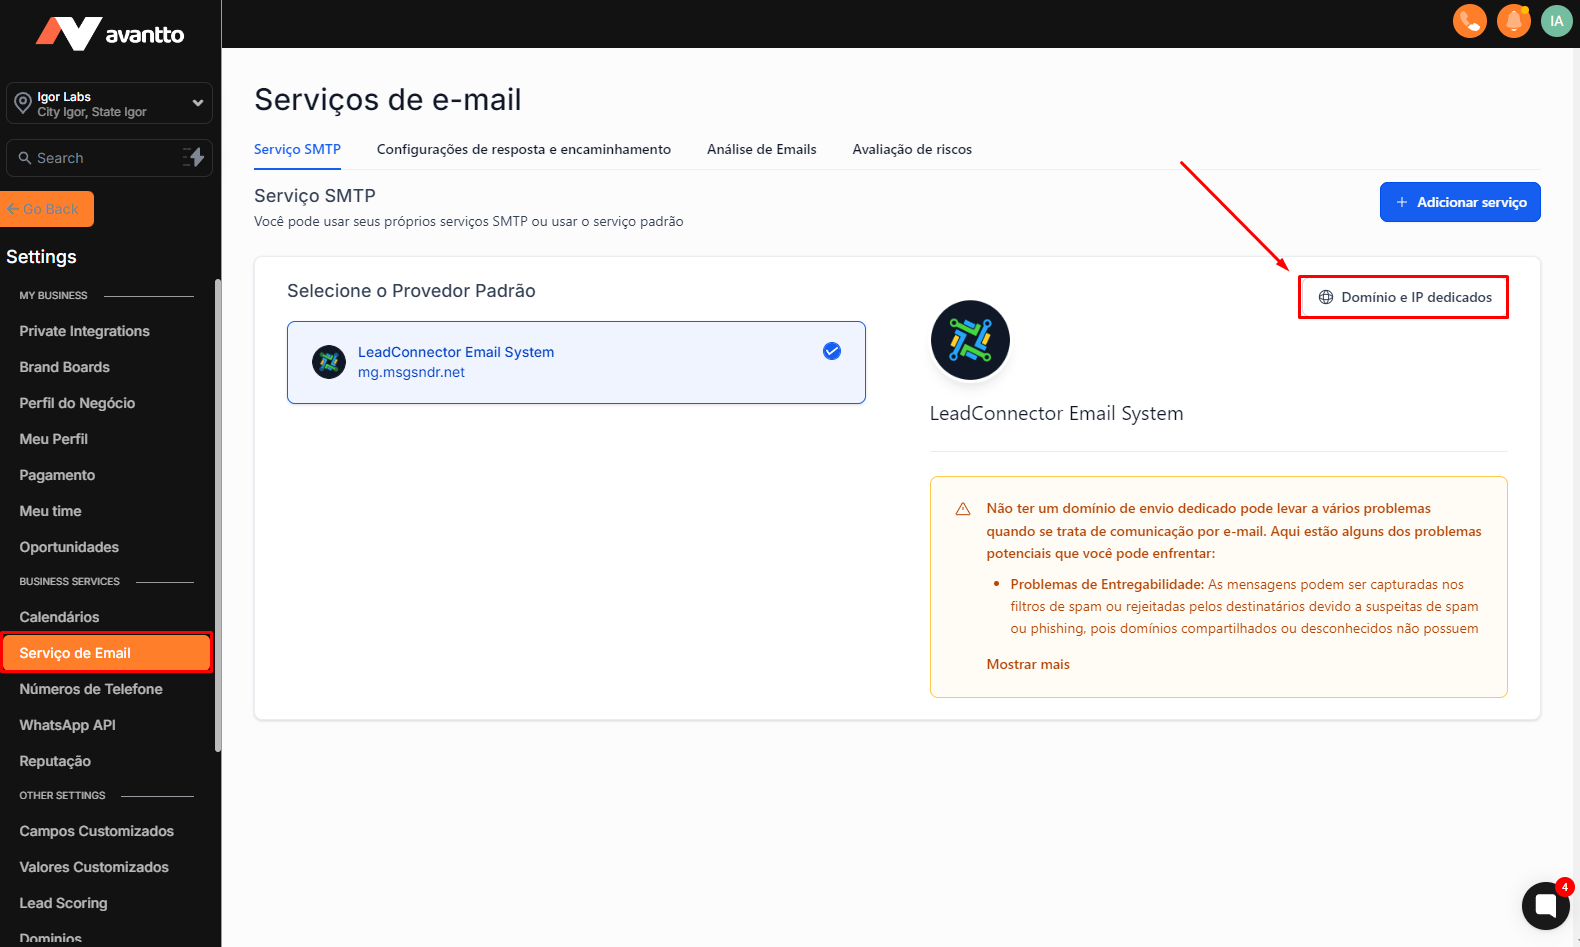
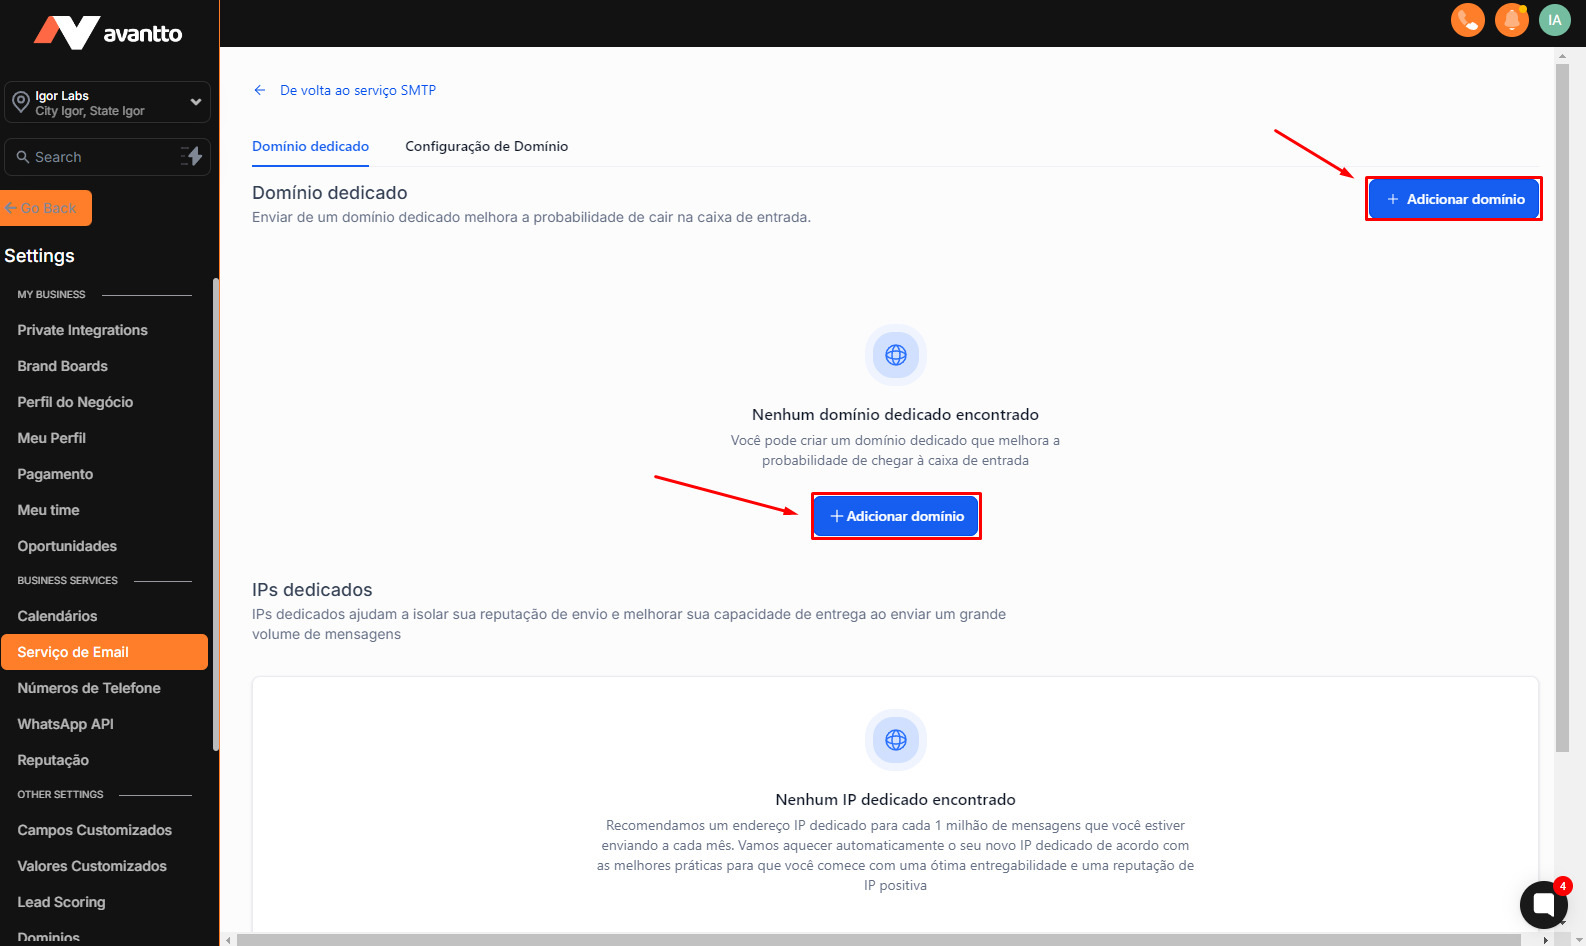
1.3 You can also integrate your own domain.
To do this, still in the left side menu, click on "Domain and dedicated IP" and then select "Add Service". Then, choose the option corresponding to your domain integration.
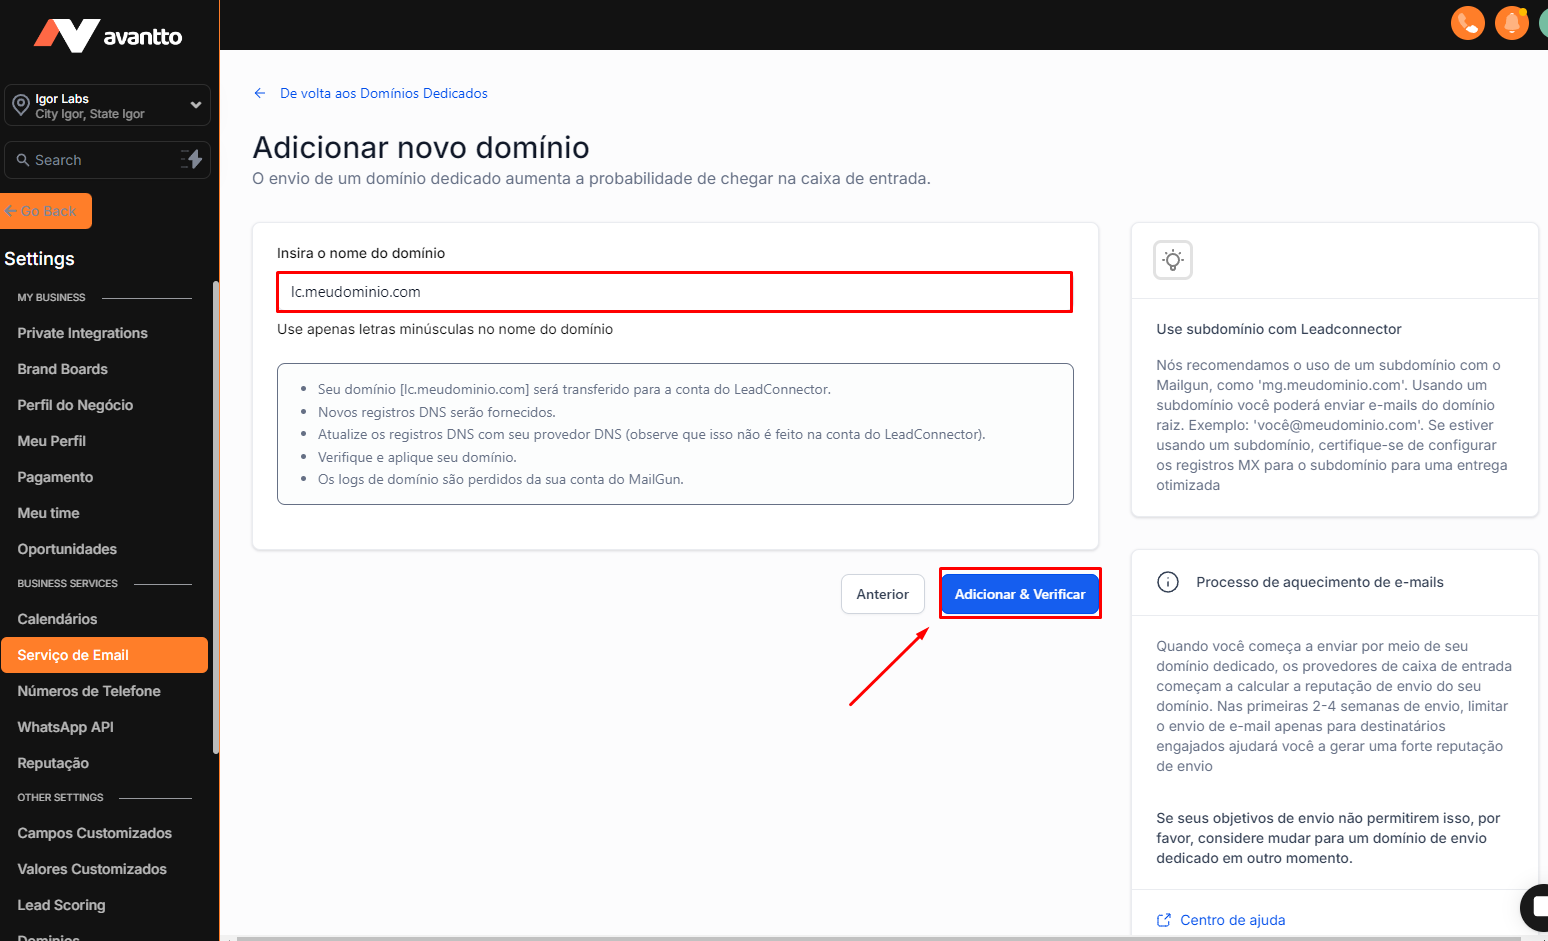
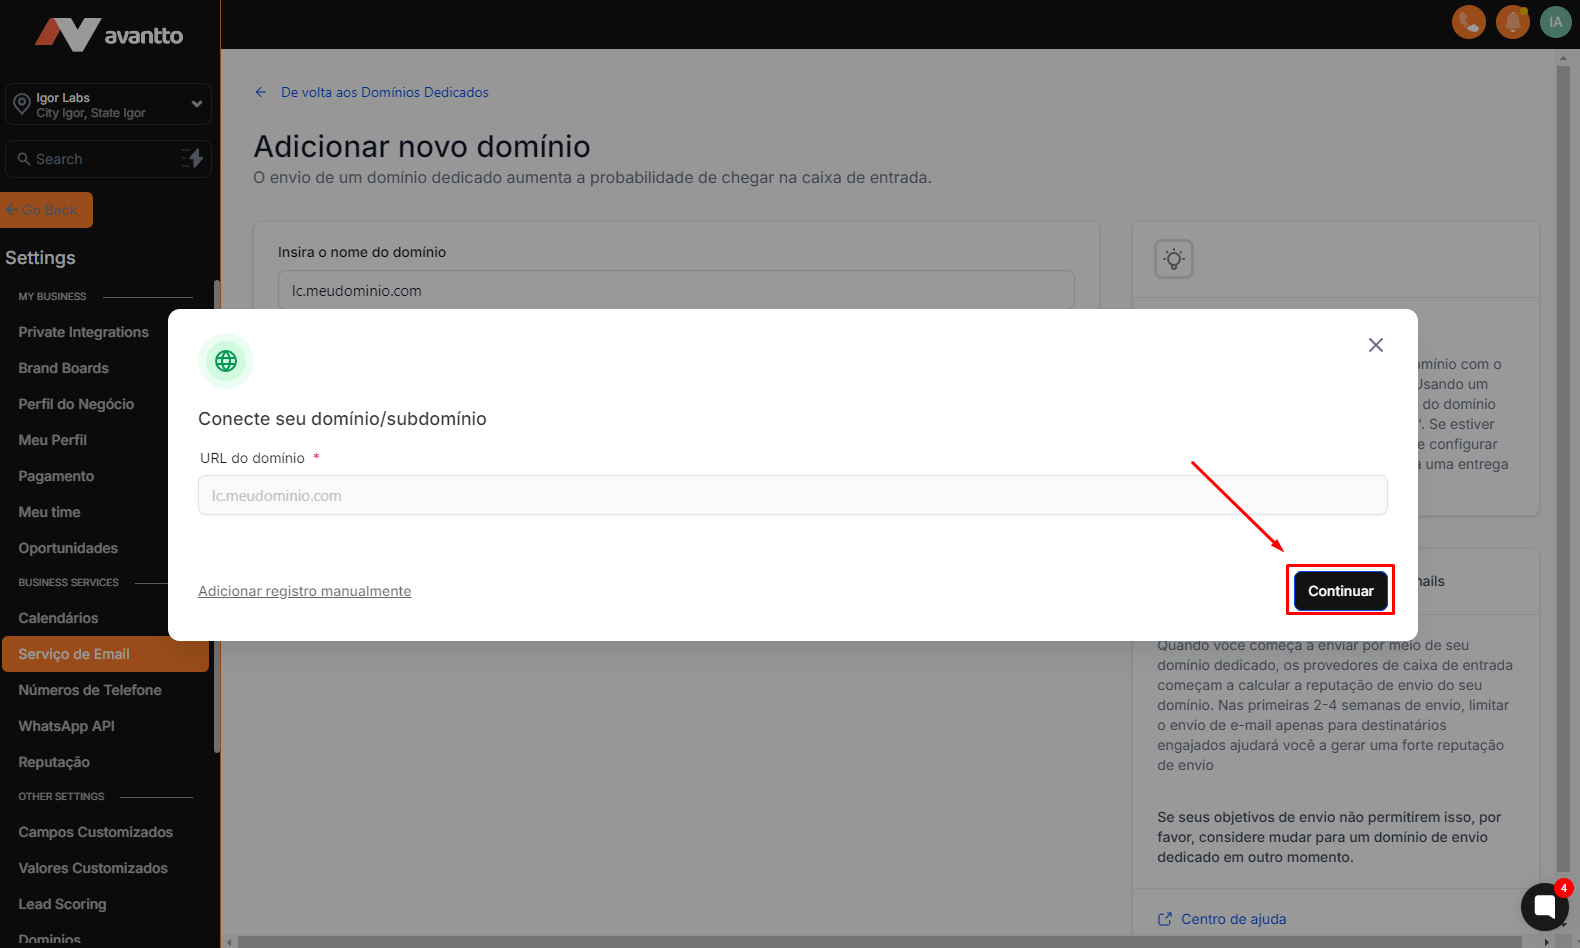
1.4 The next steps consist of filling in the fields with the requested information.
The entire process will be presented in an intuitive manner.
After completing the setup, you will be eligible to use the email.

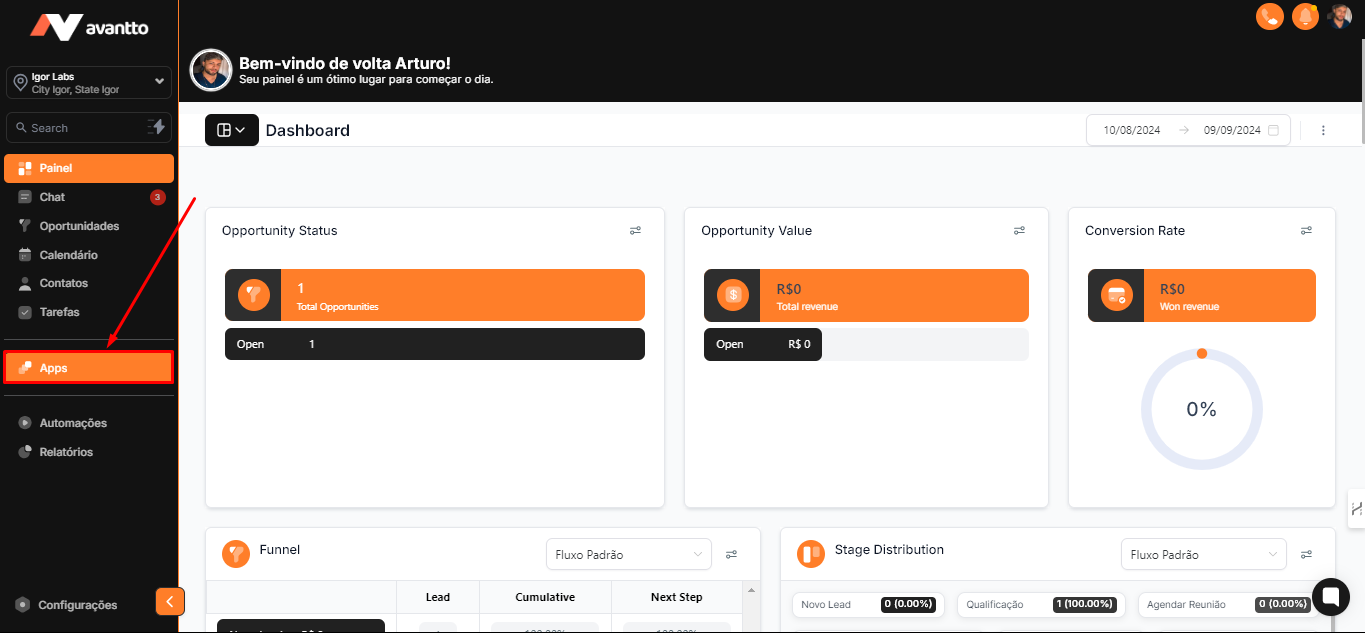
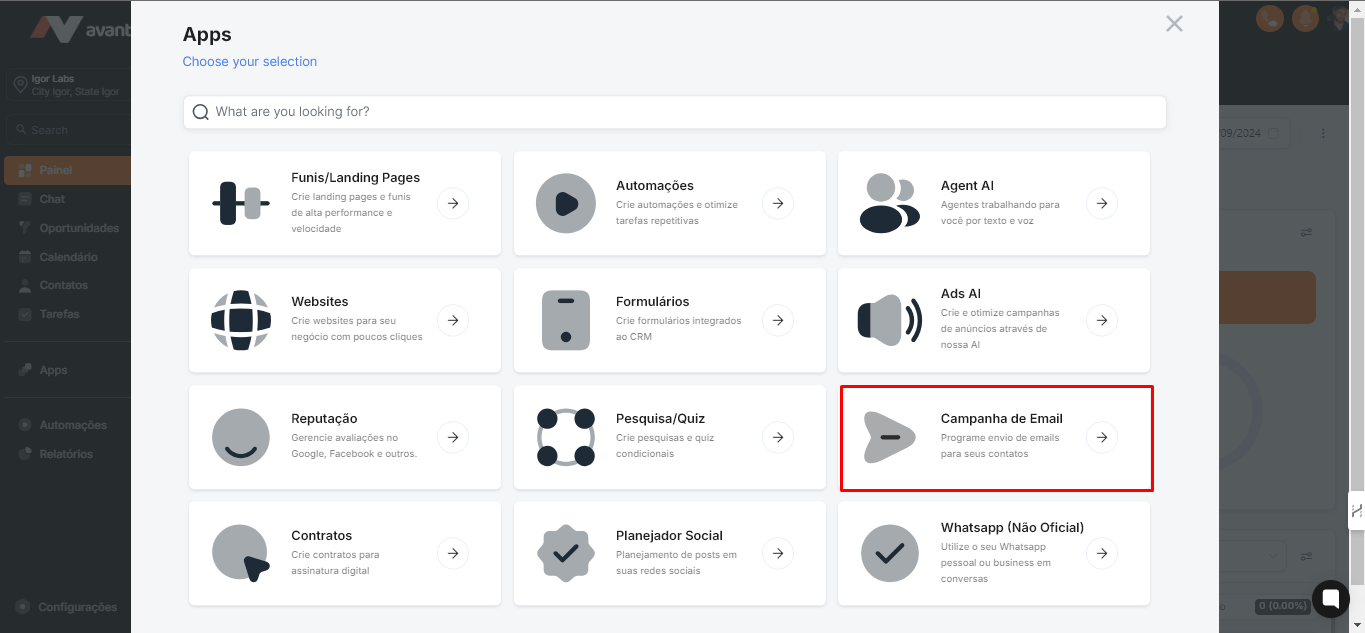
2.1 In the left side menu of the screen, click on "Apps"
2.2 Click on "Email Campaigns"
2.3 Locate the "Emails" field, which will present two options: "Campaigns" and "Templates".
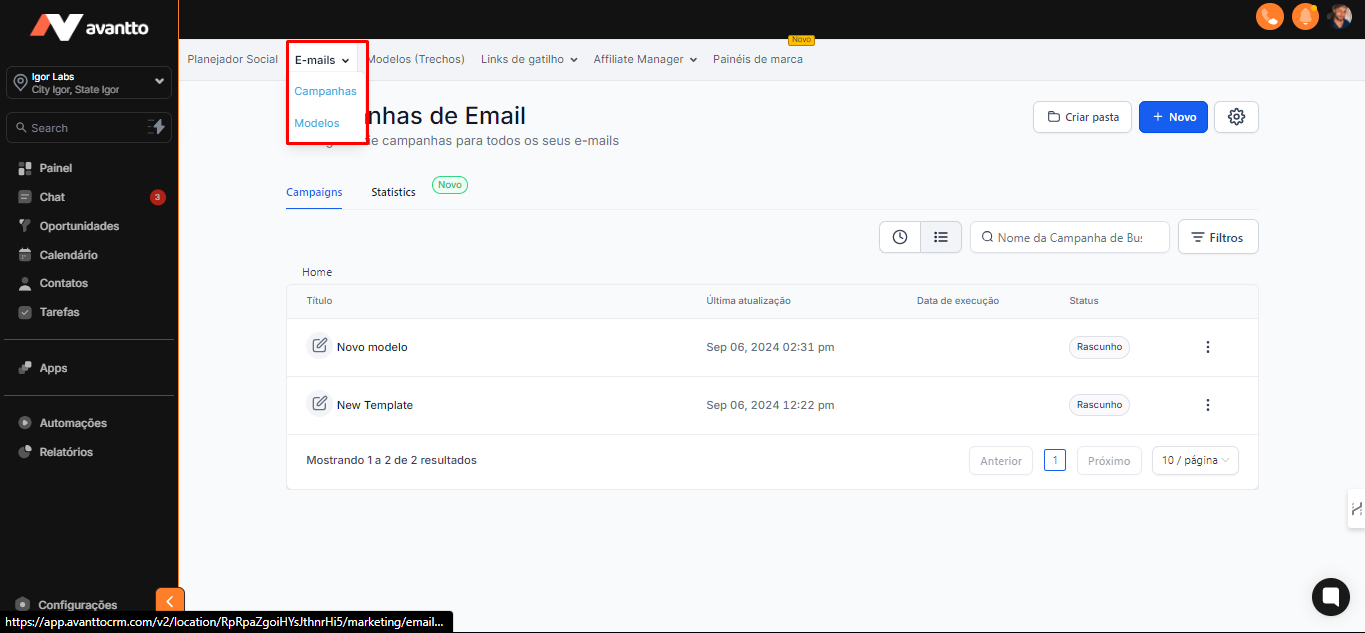
2.4 Click on "Templates."
All the templates we create in this section can also be used within Automation flows.
You will have the option to draft your own emails within the automation or use the templates available in the account. Therefore, all templates created here can be utilized in automations.
2.5 To create a new template, click on "New." You will see some options, including templates already defined in the account. Just click on one of them to view all available templates in the library or choose to create a blank template.
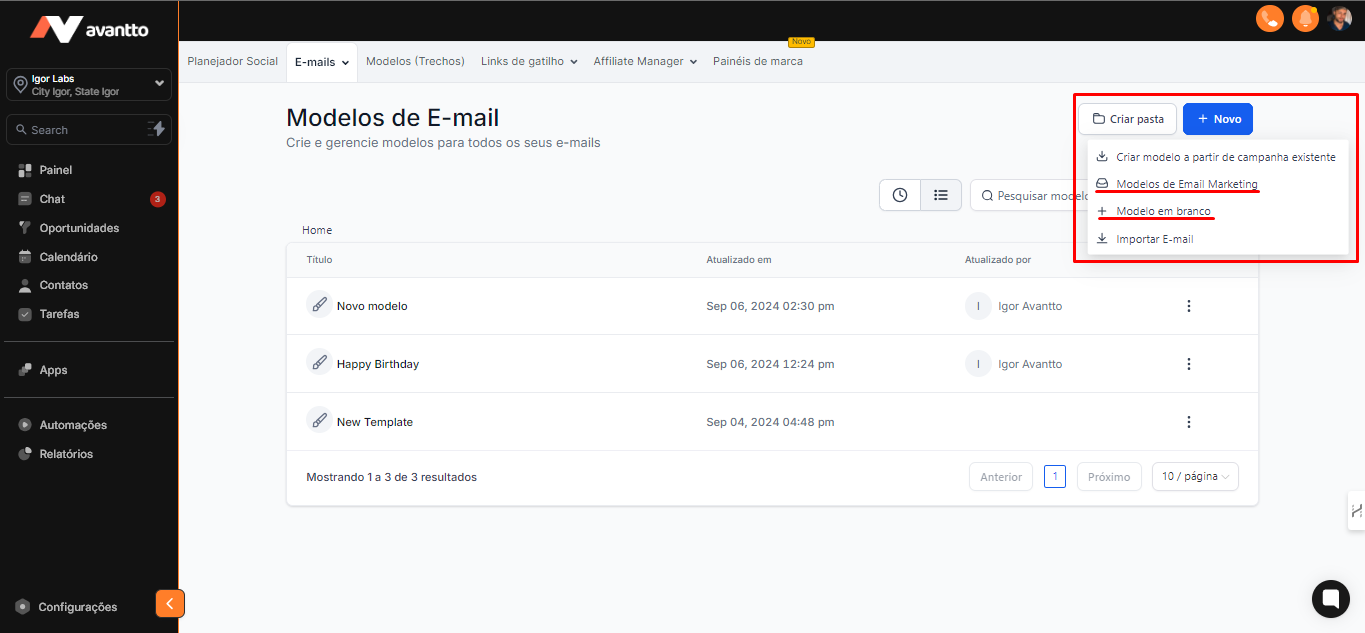
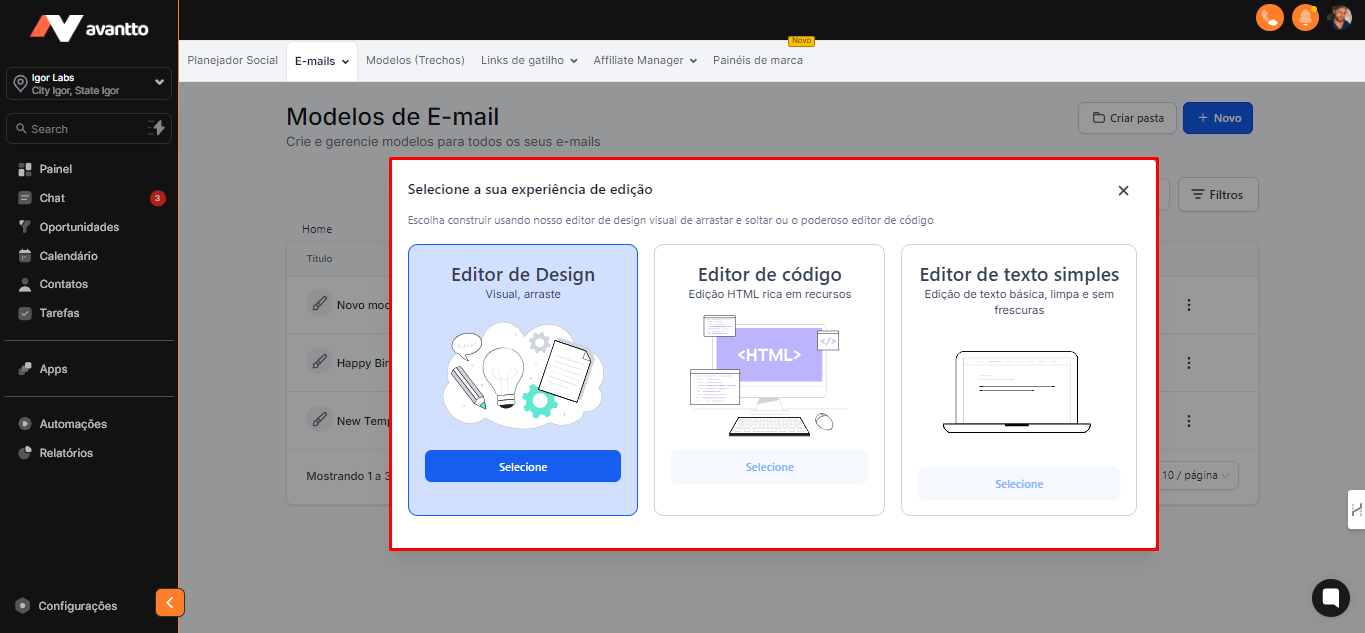
2.6 To create a blank template, click on "Blank Templates." There are three options available:
Design Editor: An intuitive email builder that uses drag-and-drop functionality, making the creation process easier.
Code Editor: Allows you to insert HTML code, ideal if you want to create your template in another tool and transfer it here. You can view changes in real-time while editing the code.
Plain Text Editor: An option to create a basic email.
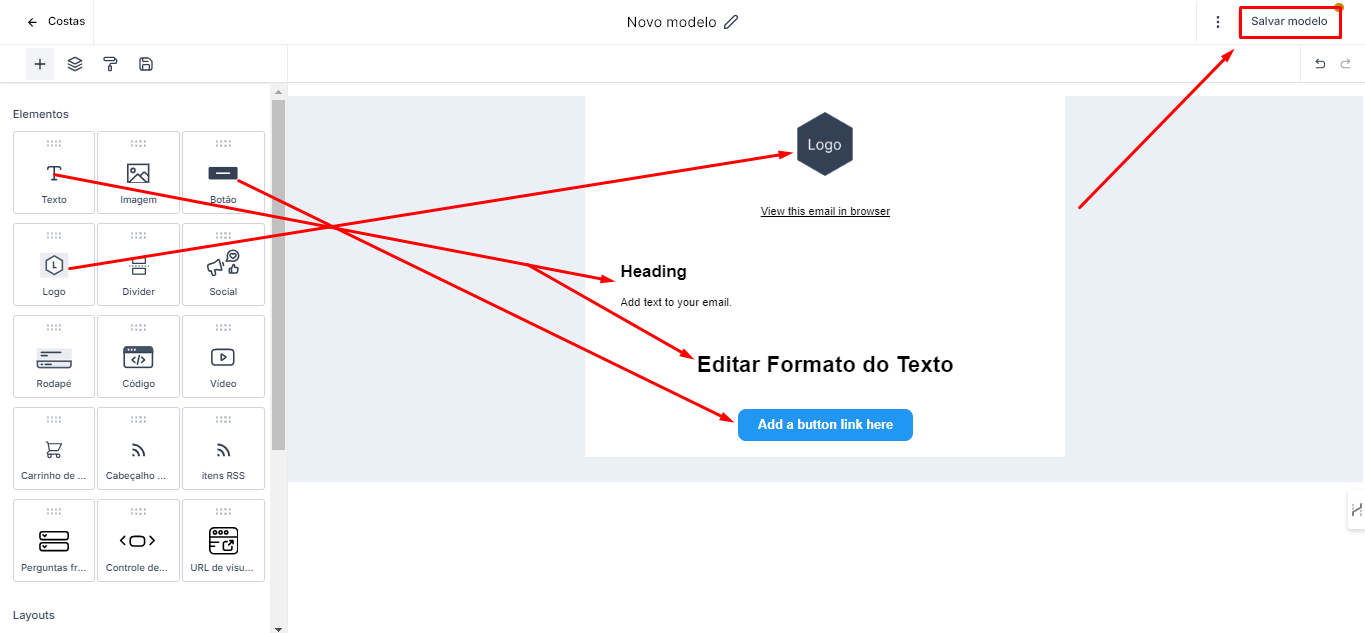
2.7 The Design Editor is the tool you will use the most in practice.
When creating a template from scratch, you will find several options, such as:
Add and edit text or format.
Insert images and logos.
Add buttons.
Embed HTML code, if you want to embed, for example, your Avantto schedule, bring in blog items, or include a shopping cart if you have your Shopify store or another payment method connected.
To add an element, click on the desired option and drag it to the creation area, positioning it where you prefer. Use your creativity and, after finishing, just save your work.
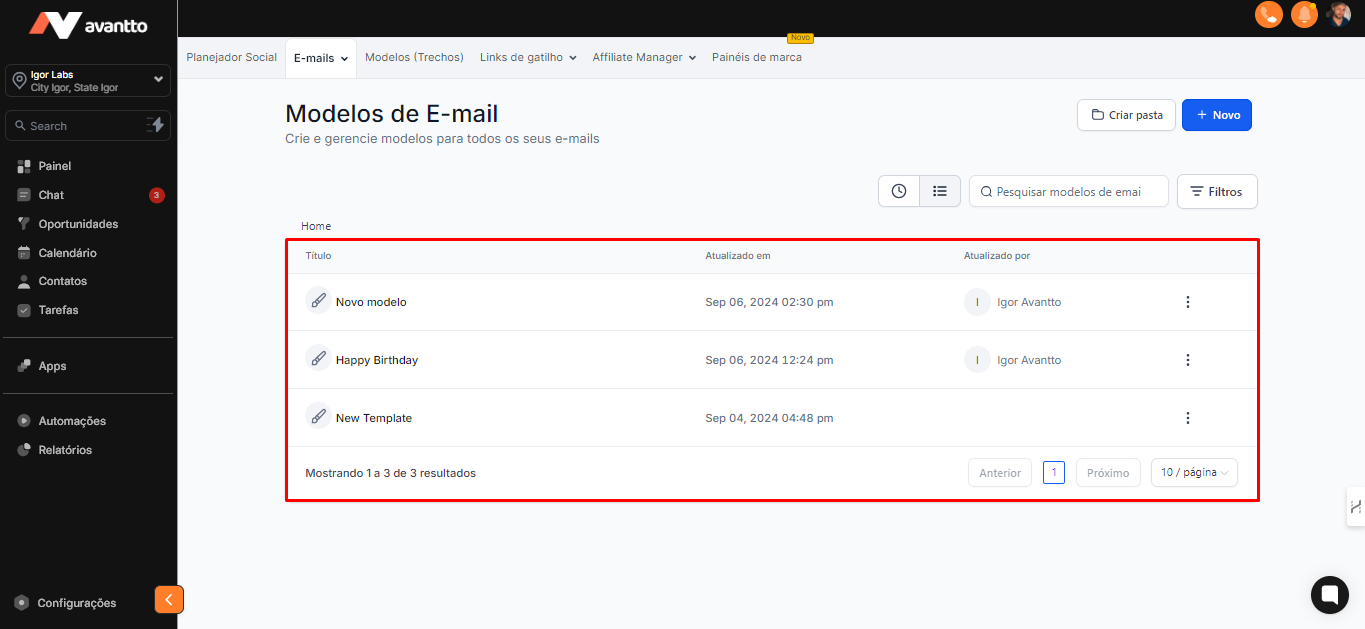
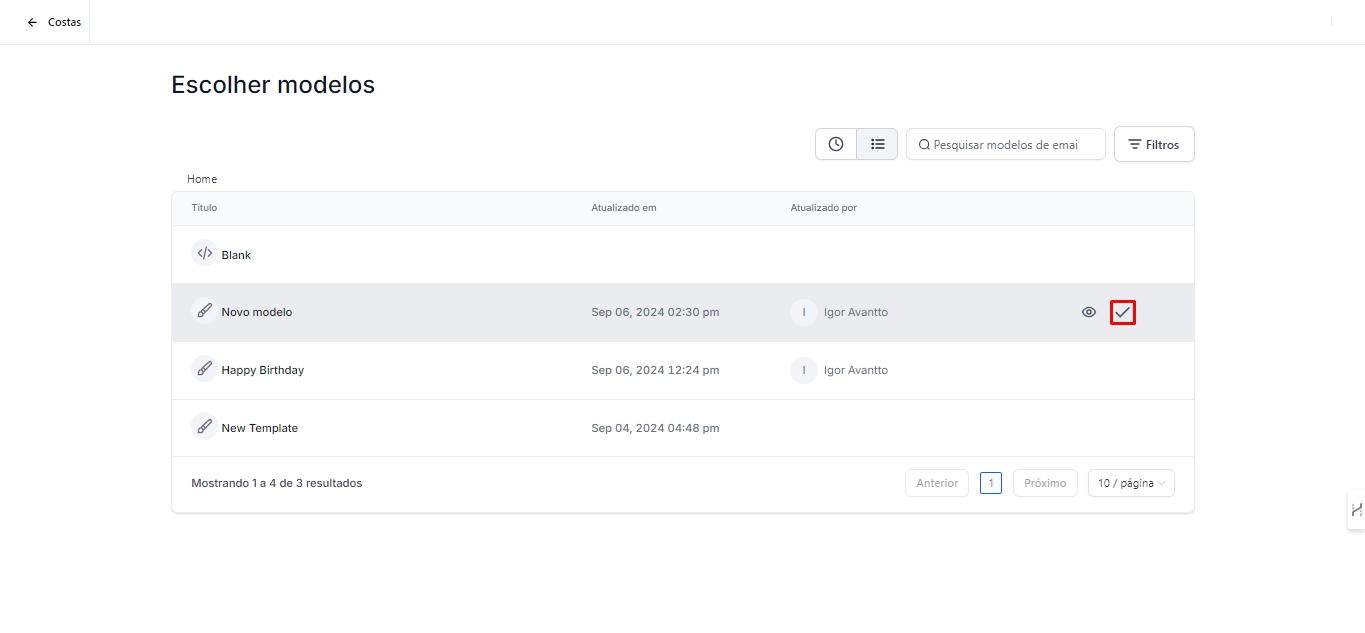
2.7 When saving the template, it will be available as shown in step 2.4. From these templates, we can create campaigns. Next, we will use the "Happy Birthday" template as an example for creating a campaign.
2.8 Click on "Campaigns" and then on "New", following the same procedure as the "Template" step-by-step. A list of all created templates will be displayed; just choose which template you want to use in the campaign.
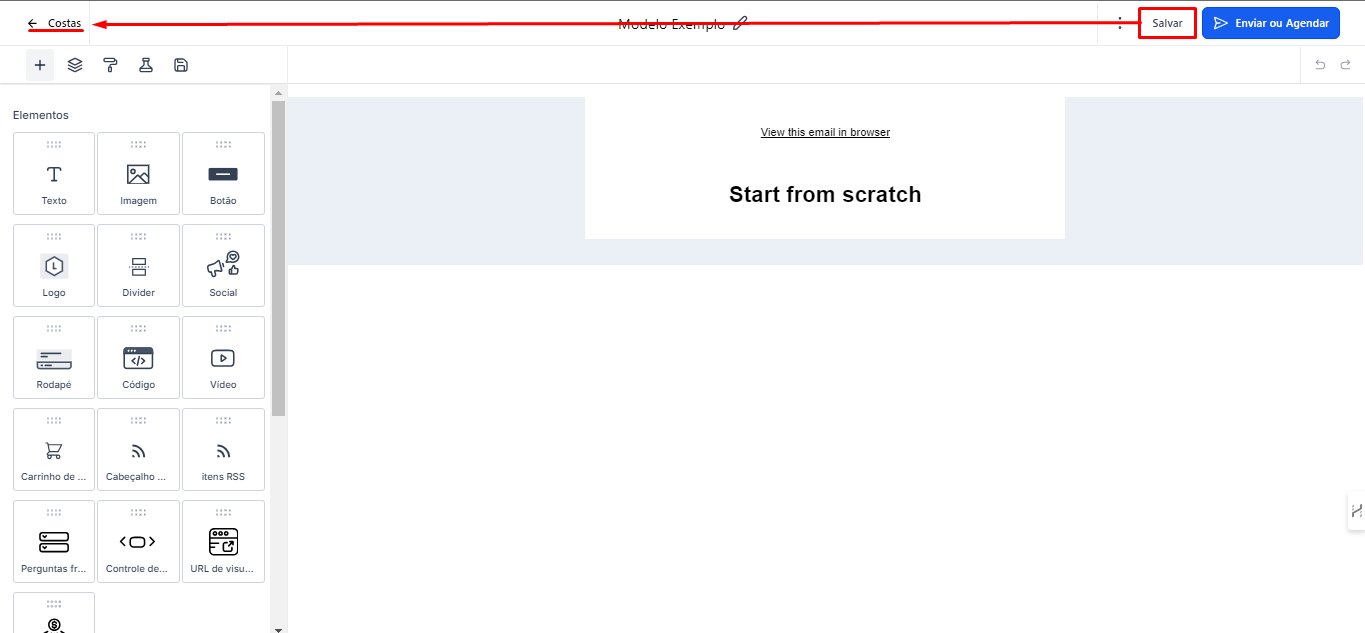
2.9 Save the email and return to the "Campaigns" screen
2.10 On the campaigns page, you can click on the three dots next to the chosen campaign to view a preview. If you want to change any information, just click directly on the campaign.
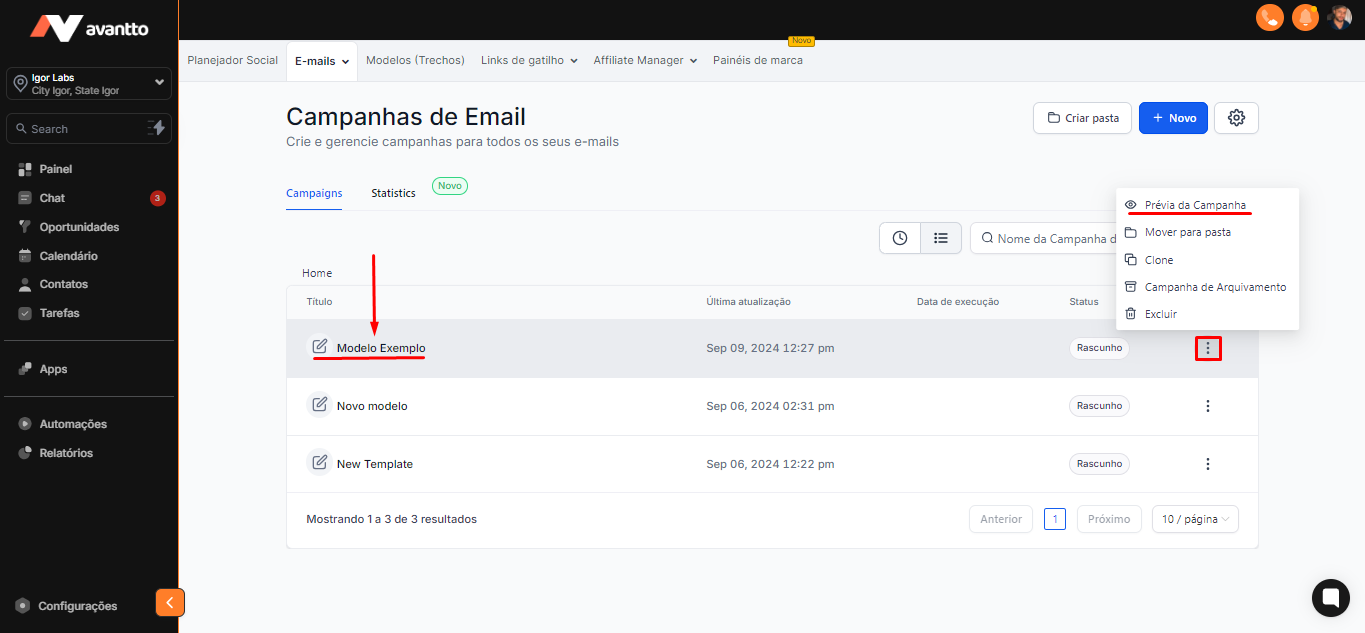
2.11 When you open the campaign to make changes, you will see the A/B Test option (available only in campaigns; it will not appear when accessing templates). This is a very important feature.
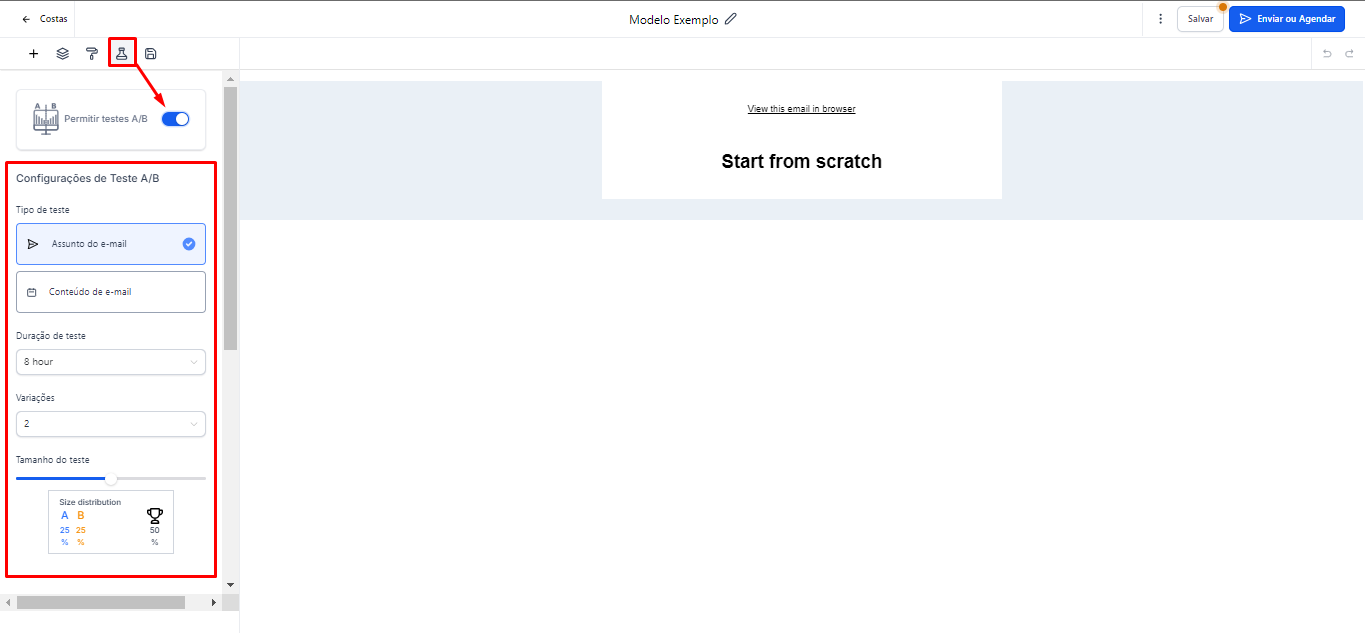
By clicking on "A/B Test" and enabling the "Allow A/B Tests" option, you will be able to choose between two test methods, through the subject and through the body of the email. You will also be able to choose the duration for which the test will remain active. For example, if you send 100 emails, you can analyze, in the next 8 hours, how many will be opened, how many will be replied to, among other metrics. Set how many variations you want to test and define the test size.
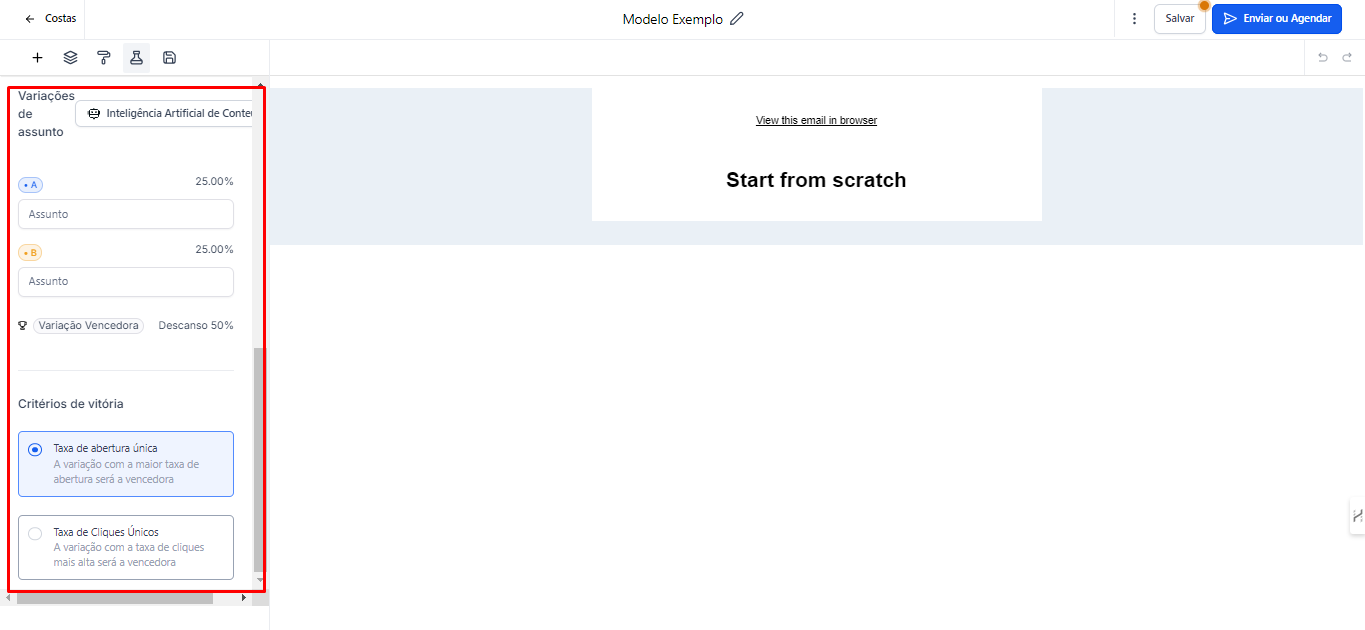
2.12 To perform the A/B subject test, set up the two subjects you want to test and define the winning criteria, such as unique open rate or unique click rate.
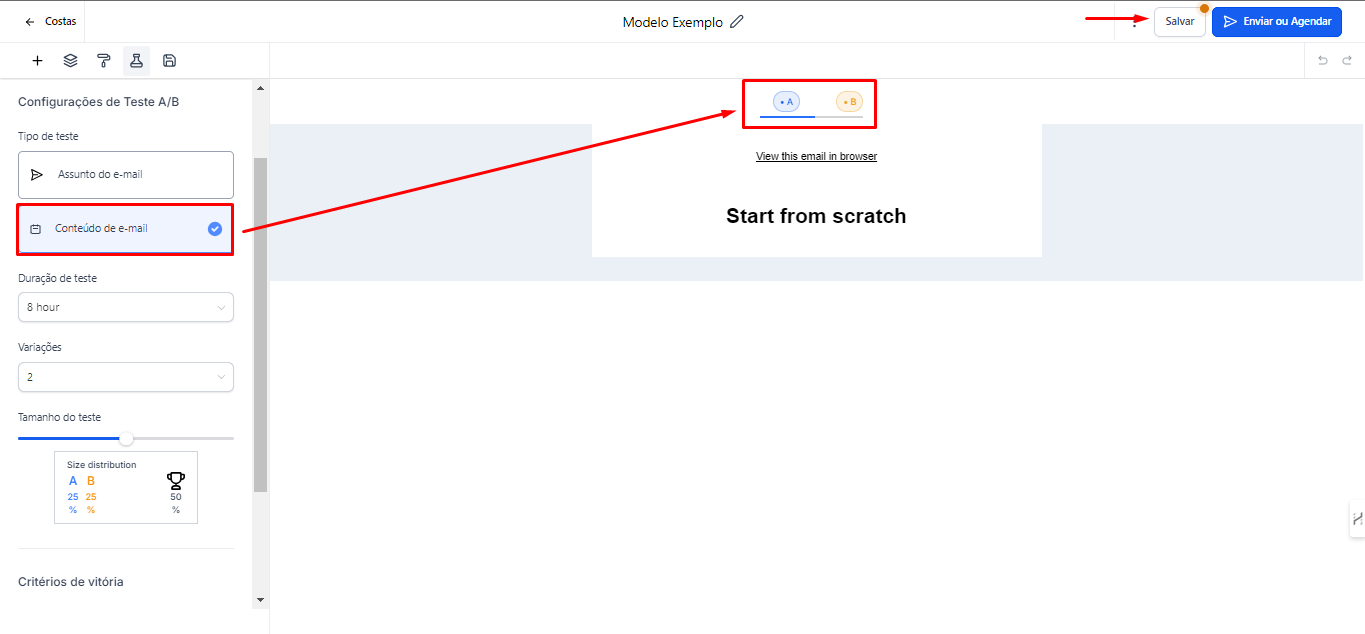
2.13 If you choose "Email Content", the screen will display the Test A and Test B options. In this section, you can modify the content text as desired. After making the changes, click "Save".
2.14 To send the campaign that was created, click "Send" or "Schedule".
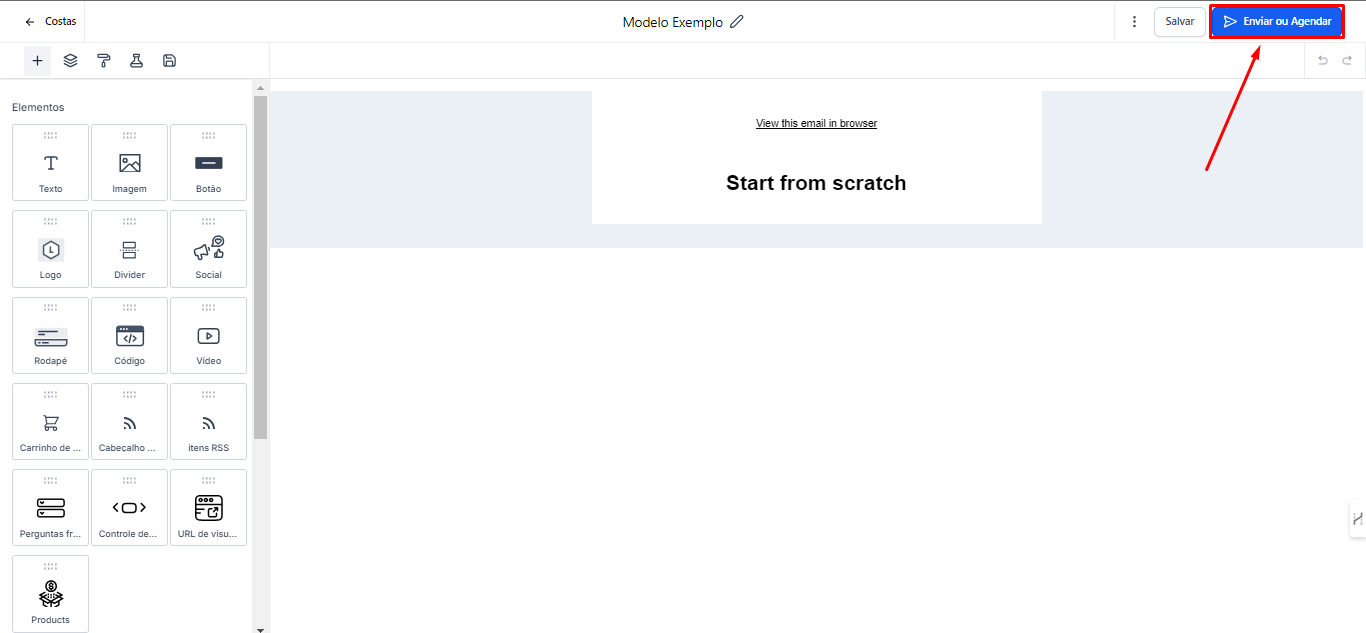
2.15 Some options will appear, such as:
Send Now: To send the campaign immediately.
Schedule: Allows you to schedule the sending for a specific date and time.
Batch Scheduling: You can set up sending in intervals, choosing the number of emails sent in each batch and defining the frequency (in hours, days, minutes, or seconds), as well as the days of the week and start and end times.
RSS Scheduling (Blogs): Just enter your blog's URL and schedule recurring posts. The idea is to create a custom template with personalized values, allowing you to easily update the content.

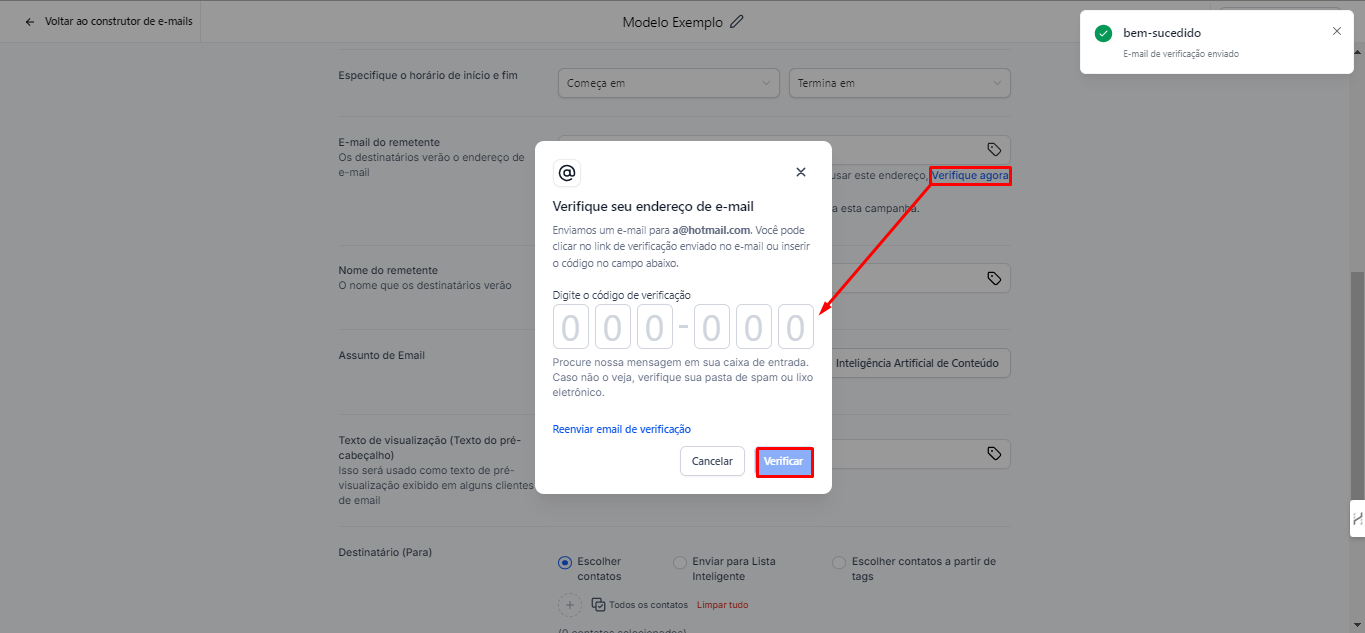
2.16 Sender Email is the address that recipients will see when they receive your messages.
It is recommended to use the email registered on the Avantto platform or an email from your own domain. For example, you can use a Hotmail email, even if it is not configured within Avantto, as long as it is a validated domain.
To validate the email, click on "Verify Email", enter the code received, and finally click on "Verify". After this step, the email will be released for use.
2.17
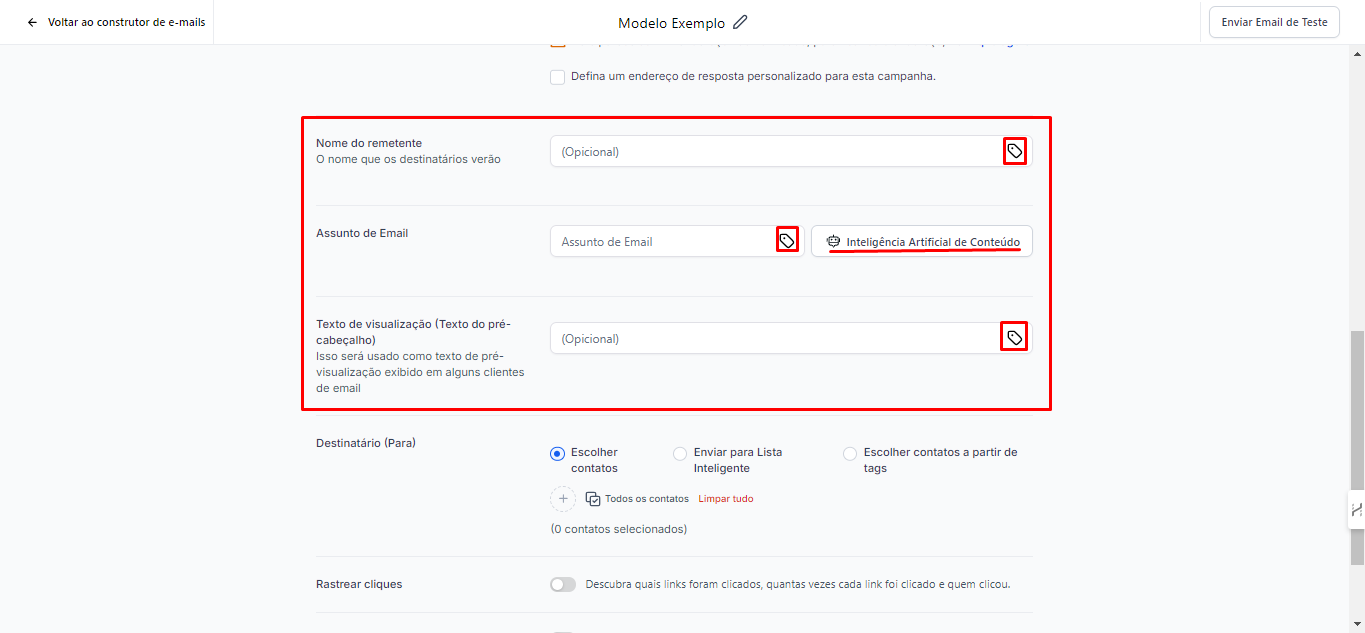
Sender's Name: This is the name that recipients will see when they receive your messages.
Email Subject: You can use artificial intelligence to help generate ideas for the subject.
Preview Text: This text appears below the subject as a description of the email, usually in a smaller format. This option is optional, as the system usually pulls the first lines of the email body. However, if you prefer to customize, just write the desired text.
In all these 3 fields, custom values can be used.
2.18 Recipients: This is an important point in creating your campaign.
Choose Contacts: You can manually select your contacts. By clicking on the "+" symbol, you can add them manually and filter the contact list by searching for name or email, which is especially useful when you want to send to a few people.
Alternatively, you can click on "All Contacts" to select a larger group.

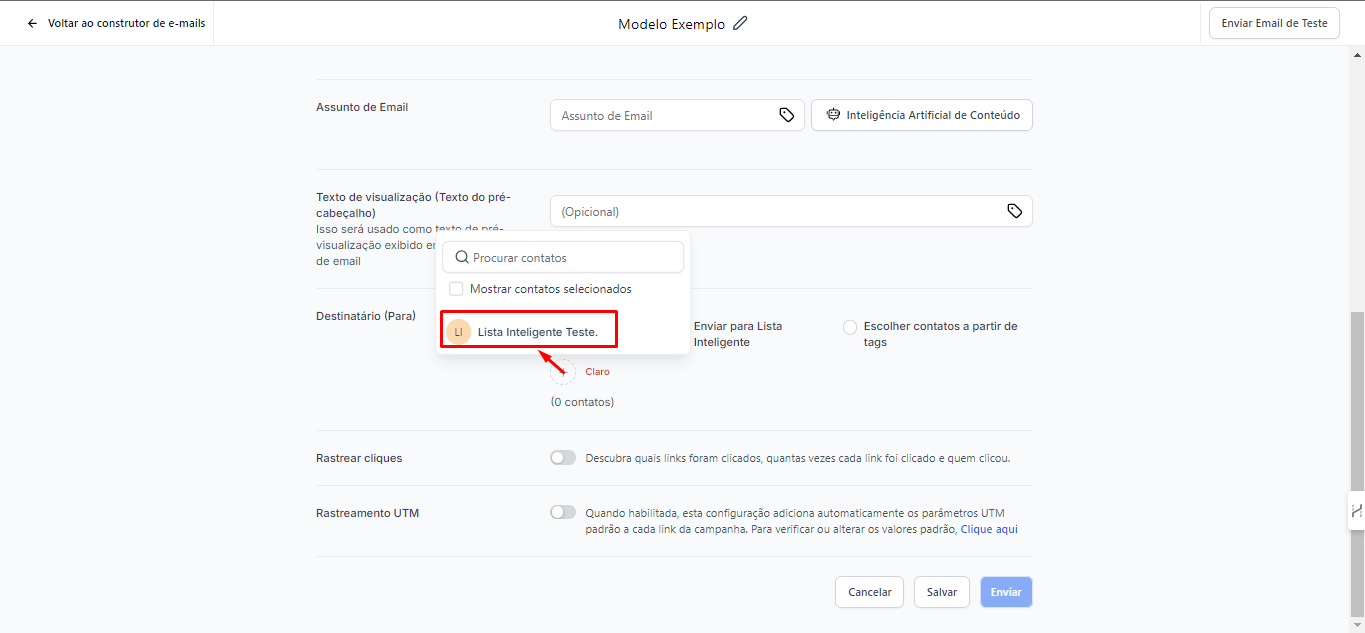
2.19 Send to Smart List: To send your campaign to a smart list, simply click on the "+" symbol and select the list you previously created.
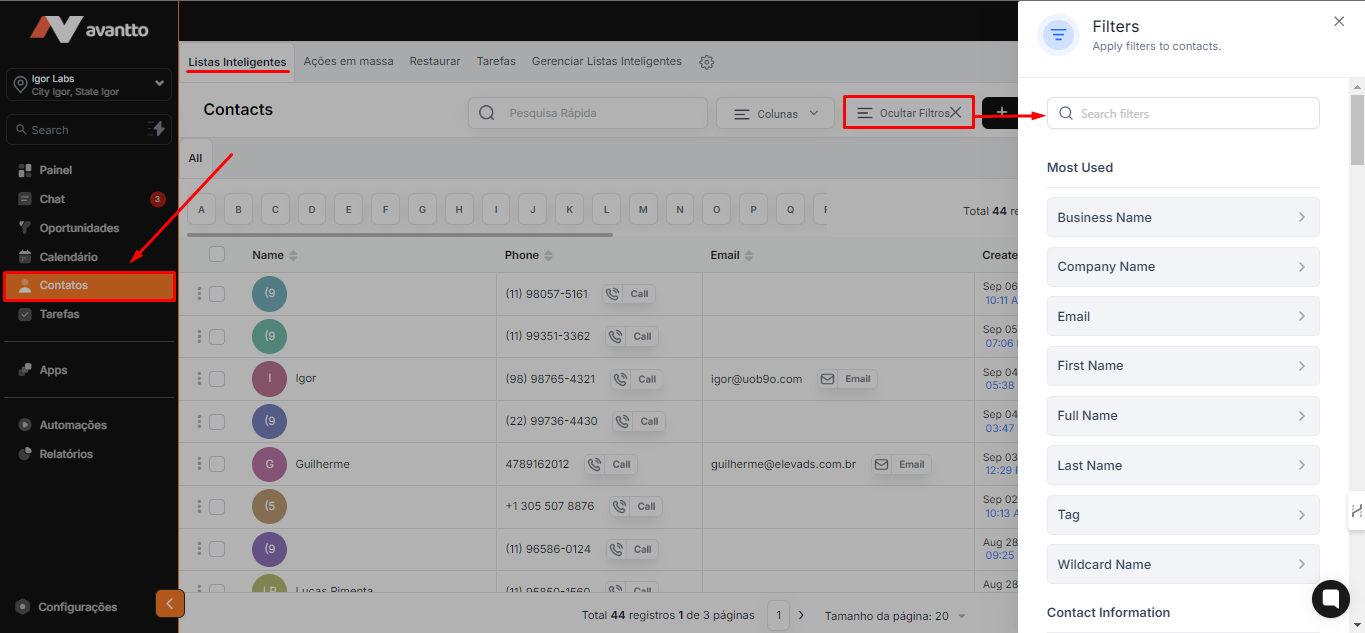
2.20 To configure and save smart lists, click on the left side menu of the screen under "Contacts."
Then, access "Smart List" and click on the filters to select the options you want to refine.
Thus, you can create a list containing only the contacts that meet the filtered characteristics.
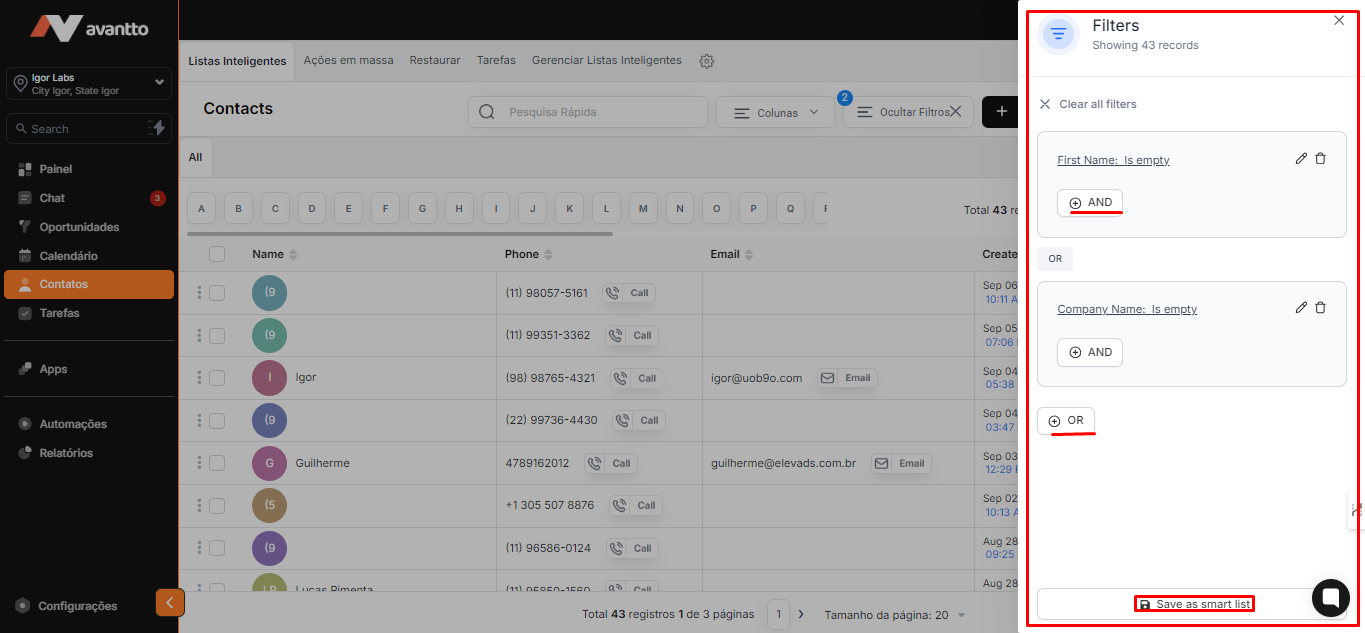
2.21 Here, you will have the "OR" and "AND" options, which allow you to further refine the filters.
After selecting the desired filters, click on "Save as Smart List" to complete the creation of your list.
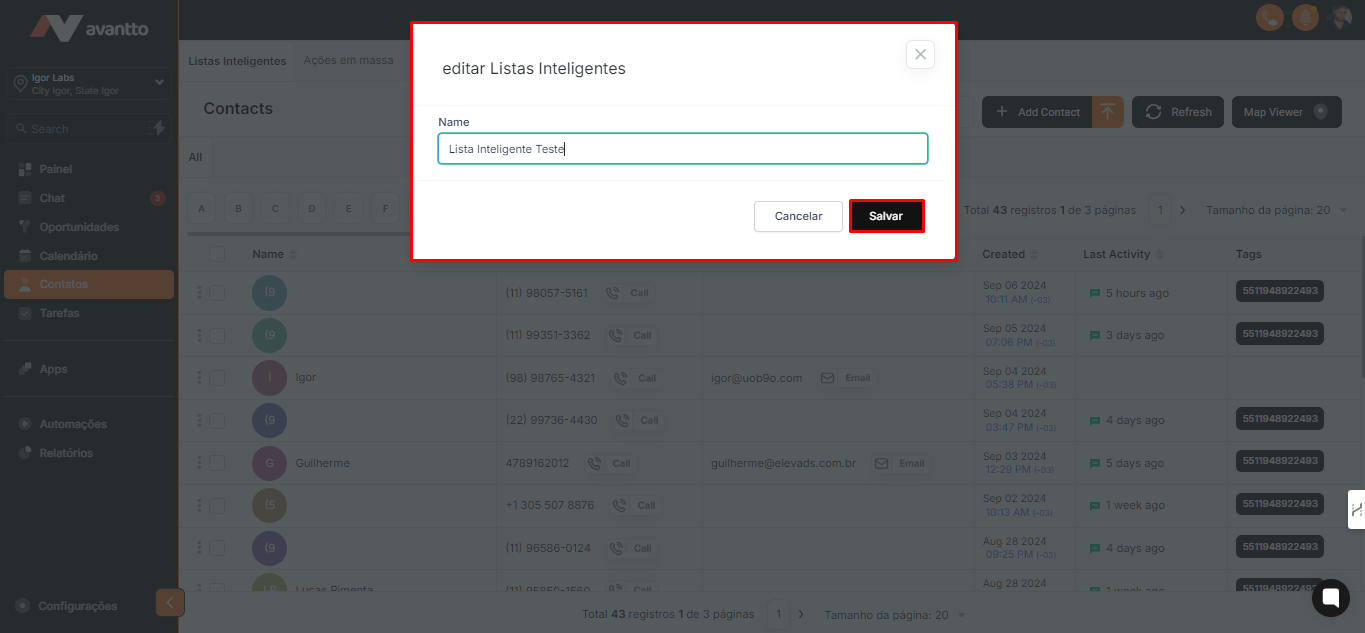
2.22 Give your list a name and click "Save" to complete the process.
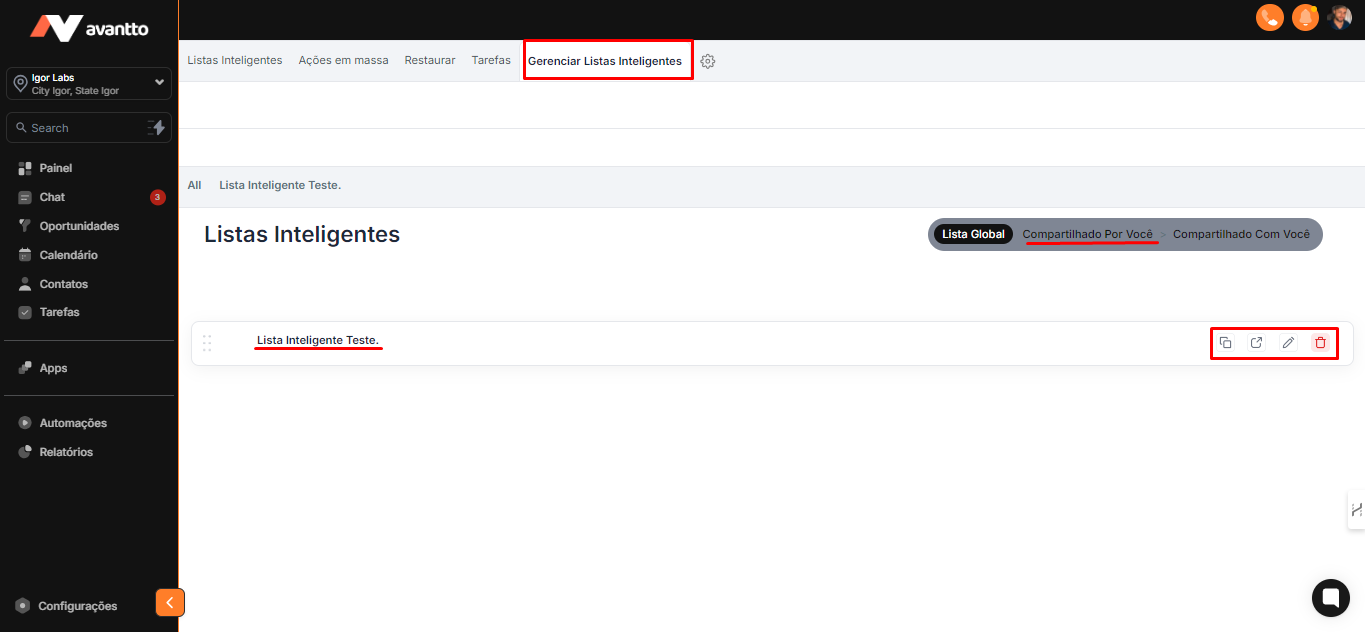
2.23 You can manage your list in "Manage Smart Lists."
In this section, you will have the options to Duplicate, Share with others, Edit, and Delete the list as needed.
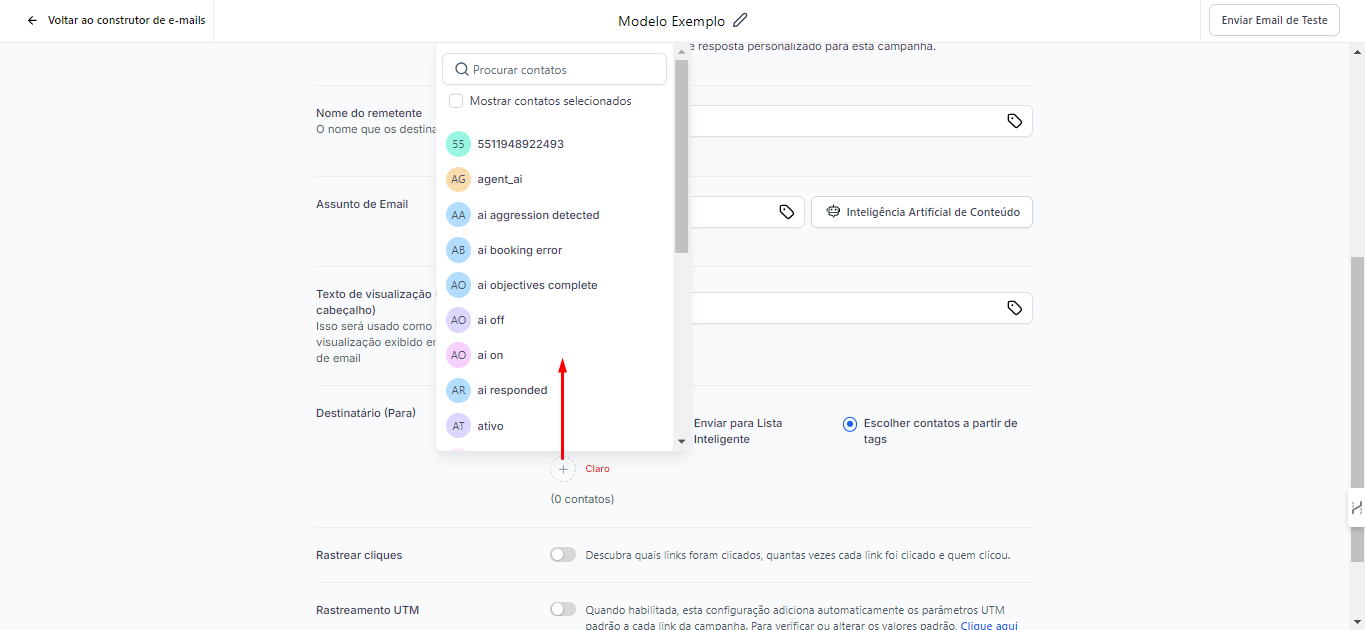
2.24 Choose Contacts Based on Tags: To select contacts based on tags, simply click the "+" symbol and choose the desired tags.
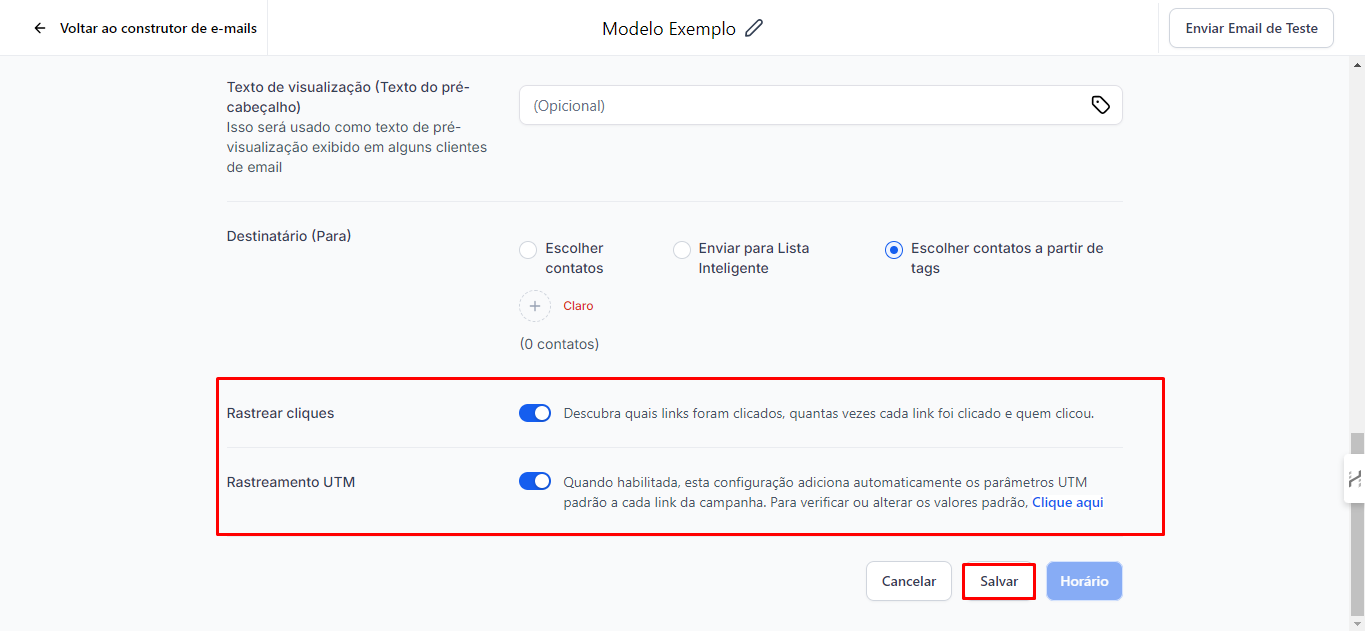
2.25 It is recommended that the "Click Tracking" and "UTM Tracking" options are enabled. They are important so that you can analyze how many people clicked on certain links within the email and identify which campaign each contact came from, especially when there are multiple campaigns running.
By using UTM tracking, you will be able to assign this value to the contact, allowing you to filter information later.
After setting up, click "Save."
There is already a nurturing flow that combines messages and emails, but nothing prevents you from creating a flow with multiple emails, customizing the sequence according to your needs.
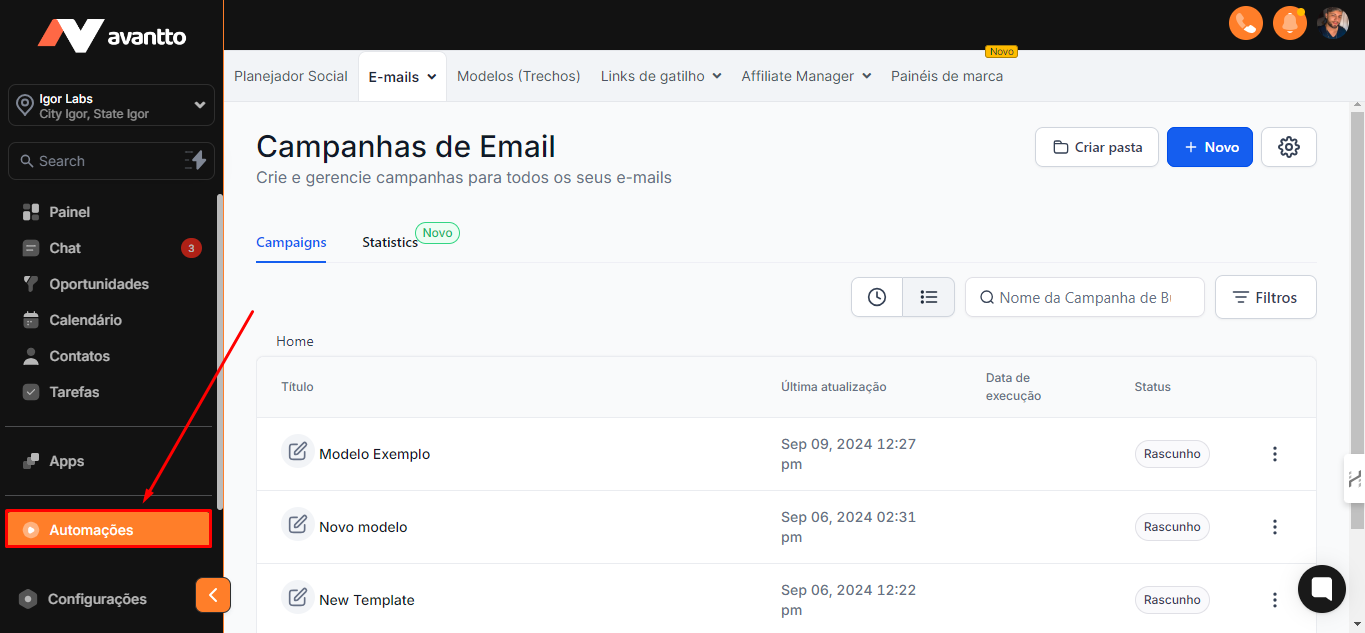
3.1 In the left side menu of the screen, click on Automations
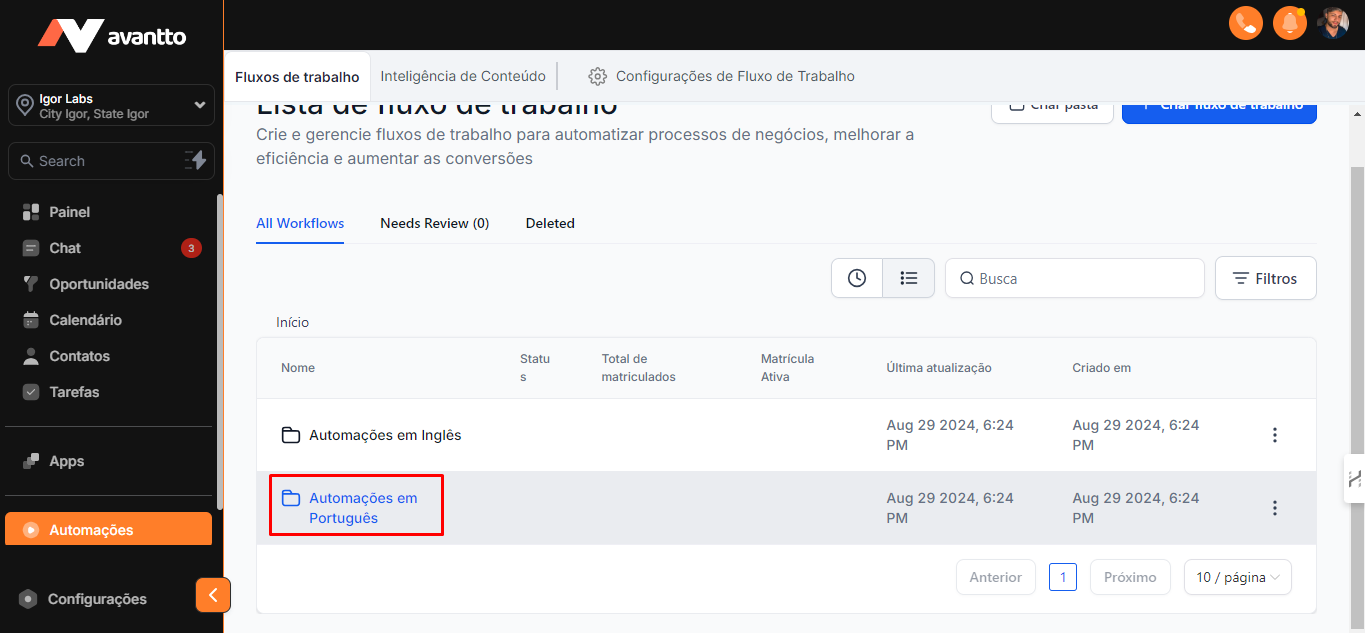
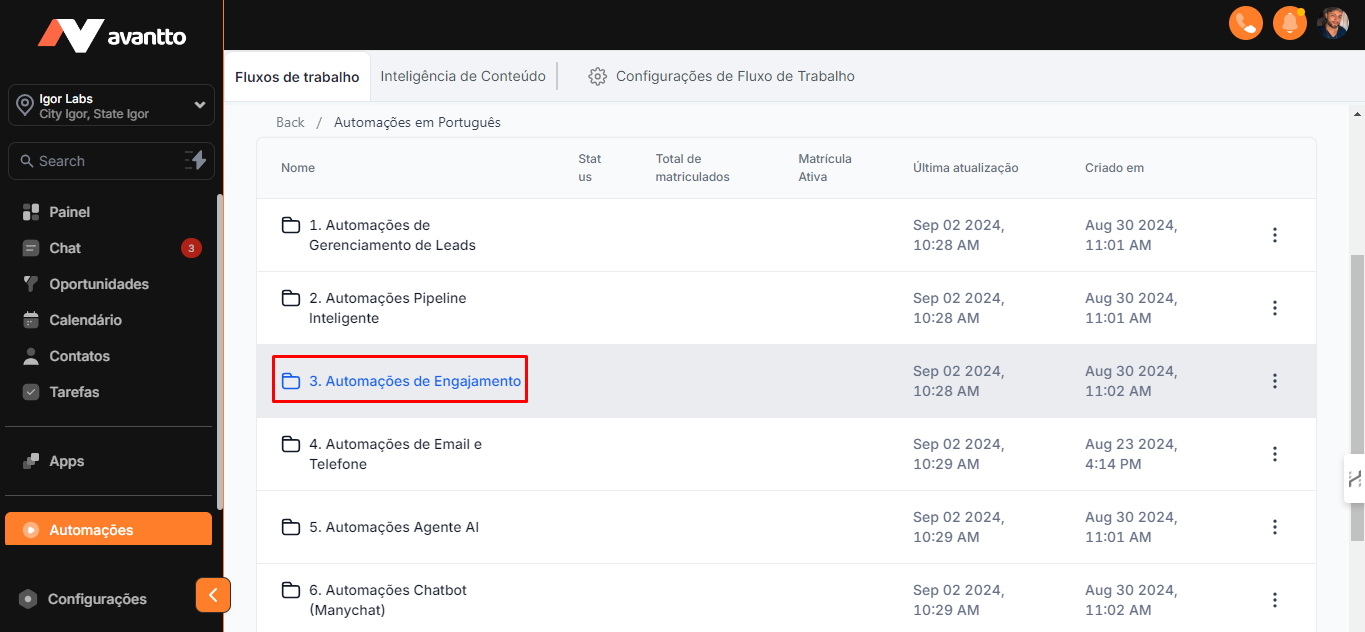
3.2 Click on "Automations in Portuguese"
3.3 Choose "Engagement Automation"
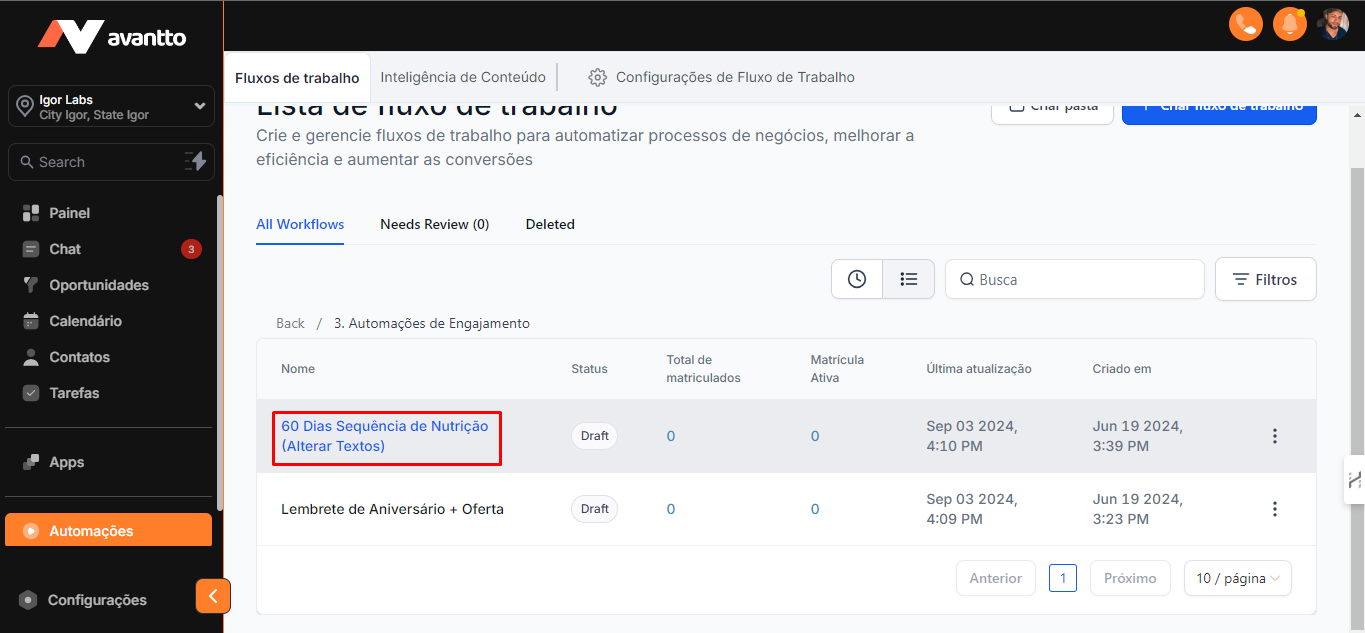
3.4 You will find the "60 Days Nutrition Sequence."
This is a pre-configured flow that you can customize by changing the texts as needed.
It includes both emails and SMS, but you have the option to use only emails.
To do this, simply duplicate the flow and delete all SMS messages.
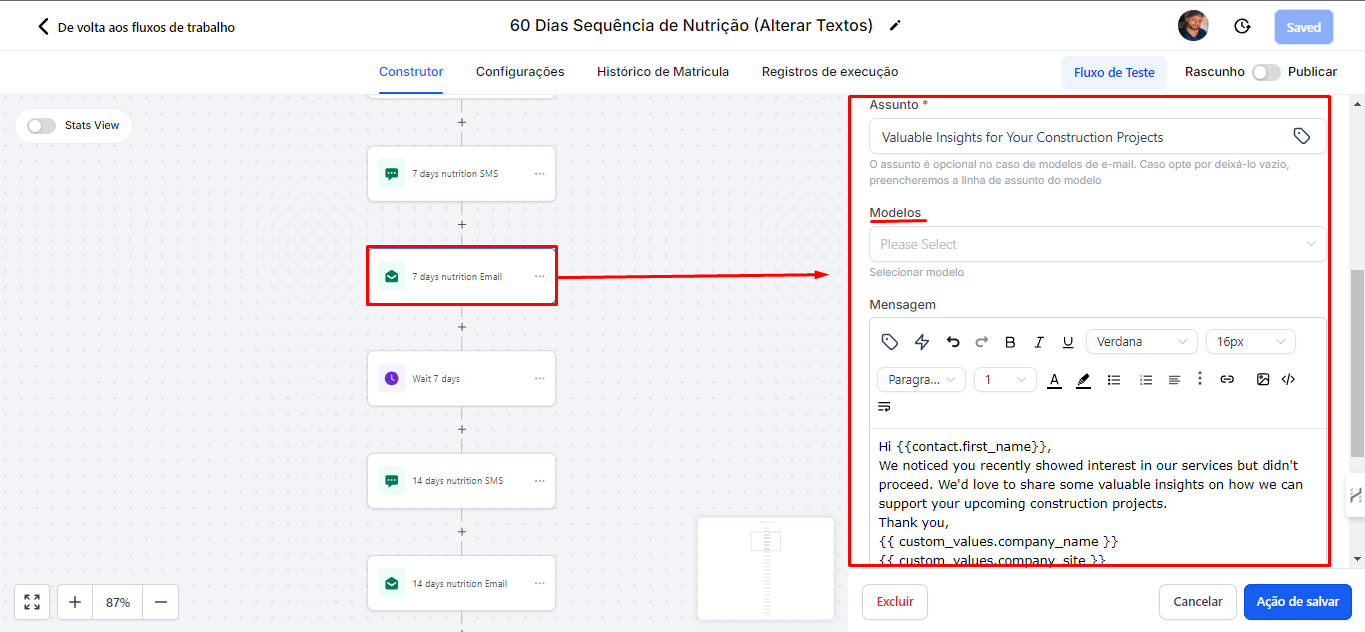
3.5 To customize your email sequence, just click on each email and edit all its content, or you can use the already created templates. If you want to change the time between one send and another, just change it within the wait actions. After making the necessary settings, don't forget to save the action.
3.6 To add a contact list within this automation and trigger the email sequence, go back to the left side menu of the screen and click on "Contacts," select the people you want to include or choose the option to select all. Then, add these contacts to the automation and link them to the email flow you created.
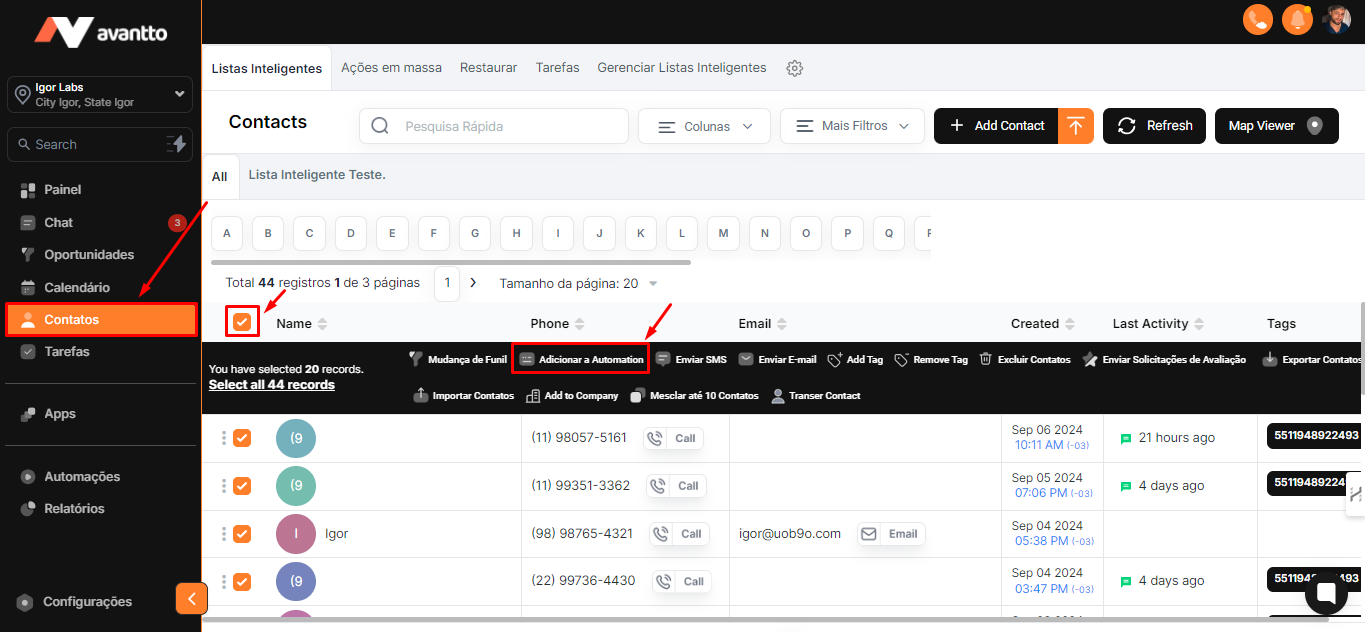
3.7 Click "Ok, proceed"
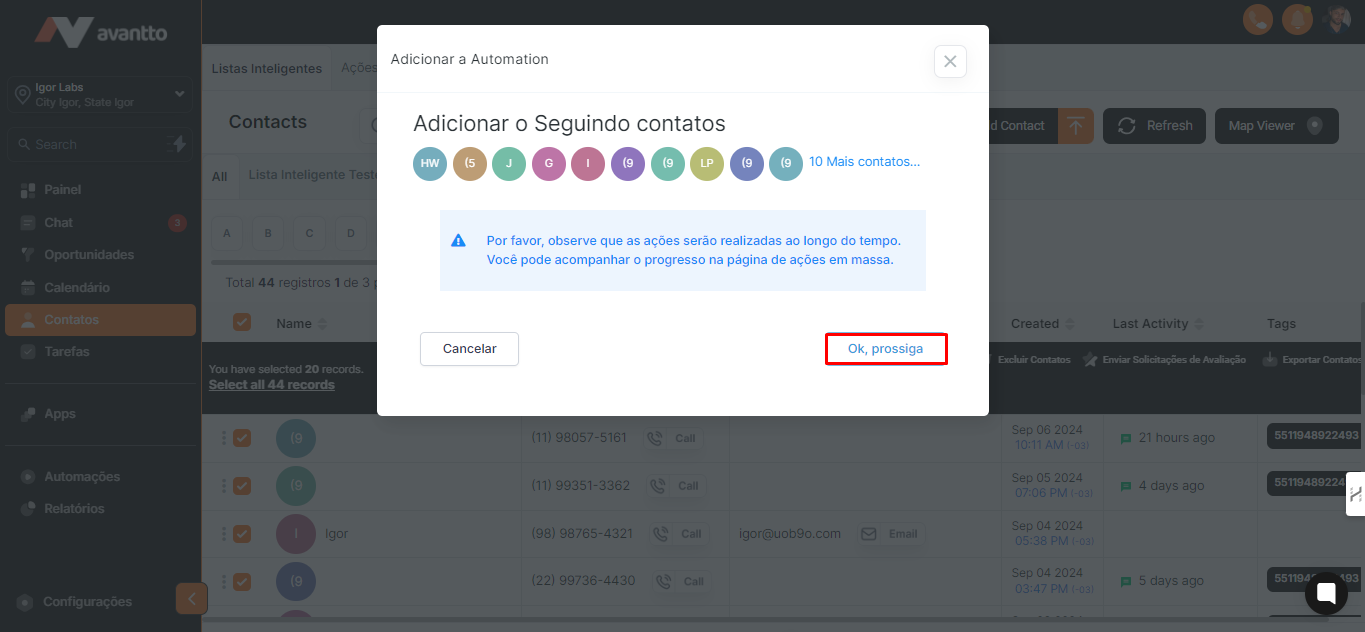
3.8 All active flows will be displayed.
When selecting a flow, you will have the options of "Add All at Once", "Add All at Scheduled Time", and "Add in Drip Mode".
Just choose the option that makes the most sense for your strategy, filling in the required information. Finally, click "Add to Automation".

3.9 These are the two options for creating email campaigns.
However, creating through the campaign app is simpler and offers the possibility to view results in statistics. On the campaign page (as shown in step 2.10), click "Statistics".
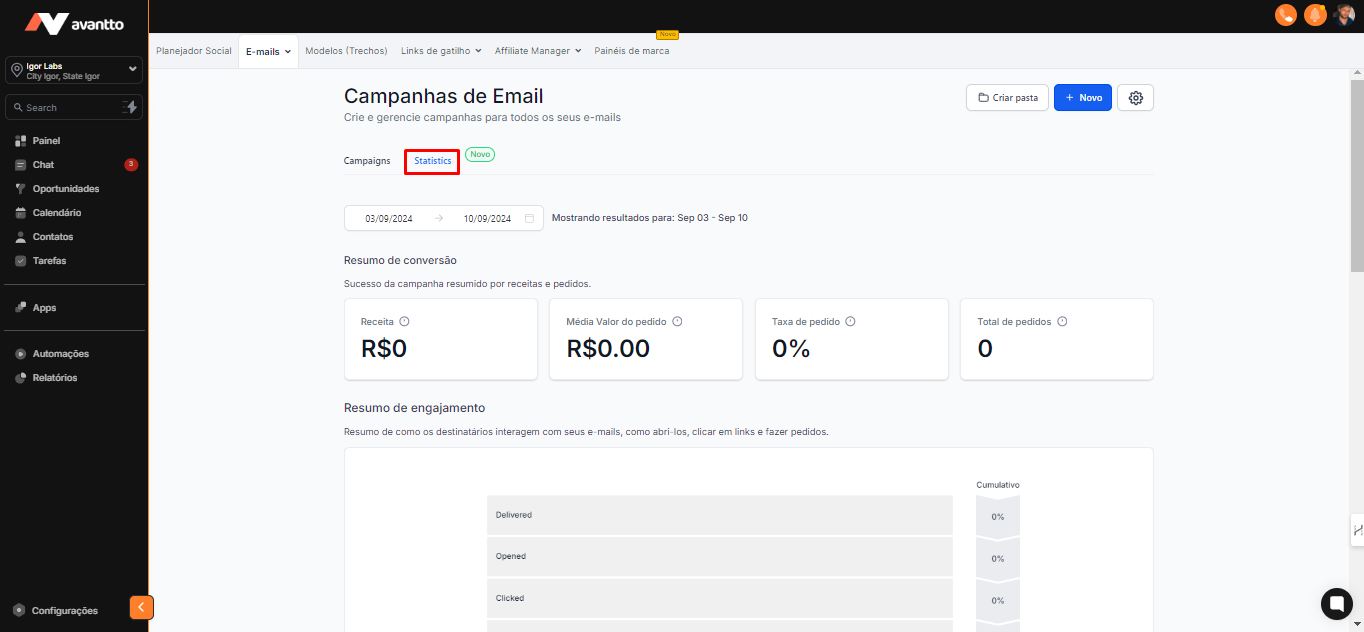
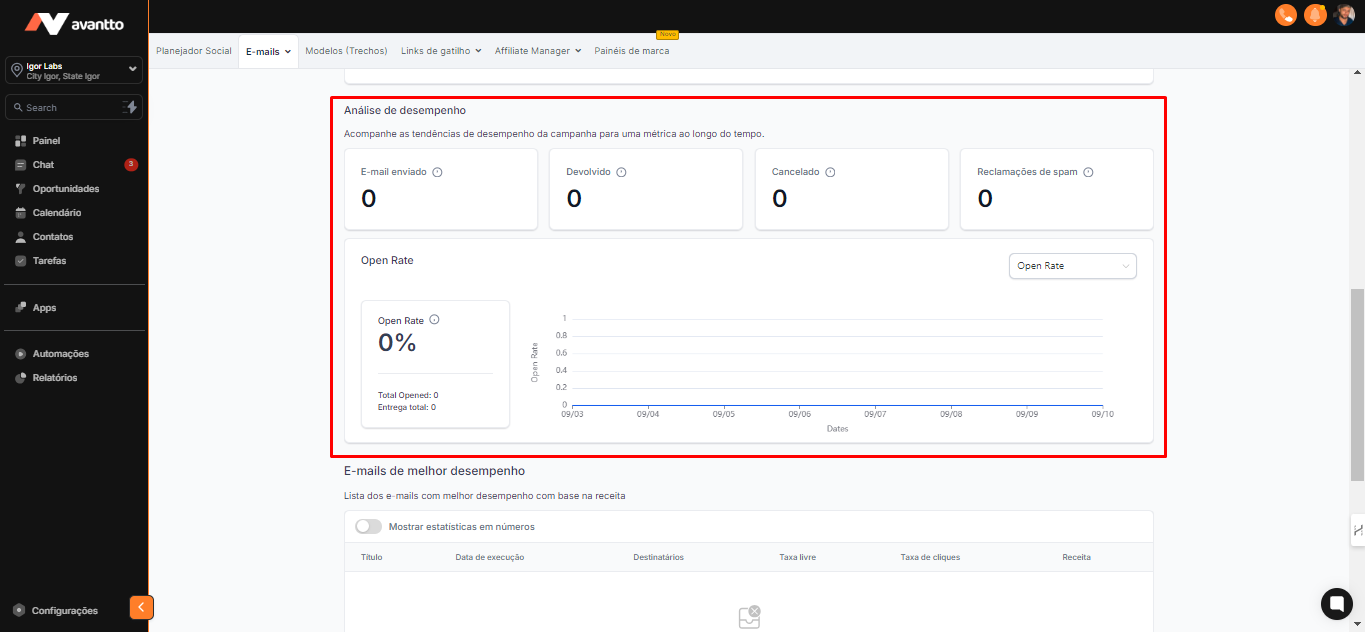
The dashboard will show how many emails were delivered, how many were opened, how many were canceled, among other metrics. You will be able to access an even wider variety of statistics.
Choose the method that makes the most sense for your campaigns.
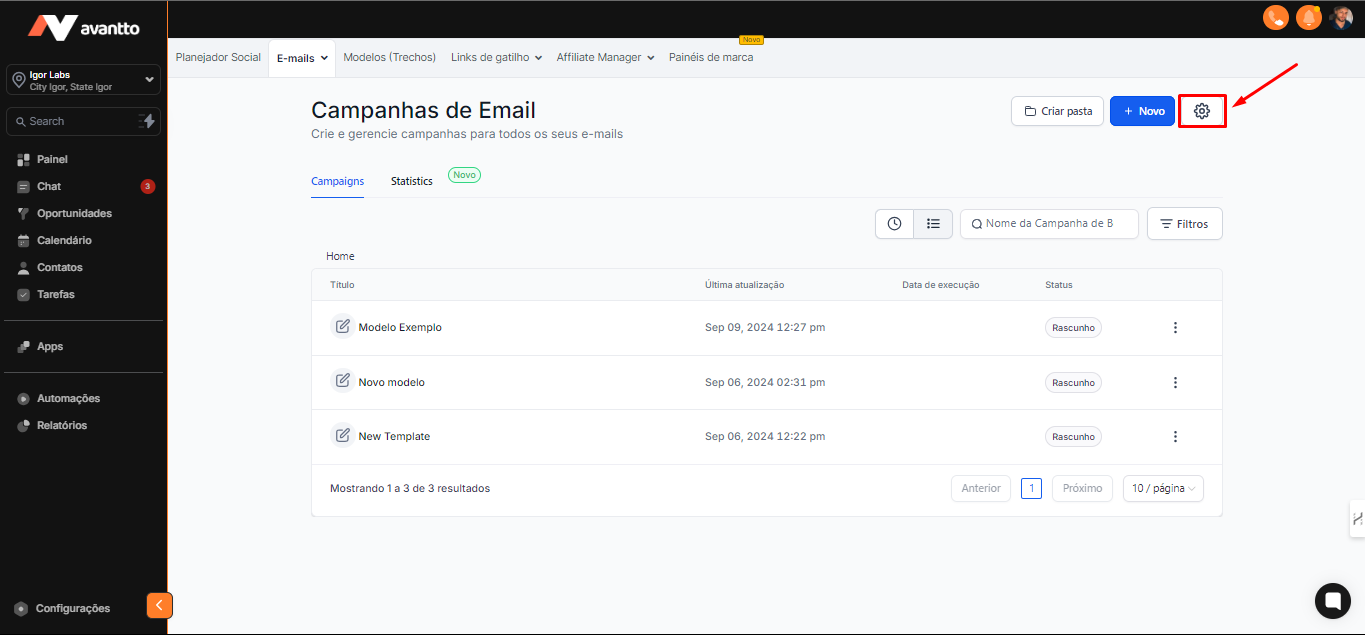
On the upper right side of the screen click on settings.
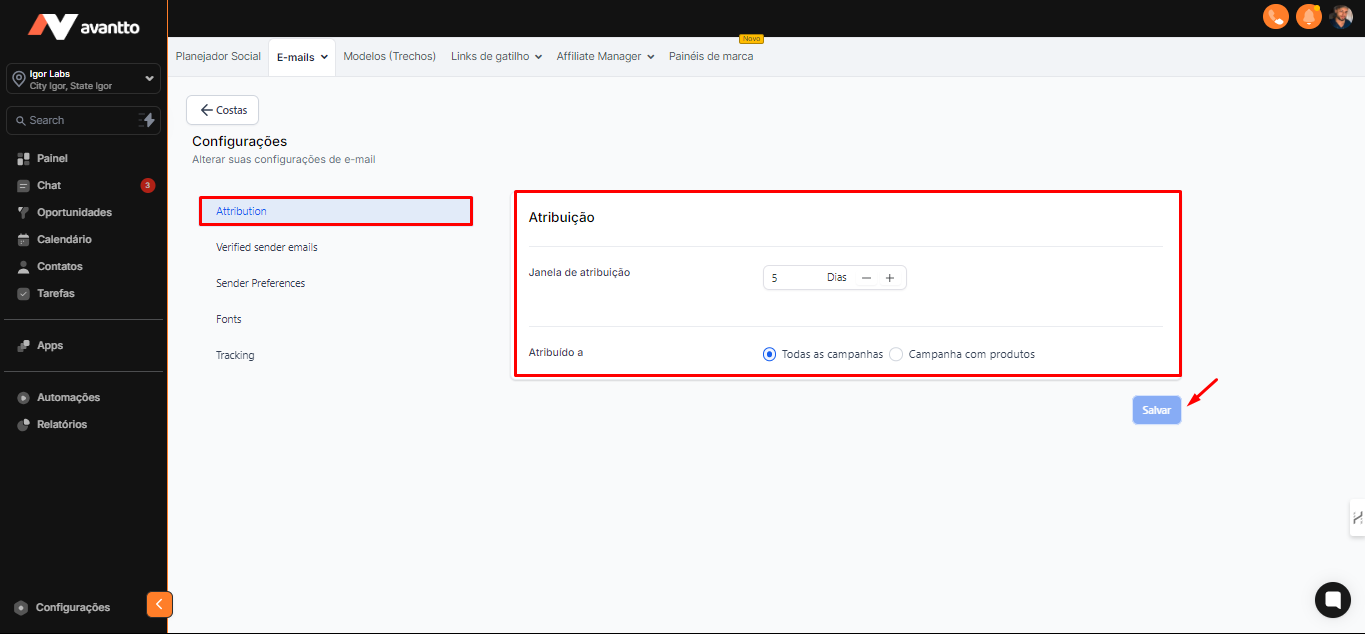
Attribution
You will be able to configure the conversion attribution window.
Verified sender emails
In step 2.16, you were asked to verify the email. If you have already accepted and verified, it will appear here for you to use. Otherwise, you can verify a new email by clicking "Verify an Email".
This is where the list of all verified emails will be displayed.

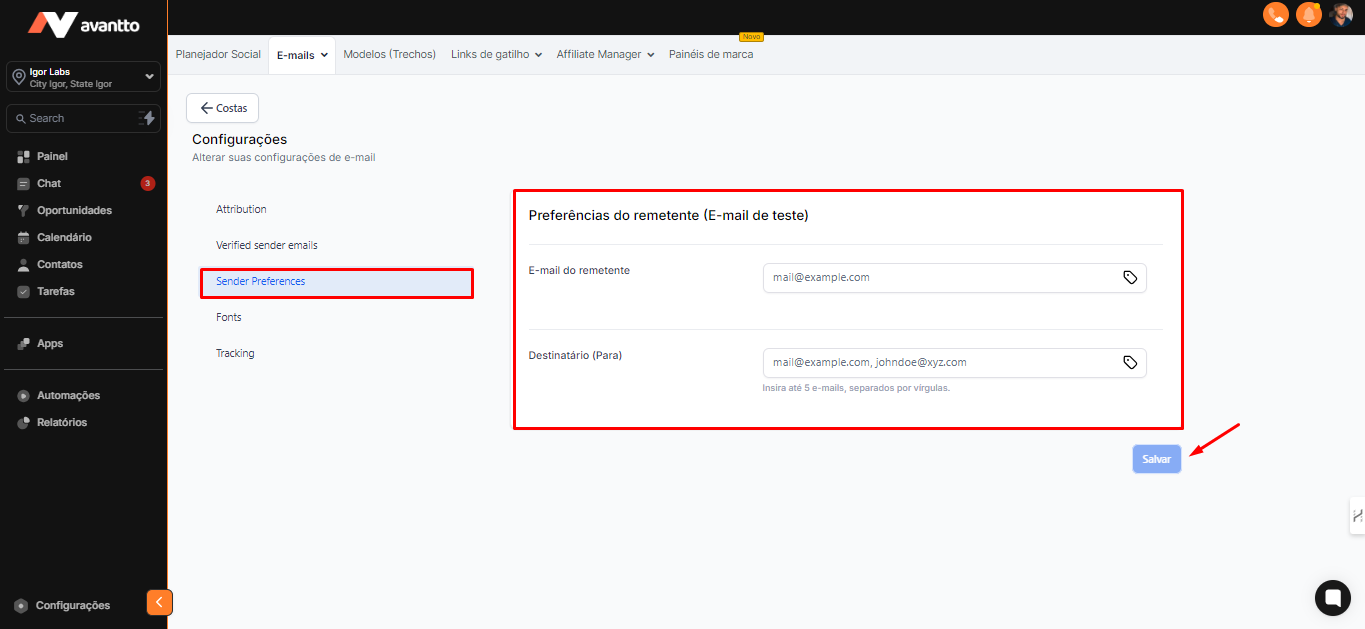
Sender Preferences
Sender's Email: If you have verified emails, you can choose which one will be your preferred one.
Recipients: You can add up to 5 emails, separated by commas. For example, if you want to send an email marketing campaign and want certain people to be aware, just enter the desired addresses here.
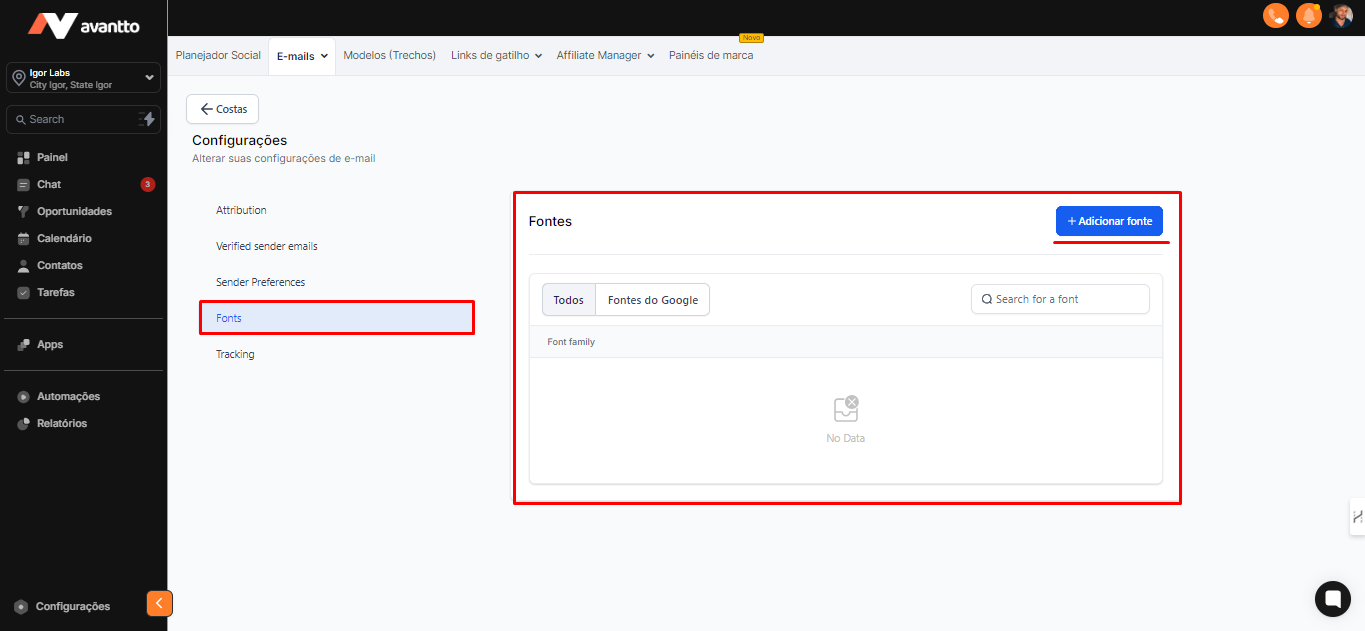
Fonts
If you want to add more fonts, the platform provides this option by clicking on "Add Font."
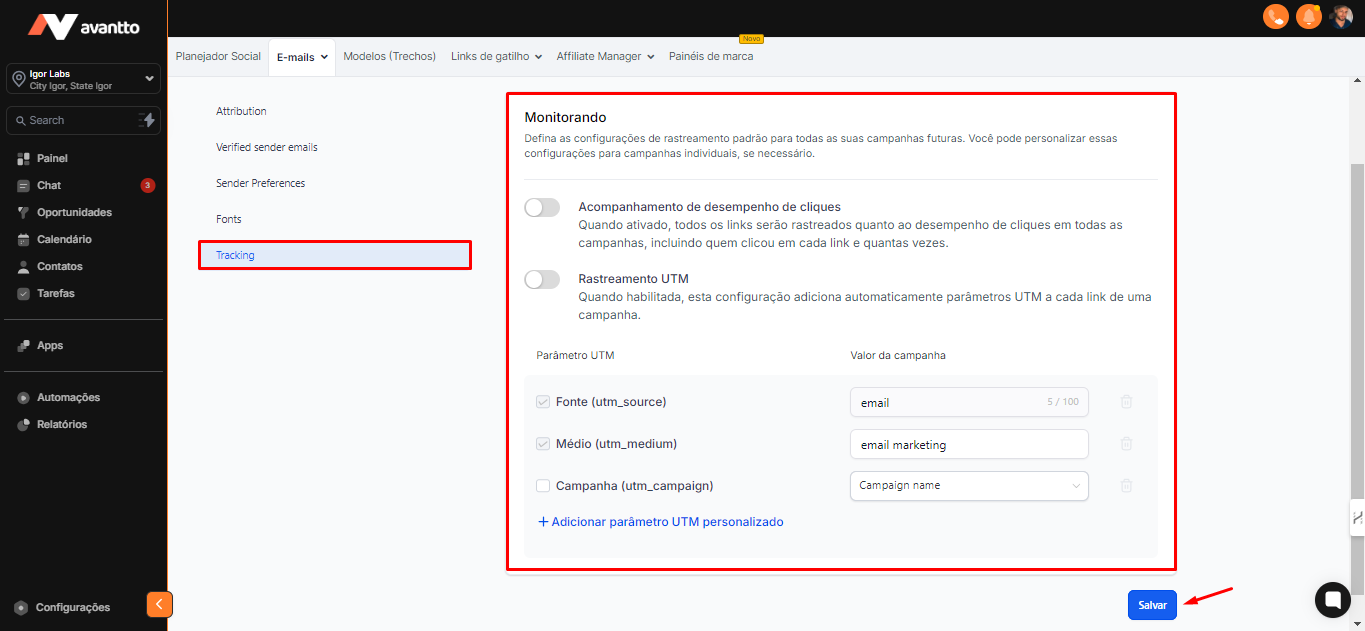
Tracking
Click Performance Tracking and UTM Tracking can be kept active by default, or you can change them within the campaigns, as shown in step 2.25.
The UTM parameters and the campaign value are already configured by default. However, if necessary, you can modify how the medium of the campaigns will be displayed.