This guide addresses the process of setting up the business profile on the platform, highlighting the importance of entering correct and relevant information to optimize the use of the system. The first step is to access the settings through the menu on the left, where the user will find essential fields such as "Friendly Name," which identifies the account in the search bar, and "Business Name," which should reflect the company's legal name. Additionally, it is necessary to fill in additional information, such as logo, business phone, and contact email, before clicking "Update Information" to save the changes. The physical address of the business and the authorized representative's data must also be entered, especially for companies located in the United States. The guide recommends enabling the "Allow Duplicate Opportunity" option if applicable to the type of business, as well as adjusting preferences related to contact deduction and automatic responses for missed calls. The main objective of this procedure is to ensure that all business information is correct and up-to-date, facilitating the management of contacts and opportunities on the platform.

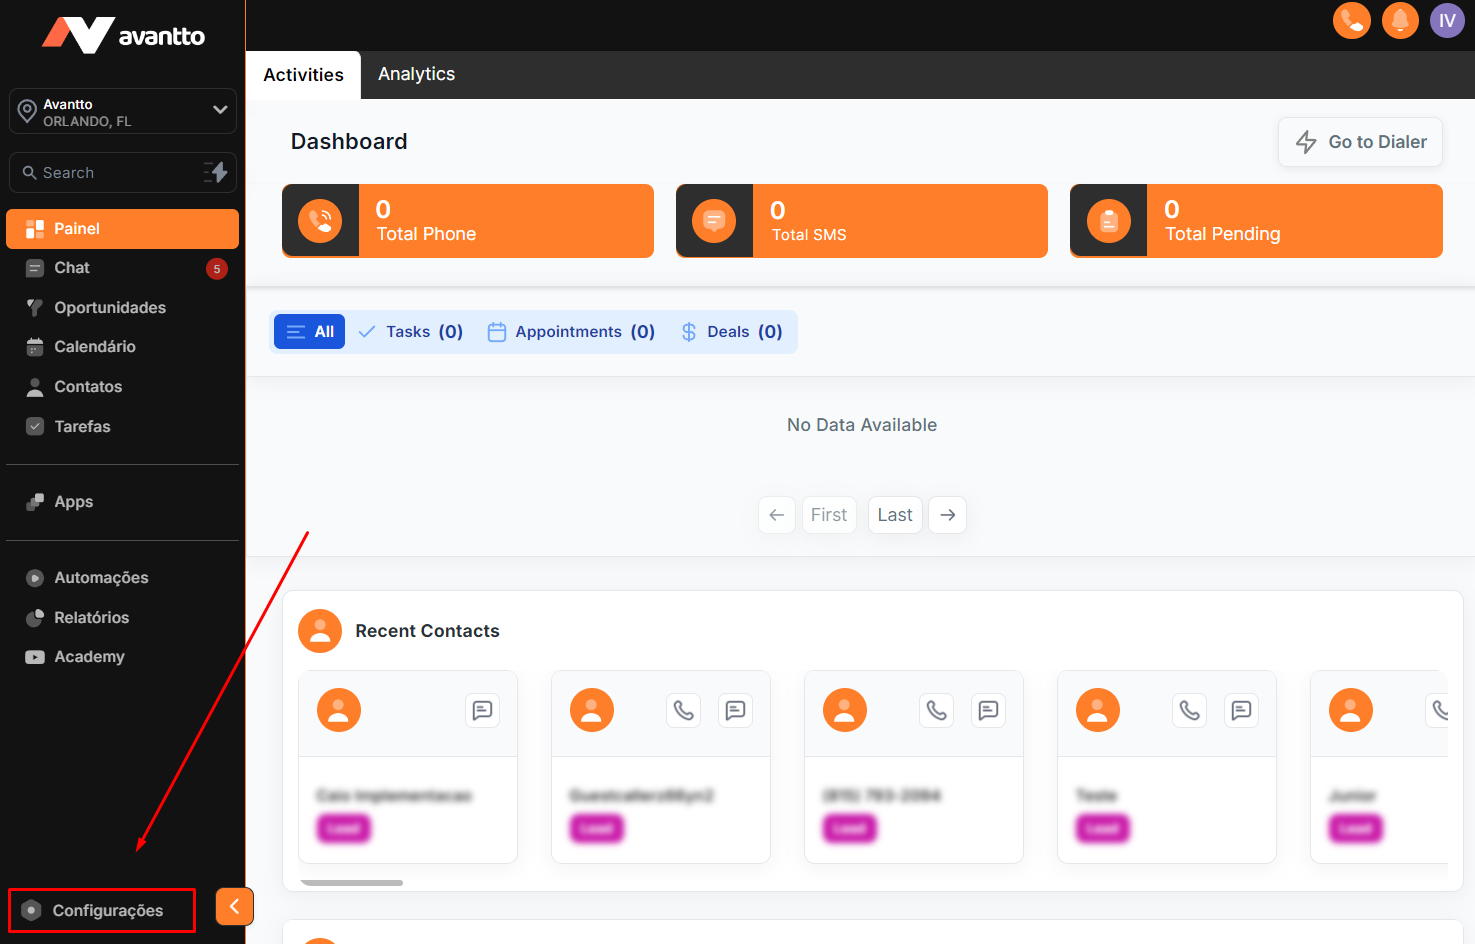
1.1 Click on settings in the menu on the left side.
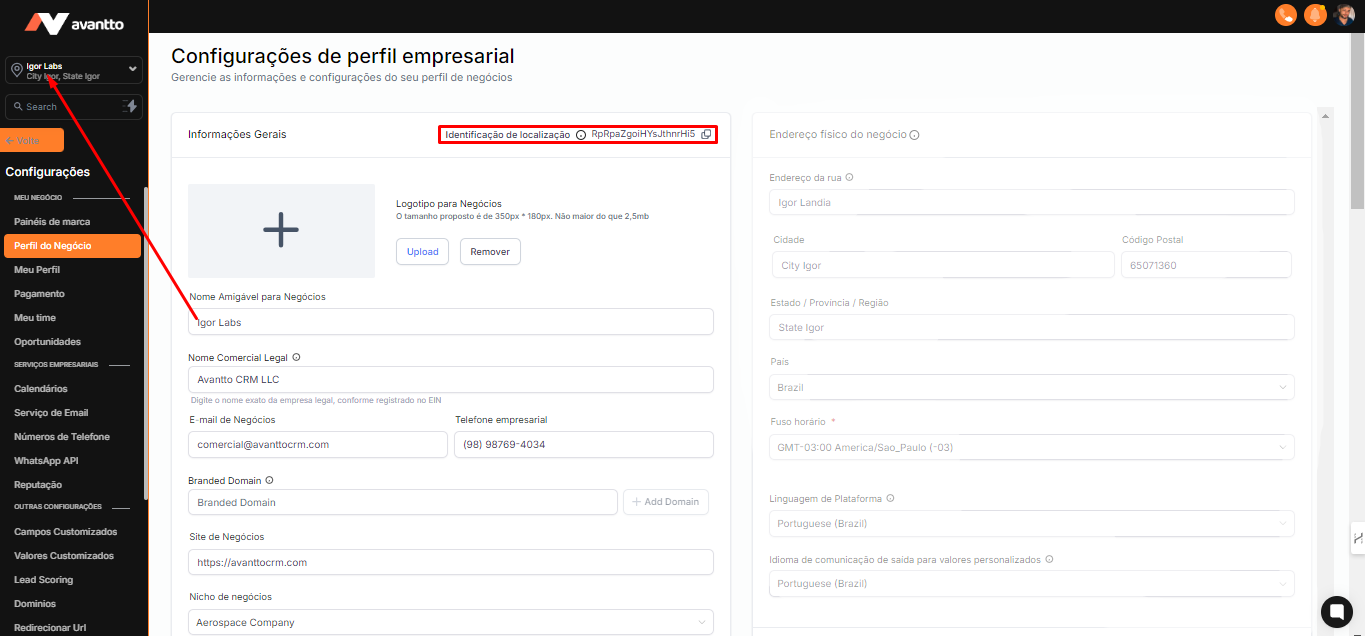
1.2 Upon accessing the business profile settings, you will find the following fields:
Friendly Name: It is especially important as it is the name that will appear in the search bar and will be used to identify your account if you have access to more than one.
Business Name: Refers to the legal name registered in any official document.
Branded Domain: Fill in this field after integrating the domain or subdomain.
Additional Fields: Complete the requested fields, such as logo, business phone, contact email, friendly name for the business, and market niche.
After filling in all the information, click on "Update Information" to save, otherwise the information will not be updated.
Local ID: This is your account identifier. Whenever you need to reference your account or account number, just copy this ID.
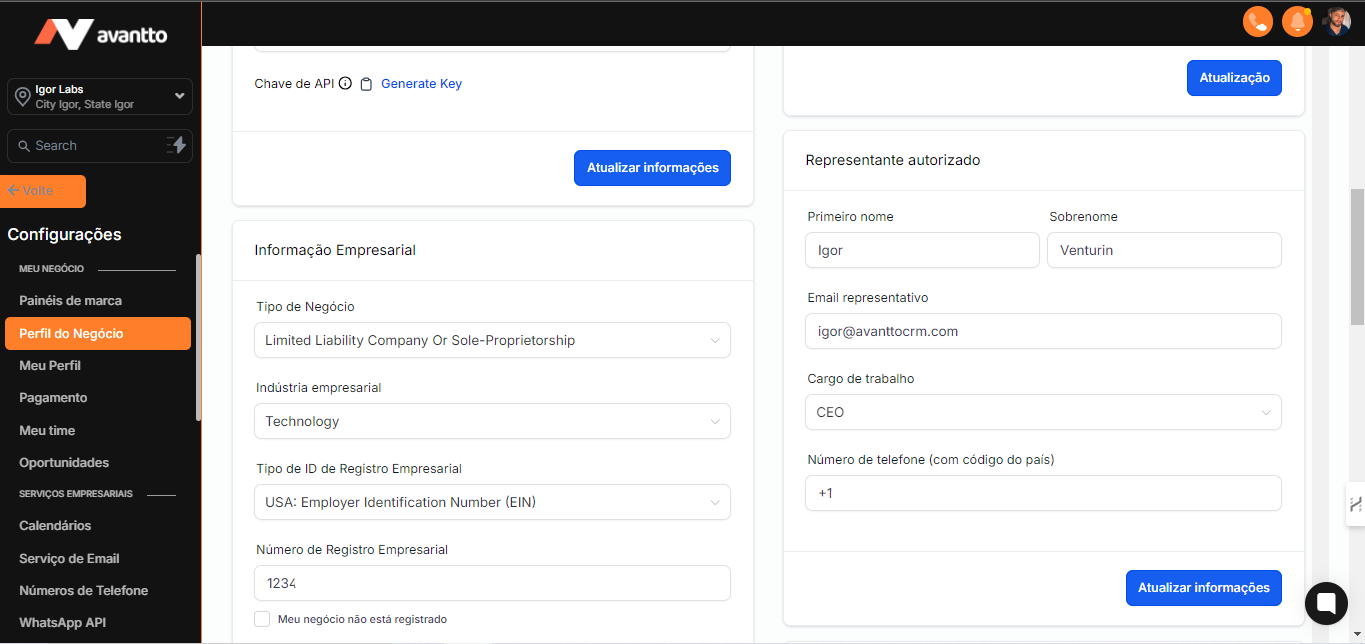
1.3 The fields related to the physical address of the business and the authorized representative must be filled out. The business information needs to be configured for companies located in the United States. If you have already completed the A2P registration, this information will be automatically filled in. Otherwise, you can manually enter the requested data in each field.
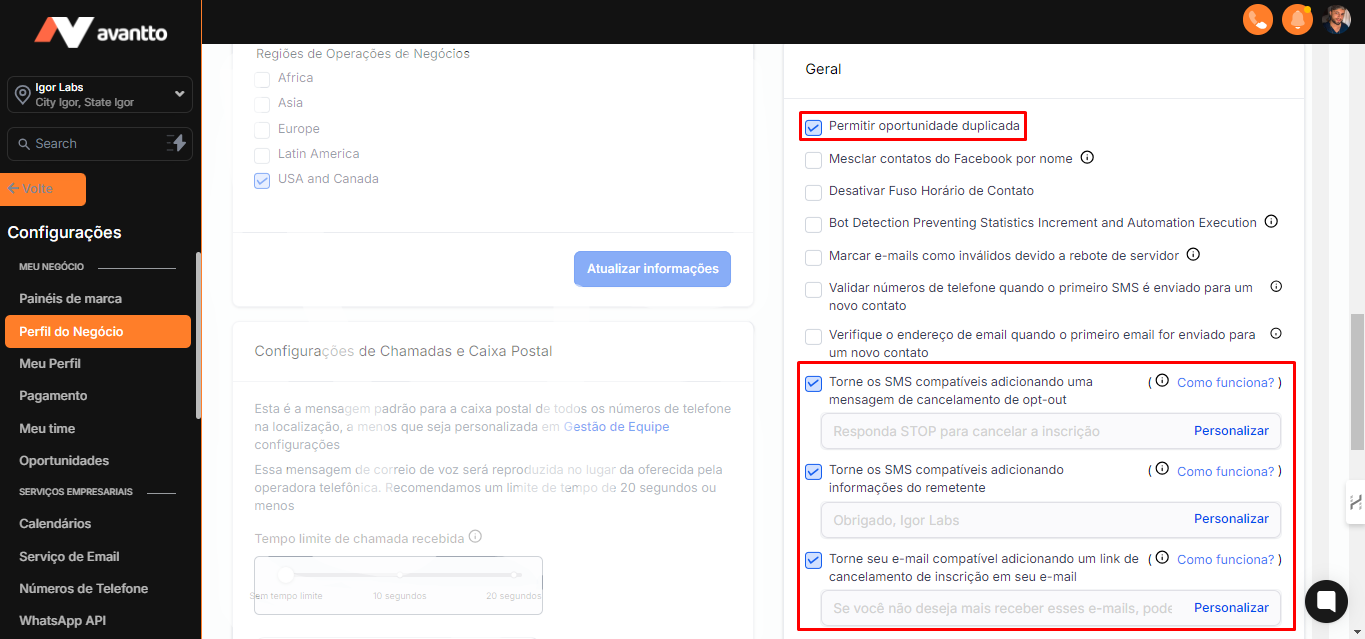
1.4 In the "General" field, you will find settings related to contact opportunities. By default, the "Allow Duplicate Opportunity" option is disabled; however, depending on the type of business or niche, it is recommended to enable it, as a single contact can generate multiple opportunities within a single pipeline.
The other fields can be selected as needed, keeping in mind that there may be an additional cost associated with some options, which can be consulted in 🛈.
Additionally, when starting conversations without consent, through chat or automations, the standard "opt-out" text is added at the end of the first message as shown in the screenshot below, and the same applies to "opt-in" for messages and emails. Both messages can be configured.
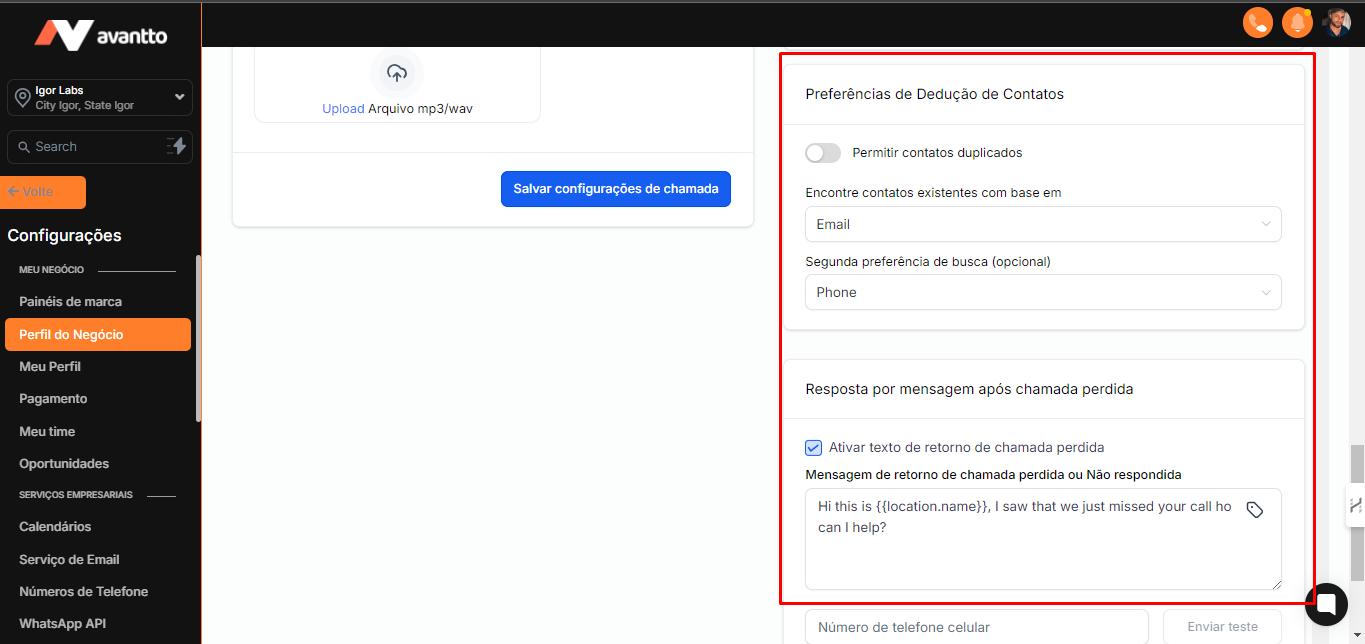
1.5 In "Contact Deduplication Preferences," it is recommended to keep the option disabled to avoid duplicate contacts. However, if it makes sense for your business, you can enable it.
Regarding "Message Response After Missed Call," it is not necessary to configure it, as there is already an automation for this. However, if you prefer to use the function natively, you can configure it.