This guide addresses the process of creating and managing pipelines in an opportunity management system. This process is divided into three main steps: first, the user accesses the "Opportunity" menu to view, edit, and create new pipelines, being able to change stage names and set data visibility in the dashboard charts; second, the created pipeline allows viewing and use in automations, with filters that segment opportunities by various criteria and sorting options; finally, in the menu, it is possible to export opportunities and import new ones, following a specific format to ensure the correct update of the platform. The main objective of this process is to facilitate efficient management of opportunities, providing a clear and detailed view of the information for more informed decisions.

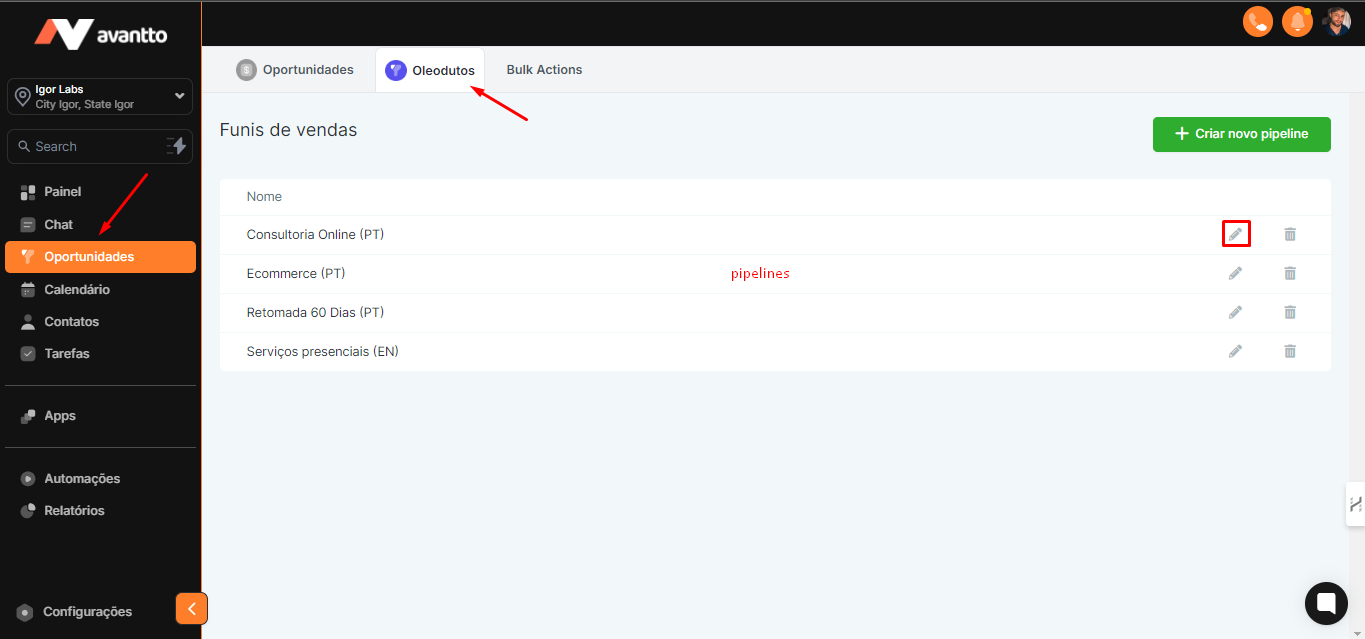
1.1 To start, access the left side menu and click on Opportunity, then on Pipelines. You will see all the created pipelines, where you can edit them.
1.2 In the Edit section, you can change the name of the stages and move them using the up/down arrow buttons. In Actions, you have the option to choose whether to show or hide the data of the respective stage from the pie and funnel charts on the dashboard. Additionally, you can add new stages by clicking on + Stages.
The options "Visible in pie chart" and "Visible in funnel chart" determine whether the pipeline data will be displayed in the Dashboard section (in the left side menu) and later in Analytics.
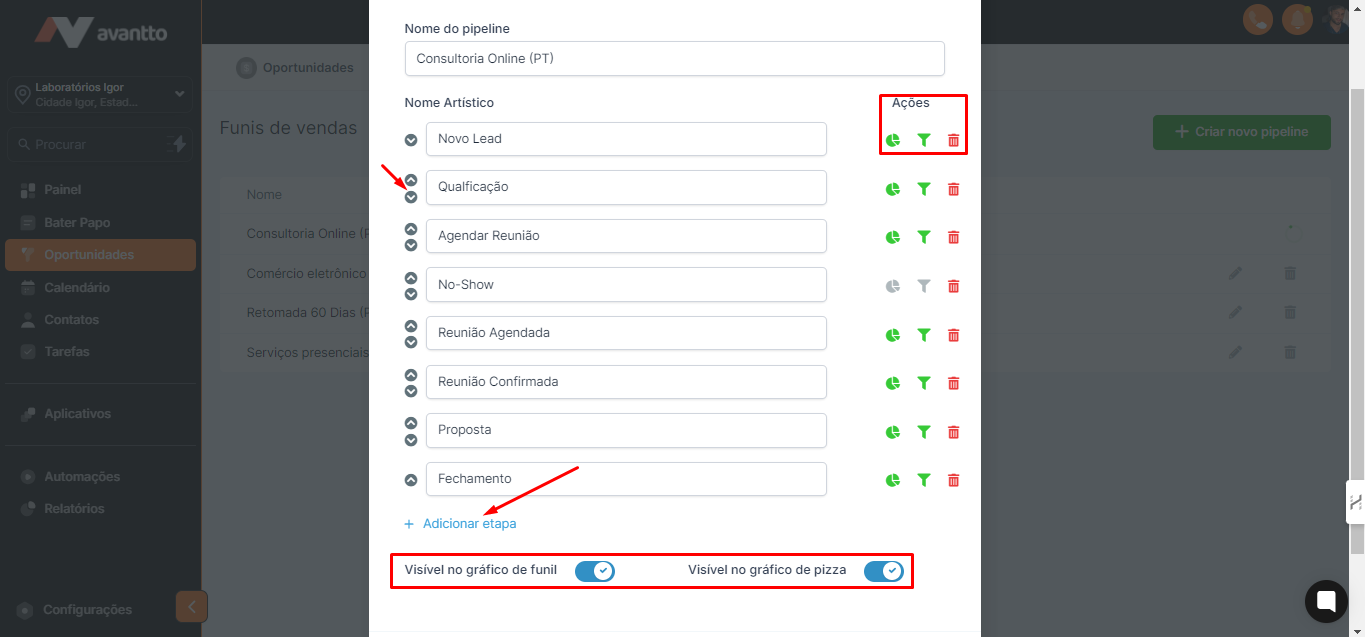
1.3 To create a new pipeline, click the "Create New Pipeline" button. Then, define the name of the pipeline and add stages using the Add Stage option. Don't forget to name each of the stages as needed. Save.

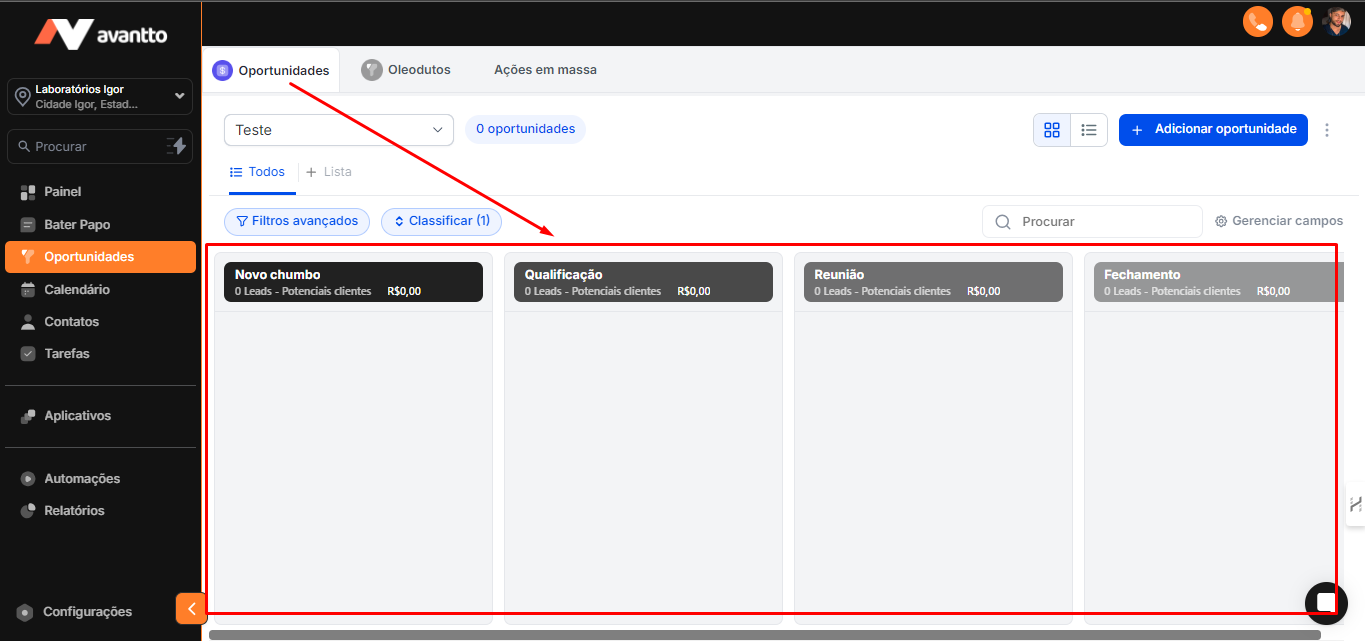
2.1 The pipeline will be displayed in the Opportunities section, as illustrated in the image below. Additionally, you can use it in automations.
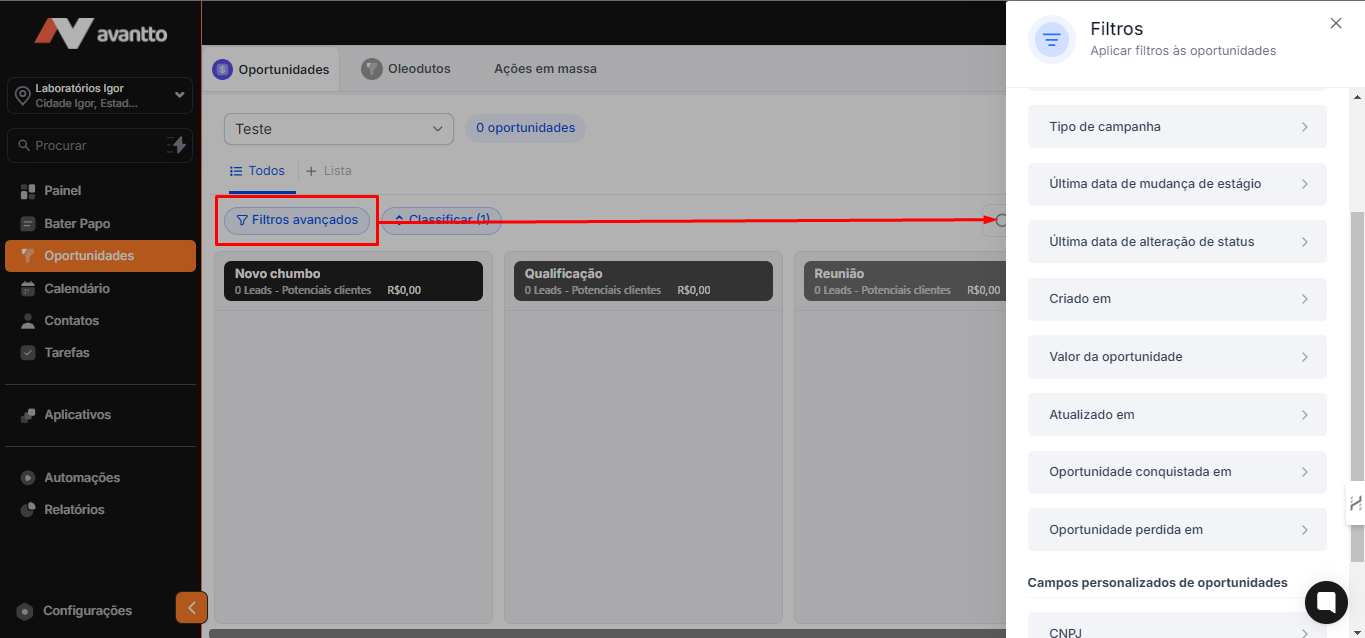
2.2 Another interesting point about pipelines is the filters, which allow you to segment a variety of options, such as by owners, followers, status, types of campaigns, among others. It is also possible to filter by "Custom Fields," which are custom fields created in the account.
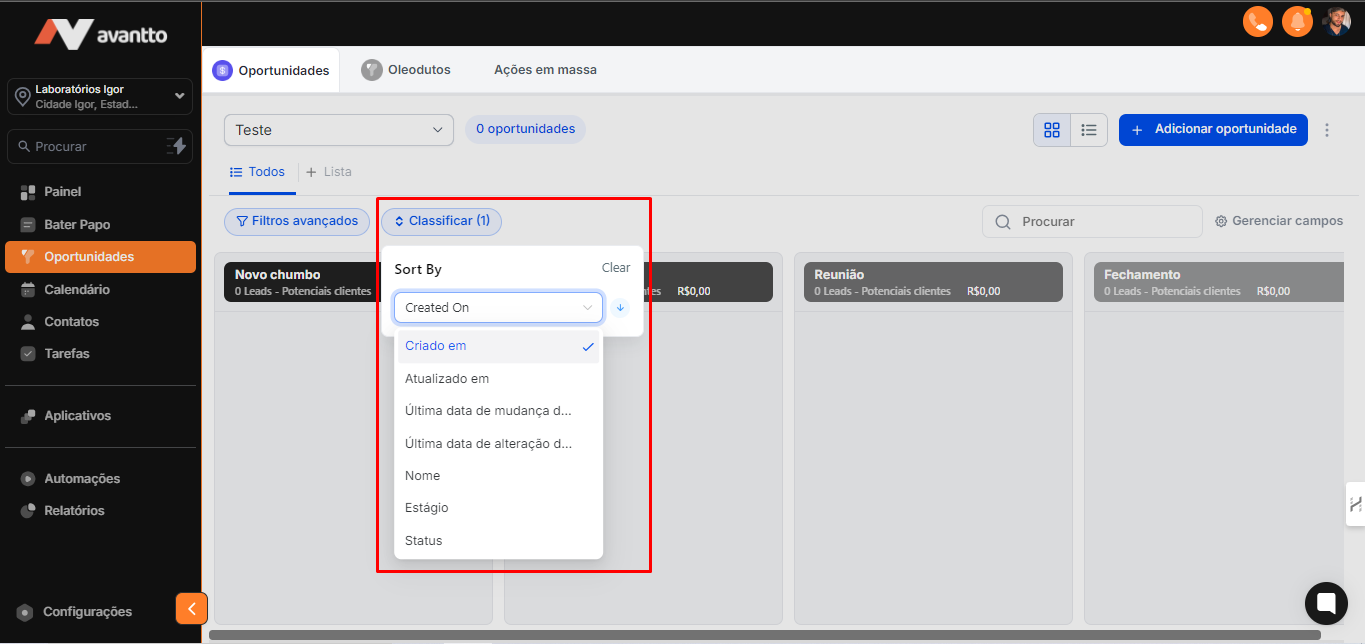
2.3 It is possible to Sort/Classify the data.
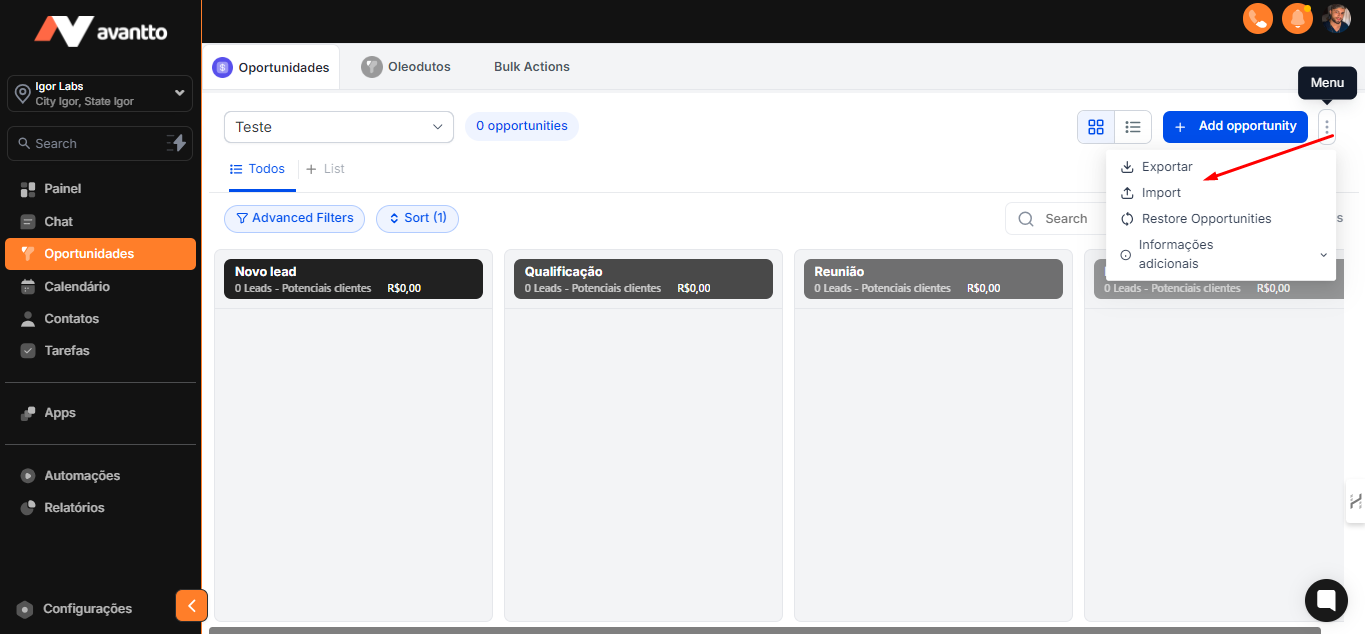
3.1 In the left menu, it is possible to export all opportunities included in the current pipeline view.
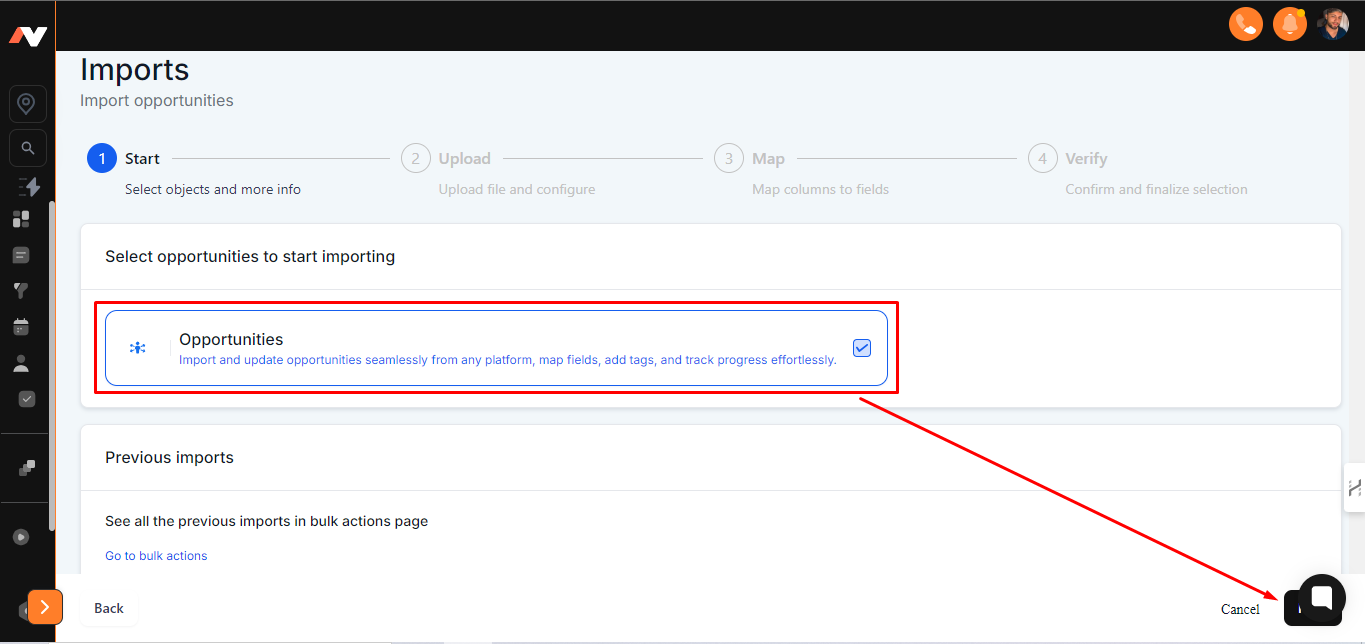
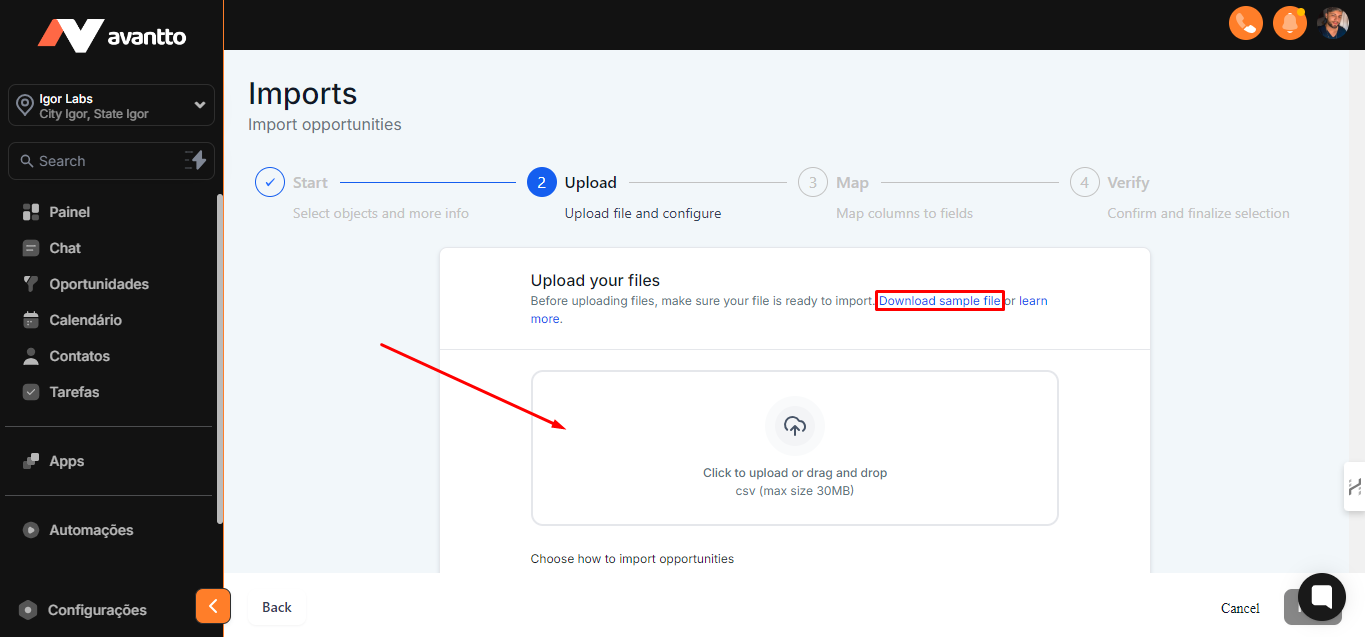
3.2 In the case of Import, the "Opportunities" option must always be enabled, as this is essential to update the platform, fields, tags, etc.
Click the "Next" button for the next step.
3.3 It is highly recommended that whenever you perform an import, you download the sample file and open it in an application of your choice, such as Google Sheets or Excel.
After opening the file, enter the data from the opportunity database you want to import. Make sure to follow the example format to ensure that the information is correctly recognized by the system.
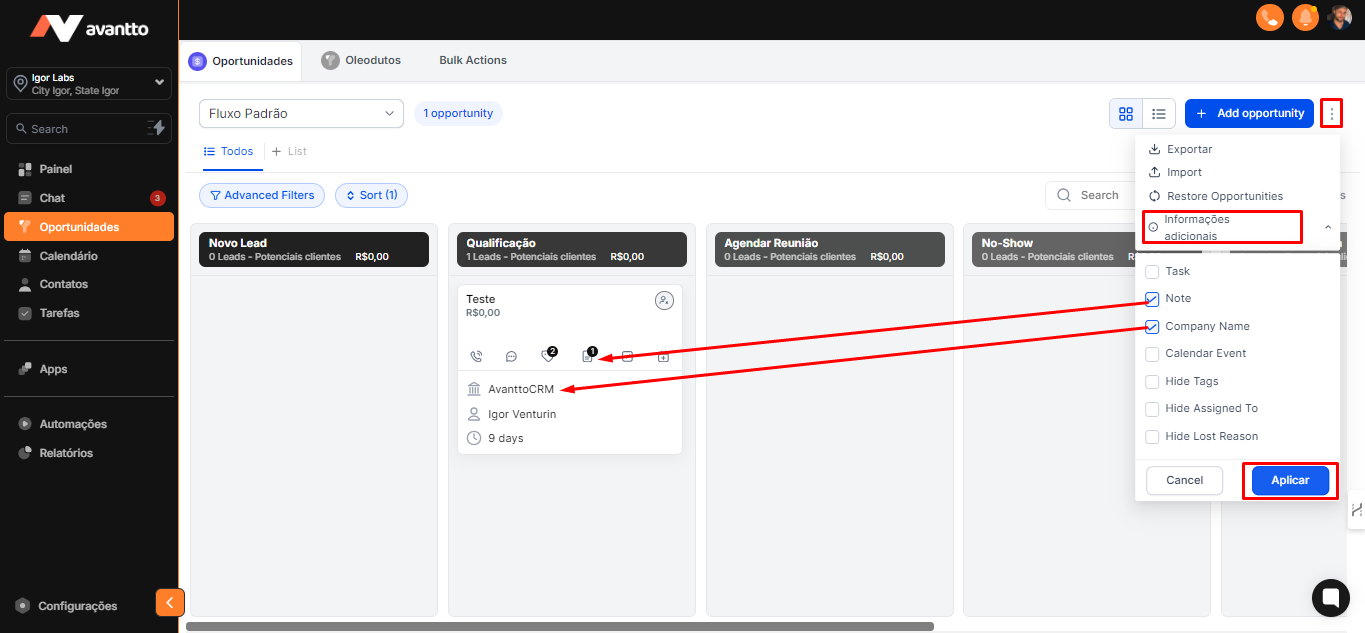
3.4 To assist in the preview and analysis of the opportunity, simply correctly configure the additional information that appears on the pipeline card of each opportunity, such as notes, client tasks, company name, calendar, and hidden tags. This information helps you perform detailed analyses and have a complete view of interactions with clients.
To configure this information, click on the three dots (as shown in the image) and select "Additional Information." Then, choose which data you want to display, such as "Notes" and "Company Name," and click "Apply." Thus, this information will immediately appear in the contacts.