This guide addresses the process of creating and managing workflows on the Avantto platform, essential for automating interactions and optimizing communication with clients. The first step is to locate the "Workflows" tab in the "Automations" menu, where you can view existing workflows and create new ones, assigning a name that reflects their purpose. Next, when creating a workflow, the user must add a trigger that initiates the automation, such as a change in the status of an opportunity, and configure the actions that will be executed, such as sending internal or external notifications. The guide also highlights the importance of adding conditions to check if the client has responded, allowing the workflow to follow different paths depending on the response. Additionally, it is possible to copy existing automations to facilitate the creation of new workflows, customizing as needed. The main objective of this procedure is to ensure effective and continuous communication with clients, improving the efficiency of the sales and follow-up process on the Avantto platform.

1.1 In the left side menu, click on "Automations." In this section, you will find existing workflows and folders.
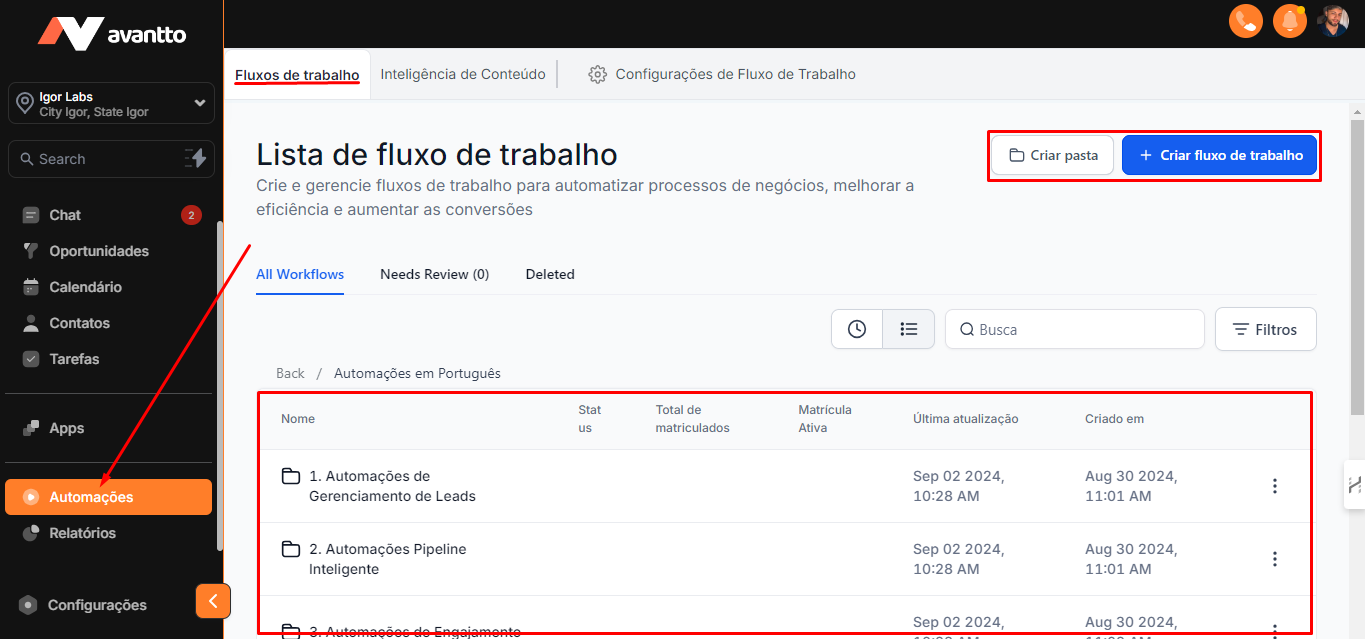
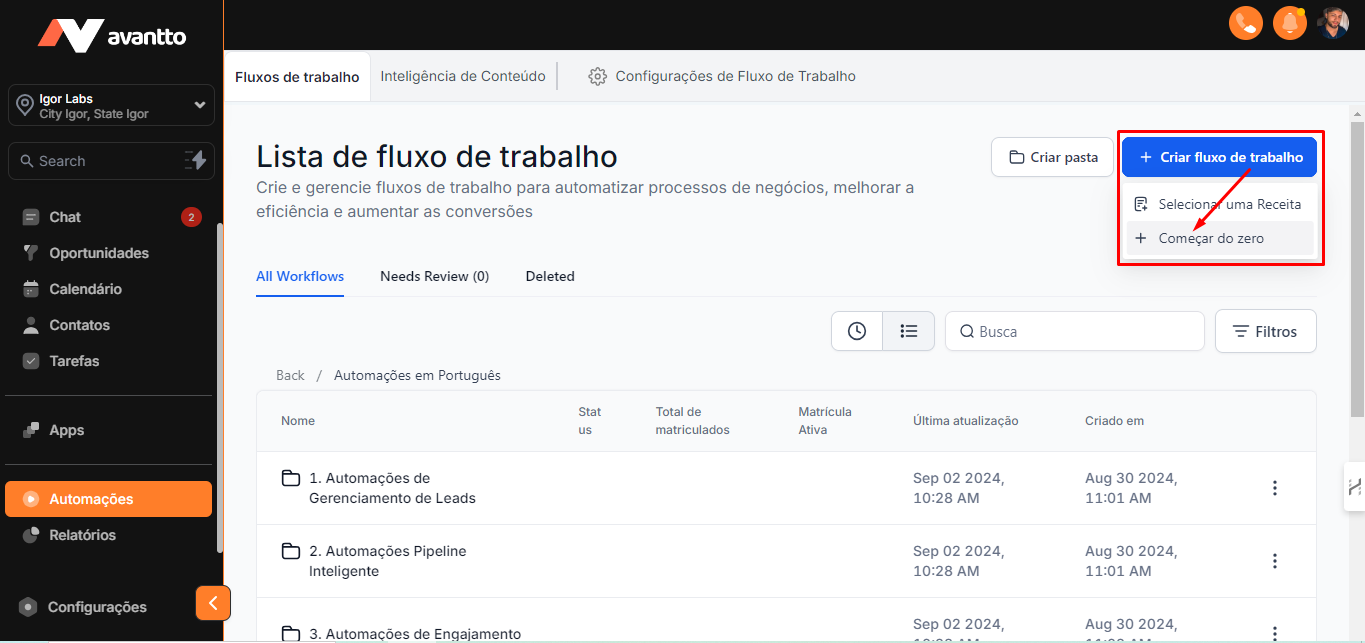
1.2 You can create a flow within an existing folder, create a new folder, or develop the flow outside of any folder. Then, click on "Create Flow" in the "Start from Scratch / Começar do Zero" option.
1.3 Upon accessing the flow creation page, you should assign a name to the automation that reflects its purpose.
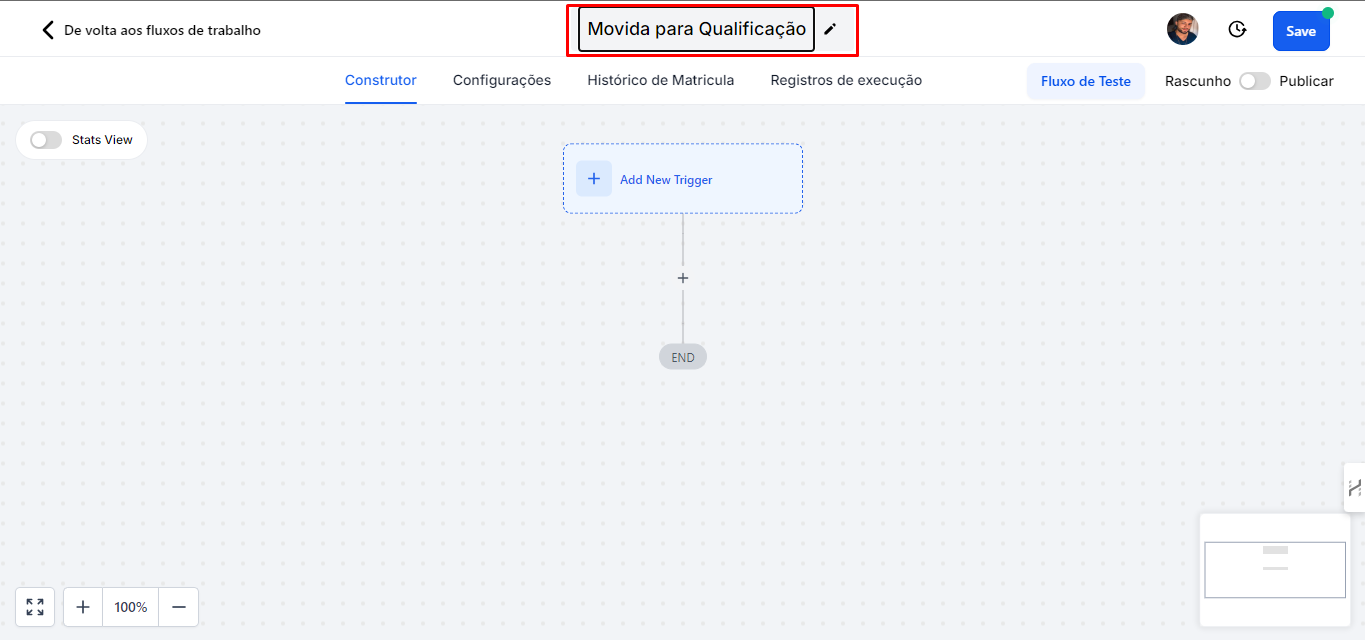
2.1 Click on "Add New Trigger" to create a new trigger.
On this page, the list of available triggers will appear.
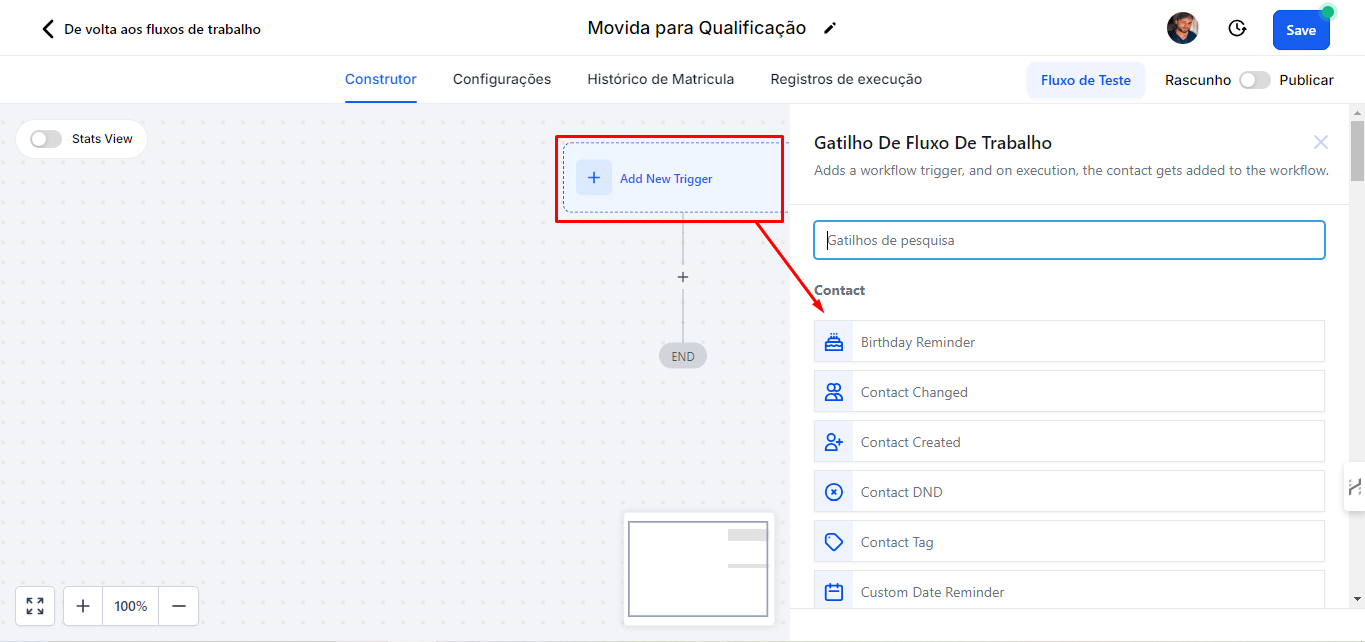
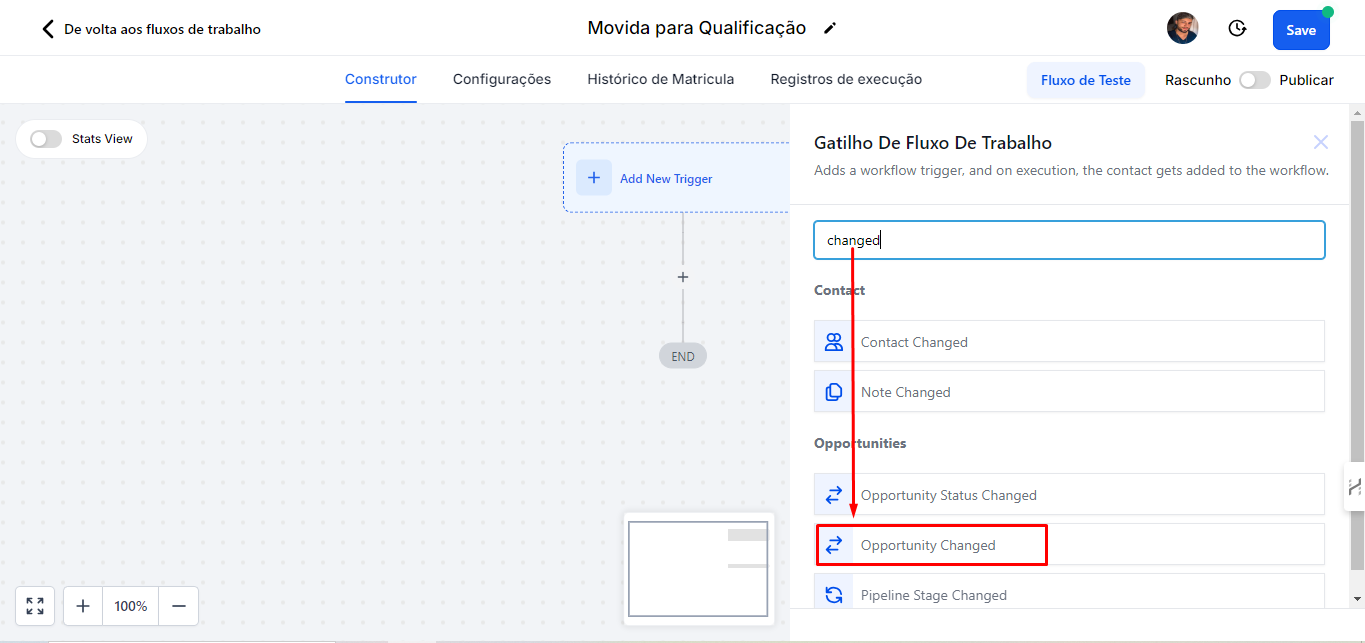
2.1 You can search by the trigger name or scroll through the list to find it. This will make it easier to select the most suitable trigger for your automation. In the example presented, as we are using the trigger related to opportunities, select "Opportunity Changed."
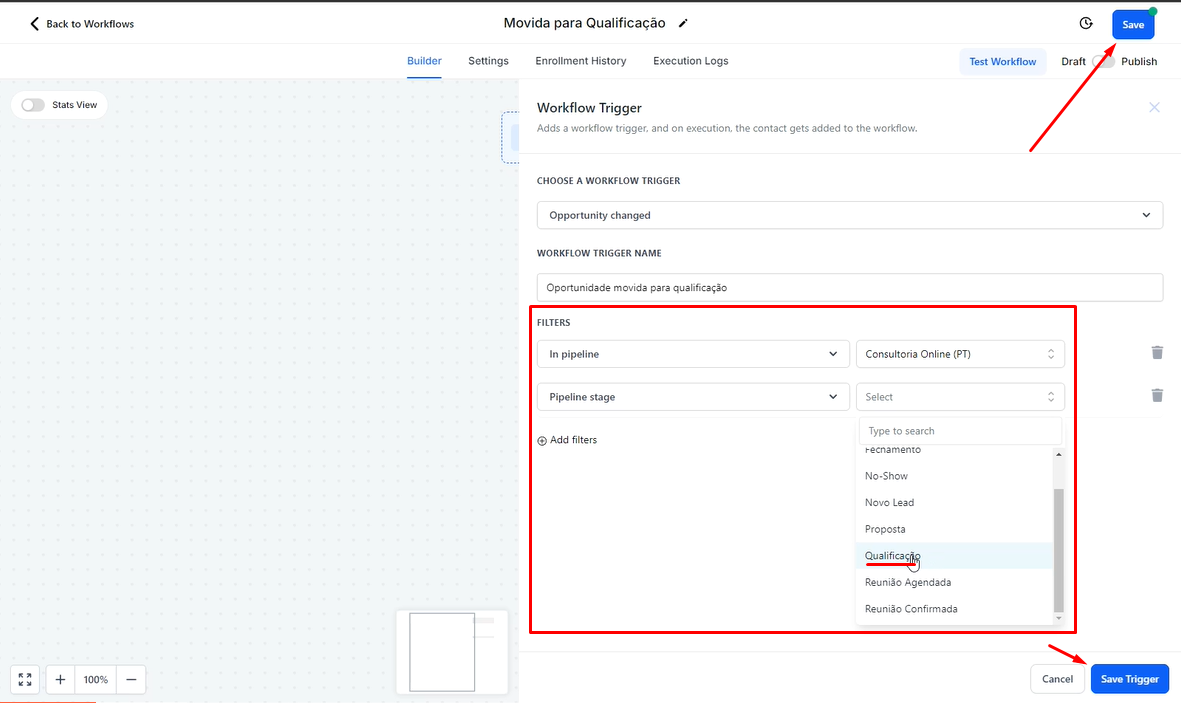
2.2 In this section, you can change the name of this specific trigger action to facilitate organization. Additionally, add the necessary filters to define which opportunities will be observed.
Following the same example of the settings below, select the "In Pipeline" Pipeline and then define which stage will be considered as a trigger by clicking on "Pipeline Stage," so the automation will start when the opportunity is moved to this stage in the current pipeline.
Additionally, there are other trigger options available, such as when the opportunity has its status changed to "Lost" or "Won." Although there are several types of triggers, the focus here is to demonstrate the movements between the funnel stages.
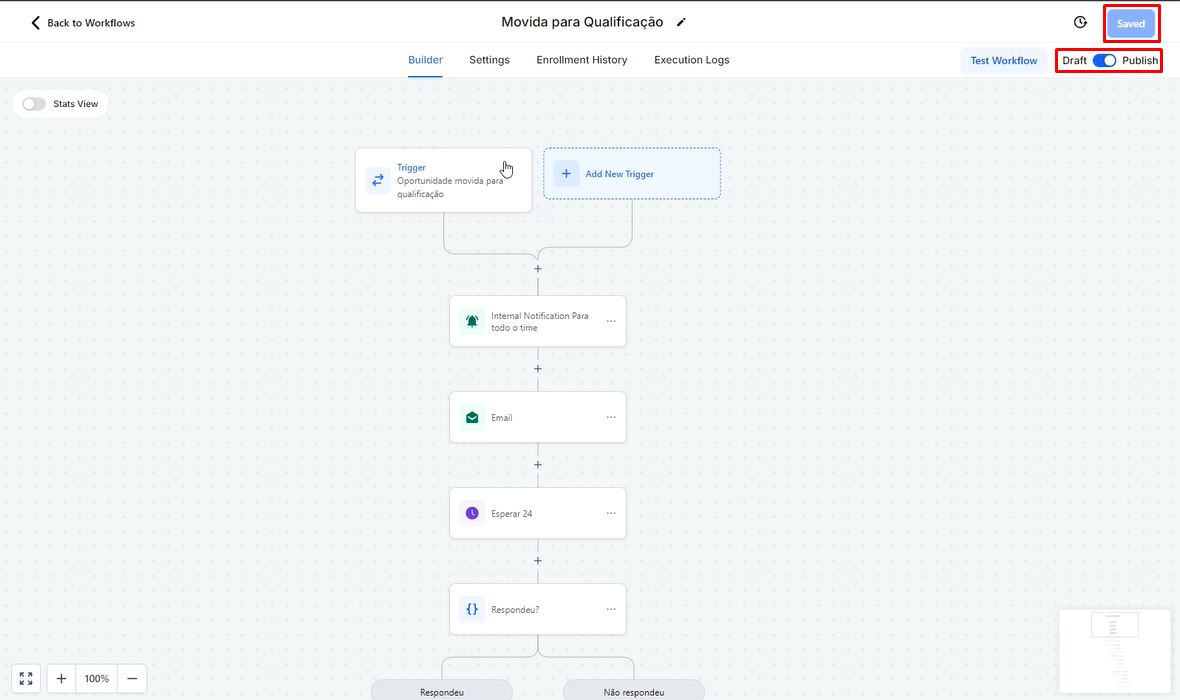
It is important to remember that whenever you make a change, you must click "Save Trigger" to save the trigger and "Save" to save the flow. Otherwise, you may lose all the changes made.
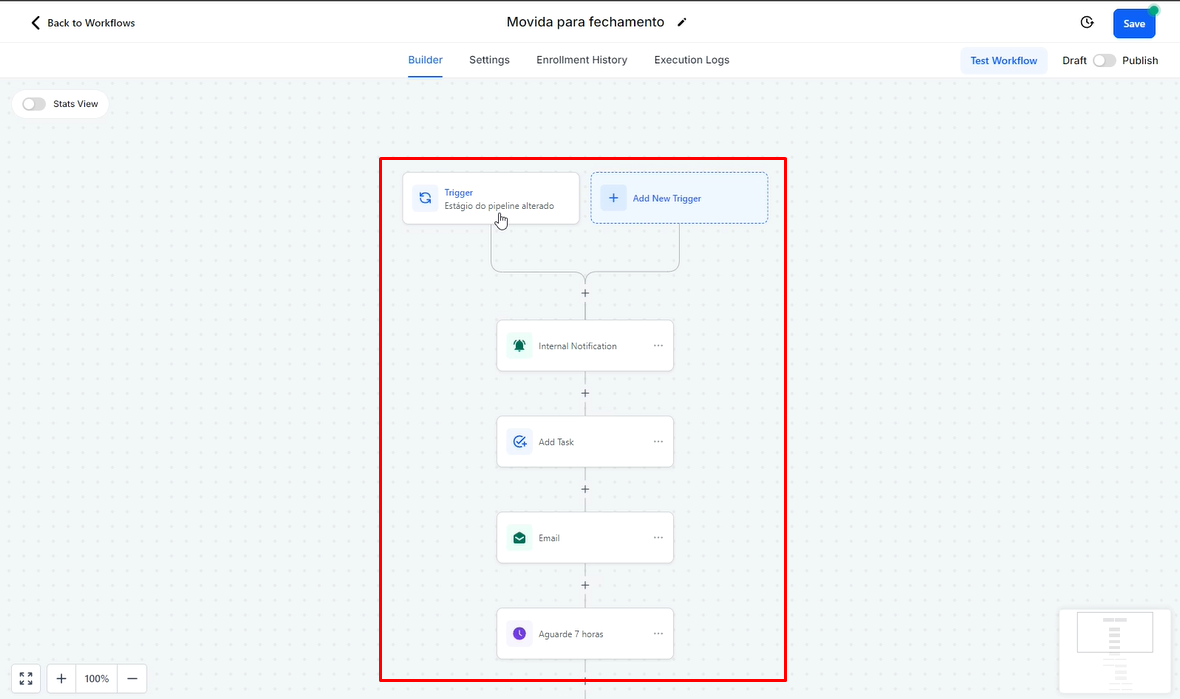
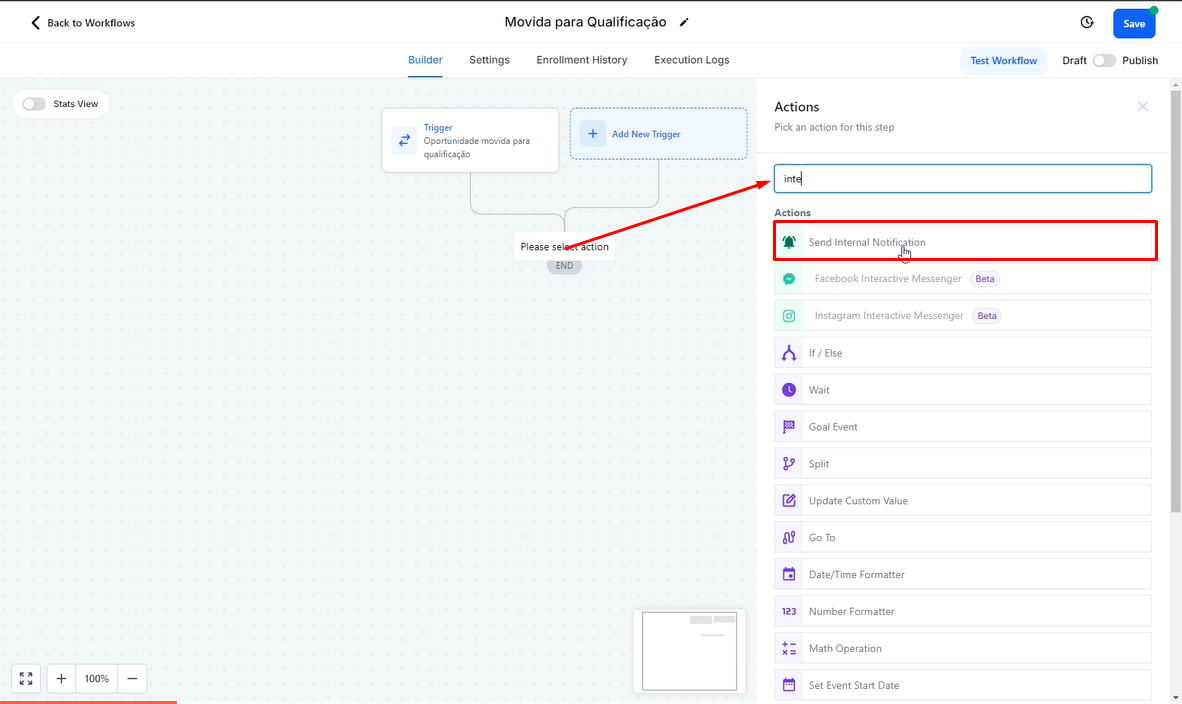
2.3 After saving the settings, click on the "+" to add an action. For this example, we will send an internal notification to the team, informing them that the opportunity has been moved to a different stage, so you should choose "Send Internal Notification."
If you are using the system in Portuguese, search for the corresponding name in the language.
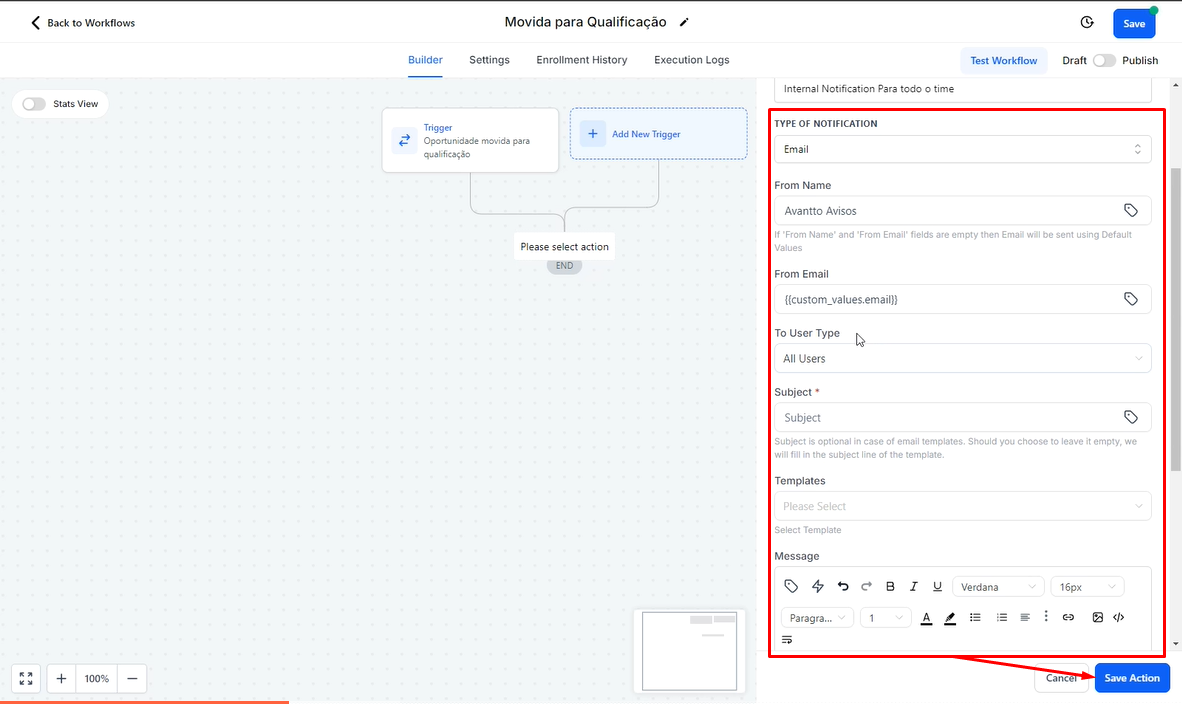
2.4 Name this action. Then, choose the desired type of notification. You can choose to send an email, a notification within Avantto's own system, or an SMS.

2.5 After selecting email, fill in the following fields:
From Name: You can enter any name, such as "Avantto Notices."
From Email: The email sent must be a valid address. If the address does not exist, the message will not be sent. It is recommended to use an email that belongs to a user of the account. Therefore, it is suggested to use an email registered in the Custom Values, such as {{custom_values.email}}.
To User Type: Choose who the email will be sent to. The options include:
Assigned User: Sends to the person responsible for the opportunity.
All Users: Sends to all users.
Particular User: Allows you to choose a specific user.
Custom Email: To send to a specific email that is not registered in Avantto. In this example, I selected to send to everyone.
Subject: The subject can be set as "Notice! The opportunity {{opportunity.name}} has been moved to qualification"
Message: Here you have the freedom to write and use Custom Values to personalize the information you want to send by email.
Finally, click on "Save Action" to save your settings.
Sending a Notification to the Client
Basically, the process is the same as the previous example, the difference is that it is not necessary to indicate who the email will be sent to, as it will be sent to the contact of the opportunity. To add the email, click again on the "+", search for "Email" and configure the suggested fields.
2.6 To configure an action that prevents more emails from being sent in the sequence if the client responds, follow the steps below:
On the flow creation page, click on the "+" and choose the action "Wait / Espera".
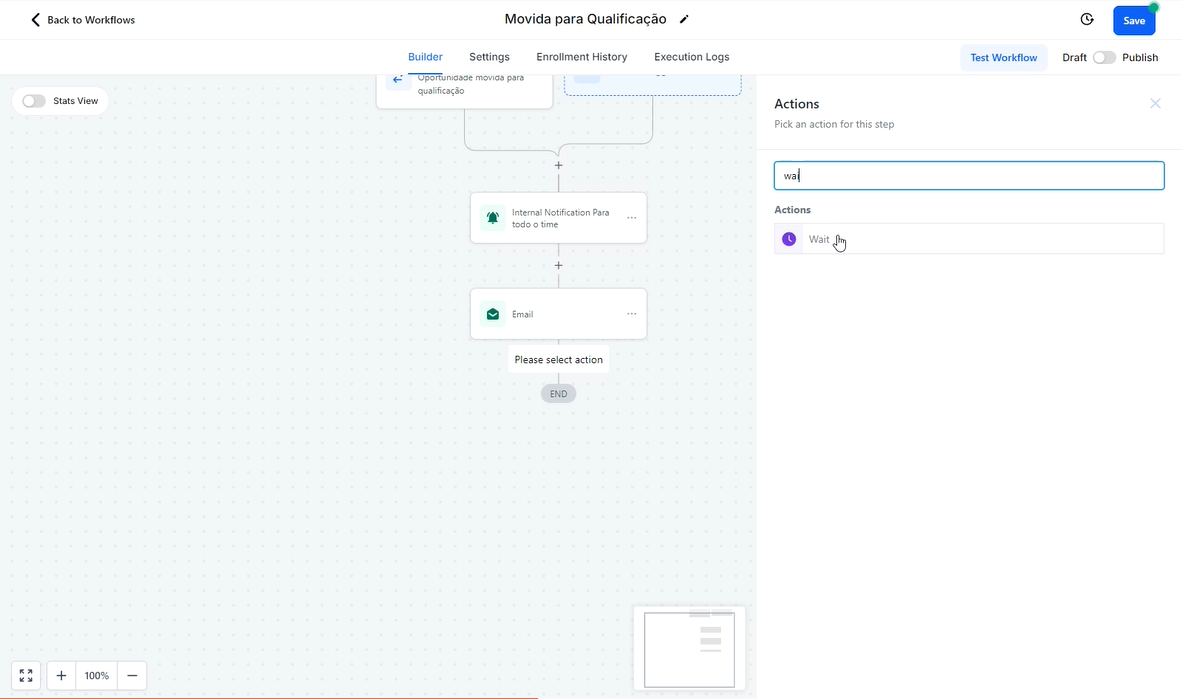
After choosing "Wait/Espera", a configuration screen will appear.
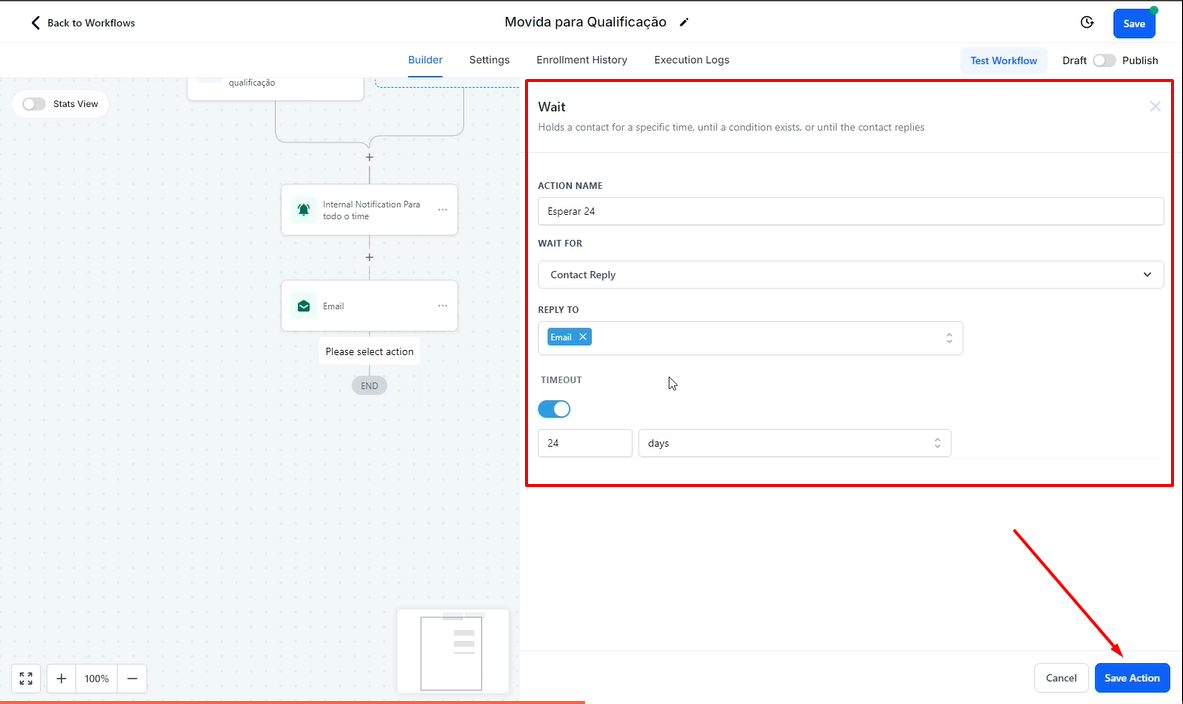
In "Action Name", give a name to this action, such as "Wait 24h".
In "Wait For", choose the "Contact Reply" option from the CRM event list to wait for the opportunity's response.
In "Reply To", all previously configured communication actions will appear. For the example, select the email that will be waiting for the response.
In "Timeout", with the option activated, choose the time you want to wait before proceeding to the next step.
Finally, click "Save Action" to save your settings.
If the client responds, the automation will automatically move to the next step. If there is no response, after the time added in "Timeout", the automation will also proceed to the next step.
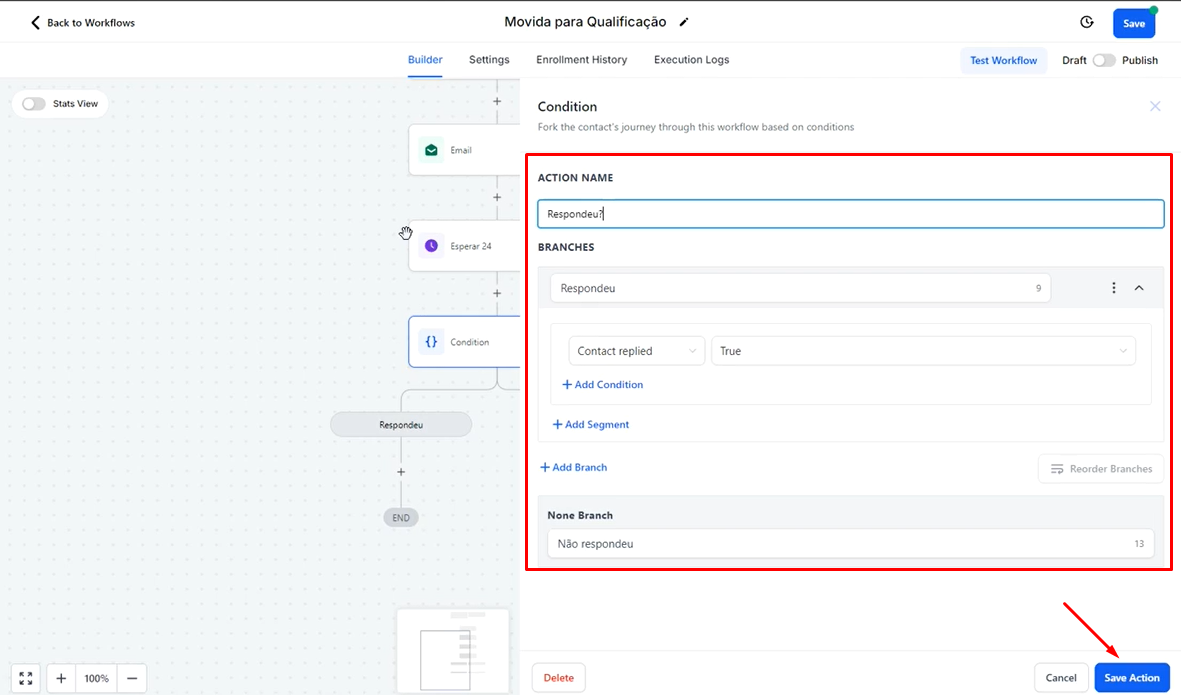
2.7 Adding the "If/Else" condition action.
In this action, you will continue the flow based on whether the client responded or not, separating into two branches: "Responded" and "Did Not Respond".
On the flow creation page, click on the "+" and choose the "If/Else" action.
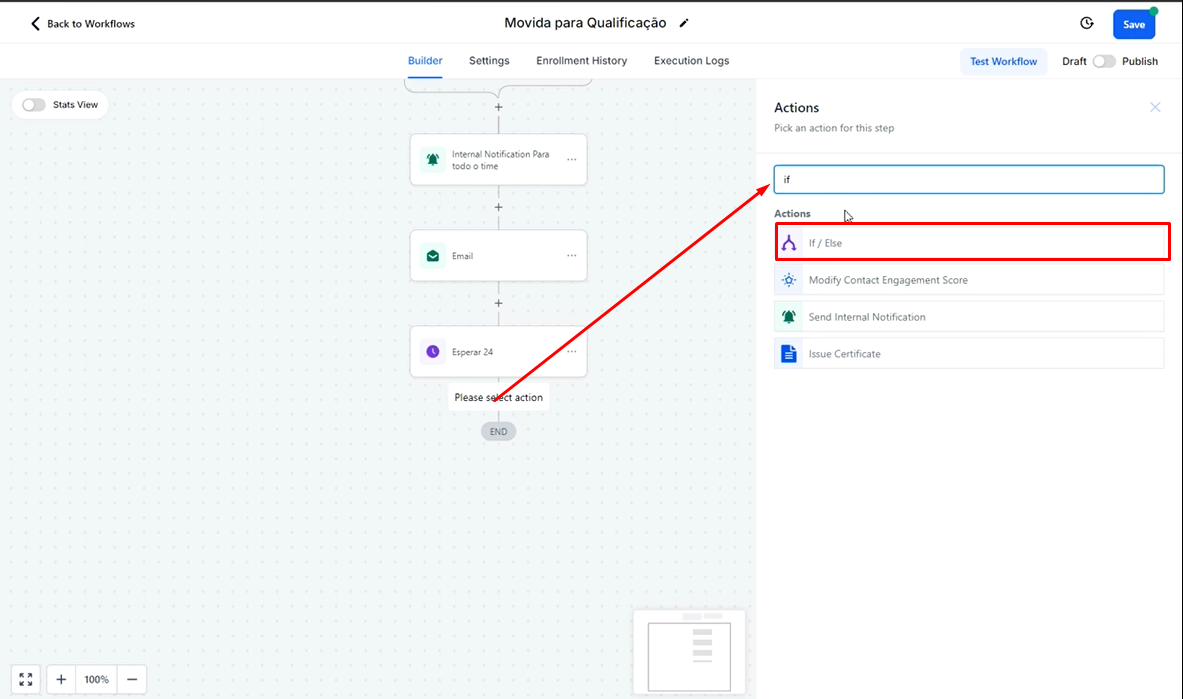
In the "Action Name" field, you can rename the action based on the intention, for example, "Responded?".
Configuring the Branches:
BRANCHES:
Rename as "Responded".
In Select, choose the "Contact Reply" option and, in the next option, select "Contact Replied".
In Select Operator, choose "True".
If the client responds, they will be directed to this branch.
None Branch:
Rename as "Did Not Respond".
If the client does not respond, they will be directed to this branch.
Finally, click on "Save Action" to save your settings.
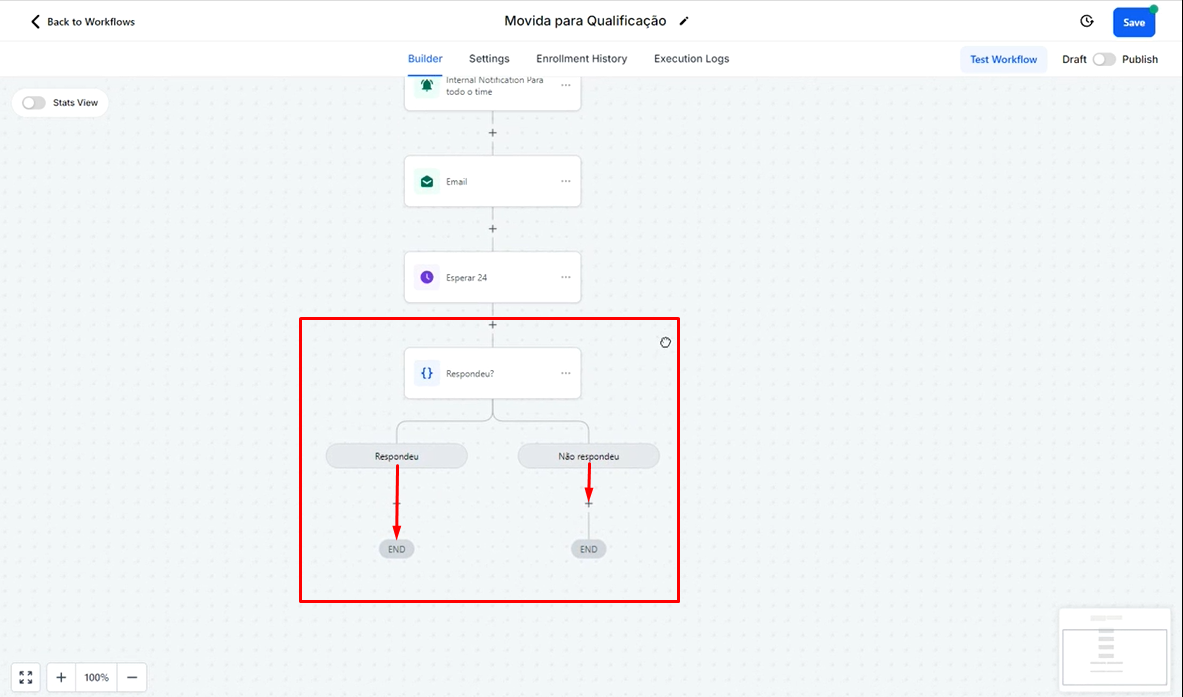
After the above configuration, you should leave the "Responded" branch without further actions and add more emails in the "Did Not Respond" branch. This way, if the client responds, the flow will be interrupted due to the lack of further actions. However, if there is no response, the flow will continue sending emails according to the scheduled actions and times.
The intention of this flow is to ensure that communication persists until the client responds.
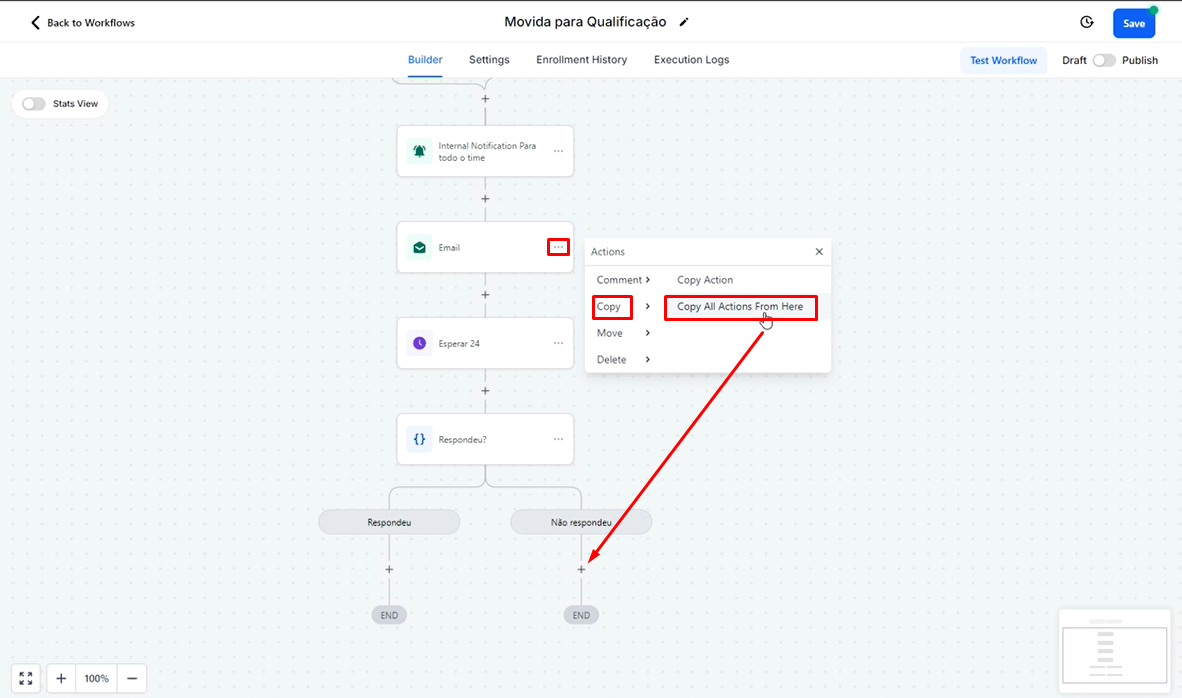
2.8 Create next steps
To simplify the follow-up, instead of creating the next steps one by one, you can copy all the actions that are below the chosen action.
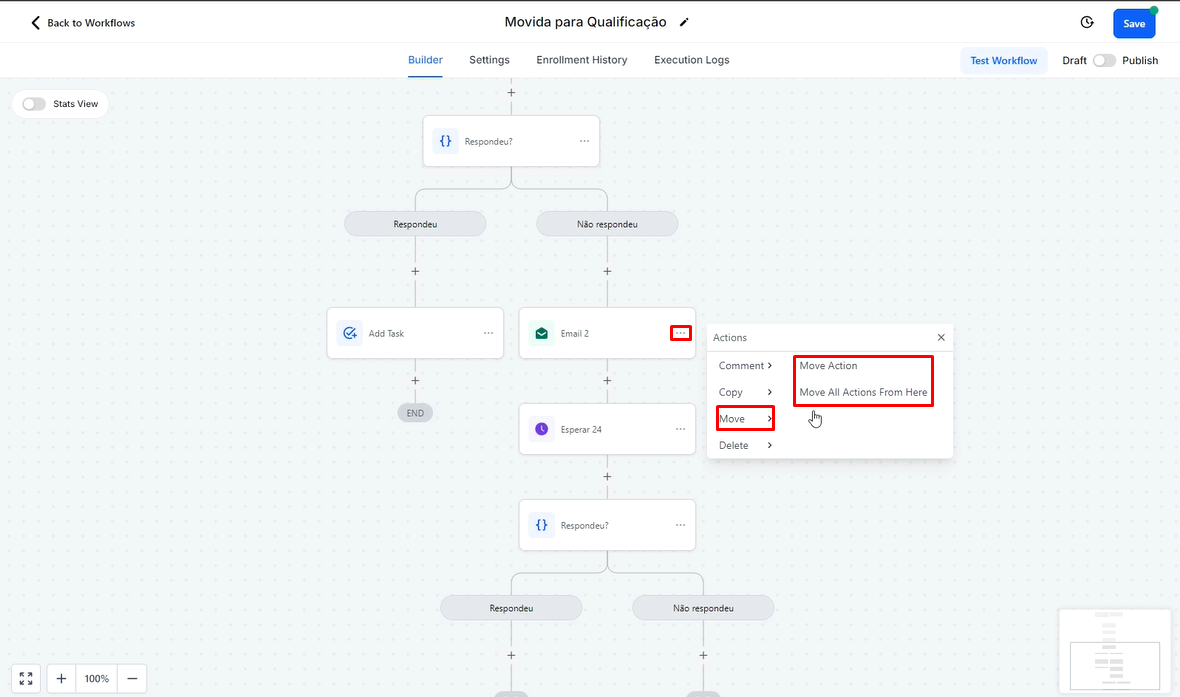
To copy, click on the three dots next to the email you want to duplicate, then select "Copy" and then choose "Copy All Actions From Here".
After that, paste these actions in the "+" below the "Did Not Respond" option.
Remember that when you copy any step and choose the "Copy All ..." option, all actions below the selected step will be copied and pasted into the new position. This facilitates the creation of consistent email sequences without the need to reconfigure each step manually.
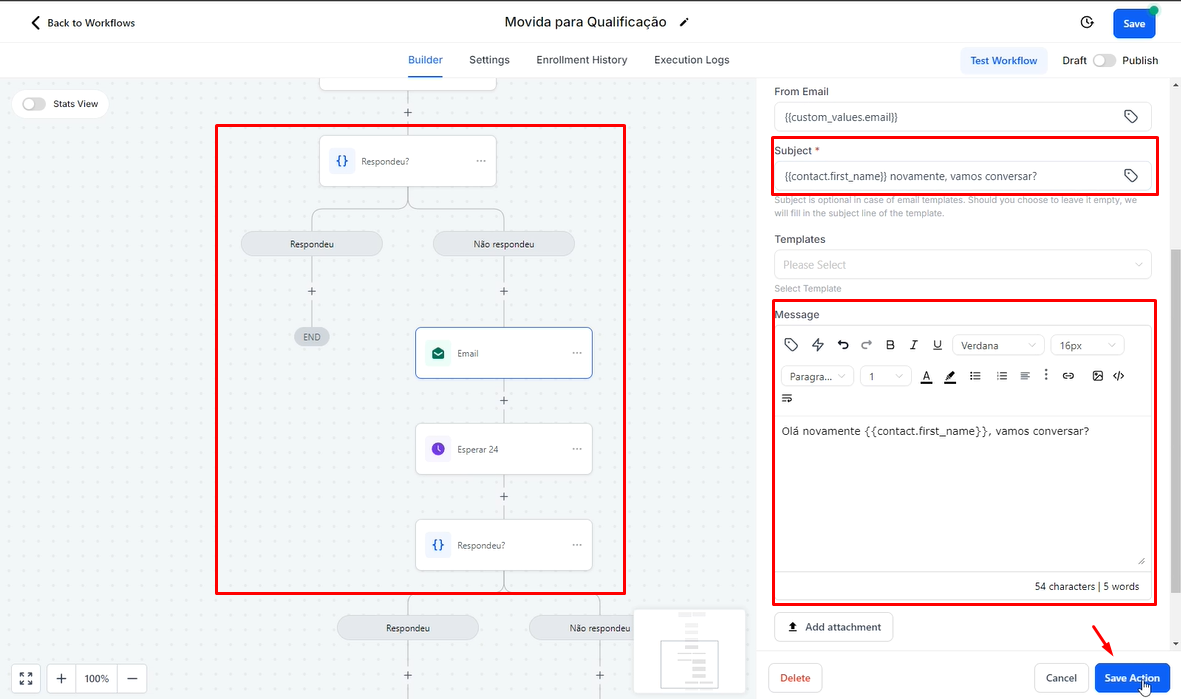
You will see that the same copied structure will appear, maintaining all previous settings. This will facilitate editing and customizing the necessary information for the new email. Similarly, the "Wait" action will already be configured automatically. If you want it to wait for less or more time, just adjust it as needed.
2.9 Adding a Task
If you want to add a task if the person responds, click on the "+" below "Responded" and add an "Add Task" action.
For example, fill in the fields:
In "Title", write: "Respond {{opportunity.name}}"
If you choose "Move All Actions From Here", the entire structure below this action will be moved to the new position.
To finish, always remember to activate and test the automation to ensure everything is working correctly. Don't forget to save your changes and activate the flow by enabling it in "Publish".
The automation used as an example is for no-show (Noshow)
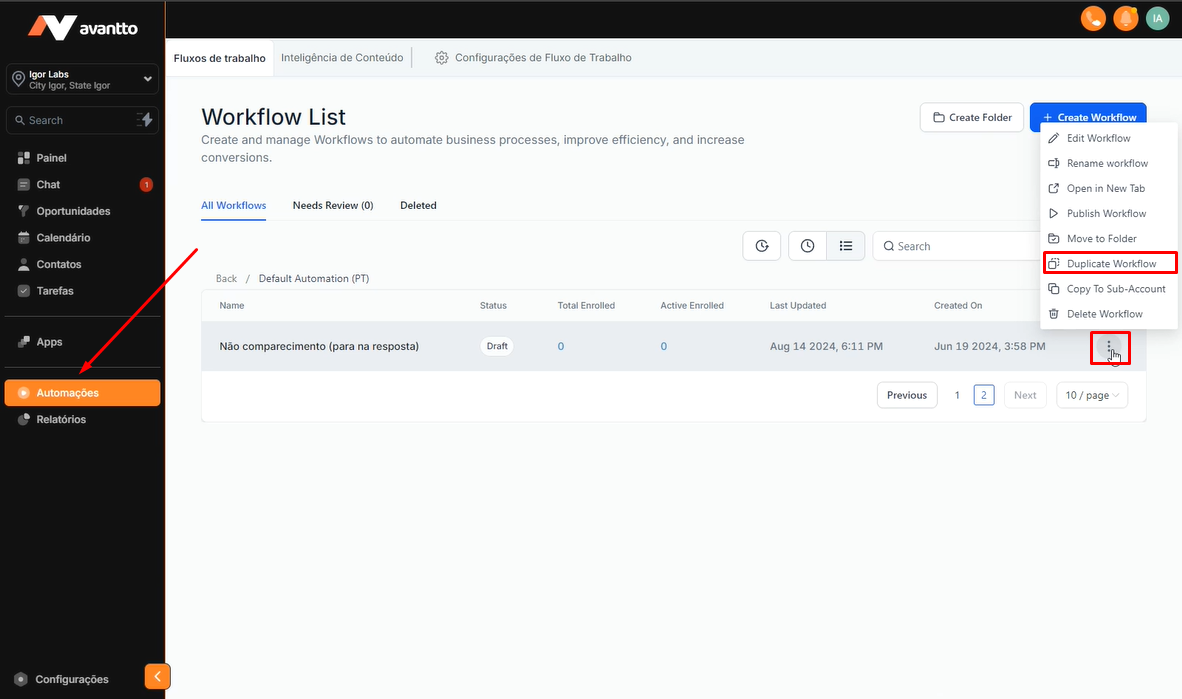
3.1 Still in the Automations menu, choose the automation you want to leverage.
Click on the three dots next to the automation and then select "Duplicate Workflow" to create a copy of the existing automation.
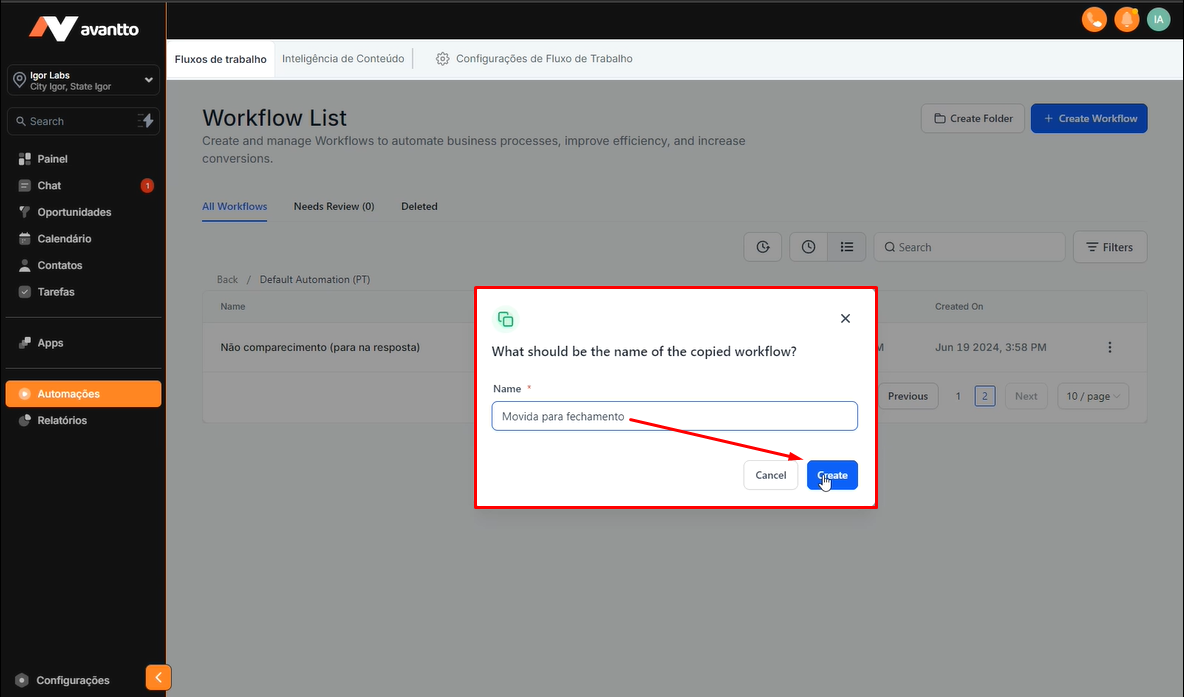
3.2 Rename this automation according to your needs and click "Create".
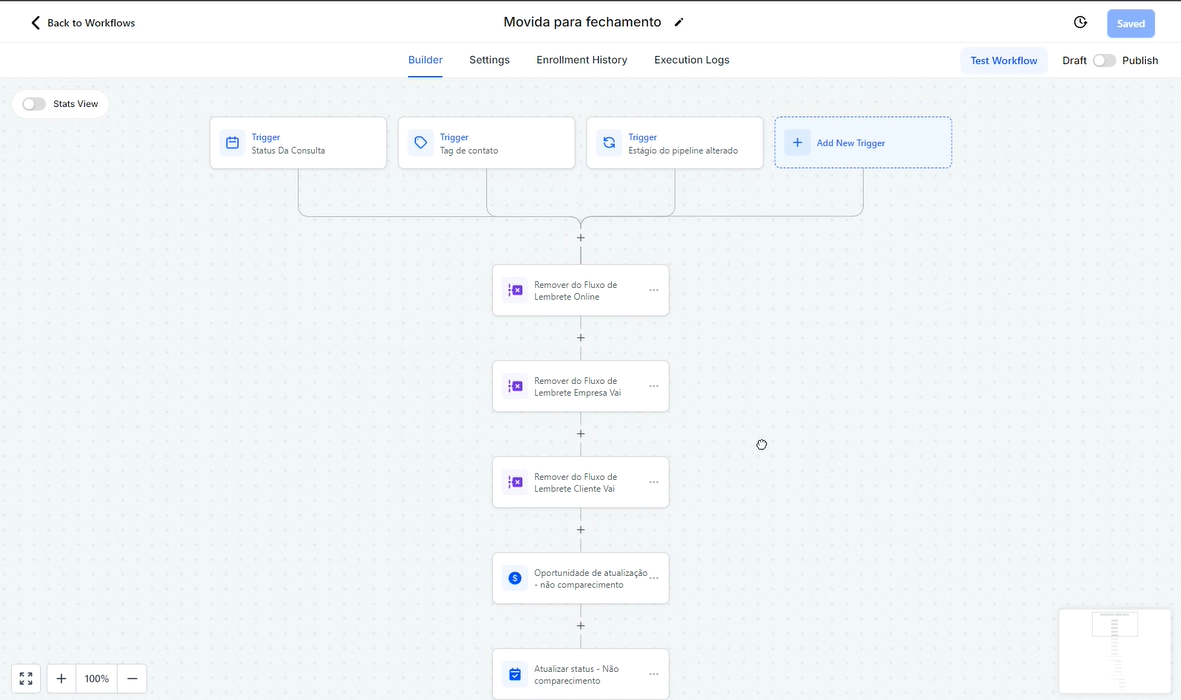
3.3 After creating the automation, the structure will be identical to the original (as shown in the image) because it is a copy. Therefore, it is necessary to delete some elements that do not make sense for the new flow, keeping only the relevant parts.
3.4 After deleting the elements that do not make sense for the new flow, you will have the necessary structure to continue. Now, replace the descriptions and add other elements as needed, using everything taught in Step 2.